
How To Paint Your Ceiling Without Mess or Stress
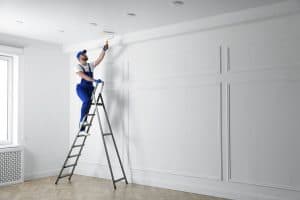
I painted the ceiling and I really didn’t realize how much work painting a ceiling would be. Both of these things are true.
I was wrong about getting ready for it. I shifted the furniture to what felt safe, laid down a plastic sheet covering the majority of the floor and then grabbed the roller. I was sure I knew what I was doing, because I’d painted walls before and figured a ceiling would be pretty similar.
It isn’t similar.
Just the spray of paint flying everywhere was an eye-opener. Paint goes much further than you’d think from a roller over your head. There were drips on the floor in spots the sheet was absolutely over, a very light spray on a chair I’d moved to a safe area, and even a little on my phone – on a shelf I clearly hadn’t moved far enough.
The ceiling itself is good. But everything else around it shows I could have been a bit more careful.
I’m telling you this because it’s what I wish I’d known before I began.
The Thing No One Tells You About Painting A Ceiling
Painting a wall is simple. You move up and down with the roller or brush, the paint obligingly stays on the wall, and gravity is on your side.
Painting a ceiling, however, is a whole other situation with gravity. Basically, every bit of paint you get on the ceiling is trying to fall down on the floor, your furniture, or even on you!
This isn’t to say ceilings are difficult. It simply means you need to get ready in ways you don’t with walls, and if you don’t, you’ll be spending your time cleaning up paint from things that should have been left alone instead of enjoying your newly painted ceiling.
If you do all the preparation correctly, the rest of the job will be easy.
Before Starting The Painting Process
Before painting your home, understanding some basic principles is essential to achieving a smooth and professional-looking finish. Here’s what you need to know:
Surface Preparation
- Clean walls and ceilings thoroughly to remove dust and dirt.
- Patch any holes or imperfections with spackle, then sand to a smooth finish.
- For glossy surfaces, lightly sand to help paint adhere better.
Select the Right Tools
- Brushes: Use quality brushes for crisp, clean edges.
- Rollers: Choose a high-quality roller to avoid streaks.
- Painter’s Tape: Helps protect areas you don’t want to paint.
Work in Small Sections
- To maintain a smooth finish, paint in manageable sections, typically 3-4 feet at a time.
Start from the Top
- Begin with the ceiling, painting edges first (“cutting in”) and then filling in the large surfaces. This avoids drips on freshly painted walls.
Choose the Right Finish
- Flat/Matte: Ideal for ceilings and walls as it hides imperfections and prevents glare.
- Semi-gloss/Satin: Best for trim, doors, and high-traffic areas.
Master the Technique
- Use a “W” or “M” pattern when rolling paint. This distributes the paint evenly, avoiding streaks or uneven coverage.
- Fill in the gaps with smooth, vertical strokes to create a uniform coat.
Be Patient
- Allow each coat to dry thoroughly before applying the next to ensure a smooth and flawless finish.
By following these foundational steps, you’ll be well on your way to painting your home like a pro, even if it’s your first time!
1. Essential Tools and Materials for Ceiling Painting
Before you start, make sure you have everything on this list. Really, you need all of it. You’ll regret not having the things you leave out when you’re halfway through the job!
| Tool/Material | Purpose |
|---|---|
| Paint | Ceiling paint typically comes in flat or matte finishes to reduce reflections and hide imperfections. Choose a washable, durable paint for rooms that need regular cleaning. |
| Roller & Cover | A high-quality roller with a nap (thickness) suited to your ceiling’s texture will ensure an even coat. For flat ceilings, use a 3/8-inch nap; for textured ones, opt for a thicker nap (1/2 inch or more). |
| Extension Pole | An extension pole allows you to reach higher areas without a ladder. This is particularly helpful for larger rooms or high ceilings. |
| Angled Brush | Use an angled brush for cutting in around edges and corners, where the roller can’t reach. |
| Paint Tray | Helps hold your paint and keeps it ready for easy application onto your roller. |
| Drop Cloths | Protect your floors and furniture from spills and splatters. |
| Painter’s Tape | Ensures straight, crisp lines around trim, edges, and where the ceiling meets the wall. |
| Ladder | If your ceiling is particularly high, you may need a ladder in addition to the extension pole for some precise work. |
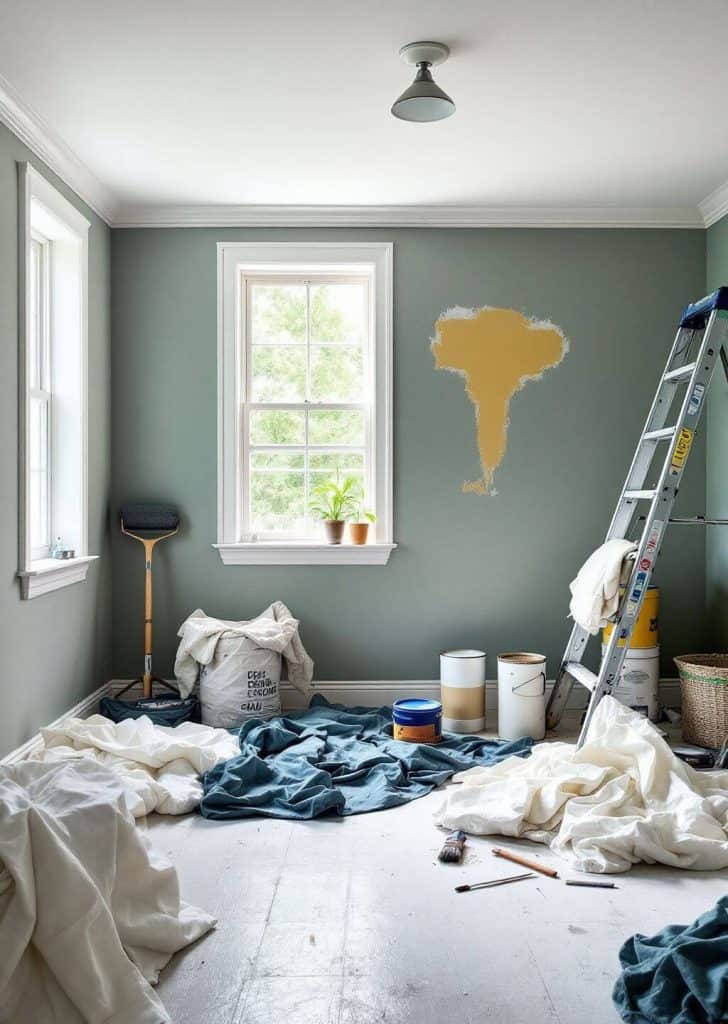
2. Preparing the Room for Painting
This part of the job really sets the tone for everything else, so it’s important to do it well.
Get as much as possible out of the room. Chairs, lamps, small tables, anything you can move, should be removed. And what you can’t remove needs to be thoroughly covered, not just thrown over with a sheet. Use plastic sheeting, and tape it down all around so no paint can get under it – and you will have paint getting under it.
Cover the whole of the floor with sheets. Make sure the sheets overlap so you don’t have any exposed bits. If the floor is smooth, tape the edges of the sheets down; they’ll slide around when you walk on them and openings will appear precisely where you don’t want them.
Carefully use painter’s tape along where the wall and ceiling meet. Don’t hurry this. A nice, straight line of tape is what gives the ceiling a professional look at the wall’s edge. If you rush the tape, the edge will be messy and you’ll never fully correct it with more paint.
Before painting, clean the ceiling. A long-handled duster or a vacuum with a brush is good. Dirt and cobwebs will stop the paint from sticking, and you won’t be able to spot them until the paint is on and it’s too late to do anything about it.
You may need to prime. New plasterboard (drywall) always needs primer. If there are water marks, use a stain-blocking primer or they will show through the paint, however many layers you add.
And if the current ceiling is a dark shade and you are painting it a lighter one, prime it first – you’ll use fewer paint layers and therefore save on cost.
3. How To Paint Your Ceiling Like A Pro
With preparation out of the way, it’s time to begin painting. Below are the detailed steps to ensure your ceiling looks like it was done by a professional:
Cut in the edges first
Load your angled brush and paint a strip of roughly 5-7cm around the entire perimeter of the ceiling — along the walls, around any light fixtures, around anything the roller won’t reach. This is called cutting in and it needs to happen before the roller.
Be patient here. This is the step that defines the finished result. A clean cut-in line means the ceiling looks intentional and precise. A rushed one means visible irregularities at the edges that you’ll see every time you look up.
Roll in sections
Once the edges are done, move to the roller. Work in 1 metre square sections rather than trying to cover too much at once.
Load the roller, remove the excess in the tray, and apply using a W or M pattern — roll the paint onto the ceiling in a rough W shape first, then fill it in with smooth parallel strokes in one direction. This distributes the paint evenly before you level it out. Working in one direction for the final strokes gives a more uniform finish.
Keep the roller moving and don’t stop mid-section. If you stop and restart in the same spot the paint dries unevenly and the mark stays.
Use the extension pole
For most of the ceiling you don’t need a ladder — the extension pole lets you work from the floor, which is more comfortable and gives you better control. Steady, even pressure. Don’t press too hard or the roller skips.
Watch for drips
Don’t overload the roller. A heavily loaded roller above your head is a drip waiting to happen. Load it, remove the excess, apply. If a drip appears on the ceiling, smooth it immediately with the roller before it starts to dry.
If it lands on the floor or furniture, wipe it immediately — dried paint on furniture is a considerably worse problem than wet paint.rs for the first coat to dry. Apply a second coat using the same techniques.
Sometimes, a third coat might be necessary depending on the color or finish you’re going for.
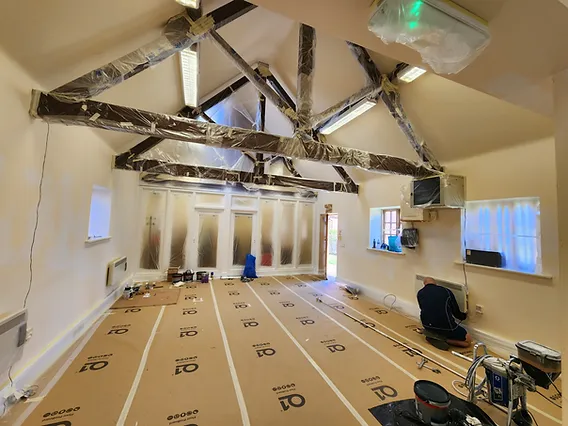
4. Special Considerations for Textured Ceilings
If you have a ceiling that’s not smooth, so if it has a popcorn texture, stucco, or any raised pattern, you’ll need to do things a little differently.
Use a roller with a pretty thick pile (at least half an inch) to get the roller into all the dips and shapes of the surface.
Paint in smaller areas than you would on a perfectly flat ceiling. And don’t push hard – you’re aiming to coat the texture, not squash it.
Pushing too hard will hurt the surface and you’ll see where you did it when the paint is dry. Oh, and ceilings with texture will use up more paint and will take longer to paint. Factor that into your plans for both!
5. Final Touches and Cleanup
After all the layers of paint are on and completely dry, gently take off the painter’s tape. Pull it away slowly, at about a 45 degree angle, to get nice, crisp edges. Should any paint have gone under the tape, a little brush and some paint will fix those spots.
And lastly, wash your brushes, rollers, and everything else you used for painting. For roller covers, either rinse them with warm water, or for a truly good cleaning, use a brush cleaner.
Frequently Asked Questions (FAQs)
1. Can I paint a ceiling without primer? If your ceiling has already been painted and isn’t falling apart, you might not need to prime it. But for brand new drywall, places with stains, or anything that’s been hurt by water, you absolutely should prime first. Primer is much cheaper than having to paint the whole thing over again because of stains showing through.
2. How do I avoid roller marks when painting a ceiling? To get rid of lines from the roller, paint with long, smooth movements, and do it in areas that aren’t too big. A little overlap with each stroke will give you a smooth, uniform finish. And, you’ll want to have paint on your roller for coverage, but don’t use so much that it drips.
3. What is the best type of paint for ceilings? For ceilings, a flat or matte paint looks best as it disguises bumps and stops light from bouncing around. Importantly, particularly for kitchens and bathrooms with a lot of dampness, choose paint that resists mildew and can be washed.
4. How do I clean up after painting a ceiling? Clean your brushes, rollers, and other tools with warm water and soap if using water-based paint. For oil-based paints, use mineral spirits or a dedicated solvent cleaner. Always clean immediately after use to prevent paint from hardening on the tools.
5. Should I paint the ceiling before the walls? Yes, it’s generally easier to paint the ceiling first. If you paint the walls first, it’s harder to avoid getting ceiling paint on them. Painter’s tape can protect edges, but starting with the ceiling makes the job smoother overall.
6. How long should I wait between coats of ceiling paint? Drying times vary, but it’s typically safe to apply a second coat after 2-4 hours. Ensure the first coat is completely dry to avoid smudging and ensure an even finish.
Conclusion

The ceiling I painted actually looks good. You’d never guess from looking up at it in the room that it was my very first time.
I did discover the splatters on the floor later, and one chair arm had a very light spray of white on it. I cleaned those up, and for weeks they reminded me to not hurry the prep work before you start painting.
Definitely do the preparation. Cover absolutely everything, use lots of drop cloths (more than you believe you’ll need), and be patient when painting around the edges. In fact, the painting part is easy; the way the whole thing looks, and whether it seems like a professional did it, depends on everything you do before you actually apply the paint.
That’s all from me for now.
If you’ve painted a ceiling and have a trick you’ve learned the hard way that I haven’t shared, or if you made a prep error that makes my mishaps look small, please share in the comments.
I read every single one and I really like to be sure I am not the only person who didn’t expect how much paint would fly!
Until next time,
Stay safe,
Tasos
I’m Anastasios Moulios, co-founder of DIY Cozy Living. I enjoy finding creative, practical ways to make small spaces feel warm, stylish, and lived-in. I started this blog with Katerina to share real ideas that make a home feel a little more personal and a lot more comfortable.
