
How to Remove Peel and Stick Wallpaper Without Damaging Your Walls

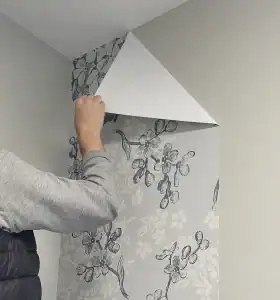
The corner was where I went wrong.
Everything else had come off cleanly. Slow, patient, methodical — peel from the edge, pull at a low angle, keep the tension even. The wallpaper lifted off the wall in long satisfying strips and the paint underneath looked exactly as it had before we’d put it up. I was feeling confident. Then I got to the corner where two panels met, tried to get under the overlapping edge, and cut straight through the paper with my fingernail trying to lift it.
That corner took three times as long as the rest of the wall combined.
Peel and stick wallpaper is one of the best things to happen to renter decorating in recent years. It goes up quickly, it looks genuinely good, and the whole point of it is that it comes down without damage when you leave. That last part is mostly true with the right technique and almost not true at all with the wrong one.
Here is the right technique, the tools that make it easier, and what to do when things go wrong — which they sometimes do regardless of how careful you are.
What You Need to Know Before You Start
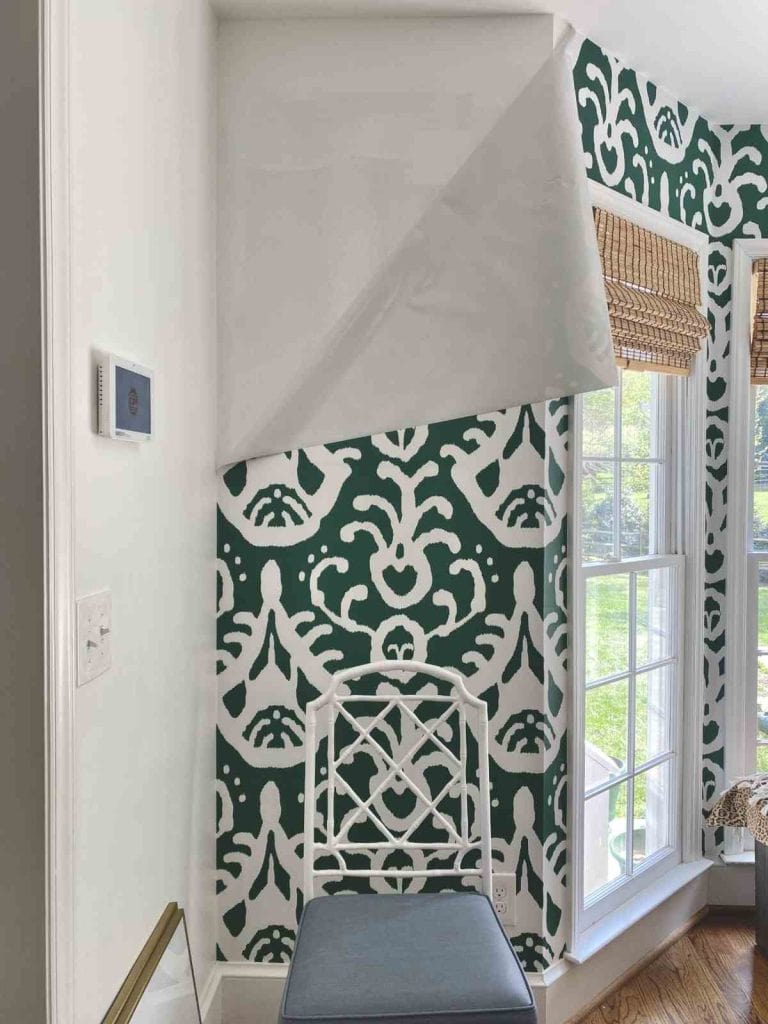
How long has it been up? This is the single most important factor. Peel and stick wallpaper that’s been up for two months comes off considerably more easily than paper that’s been up for two years. The adhesive bonds more strongly over time and with temperature changes. If yours has been up for a long time, expect the process to take longer and require more heat.
What’s the wall surface underneath? Fresh, well-cured paint on a properly primed wall handles peel and stick wallpaper removal well. Old paint, flat matte paint, paint that was already peeling slightly, or paint applied over wallpaper — these are all more vulnerable to damage during removal. If you know the wall surface was already compromised before you put the wallpaper up, remove it extra carefully and lower your expectations slightly about a perfect result.
What brand is the wallpaper? Higher quality peel and stick wallpaper is specifically engineered to remove cleanly. Budget options use stronger adhesives that weren’t designed with clean removal in mind. If you know your brand, look up removal instructions from the manufacturer before starting — some have specific recommendations that override the general advice below.
What You Need To Start The Process
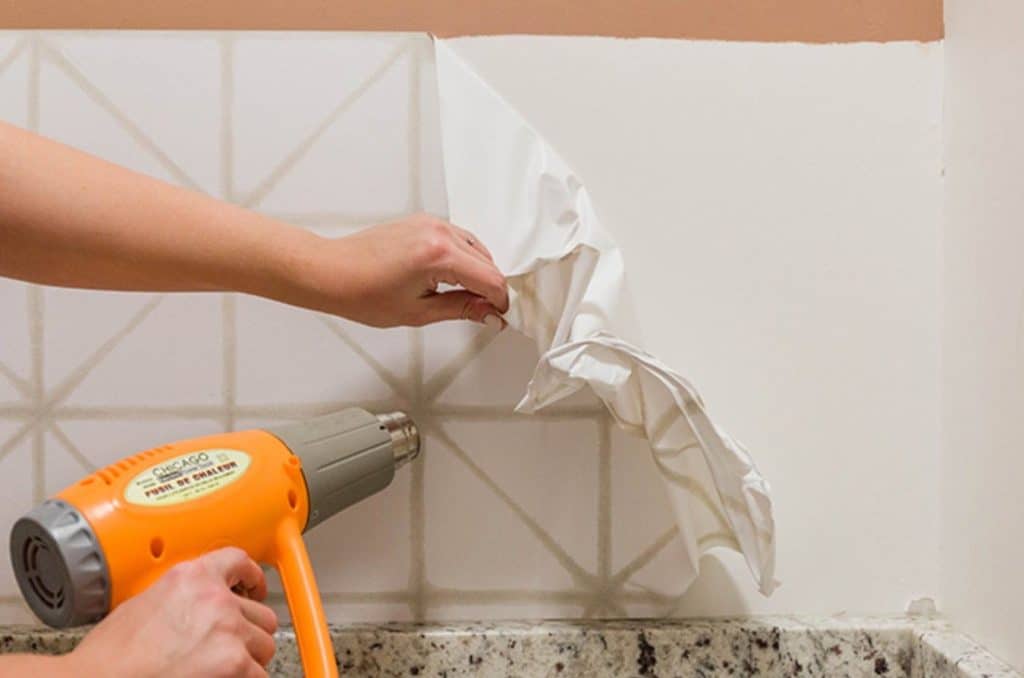
A hairdryer or heat gun on a low setting. Heat is the most effective tool for loosening peel and stick wallpaper adhesive and making the paper itself more pliable during removal.
A hairdryer on medium heat is sufficient for most wallpapers and considerably safer than a heat gun on a painted wall surface.
A plastic scraper or an old credit card. For lifting stubborn edges and corners without cutting into the wall surface. Never use a metal scraper on a painted wall — metal edges dig in and the damage is irreversible.
A spray bottle filled with warm water. For stubborn adhesive residue after the paper is off.
A soft cloth or sponge. For wiping adhesive residue.
Rubbing alcohol or adhesive remover. For residue that warm water alone doesn’t shift.
Patience. Genuinely. The single most common cause of wall damage during peel and stick wallpaper removal is someone rushing because they’re bored or frustrated with how long it’s taking.
Step One: Start at the Right Place
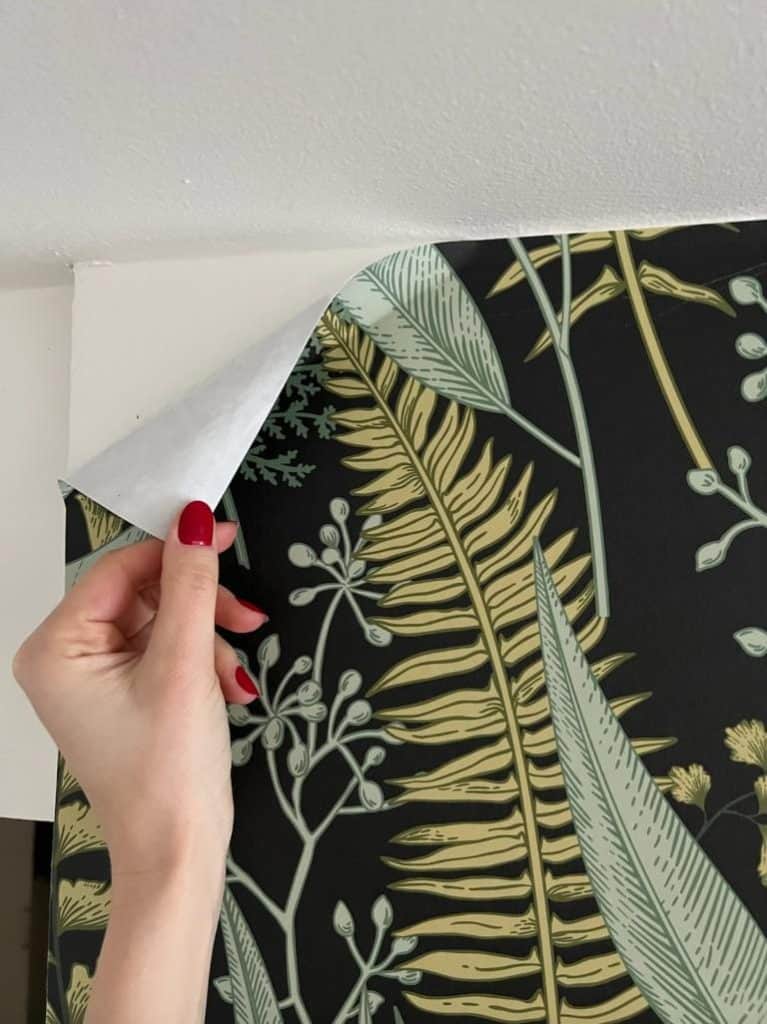
Find a seam (the edge where one panel ends and another begins) or a corner where the paper starts. Do not try to lift the paper from the middle of a panel where there’s no natural edge to get under. You’ll tear the paper and potentially damage the surface beneath.
If the paper has been trimmed flush to the wall at every edge, run your fingernail along the very edge of the paper until you find a point where it lifts slightly. This is your starting point.
If the paper is at a corner, the difficult part I mentioned, approach it from the side rather than trying to lift from the corner point itself. Get under the edge of the panel on one wall first, lift that side away, and then deal with the corner section once the surrounding paper is already removed.
Step Two: Apply Heat
Before pulling anything, apply heat to the section you’re about to remove.
Hold the hairdryer about ten to fifteen centimetres from the wall surface.
Move it slowly over an area roughly thirty centimetres square — don’t hold it in one spot or you risk overheating the paint underneath. Ten to fifteen seconds of heat over each section is enough to warm the adhesive without damaging anything.
The paper will feel slightly warmer and more pliable to the touch. This is what you want. Warm adhesive releases more cleanly than cold adhesive, and warm paper is less likely to tear.
Work in manageable sections rather than heating the whole wall and then trying to remove everything at once. The adhesive cools and re-bonds faster than you’d expect, so heat a section and remove it before moving to the next.
Step Three: Peel at the Right Angle
This is where technique matters most.
Get under the edge of the paper and begin peeling. The angle of the peel determines the outcome more than almost anything else.
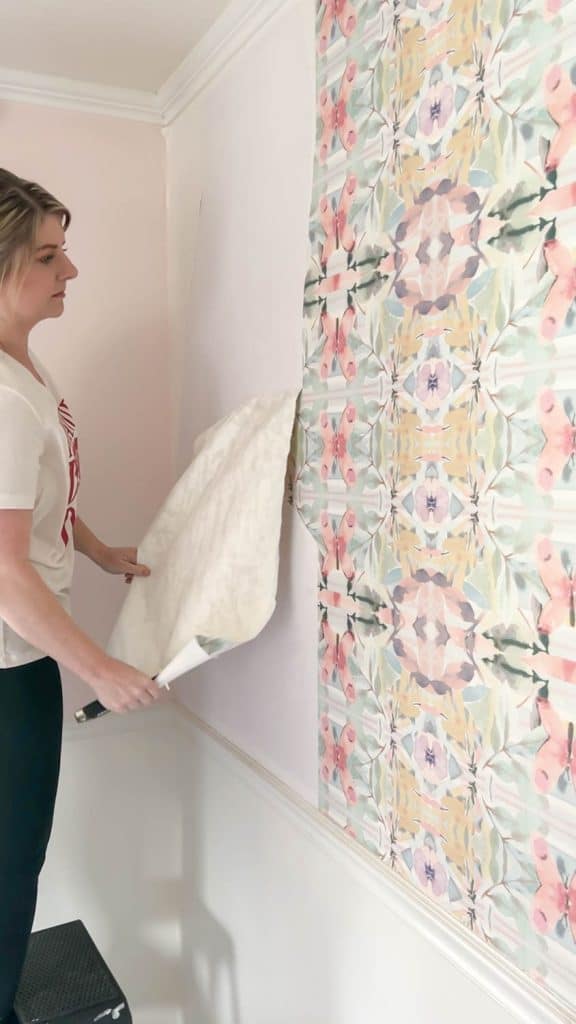
Peel back at a low angle — as close to parallel with the wall surface as possible. Ideally pulling the paper back on itself at roughly thirty to forty-five degrees from the wall.
Do not pull outward, away from the wall, at a ninety degree angle or beyond. Pulling outward puts maximum stress on the bond between the adhesive and the paint, which is exactly what lifts the paint. Pulling at a low angle along the wall surface distributes the stress differently and releases the adhesive without pulling the paint with it.
Pull slowly and steadily. A smooth consistent tension is better than a series of jerks and tugs. When you feel resistance, stop pulling and apply more heat to the resistant section before continuing.
Forcing paper that doesn’t want to move is how walls get damaged.
🔥 Would you like to save this?
Step Four: The Corners
I’ll be specific about this because it’s where I made my mistake and it’s where most people have problems.
Interior corners — where two walls meet — almost always have overlapping paper from two panels. One panel was applied first, then a second panel overlapped it at the corner point. When removing, you need to deal with these separately rather than trying to pull both at once.
Remove the panel that was applied second (on top) first. Heat the corner section thoroughly — it needs more heat than a flat wall section because the adhesive has bonded on both the wall surface and the back of the overlapping panel. Get under the edge of the top panel with the plastic scraper, not your fingernail, and lift it slowly.
Then remove the underlying panel. With the top layer gone, the underlying panel’s corner edge is now accessible and comes off more cleanly.
For exterior corners — where a panel wraps around a protruding corner — the paper is under tension and more likely to tear. Heat it thoroughly, go extremely slowly, and use the plastic scraper to support the paper as you peel rather than letting it hang free under its own weight.
Step Five: Deal With Residue
Once the paper is off, check the wall carefully in good light. Some residue is almost always left behind — a slightly sticky or shiny patch where the adhesive has remained on the wall rather than coming off with the paper.
For light residue: dampen a soft cloth with warm water and rub gently in circular motions. Most peel and stick wallpaper adhesive dissolves easily in warm water and wipes away cleanly.
For stubborn residue that warm water doesn’t shift: apply a small amount of rubbing alcohol to a cloth and rub gently. Test in an inconspicuous area first — rubbing alcohol can affect some paint finishes, particularly flat or matte paint. If it affects the paint, switch to a dedicated adhesive remover product instead.
For residue that has hardened over time: apply warm water and let it sit for a minute before wiping.
The moisture re-softens the adhesive and makes it easier to remove. A hairdryer on low heat applied to the residue area before wiping also helps.
Never scrub hard or use an abrasive cloth on painted walls — the paint surface scratches and the scratches show even after the residue is gone.
What to Do When Things Go Wrong
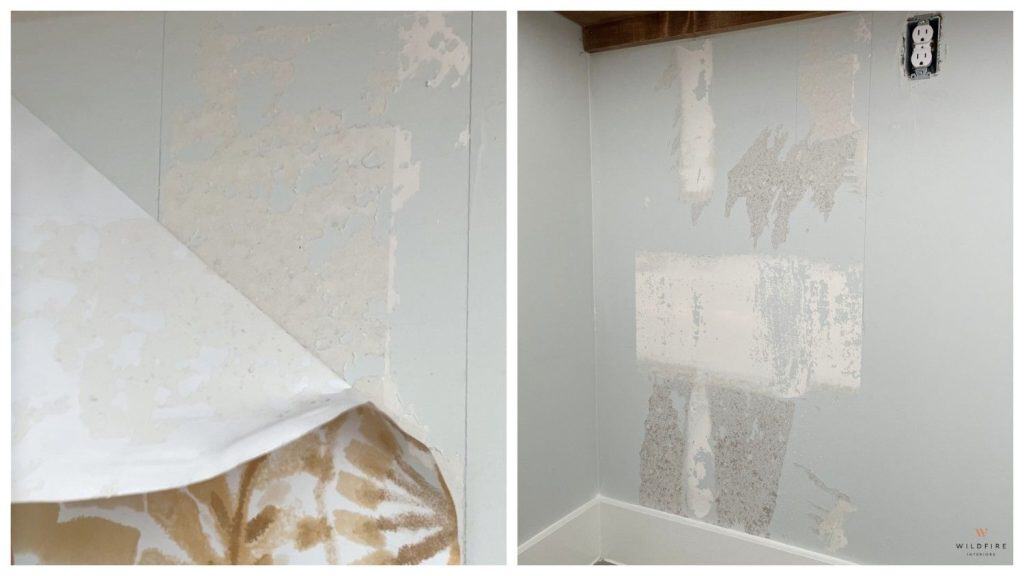
The paint is lifting with the paper: Stop immediately. Apply more heat to the section you’re on and try again more slowly. If paint continues to lift, dampen the paper slightly with warm water from a spray bottle before peeling — the moisture helps release the adhesive bond without the paint coming with it.
The paper tore and you can’t get under the remaining piece: This is what happened to me in the corner. Use the plastic scraper to get under the torn edge — go in at a very shallow angle and work slowly. If you can’t get under it at all, apply heat directly to the torn section and try again. A piece of tape pressed firmly onto the torn paper and then pulled back at a low angle can sometimes grab enough surface to restart the peel.
There’s a small area of paint that lifted despite careful removal: Fill it with a tiny amount of spackling compound, let it dry, sand lightly, and touch up with matching paint. Most landlords will not notice a repair this small if it’s done carefully. Keep the original paint colour if you can — ask the landlord what it was when you moved in, or take a chip to a paint shop for matching.
The adhesive won’t come off the wall: Try Goo Gone or a similar adhesive remover specifically formulated for wall use. Apply it, let it sit for the time specified on the packaging, then wipe gently. Follow with a warm water wipe to remove any product residue before it affects the paint.
The Deposit Conversation
If you’re removing peel and stick wallpaper specifically because you’re moving out and want your deposit back, here is the sequence that gives you the best outcome.
Remove the wallpaper as early as possible before your move-out date. This gives you time to deal with any residue or minor damage properly rather than rushing it the day before the landlord inspection.
Photograph the wall before the wallpaper went up if you have those photos. Photograph it again after removal. If the wall looks the same in both photos, the photos are your evidence.
If there is any minor damage, a small patch of lifted paint, a residue mark that won’t fully come off, fix it before the inspection rather than hoping the landlord won’t notice. A small touch-up done well is invisible. An unaddressed mark gives a landlord something to point at.
The goal is a wall that looks exactly as it did on move-in day. With the right technique and a little patience, peel and stick wallpaper removal achieves this almost every time.
My Final Thoughts
The corner that gave me trouble is fine now.
I took my time with it after the initial mistake, applied more heat than I thought necessary, used the plastic scraper instead of my fingernail, and it came off cleanly. The wall underneath showed no sign of anything having been there.
That’s the outcome you’re working toward.
Not just removing the paper but removing all evidence that it was ever there. A wall that looks as it did before you decorated it is the whole point, and it’s achievable with the right approach even if it takes longer than you expected.
That’s all I have for today.
If you’ve removed peel and stick wallpaper and hit a specific problem I haven’t covered — a particular brand that behaves differently, a wall surface that caused unexpected issues — leave it in the comments.
The specific situations are always more useful than the general advice.
Until next time,
Stay safe,
Tasos & Katerina

I’m Anastasios Moulios, co-founder of DIY Cozy Living. I enjoy finding creative, practical ways to make small spaces feel warm, stylish, and lived-in. I started this blog with Katerina to share real ideas that make a home feel a little more personal and a lot more comfortable.
