
How To Remove Drywall Anchors Without Damage

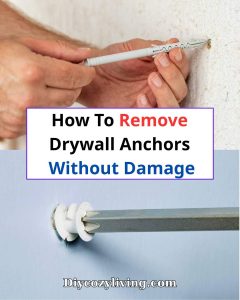
Staring at old plastic drywall anchors sticking out of your wall can be highly annoying, especially when you want to take down an old shelf or rearrange your picture frames.
All a renter or homeowner longs for is a smooth, clean, and flawless wall without creating massive, gaping holes in the drywall.
That’s why finding safe ways to remove these plastic and metal toggles has become immensely popular.
However, many people don’t want to just yank them out with pliers and rip away half of their plaster and paint.
Probably you feel that your wall will be completely ruined the second you try to pull them out, or that leaving a leftover hole behind defeats the entire purpose of being careful.
This is a completely logical thought, despite the fact that removing drywall anchors and patching the tiny hole left behind is incredibly easy and cheap if you use the right techniques.
There are multiple ways available through which you can get rid of these stubborn anchors without causing any serious harm to your room.
The clever ways to fix your walls are easy to follow, and they won’t cause any extra frustration whatsoever.
But, how exactly can we do it safely and patch up the holes?
Let’s dive in!
Why You Need to Remove Drywall Anchors Carefully
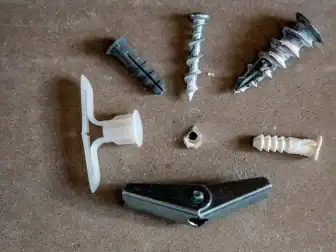
There can be various reasons why you might want to finally get rid of those old wall anchors today.
Some of the most common reasons are moving out of a rental apartment, patching up a room for a fresh coat of paint, or shifting your heavy furniture around.
But why should you completely abandon the brute-force method of just pulling them with a hammer?
No matter what kind of anchor you are dealing with, it is always better to choose a patient, non-destructive method so that your drywall stays structurally sound.
Yanking them out aggressively is extremely risky, and if you make a mistake, you are left with a massive crater in your wall that requires expensive patching kits and mesh tape.
By using simple, strategic removal tricks, your walls will remain safe from the harmful effects of tearing, and your patching process will be completely stress-free.
Read Also: How To Hang Things Without Damaging Walls
How To Remove Drywall Anchors Without Damage
There are many ways to remove your anchors naturally and safely.
We are going to share the best methods, along with exactly how you should apply them and fix the leftover holes.
Tip 1: The Backing-Out Screw Process
If you are dealing with a standard plastic expansion anchor, the backing-out screw process is a suitable ingredient to choose from.
This will give you the functionality of a solid grip without tearing the drywall paper.
Things you will need:
- A regular screw
- A screwdriver
- Pliers
Step-by-step instructions to apply this method:
Step 1: In order to prep the anchor, take your regular screw and turn it manually into the plastic anchor just a few threads deep.
Step 2: Take your pliers and firmly grip the head of the screw.
Step 3: Gently pull the screw head straight outward. The screw gives you a solid grip to slide the anchor straight out like a cork from a bottle.
Tip 2: The Screwdriver Tap-In Process
Sometimes, the cleanest way to remove an anchor is actually to not remove it at all. The tap-in process is ideal for those who like a perfectly flush surface.
Things you will need:
- A large Phillips screwdriver
- A hammer
Step-by-step instructions to apply the tap-in method
Step 1: Place the tip of your large Phillips screwdriver directly against the head of the plastic anchor.
Step 2: Take your hammer and gently tap the back of the screwdriver.
Step 3: Push the anchor deep into the wall cavity so it drops down inside the wall, leaving only a tiny clean circle to patch over.
Tip 3: The Threaded Anchor Reverse Twist Process
For those who have large plastic or zinc-alloy threaded anchors, we have the right way to remove them. Try the reverse twist process.
Things you will need:
- A Phillips or flathead screwdriver
🔥 Would you like to save this?
Step-by-step instructions to apply the reverse twist:
Step 1: Never pull these anchors straight outward. Instead, press your screwdriver firmly into the head of the anchor.
Step 2: Twist the screwdriver counter-clockwise slowly.
Step 3: Neatly unscrew it right out of the drywall thread by thread until it pops out completely.
Tip 4: The Utility Knife Lip Cut Process
If an anchor refuses to move or you cannot push it in, a utility knife will let you fix that perfectly.
Things you will need:
- A very sharp utility knife
- A screwdriver
Step-by-step instructions to apply the lip cut:
Step 1: Carefully score the decorative plastic rim or collar on the front of the anchor.
Step 2: Cut the lip completely off so the anchor is flat against the wall.
Step 3: Once the lip is gone, push the remaining body into the wall with your screwdriver, leaving a perfectly flush hole.
The Spackle And Patch Process (Fixing The Hole)
Removing an anchor or pushing it backward will always leave a hole behind. Here is exactly how you can make that hole disappear safely so your wall is flawless again.
Things you will need:
- A small tub of spackle (or drywall joint compound)
- A putty knife
- A fine-grit sanding block
Step-by-step instructions to fix the hole:
Step 1: Take your putty knife and gently scrape away any loose paper or drywall dust around the edges of the tiny hole to create a clean surface.
Step 2: Scoop a small amount of spackle onto your putty knife and press it firmly into the hole, scraping it completely flush against the wall so there are no heavy bumps.
Step 3: Let it dry completely for a few hours. Once it is fully dry, take your sanding block and gently rub the area until it is perfectly smooth and ready for a quick dab of matching paint.
What Kind Of Results to Expect?
The safe anchor removal process is the best way to prep your room because it causes zero unnecessary harm and keeps your repair zones extremely small.
Tools such as needle-nose pliers, regular screwdrivers, and spackle will make your walls look completely pristine before painting.
Depending on the type of anchor you have, the method you choose will give you great results.
Obviously, don’t expect miracles.
None of these methods is able to leave your wall completely flawless without a tiny bit of spackle. You are always going to be left with a small round hole where the anchor originally sat.
In short, the aesthetic results for your walls will be great, but nothing spectacular if you refuse to apply a tiny bit of joint compound over the remaining hole afterward or skip the sanding step.
Please remember this because we don’t want you to get disappointed if your wall still looks bumpy.
However, you can expect excellent results for your weekend home improvement goals because these ideas are tried and tested by Katerina and me in our own projects.
Conclusion
Drywall anchor removal tricks can fix and organize your house good enough.
Choose the method as per your specific anchor type so that the tools match your specific needs.
Fix your walls safely, and set your home free from ugly plastic plugs and bumpy surfaces.
But, remember these techniques will not have impressive results if you rush the process and yank the metal brackets out sideways, as you will absolutely tear the paper lining of the drywall.
This doesn’t mean that you should leave those ugly plastic eyesores in your wall if you don’t want to.
But, I have to let you know which are the pros and which are the cons of DIY drywall removal so that you form your own opinion on this topic.
My personal take is that if you are just fixing a few minor holes, your budget is tight, and you want to keep the repair job small, go ahead and use the simple screw-pull or tap-in ways followed by a quick spackle patch.
On the other hand, if your wall is completely riddled with dozens of heavy metal toggle bolts and structural cracks, then better cut out that section of drywall completely and replace it with a fresh sheet of sheetrock.
That’s really it!
I really hope you found our article helpful.
If you have any questions about spatulas or choosing the right spackle, feel free to write them in the comment section below and we will be more than happy to help.
Are you ready to fix your walls today?
Until next time,
Stay safe,
Tasos

I’m Anastasios Moulios, co-founder of DIY Cozy Living. I enjoy finding creative, practical ways to make small spaces feel warm, stylish, and lived-in. I started this blog with Katerina to share real ideas that make a home feel a little more personal and a lot more comfortable.
