
How to Install RV Hookups at Home

With a set of permanent hookups in place, your yard or driveway is as good as your own private campsite. You put an end to the business of lugging jugs of water or running extension cords in through a window; with a proper installation you have sewer, water and power right at the RV’s side.
There are any number of reasons to make the effort. If you keep your rig at home between outings, it is handy to be able to run the fridge or top off the batteries without firing up the engine. Then there are short visits from family who would be more comfortable sleeping in the RV than in the house. Some full timers or seasonal types will put in a permanent hookup just to have the RV serve as another room on the property.
In the end it all boils down to four items for example a solid spot to park, water and electrical lines, and a means of waste disposal. But each has its own pitfalls, so you are better off taking your time and doing it by the book.
Do check one thing first though. Depending on your locale you may need a permit for a permanent setup, and some places have zoning restrictions on how long an RV can be tied in or if you can even live in it. It is worth a phone call to the building department before you break ground so you don’t have to re-do your work.
Check the Rules Before You Touch a Shovel
You could be forgiven for overlooking this, but it is the sort of thing that will give you the most headaches if you do. Take permanent RV hookups, for instance, I mean fixed water, sewer and electric as opposed to what you put in and take out at will. In many places you will need a permit for those.
It is a matter of where you are. A few municipalities won’t make much of an issue of it, seeing it as a simple home improvement. But others will view it as putting in a second dwelling and have all sorts of zoning rules on top of you: how long the RV can be hooked up, if anyone is allowed to reside in it, the type of waste disposal you can use and so on.
Do yourself a favour and put in a call to your building or zoning office first. It is better to make one phone call than to go to the trouble of running electrical lines and pouring concrete only to be told you have to tear the whole thing out.
The Parking Pad
You can put an RV on the grass, but it will work its way into the ground. The thing is, they’re heavy and if the terrain isn’t perfectly even, you’ll end up with a unit that’s out of level. That’s when you start to have trouble with the fridge or your door seals.
The answer is a pad made of gravel or concrete. It puts you on a firm, flat plane and it’s something you won’t have to redo in a few months.
Start by getting the dimensions of your RV and tack on about four feet all around for some elbow room. And don’t forget to look up at where you want to be; make sure there are no power, phone or cable lines running over the spot.
If you’re going with gravel, you need to do it right. Level off the ground and put in a hole four to six inches deep, more or less depending on how much your rig weighs. Put down some filter cloth on the dirt first. I see people leave this out, but it’s important. It keeps the soil from working its way up into the gravel and making for soft spots down the road.
Stick with number 57 or 2 washed gravel. Don’t bother with pea gravel; an RV is too heavy for it and will just sink in. And stay away from “crush and run” — the stone dust in it will get tracked inside every time you step in. Recycled concrete is a no-go, too. You never know what kind of rebar or wire is in there, and a bit of metal in your driveway is a one-way ticket to an unexplained flat.
With concrete, you lay the same kind of base: four inches of tamped gravel with the filter cloth under it. Then you pour four to six inches of concrete, using some boards to form a nice straight line. Some wire or fibre mesh in the mix doesn’t hurt for extra heft.
Here’s a tip before you do any of this: think twice about running water or electrical under the slab. It’s the easy way to go, but if a line goes, you have to break the pad to fix it. Plus, those buried lines can settle on their own and you’ll be left with a sunken patch in your pad.
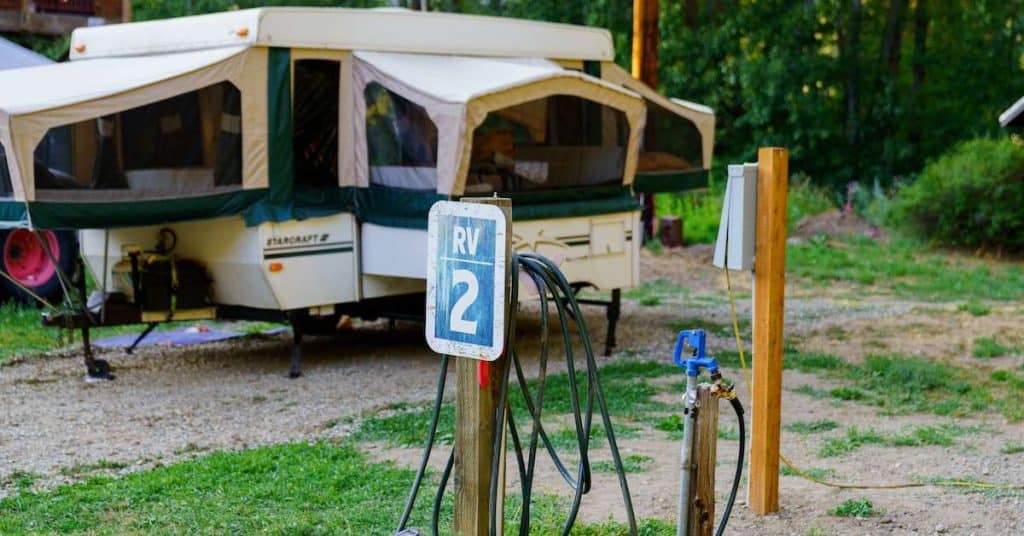
Setting Posts for Water and Electric
With the pad in place, you can put in some posts to get your water and power at a good working height, like you would at a well-put-together campsite. A 4×4 is all you need for that.
Make a hole about 8 inches wide and 30 down for each post. Once you have it set and level, you can fill it with any concrete you have left over from the pad or just dry pack it with some bagged mix. The trick with dry packing is that the moisture from the ground will do the rest and harden it for you. If you’re in a drier part of the country, you can’t count on that and should wet the concrete down first.
Just be sure to put the posts where they’ll be handy for the RV so you aren’t making a chore out of hooking up your hoses and cords.
Running the Water Line
Don’t put a shovel in the ground until you’ve had your utility lines marked. If you’re in the US, that’s an 811 call or whatever they do in your area to get them out and flag things for you. In some towns it’s not just common sense, it’s the law. You don’t want to be the one to put a pick in a water or gas line; it’s a costly and potentially hazardous way to make a mistake.
You’ll have to run the trench for your new water line under the frost line – that is, as deep as the ground gets in your part of the country in the dead of winter. The depth can be all over the map from one region to another, so check with the building department or look up the figure for your zip code. If you don’t go that far down, a hard winter will see your line freeze and pop.
It’s a lot of work by hand, so I’d rent a trencher from the hardware store if you can. It will put you through this in no time, particularly when you need to get some real depth in.
For the pipe, you can’t go wrong with CPVC. It’s made for both above and below grade and is easy to handle. But here’s a heads-up: leave the purple primer on the shelf. There are primers for PVC, for CPVC, and some for both. Put the wrong one on and you may have a leak down the road even if the joint looked good at the time. Stick with a good CPVC glue and you won’t have any trouble.
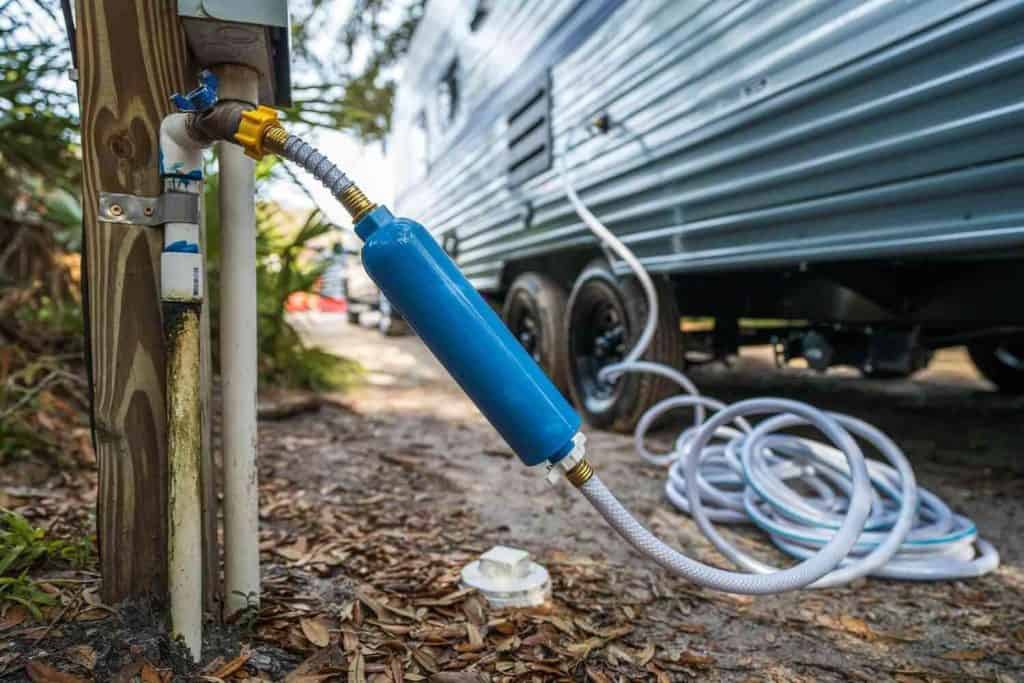
When you get the line to the post, put some heat tape around it before you make it permanent; that will keep the exposed part from freezing. Clamp it down, backfill the hole and put a faucet on top of the post and you’re done.
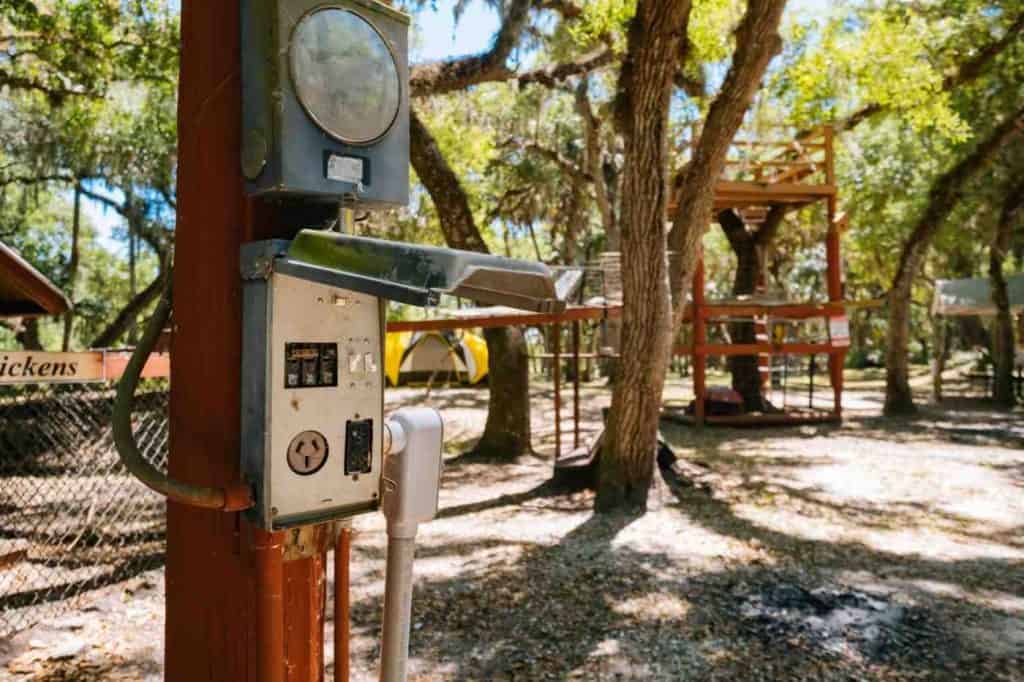
The Electrical Hookup
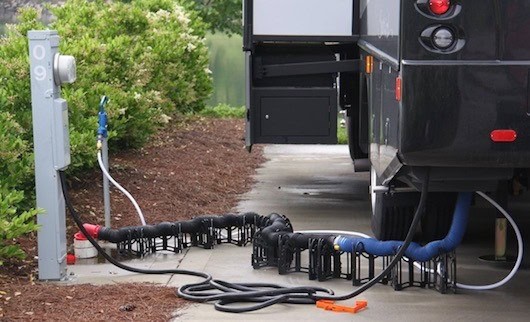
This is the section where I’d tell you plainly: hire a licensed electrician.
The first thing to determine is whether your RV runs on 30 amp or 50 amp service. Check your owner’s manual, or simply look at the plug. A 30 amp system uses a three prong plug and delivers around 3,600 watts, generally enough for lights, a single air conditioning unit and the basics without much room to spare. A 50 amp system uses a four prong plug and delivers over 12,000 watts, which means you can run multiple appliances, including more than one AC unit, without constantly tripping breakers.
| 30 Amp | 50 Amp | |
|---|---|---|
| Plug type | Three prong | Four prong |
| Power delivered | Around 3,600 watts | Over 12,000 watts |
| Typical RV size | Smaller to mid size | Larger motorhomes, fifth wheels |
| Appliances at once | Usually one major appliance | Multiple simultaneously |
You’re going to have an electrician put in a dedicated line from the breaker (or sub panel) over to the RV. Don’t try to be a hero with this one; it’s not for the do-it-yourselfer. The wiring, the breaker and the gauge of the line have to be right for what your RV is pulling, and if you make a misstep you could put your whole house or the RV at risk.
That said, if you like to work with your hands and want to put some money back in your pocket, you can handle the trenching. After the electrician has you on where and how deep to put it, go ahead and do it. You’ll have a machine on hand for the water line, so you might as well. Just make sure you don’t put the electrical and water lines in the same hole; they should be their own.
I’d also have the electrician put a regular outlet on the post. Comes in handy in the winter for the heat tape on the water line, or for anything else you need when you’re out by the rig.
And when you’re all set up, run your power through a 30 or 50-amp surge protector before you hook in. A bad connection or a bolt of lightning can fry the electronics in an RV, and you don’t want to be paying to fix that when a little device can prevent it.
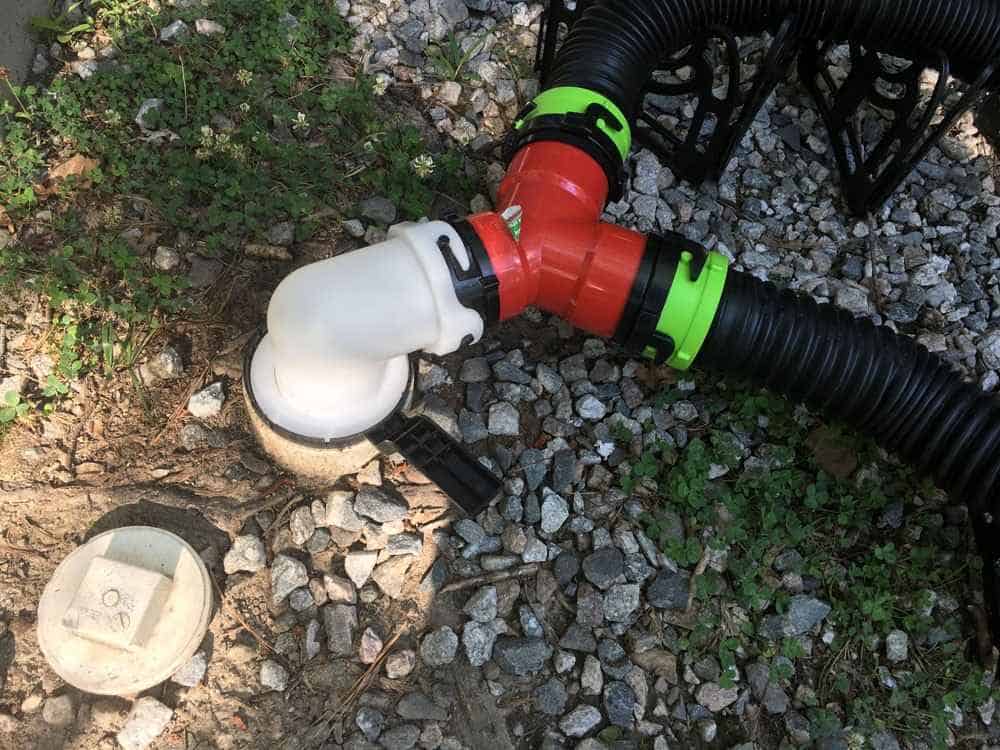
The Sewer Hookup
There are genuinely three different paths here depending on what’s already on your property, and the right one for you depends entirely on what exists already.
Connecting to an existing public sewer system is the simplest option where it’s legal. Some municipalities don’t permit residential RV sewer connections even where a sewer line is present, so this needs checking with local officials first. Where it is allowed, it works exactly like a campground hookup: locate the sewer cleanout cap in your yard, remove it, and connect your sewer hose.
Connecting to an existing septic system works similarly but usually requires a four inch pipe run from the septic tank’s holding area to give you something proper to connect to, rather than simply attaching to the tank directly.
Installing a dedicated holding tank is the most expensive route by a significant margin and is generally the last resort, reserved for properties with no existing sewer or septic access at all. Burying a tank is costly, and you’ll also need to arrange periodic pump outs once it’s installed, which is an ongoing cost rather than a one time expense.
You won’t see it in most of the run-of-the-mill guides, but there is a fourth way to go about this. It’s one of those things you should get a handle on, as it’s the answer for a lot of folks with a particular set of circumstances.
What you’re looking at is a macerator pump. You hook it up to your RV’s sewer and it will pulverize the waste into a slurry before pushing it out through a regular ¾-inch garden hose. That’s a far cry from the bulky, wide sewer hose you’d be lugging around otherwise. The beauty of it is that since it’s a pump and not just gravity doing the work, it can send waste up and over some ground—fifty feet or so with some of them. So if your septic or cleanout is a bit of a trek from where you’ve put down the RV, it comes in handy.
If you don’t want to deal with electricity, there are jet pumps. They run off the water pressure of an ordinary hose to do the same job. You’ll save a good deal of money over a powered unit and they do the trick for now and then, even if they are a bit of a water waster.
When you have to make do with a septic or sewer line that’s not right next to your parking spot, either of these is something to put on your list. They can keep you from having to put in a long, deep trench for a gravity-fed line.
Composting toilets are also worth a brief mention as an alternative path entirely, sidestepping the sewer hookup question altogether. These separate liquid and solid waste, using natural material like mulch to break down solid waste with the help of a small fan to manage odour. They cost a fair amount upfront but considerably less than installing a buried holding tank, and they eliminate the need for any sewer connection at all.
What This Actually Costs
You’ll see a wide range in the bill. It all comes down to how much you put in on your own, what you have to pay for permits in your area, and the kind of sewer work you’re up against. Here’s what we’re looking at with today’s prices:
Water: You can put it in for as little as $20 if you do the hard part like the trenching and piping. But let a plumber handle it and you’re talking a few hundred.
Electric: If you dig the trench and an electrician is just there to make the panel tie-in, you might be out about $100 in parts. A full-service job with a new dedicated circuit will run you over a grand.
Sewer: No charge if you can make a direct link to what’s already there. On the other hand, if you need a holding tank put in from the ground up, that could be in the thousands.
A Final Thought
You can put a lot of time into this and still be left with the same impression: it’s all in the unglamorous, unseen details. Even from an arm’s length, that’s what stands out to me. It’s the filter cloth you tuck under the gravel and never see again.
The frost line you have to get right the first time. Or the way you run water and electric in their own little trenches—seems like overkill until you think about it.
There’s no show to it. But then again, that’s what separates a system you can set and forget for a decade and a half from one you’ll be re-digging in two years.
I’ll leave it at that. For those of you who have put your hands to it on your own land, I’m open to some input in the comments.
If there’s a quirk in your local codes or the weather here that a broad-stroke article like this misses, let me know. When it comes down to it, you can’t beat what you’ve been through for yourself.
I’m Anastasios Moulios, co-founder of DIY Cozy Living. I enjoy finding creative, practical ways to make small spaces feel warm, stylish, and lived-in. I started this blog with Katerina to share real ideas that make a home feel a little more personal and a lot more comfortable.
