
21 DIY Picture Frame Ideas That Look Expensive and Cost Almost Nothing

The frames you buy at a home decor shop are almost always either too plain, too expensive, or too identical to the one in every other house on the street. The frames you make yourself are none of those things.
They carry the afternoon you spent making them, the materials you chose, and something that a mass-produced frame from a warehouse shelf simply cannot have: the fact that it exists because you made it.
These 21 ideas range from five-minute makes using supplies you already have to more involved afternoon projects that produce something genuinely impressive.
The first six are original ideas you will not find in the standard frame roundup. Ideas seven through twenty-one are the classics, written with enough detail that you can actually make them rather than just admire the photo.
What Makes a DIY Frame Worth Making
Before you reach for the glue gun, it is worth thinking about what the frame needs to do. A frame that holds a cherished family photo needs to be stable, level, and durable.
A frame made as a gift needs to be finished neatly enough that it does not look homemade in the wrong way. A frame for a seasonal display can be looser and more experimental since it is not meant to last forever.
The single most important thing in any DIY frame project is the backing. Whatever you decorate the outside with, the photo needs something solid behind it to stay flat and protected.
A piece of thin MDF or hardboard cut to size from a hardware store costs almost nothing and makes every frame project look more finished. Cardboard works for lightweight temporary projects but warps over time, especially in humid rooms.
The second most important thing is the hanging method. Sawtooth hangers, picture wire, and D-ring hangers all give a more professional result than a piece of tape or a single nail through the frame itself. For lightweight frames, a strong adhesive strip hook works perfectly and leaves no wall damage, which matters if you rent.
1. Pressed Flower Frame
A plain white or natural wood frame decorated with dried and pressed flowers and leaves is one of the most genuinely beautiful DIY frame ideas and one of the least commonly done well. Press flowers between the pages of a heavy book for two to three weeks until they are completely flat and papery. Arrange them on the frame surface in a design you like, working from the largest pieces down to the smallest, and seal with two coats of Mod Podge applied gently with a soft brush. The result looks like something from a botanical gift shop and costs the price of a plain frame and whatever flowers you have in the garden.
What you need: A plain frame, pressed flowers and leaves, Mod Podge, a soft brush, and a finishing sealant spray for durability.
Best for: A bedroom, a bathroom shelf, or as a gift for someone who loves gardens. The botanical look suits any neutral or white-walled room.
One honest note: Avoid pressing flowers in direct sunlight during the drying process as they fade to brown rather than holding their colour. Pansies, ferns, lavender, and small daisies press the most reliably.
2. Driftwood and Branch Frame
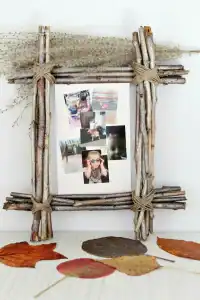
Collect four pieces of driftwood or straight branches in roughly matching lengths and bind them at the corners with jute twine or wire to form a rectangle. Hot glue the joints from behind for stability. Hang with wire stretched between the two side pieces. This frame works best as a display for lightweight prints or photos clipped to the bottom with small wooden pegs rather than inserted into a traditional frame opening. It looks completely natural and costs nothing if you gather the wood yourself.
What you need: Four pieces of driftwood or branches, jute twine or wire, hot glue, picture wire, and small wooden pegs for displaying photos.
Best for: A coastal, bohemian, or Scandinavian-style room. Works well in a bathroom, bedroom, or entryway where you want something organic and textural.
One honest note: Let driftwood dry completely before using it. Damp wood warps and shrinks as it dries, which will pull the frame out of shape.
3. Cork Board Frame
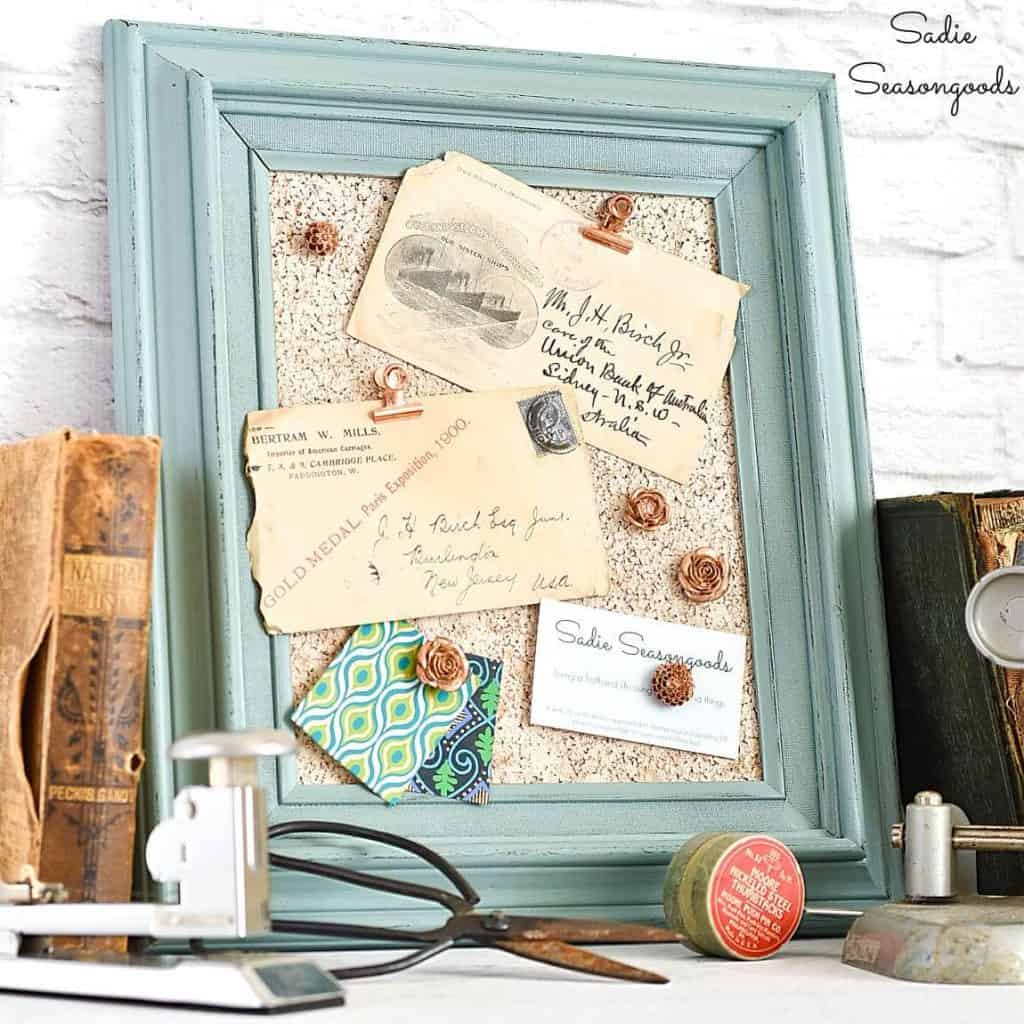
Glue cork tiles or wine corks cut in half lengthways around the border of a plain frame.
The cork adds texture, warmth, and the practical bonus of a pinnable surface immediately around the photo. Use a thin layer of strong adhesive and press firmly for thirty seconds per section.
Sand any rough edges gently once dry. This idea is particularly useful in a home office or a child’s bedroom where the area around the frame becomes a miniature display board for notes, cards, and small mementos.
What you need: A plain frame, cork tiles or wine corks, strong adhesive or hot glue, and sandpaper for finishing.
Best for: A home office, a teenager’s bedroom, or a kitchen notice board area. Practical and decorative at the same time.
One honest note: Wine corks vary significantly in diameter. If you are using corks, sort them by size before gluing so each side of the frame has corks of a similar height and the surface sits flat.
4. Decoupage Paper Frame
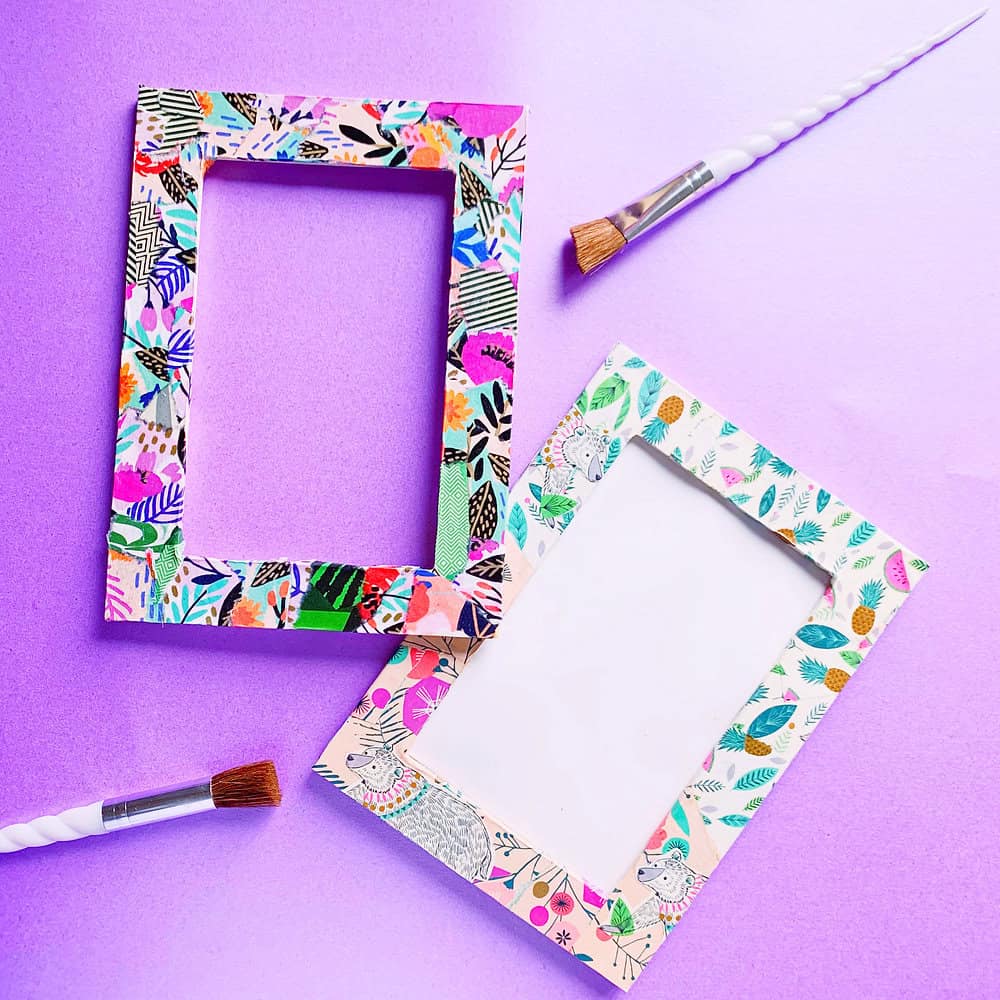
Cover a plain frame completely in torn or cut pieces of patterned paper using Mod Podge as both adhesive and sealant. Tissue paper, pages from old books, vintage maps, sheet music, or patterned napkins all work beautifully.
Overlap pieces slightly so no bare frame shows through, smooth out air bubbles as you go, and finish with two or three coats of Mod Podge over the top once dry. The result looks layered, intentional, and completely different from a bought frame.
What you need: A plain frame, patterned paper of your choice, Mod Podge, a brush, and a clear sealant spray for durability.
Best for: A gallery wall, a child’s room with bright coloured paper, or a vintage aesthetic with book pages or sheet music.
One honest note: Work in small sections rather than trying to cover the whole frame at once. Mod Podge dries quickly and large pieces of paper are hard to smooth without tearing once partially adhered.
5. Mirror Mosaic Frame
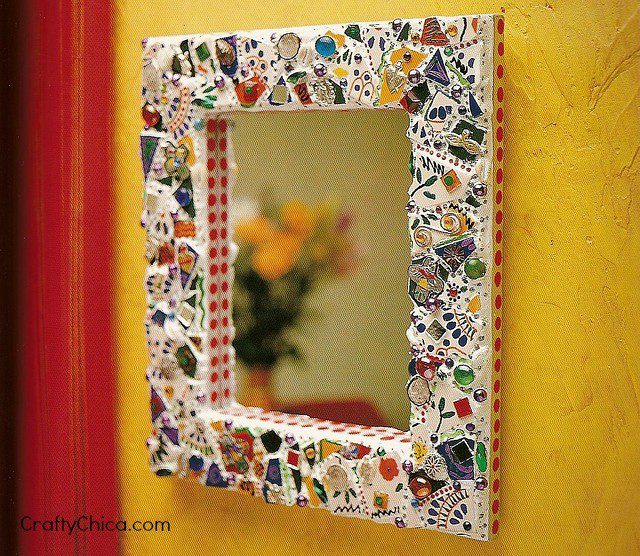
Break small mirror tiles into irregular pieces (wrap them in a cloth and tap gently with a hammer) and adhere to a wide frame surface using tile adhesive or strong craft glue.
Fill the gaps between pieces with grout in a colour that complements the room, wipe clean, and seal with grout sealant.
The finished frame catches light from every direction and looks genuinely impressive. This is the most time-consuming idea in this article but also the most dramatic result.
What you need: A wide sturdy frame, small mirror tiles, tile adhesive, unsanded grout, a grout float, clean cloths, and grout sealant.
Best for: A bathroom, a dressing table, or an entryway where it catches natural or artificial light. Not suitable for a child’s room.
One honest note: Wear gloves when handling broken mirror pieces. Tile adhesive needs twenty-four hours to cure fully before grouting.
6. Fabric Wrapped Frame
Wrap a plain frame tightly in fabric, securing at the back with hot glue. Choose a fabric that complements your room, a linen for a neutral look, a bold print for a statement piece, or a velvet for something tactile and luxurious. Cut the fabric generously so it wraps around all four sides with enough excess to fold neatly at the corners. Mitre the corners as you would when wrapping a gift and secure firmly. The result looks upholstered and deliberate rather than crafted.
What you need: A plain frame, fabric of your choice, hot glue gun, scissors, and a ruler for cutting straight edges.
Best for: A bedroom or living room where you want a softer, more upholstered look. Works well in pairs on either side of a mirror or bed.
One honest note: Iron the fabric before you start. Creases show through the finished frame, especially on lighter fabrics, and are almost impossible to remove once the fabric is glued in place.
7. Photo Transfer to Wood
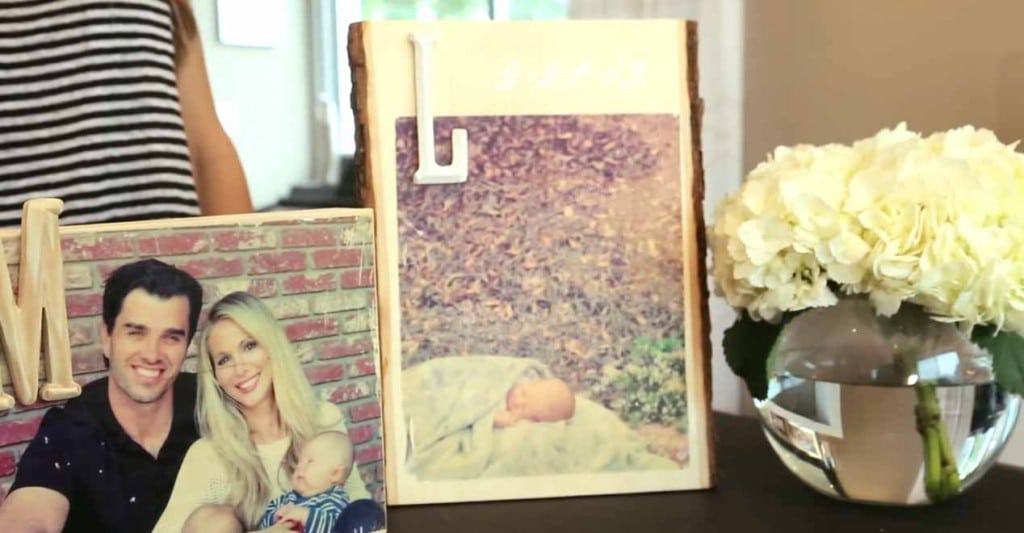
Via DIY Joy
Transferring a photo directly onto a piece of wood or a wooden pallet gives you a frame and a print in one object, and the distressed, vintage quality of the result is impossible to replicate with a standard printed photo.
The method uses Mod Podge as the transfer medium: print your photo on a laser printer (not inkjet, the ink does not transfer the same way), apply a generous coat of
Mod Podge to the wood surface, press the photo face down, let it dry for at least twenty-four hours, then wet the paper backing and rub it away gently with your fingers. The ink stays on the wood while the paper lifts away, leaving a soft, slightly aged image that looks like it has always been there.
What you need: A piece of wood or wooden pallet piece, a laser-printed photo, Mod Podge, a brush, and patience for the paper removal step.
Key tip: The wetter you keep the paper during the rubbing step, the cleaner the transfer. Dry patches tear rather than rubbing away and leave blotchy spots.
Best for: A rustic or farmhouse aesthetic, a living room gallery wall, or as a gift for someone who appreciates a handmade feel over a polished print.
8. Washi Tape Picture Frame
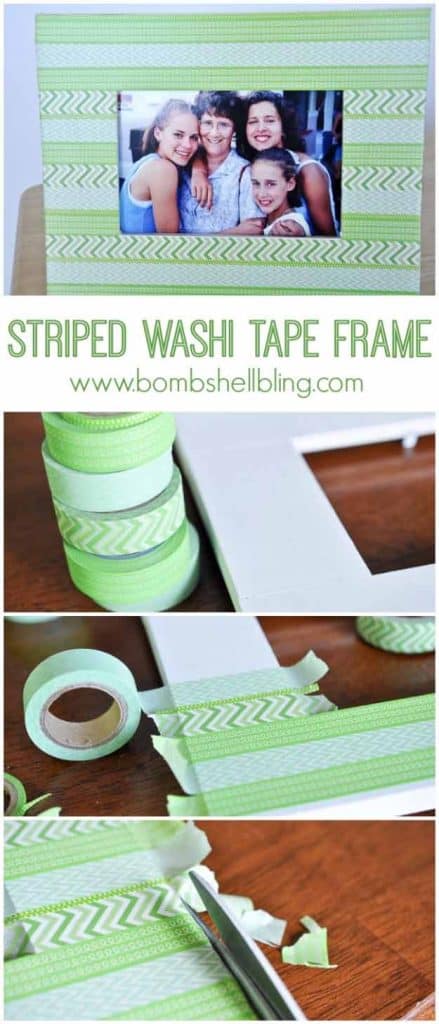
Via Bomb Shell Bling
Washi tape applied in stripes, chevrons, or random patterns across a plain frame is the fastest frame upgrade on this list and the most reversible, which makes it ideal for renters or anyone who changes their decor often. The tape peels off cleanly without leaving adhesive residue, so you can strip and re-tape the same frame in a new pattern whenever you want a change. Apply tape in parallel lines across the frame, trim the overhang with a craft knife against a ruler for a clean edge, and seal with a light coat of Mod Podge if you want it to stay put more permanently.
What you need: A plain frame, washi tape in your chosen pattern, a craft knife and cutting mat, and optional Mod Podge for sealing.
Key tip: Warm the tape slightly with a hairdryer before applying it around corners. Cold tape cracks and lifts at bends, while warmed tape molds to the shape cleanly.
Best for: A child’s room, a temporary display, or a renter who wants a personalised frame without any permanent commitment.
9. DIY Lamp Picture Frame
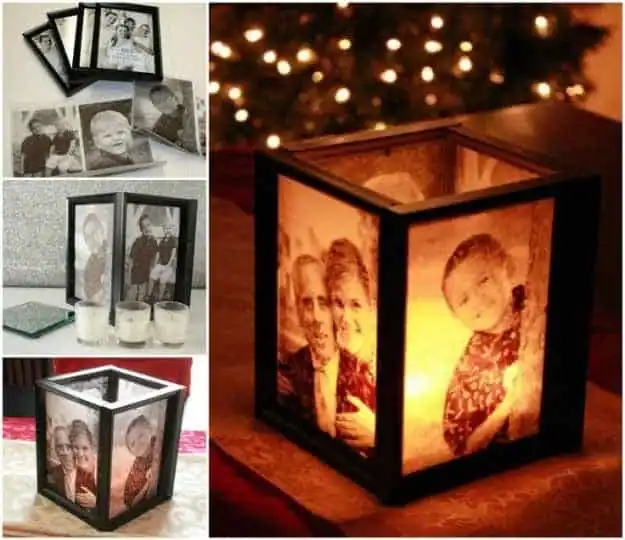
Four five-by-seven frames arranged in a square and glued together at the edges create a box-shaped luminary that doubles as a light fixture. Print translucent photos onto vellum paper (the kind used for tracing), slot one into each frame, and place LED tea light candles inside the box. The light glows through the vellum images, turning family photos into a soft, luminous display that looks extraordinary on a mantel or dinner table. This is the most unexpected idea on the list and the one that generates the most conversation.
What you need: Four matching five-by-seven frames, vellum paper, a home printer, LED tea light candles, and strong adhesive or glue dots to join the frames.
Key tip: Use LED candles only, never real flames near paper. Print the photos slightly lighter than normal since the backlight makes them appear brighter than they look on screen.
Best for: A dinner table centrepiece, a mantel display, or a nightstand in a bedroom. Particularly beautiful at Christmas or for a special occasion.
10. Mason Jar Vase Picture Frame
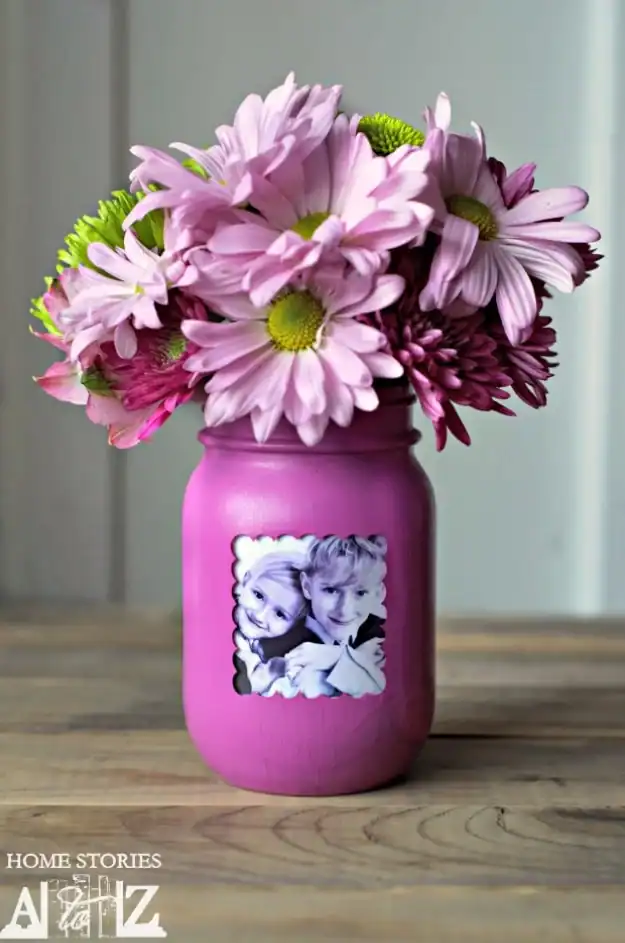
A picture frame with a mason jar wired or glued to the front becomes a wall-mounted vase-and-photo display in one object. Attach the jar to the lower section of the frame using hose clamps or strong wire, fill with a small plant or fresh flowers, and hang the whole thing on the wall. The photo sits in the frame above while the plant brings the display to life below. The combination of the flat photo and the three-dimensional plant element is unusual enough to look genuinely designed rather than assembled.
What you need: A frame, a small mason jar or similar glass vessel, hose clamps or strong wire, and a small plant, orchid, or fresh flowers to fill the jar.
Key tip: Use a succulent or air plant rather than a water-filled cut flower arrangement unless you are very confident the jar attachment is completely secure. A leak on a wall is not a good outcome.
Best for: A kitchen, a bathroom shelf, or an entryway where a little living greenery alongside a photo adds warmth.
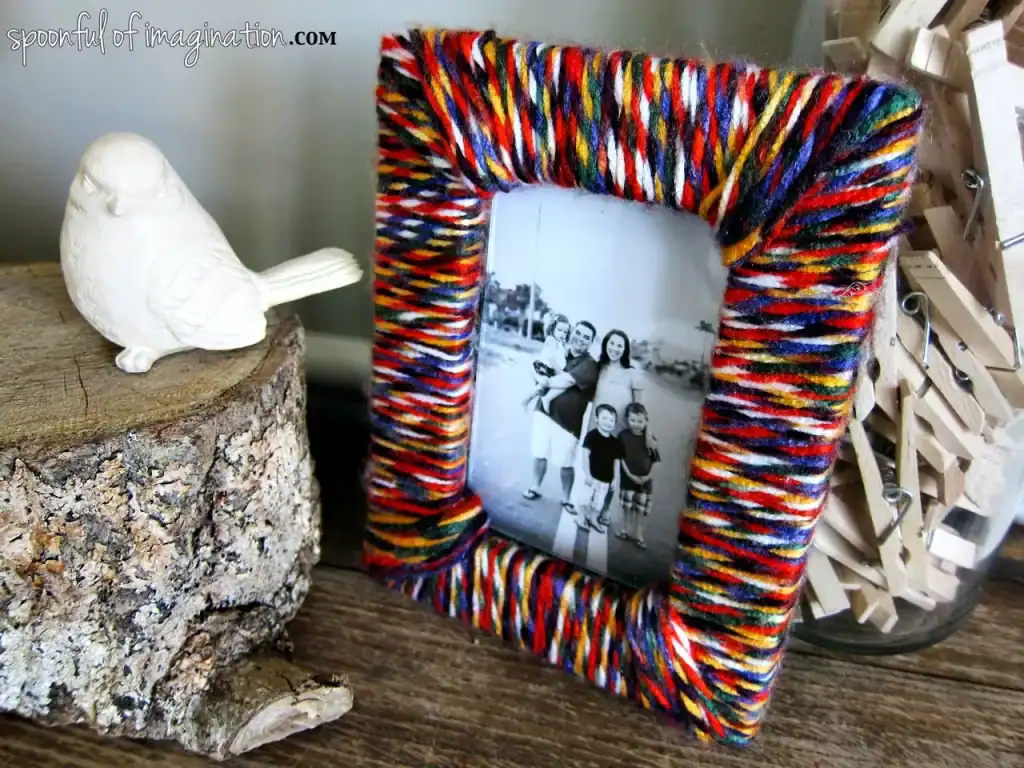
11. DIY Yarn Photo Frame
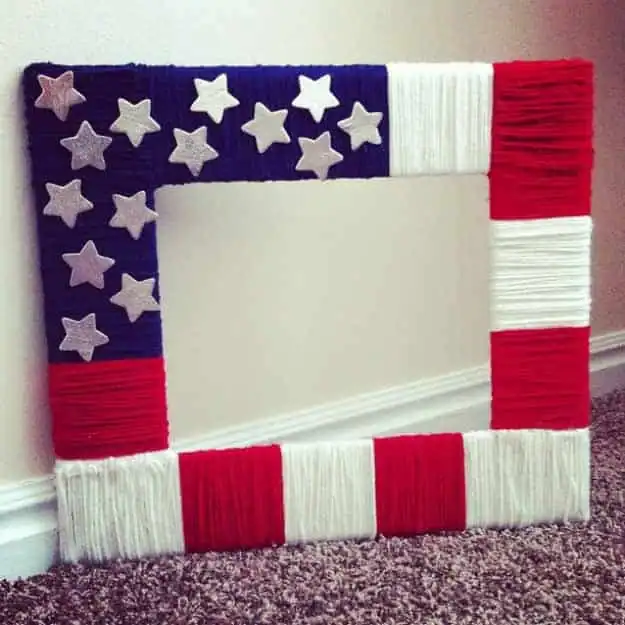
Wrapping a frame in yarn is one of the most satisfying and meditative DIY frame projects because it transforms a cheap or ugly frame completely in a single session. Apply hot glue to one section of the frame at a time and wrap the yarn tightly and evenly, keeping the rows flush against each other so no frame surface shows through. Change colours at any point by tying the new yarn to the end of the old and continuing. The texture of the finished frame is warm and cozy in a way that no paint finish can replicate.
What you need: A plain frame, yarn in your chosen colours, a hot glue gun, and scissors.
Key tip: Start and end each colour at the back of the frame where the join will be hidden. Pulling the yarn tight as you wrap prevents the rows from shifting and keeps the surface even.
Best for: A child’s room, a nursery, or any room where you want something warm and tactile rather than polished and flat.
12. Old Window Picture Frame
🔥 Would you like to save this?
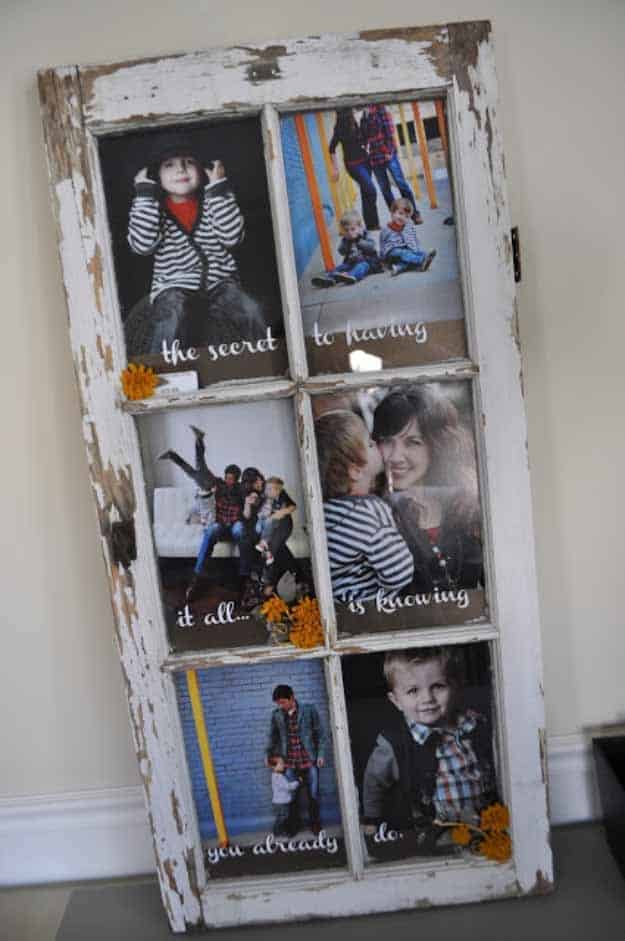
An old multi-pane window found at a salvage yard, a car boot sale, or a skip becomes a multi-photo display, a chalkboard panel, or a message board with almost no work beyond cleaning it up and deciding what to put in each pane. Leave the glass in for photos printed to fit each section, remove the glass and replace with chicken wire for a hanging display, or paint one pane with chalkboard paint for a writable section alongside the photos. The worn paint and aged wood of a genuine old window is impossible to fake with a new frame.
What you need: An old window frame, cleaning supplies, and whichever inserts suit your chosen use: photos, chicken wire, or chalkboard paint.
Key tip: Measure each individual pane before printing photos since old windows are rarely perfectly uniform. Each section may be a slightly different size.
Best for: A farmhouse, cottage, or rustic aesthetic. Works particularly well leaned against a wall on a console table rather than hung, where the full height can be appreciated.
13. DIY Photo Frame with Maps
Via Alyssa B. Young
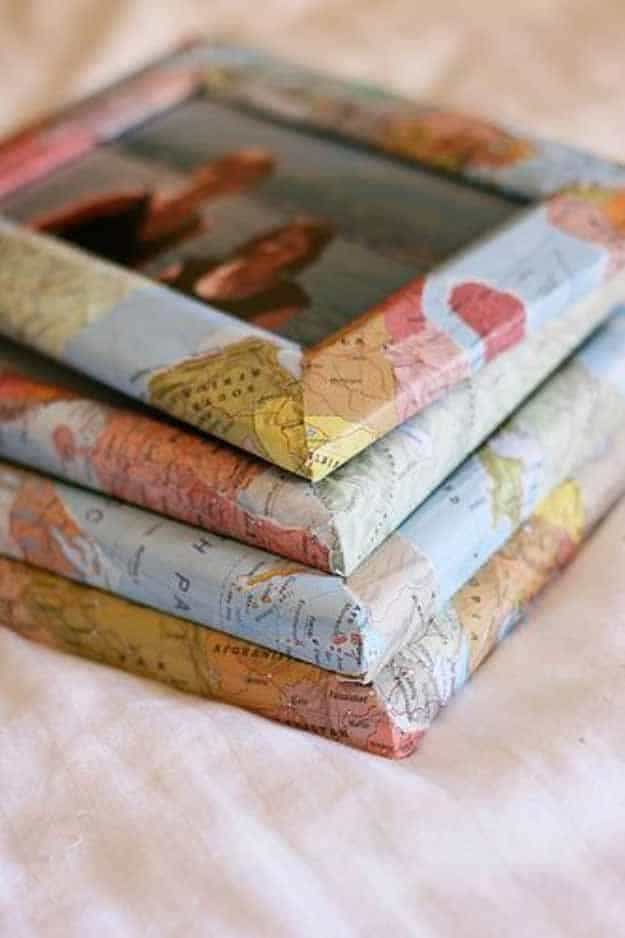
Covering a frame with pieces of an old map, whether a road atlas, a nautical chart, or a vintage city map, creates a display that tells a story as well as holding a photo. Cut the map into sections sized to cover each face of the frame, adhere with Mod Podge, and seal with two more coats once dry. Centre the map section on a meaningful location, the city where you met, the place the photo was taken, or a country you have always wanted to visit. The layering of the personal photo and the geographical context makes this more than just a frame.
What you need: An old map or atlas page, a plain frame, Mod Podge, a brush, and scissors or a craft knife for cutting.
Key tip: Tear rather than cut the map edges for a softer, more organic join between sections. Torn edges blend into each other with Mod Podge far more naturally than cut edges.
Best for: A home office, a travel-themed room, or as a gift for anyone who has a meaningful connection to a particular place.
14. Rolled Newspaper Picture Frame
Roll individual strips of newspaper tightly into thin tubes and glue them side by side around a cardboard frame base to create a textured, woven-looking border.
The rolled paper reeds look surprisingly architectural once they are all aligned in the same direction, and the newsprint texture adds an interesting graphic quality.
Paint the whole frame in a single colour once the glue is fully dry to unify the texture and make the result look more finished than the raw newspaper surface.
What you need: Newspapers, a cardboard frame base, a glue gun, paint in your chosen colour, and a brush.
Key tip: Roll the newspaper strips as tightly as possible around a thin rod or pencil, then slide them off and glue the end down immediately. Loosely rolled tubes collapse and flatten when painted.
Best for: A sustainable craft project, a children’s activity that produces a genuinely usable result, or a budget home decor project where the material cost needs to be essentially zero.
15. Home State DIY Picture Frame
Via Home Ideas Deco
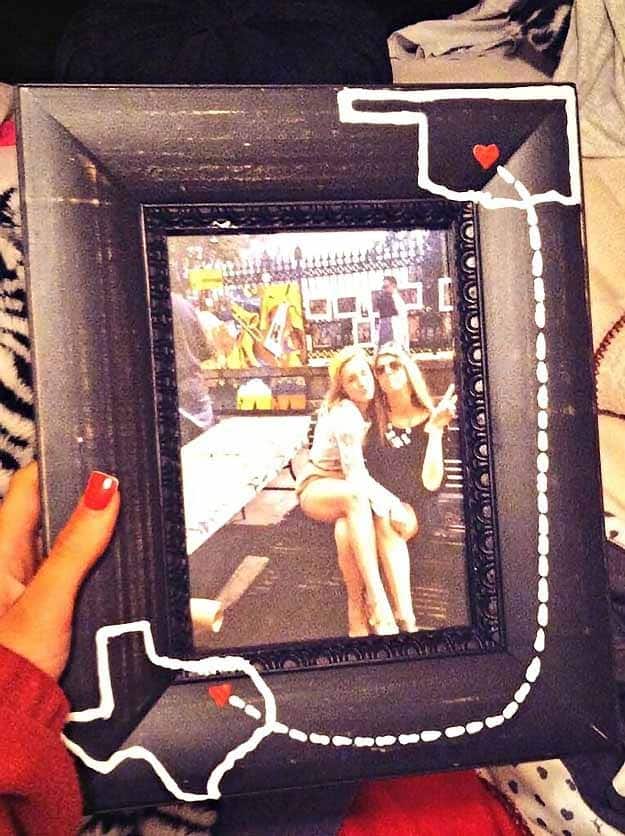
Cut or print the outline of a state, country, or region in a shape that means something to you and attach it to a plain frame as a dimensional element. Wooden craft shapes cut with a scroll saw or laser cutter work best for durability, but thick craft foam or cardboard shapes painted and sealed work well for a lighter version. The geographic shape immediately gives the frame context and makes it a personal object rather than a generic display.
What you need: A plain frame, a wooden or foam state or country shape, strong adhesive, paint, and sealant.
Key tip: Position the shape before gluing and step back to check the alignment from a distance. What looks centred up close often sits off-balance when viewed from normal viewing height.
Best for: A display celebrating a hometown, a place you lived, or a country with personal significance. Makes a meaningful moving or going-away gift.
16. Personalized Picture Frames
Via Cricut Holiday
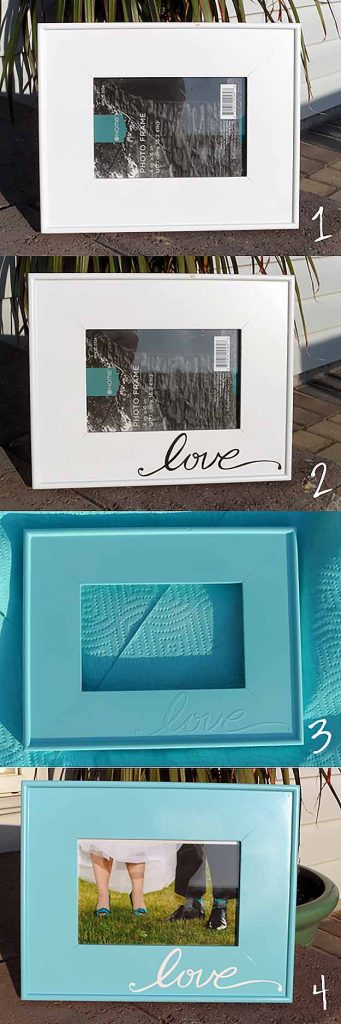
A Cricut cutting machine opens up an enormous range of personalisation options for plain frames: cut vinyl letters spelling out a name, a date, or a meaningful word and apply directly to the glass or frame surface. The precision of a machine-cut vinyl letter looks completely professional and takes minutes to apply. For a more layered effect, cut multiple words in different sizes and arrange them across the frame in a typographic composition.
What you need: A Cricut or similar cutting machine, adhesive vinyl in your chosen colour, a transfer tape, a plain frame, and a weeding tool for removing the negative vinyl.
Key tip: Clean the frame surface with rubbing alcohol before applying vinyl. Any dust or oil residue causes the vinyl to lift at the edges within days.
Best for: A personalised gift for a wedding, new baby, birthday, or housewarming. The most gift-appropriate idea on this list because the personalisation does the emotional work.
17. Scrabble Piece Picture Frame
Via Saving By Design
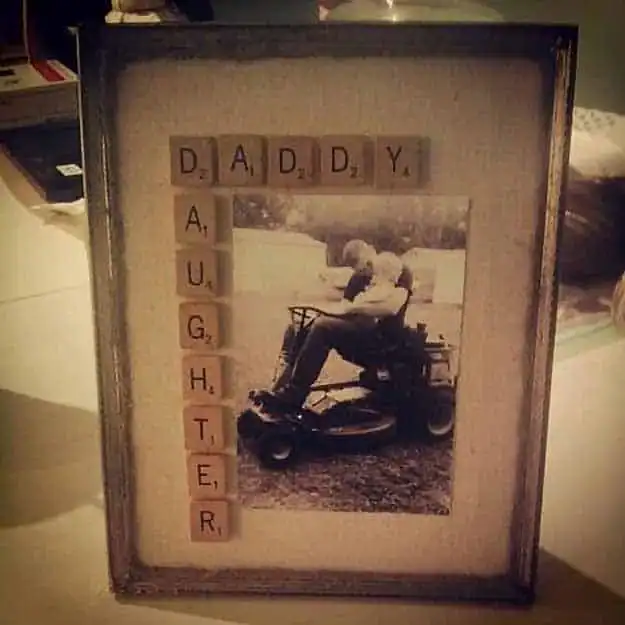
Glue Scrabble tiles spelling out meaningful words around the border of a plain frame. A name, a date, a favourite word, or a set of initials all work well. Arrange the tiles before gluing to work out the spacing and decide whether you want them lined up neatly in rows or scattered randomly for a more playful look. The wooden tiles add texture and the letter detail makes the frame immediately personal without any painting or complicated technique.
What you need: Scrabble tiles (available cheaply from charity shops and online as individual letter sets), a plain frame, and strong adhesive.
Key tip: Buy extra of the most common letters before you start. The letters you need most, E, A, S, and T, are always the ones missing from a second-hand set.
Best for: A Father’s Day or Mother’s Day gift, a personalised wedding gift, or a child’s name display in a nursery or bedroom.
18. Chalkboard Picture Frame
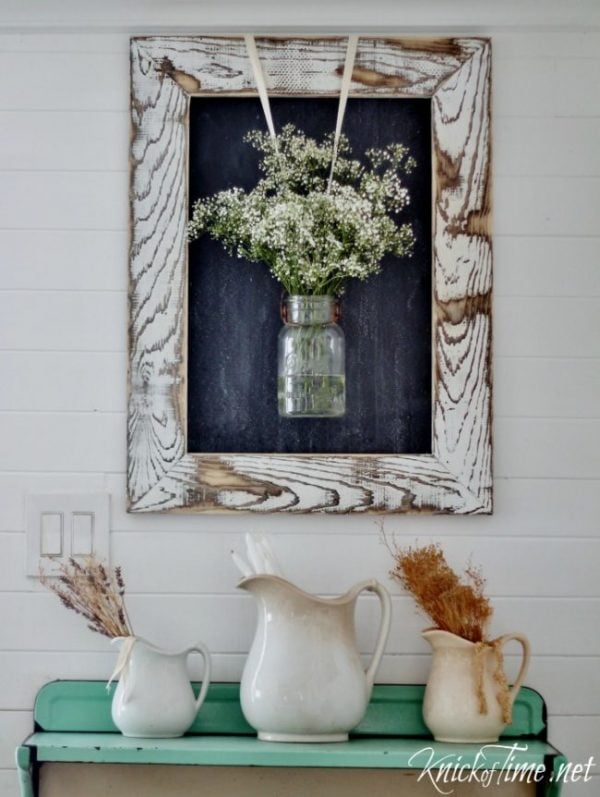
Apply chalkboard paint to the glass or a section of the frame surface to create a writable area alongside the photo.
Paint the entire glass panel for a chalkboard that the photo sits beside, or paint just the frame border for a chalkboard surround around the image.
Once cured (at least forty-eight hours), condition the chalkboard by rubbing the side of a chalk stick across the whole surface and wiping away before writing anything, which prevents ghosting. Use chalk markers for a crisper, more permanent result than regular chalk.
What you need: A frame, chalkboard paint, a brush, chalk or chalk markers, and patience for the full curing time.
Key tip: Apply at least three thin coats of chalkboard paint rather than one thick coat. Thin coats cure to a harder, smoother surface that writes more cleanly.
Best for: A kitchen where the frame doubles as a message board, a child’s room, or a seasonal display where you want to change the wording regularly without reprinting.
19. Popsicle Stick Frame
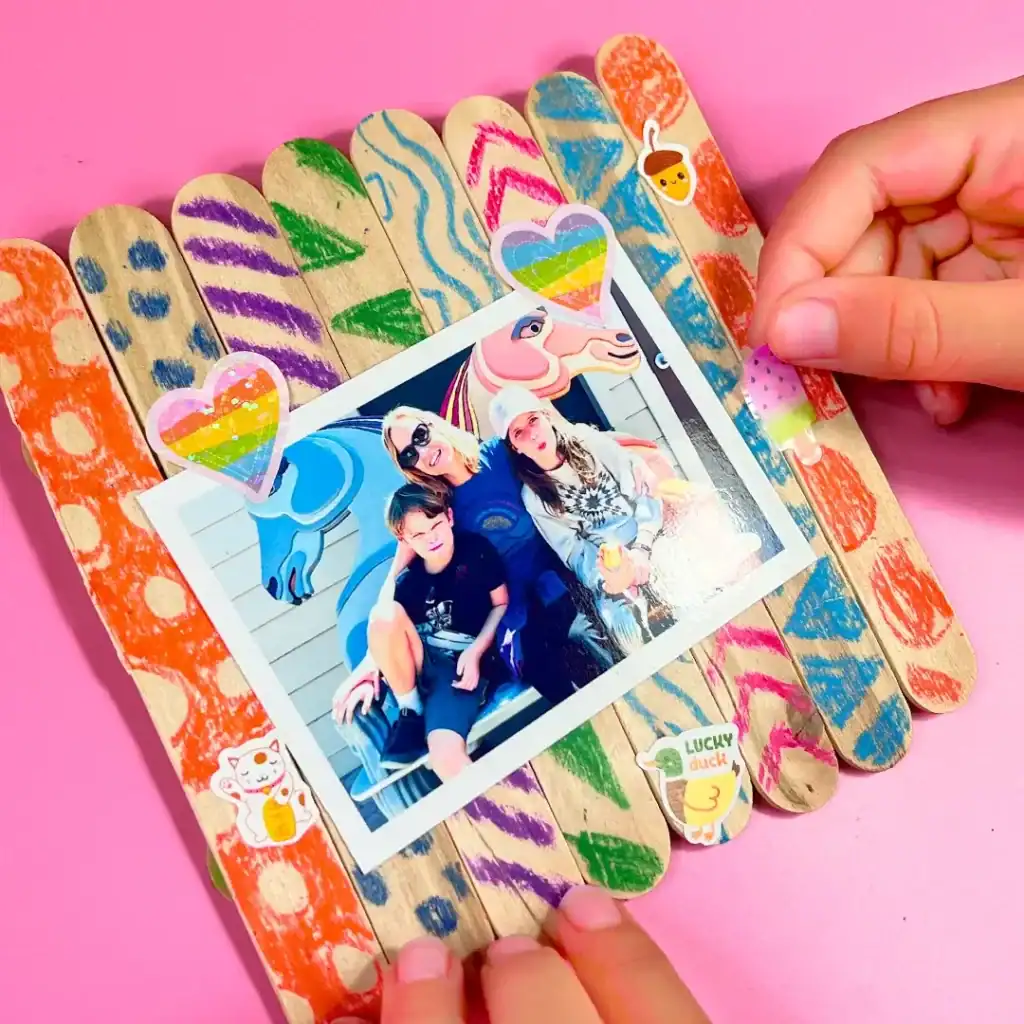
Popsicle sticks laid in a log-cabin pattern or simple grid create a lightweight, rustic frame that is particularly good for a child’s bedroom or a classroom display.
Glue the sticks in layers, alternating the direction of each layer for structural strength, and paint or stain once fully dry.
A natural wood stain makes the result look like a miniature timber frame. Paint it in a bright colour and it reads as deliberately playful. Add small embellishments, buttons, small shells, or painted details, for extra character.
What you need: Popsicle sticks, a glue gun, paint or wood stain, and optional embellishments.
Key tip: Let each layer dry completely before adding the next one. Building too quickly on wet glue causes the whole structure to shift and the corners to go out of square.
Best for: A children’s craft activity that produces something they can actually display, a school project, or a small photo display in a nursery.
20. Rope or Twine Wrapped Frame
Wrap a plain frame completely in natural rope, jute twine, or sisal cord, applying hot glue as you go to keep each row tight against the last.
The natural texture of the rope gives the frame a coastal or rustic quality that works beautifully in a bathroom, a beach house, or alongside natural materials like driftwood and linen.
The tighter and more even the wrapping, the more finished the result looks. Use the same technique with a thicker rope for a bolder, more graphic effect.
What you need: A plain frame, natural rope or jute twine, a hot glue gun, and scissors.
Key tip: Start at a corner rather than the middle of a side. Corners are the hardest part to wrap neatly and starting there means you handle them when the tension in the rope is still easy to control.
Best for: A bathroom, a beach house, a coastal aesthetic room, or alongside the driftwood frame from earlier in this list for a cohesive natural display.
21. Painted Ombre Frame
A plain frame painted in a gradient from one colour to another, either across the width or around the four sides, creates a finish that looks more considered and more expensive than a flat single colour.
Use two or three shades of the same colour family and blend them while the paint is still wet using a dry brush technique.
Move from dark at one edge to light at the other, blending in the middle until the transition is smooth. Seal with a matte or satin varnish once completely dry.
What you need: A plain frame, two or three shades of acrylic paint in a graduating colour family, brushes, a palette, and finishing varnish.
Key tip: Work quickly with the blending step before the paint dries. Have all three colours loaded on separate brushes before you start so you can move between them without stopping to reload.
Best for: A bedroom or living room where you want a colour-drenched, painterly feel. Particularly effective in a row of frames in the same colour family at different stages of the gradient, creating a tonal gallery wall.
How to Display Your DIY Frames: Beyond Just Hanging
This is the section almost every frame roundup skips, and it is the one that makes the difference between a collection of frames and a display that looks intentional.
The gallery wall approach: A gallery wall of DIY frames works best when the frames share at least one common element, either the same colour palette, the same finish, or a consistent subject in the photos. Mixing every technique from this list on one wall creates visual noise. Pick two or three complementary ideas and repeat them with variations.
Leaning instead of hanging: Leaning frames against a wall on a shelf, a mantel, or the floor is lower commitment than hanging and allows you to rearrange without new holes. It also creates a layered, relaxed look that suits more casual rooms. Lean larger frames at the back and smaller ones in front.
Mixing with objects: A frame does not have to hang alone. Grouping frames with a small plant, a candle, a ceramic object, or a stack of books creates a vignette that reads as styled rather than merely displayed. The frame becomes part of a composition rather than the only thing on the wall.
The single statement frame: One large, well-made DIY frame with a significant photo or print, hung alone on a wall with enough space around it, makes more impact than a cluster of smaller frames. The mosaic frame, the old window frame, and the photo transfer to wood all work particularly well as single statement pieces.
Seasonal swapping: Several of these frame ideas, particularly the washi tape, chalkboard, and decoupage versions, are designed to be changed. Build a system where the hanging method stays permanent and the frame itself swaps out for different seasons or occasions. One well-placed hook can hold a Valentine’s Day frame in February, a botanical pressed flower frame in spring, and a warm autumnal decoupage frame in October.
Frequently Asked Questions
What is the easiest DIY picture frame to make? The washi tape frame and the yarn wrapped frame are the two easiest since they require no cutting, no measuring, and no special tools. Both can be completed in under an hour and the materials cost almost nothing.
What materials can I use to decorate a plain frame? Almost anything flat or lightweight: washi tape, fabric, paper, pressed flowers, map sections, yarn, rope, cork, Scrabble tiles, popsicle sticks, paint, and vinyl lettering all work well. The main consideration is weight since very heavy additions to a lightweight frame can cause it to tip forward when hung.
How do I make a DIY frame look professional? Three things make the biggest difference: a solid backing material rather than cardboard, neat finishing at the corners and joins, and a proper hanging fixture rather than tape or a single nail. Taking five extra minutes on these three things raises the quality of any DIY frame significantly.
Can I make a DIY picture frame without buying a base frame? Yes. The popsicle stick frame, the driftwood frame, the rolled newspaper frame, and the old window frame all build the frame from scratch rather than decorating a bought one. The photo transfer to wood skips the frame entirely by transferring the image directly to the wood surface.
What is the best way to hang a DIY frame? For lightweight frames, adhesive picture-hanging strips rated to the weight of your frame work well and leave no wall damage. For heavier frames like the mirror mosaic or old window, two D-ring hangers on the back with picture wire stretched between them distribute the weight evenly and give the most stable hang.
How do I protect a DIY frame from dust and humidity? A coat of clear matte or satin varnish over the finished frame protects most materials from humidity and makes the surface easier to wipe clean. For frames in bathrooms or kitchens where moisture is higher, choose a waterproof sealant rather than a standard craft varnish.
The pressed flower frame on my bathroom shelf has been there for two years. It cost about four euros to make, which is what I paid for the plain frame at a discount shop. Everything else, the flowers, the Mod Podge, the sealant, I already had. It gets more compliments than anything I have bought for that room.
The point of making a frame yourself is not that it is cheaper than buying one, although it usually is. It is that it exists because you decided it should, made from things you chose, in exactly the size and colour and texture you wanted. A shop cannot sell you that.

I’m Katerina Lithopoulou, co-creator of DIY Cozy Living. I’ve always loved the little things that make a space feel special. With a background in language and a passion for photography and cozy design, I enjoy turning everyday inspiration into simple ideas people can actually use.
My motto: “Cozy isn’t a trend — it’s a feeling.”
