
Crochet for Beginners: The Only Guide You’ll Ever Need

If you’re looking at some crochet and it makes no sense to you, don’t take it as a sign you have no aptitude for it. You’ve simply not put in the time for it.
It’s an easy trap to fall into. You’re on your phone, you see a picture of a gorgeous blanket with every stitch in place, or a video where someone is working with such speed and ease, and you figure they were just born with it. Some kind of inborn gift. I was under that impression for quite a while.
Here’s what really happens: crochet is one of those things that only appears to be easy once you’ve been through a period of being thoroughly uncoordinated. And let me tell you, that part of the process doesn’t get enough credit in most how-to’s.
So we will put aside the hooks and yarn and the like for a moment. I want to get on the same page with you about the right headway to make. Your approach is going to be more important than the pace at which you pick it up.
With that said, let’s get to it.
🔥 Would you like to save this?
Why Crochet Looks So Intimidating at First
I’ll never forget the first time I put my eye on it:
- a tangle of hooks in every size
- yarn with labels you had to make sense of
- and patterns rife
with abbreviations that might as well have been in another language.
I’ll be honest, my immediate reaction was: I’m not going to be able to keep track of all this.
But you don’t have to. You can’t, anyway. You pick up what’s in front of you and let the rest fall into place. No one sits down to put crochet in their head; they just get to work and figure it out as they go.
The problem is how it’s put across to you. It’s often done in a way that’s too quick, too in-your-face with the jargon, and leaves you to fill in the blanks. A good tutorial will tell you it’s fine to be at a loss for a week or so, but most don’t.
Crochet is actually very repetitive. You’re making the same motions again and again until your hands know what to do even if you don’t. I found that to be the most surprising part of it.
What Beginners Think Crochet Requires (And What It Actually Requires)
I used to think you had to be a bit of an artist to crochet, with the kind of dexterity and patience I didn’t think I was made for.
Turns out it’s not about that at all. It’s just a matter of being open to being a novice for a while. Let your hands get used to it. Be curious rather than put on yourself.
You can make do without any special flair or a good eye for it. It’s something you pick up with your body, not in your head. At first your fingers will be a bit uncooperative and you’ll feel like you’re fumbling. Don’t read too much into it; you’re not failing, you’re only just getting started.
That’s my mantra when I put my hand to anything new.
My First Experience With Crochet (And Why It Matters)
I remember my very first foray with a hook and some yarn. I couldn’t for the life of me get the yarn to stay put on the hook; it was always one thing or another. I’d let go and it would slip, or I’d clamp down on it and be stuck. Make it any looser and you had a tangle on your hands.
You could not have told it from the videos I’d been watching. Not in the least.
I can’t tell you how many times I put it down and started over.
The only reason I didn’t throw in the towel was that I decided to let myself be lousy at it. I gave myself leave to ruin some yarn, to put in an hour’s work and end up with a mess. The moment I let go of the need to be perfect, my hands unclenched. And as they did, it all began to click, in its own time.
That’s what I see in most newbies. It’s not the stitches that are the problem. It’s the tension. In every sense of the word.
🔥 Would you like to save this?
What You Do Not Need to Worry About Yet
Before we move on to tools and yarn in the next part, I want to be clear about what you can safely ignore for now:
- You don’t need to understand patterns
- You don’t need to know stitch names
- You don’t need perfect tension
- You don’t need expensive supplies
You just need openness.
In the next part, we’ll talk about tools and yarn — slowly, clearly, and without overwhelm. I’ll walk you through exactly what to buy, what to avoid, and why most beginners buy the wrong things at first.
Tools, Yarn, and Setting Yourself Up (Without Overwhelm)
This is usually the part where beginners get stuck before they even start. Too many options. Too many opinions. Too many people saying, “You need this.”
You don’t.
When I first walked into a craft store (and later, when I started browsing online), I felt completely lost. Walls of yarn in every color imaginable, hooks in dozens of sizes, tools I didn’t understand. It made crochet feel complicated before I’d even tried it.
So let’s slow this down and make it simple.
Crochet Hooks: What Actually Matters for a Beginner
The hook: one is all you’re after.
Go with a 5mm (or H/8). It’s a good size for a beginner because it’s lenient and you can see what you’re up to. Stick with aluminum or plastic; the yarn will glide over them and that helps when your tension is still a bit wonky, as it will be. No harm in that.
Leave the sets at home. Skip the fancy ergonomic ones and hold off on bamboo for now since it has a bit too much friction. One hook is enough.
Yarn: The One Thing That Can Make or Break Your First Experience
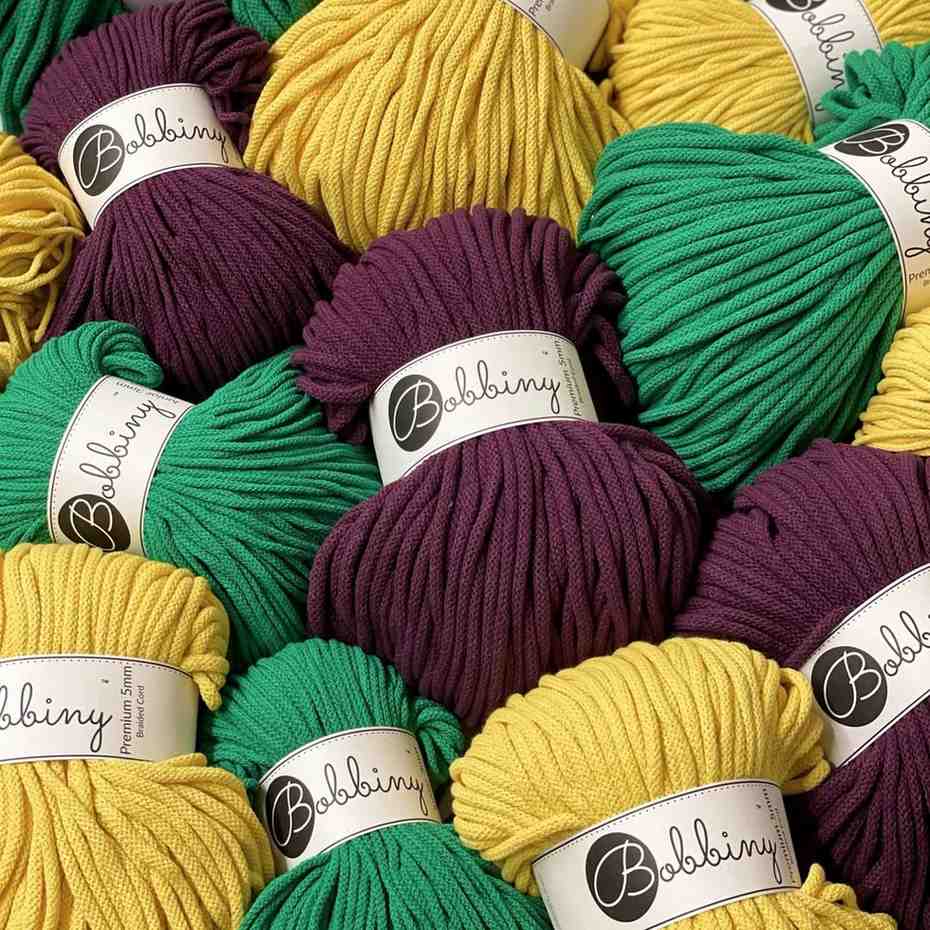
Then there’s the yarn. In my experience, this is the make-or-break. I’ve had plenty of would-be crocheters throw in the towel not from a lack of skill but because they picked the wrong kind of yarn.
What you’re looking for is a medium or worsted weight (size 4). Keep it smooth, nothing with a lot of fluff or odd fibers. And for the love of all that is holy, pick a color you can see. Not black, not a deep navy. Dark and fuzzy yarns are a pain to learn with because they obscure your work and any errors you make.
A good old acrylic is hard to beat for a starter. It’s cheap, you can find it anywhere, and it’s very forgiving. And no, shelling out for top-tier yarn isn’t going to put you ahead of the game. Put the nice wool on the shelf for when you have some experience under your belt.
One skein will do. You aren’t set on making a finished piece today, you’re just getting a feel for how your hands work. A single skein is room to make a mess, rip it out, and start over.
Fiber type (don’t overthink it)
Yarn Labels: What You Can Ignore (For Now)
As for the rest? A pair of scissors. I’m not talking about stitch markers, yarn bowls or any of the other accoutrements. I’ve seen people come away with a whole kit and then be so put off by the clutter they never get to it. Make it simple. It’ll give you the confidence to put in the time.
How Much Yarn Do You Need to Start?
For learning and practicing:
- one skein is enough
You’re not trying to finish a big project yet. You’re learning how your hands move. One skein gives you plenty of room to practice, undo, and try again.
And yes — you will undo stitches. A lot. That’s part of crochet.
Setting Up a Beginner-Friendly Crochet Space
Where you crochet matters more than people think.
You don’t need a special room or perfect lighting, but a few small things make learning much easier.
Choose a comfortable spot
Look for:
- good light (natural or a lamp)
- a chair that supports your back
- a surface where yarn won’t roll away constantly
Crocheting on the couch is fine — just make sure your shoulders aren’t hunched and your hands aren’t strained.
Keep distractions gentle
I like having:
- soft music
- a podcast
- quiet background noise
Avoid anything that makes you rush or tense up. Crochet works best when your body feels calm.
Here is an example. Pause it and do it slowly. It’s a process. You are not going to be perfect in the beginning and that’s ok!!
What Your Hands Will Feel Like (And Why That’s Normal)
Don’t be put off if your hands feel a bit odd at first. It’s to be expected.
They will be stiff and uncoordinated, and you’ll get winded in them quicker than you think. You may even start to question whether you’re making some kind of basic error. Put that thought aside; you are simply putting your muscles through their paces for the first time.
It is much like trying to put pen to paper with your other hand: it is awkward until it isn’t. When you are in the beginning stages, a short ten or fifteen minute session is all you need. Let your hands have a break in between to let it sink in, rather than just churning out more reps.
The hook and the yarn
You can do the pencil grip, holding the hook near the end as if you were writing. Or the knife grip, with your hand on top like you had a butter knife in it. I was all over the map with both before I found my groove, and I’m not alone. In fact, how you hold it may vary from project to project.
If you notice your hand is tight, don’t try to correct your form—just relax.
Then there is the non-dominant hand, which is the one you have to make work. Most how-to’s don’t give it the credit it is due.
This is the hand that is supposed to be managing the fabric and the yarn and the tension of your stitches. It is a lot to ask of a hand we don’t normally put to fine work. Be patient with it. You will pick up the coordination by doing, not by being told about it.
How to Hold the Crochet Hook (Without Overthinking It)
There are many videos and diagrams showing “correct” ways to hold a crochet hook. They mean well — but they often make beginners tense.
In reality, most crocheters naturally use one of two grips.
The Pencil Grip
You hold the hook like a pencil, closer to the tip.
This grip:
- feels familiar to many beginners
- offers precision
- works well for smaller, tighter stitches
The Knife Grip
You hold the hook like a butter knife, with your hand over the hook.
This grip:
- feels more relaxed for many people
- uses larger arm movements
- can feel more natural for looser stitches
Here’s the important part:
Neither grip is better.
I personally switched grips several times before settling into what felt comfortable. Many crocheters do. Your grip may even change depending on the project.
If your hand feels tense, that’s your cue to loosen up — not to “fix” your grip.
What Your Non-Dominant Hand Is Doing (And Why It Feels Harder)
Most beginners focus on the hook hand, but the non-dominant hand does just as much work — sometimes more.
That hand:
- holds the fabric
- guides the yarn
- controls tension
And because we don’t usually use that hand for fine motor skills, it often feels confused at first.
This is normal.
Your non-dominant hand is learning:
- how much yarn to feed
- how tightly to hold the work
- how to move in rhythm with the hook
Give it time. This coordination doesn’t come from thinking — it comes from repetition.
Yarn Tension: The Thing Everyone Struggles With
Let’s talk about tension, because this is where many beginners get frustrated.
Tension simply means how tight or loose you hold the yarn.
When you’re starting out, your stitches might be:
- too tight to insert the hook
- so loose they look uneven
- inconsistent from row to row
All of this is expected.
What beginners often do
They grip the yarn tightly, thinking control equals correctness.
In reality, tight tension makes crochet harder:
- your hands get tired
- stitches become difficult to work into
- frustration builds quickly
Instead, aim for relaxed control. The yarn should flow through your fingers, not fight them.
If your hands hurt, loosen up.
How to Wrap Yarn Around Your Fingers (A Gentle Approach)
There are many ways to wrap yarn around your fingers. None of them are mandatory.
A simple beginner method:
- let the yarn run over your index finger
- lightly wrap it around one or two fingers
- allow it to slide freely
If the yarn slips too much, wrap it once more.
If it feels tight, unwrap it.
Adjust as you go. There is no “set it and forget it” method at the beginning.
Why Your Hands Feel Like They’re Working Against You
This part surprised me when I first learned.
At the beginning, crochet feels mentally easy but physically strange. You understand the steps, but your hands don’t cooperate.
That’s because crochet builds muscle memory.
Muscle memory forms slowly:
- through repetition
- through mistakes
- through undoing and trying again
Your brain may understand what to do long before your hands do. That gap is frustrating — but temporary.
Most beginners notice a shift after a few days of practice. Suddenly, movements feel smoother. Your hands stop freezing mid-stitch. That’s muscle memory forming.
How Long You Should Practice (Less Than You Think)
This is where many beginners go wrong.
Long practice sessions lead to:
- sore hands
- stiff wrists
- frustration
Short, regular sessions build confidence.
I recommend:
- 10–20 minutes at a time
- once a day, or every other day
Stop before you feel annoyed. Crochet should feel inviting, not like homework.
What to Do When Something Feels Impossible
At some point, you will hit a moment where nothing works:
- the hook won’t go through
- the yarn splits
- your stitches disappear
When this happens, pause.
Take a breath.
Put the hook down.
Shake out your hands.
Often, the solution isn’t more effort — it’s less tension.
If needed, gently pull out a few stitches. Crochet allows you to undo without punishment. That’s one of its greatest strengths.
Preparing for Your First Actual Stitches
Now that your hands are getting familiar with the hook and yarn, we’re ready to move into the first real crochet skills:
- making a slip knot
- creating a foundation chain
- understanding where stitches live
This is where crochet starts to feel real.
Your First Real Stitch — Single Crochet (Slow and Clear)
This is the moment when crochet finally starts to feel like something.
Up until now, you’ve been preparing your hands. Now you’ll actually build fabric.
The single crochet is usually the very first stitch beginners learn. It’s simple, sturdy, and shows you how crochet really works.
What “working into a stitch” means
Right now, you have a foundation chain. Those little V-shapes are stitches. When a pattern says “work into the chain,” it simply means inserting your hook into one of those stitches.
For single crochet:
- Insert your hook into the second chain from the hook
- Yarn over
- Pull up a loop (you now have two loops on the hook)
- Yarn over again
- Pull through both loops
That’s one single crochet stitch.
The first few will feel slow and awkward. That’s expected.
Where beginners get stuck
Most beginners struggle with:
- finding the right chain
- getting the hook through
- pulling the yarn smoothly
If your hook won’t go in, your chain may be too tight. That’s not failure — it’s feedback. Loosen your grip slightly and try again.
Turning Your Work and Understanding Rows
At the end of a row you will turn your work and head back in the opposite direction, much as you would turning a page.
But first, put in a chain stitch or two; this is your turning chain and it is there to set the proper height for the next row. In this manner you build up a piece of fabric, row on row.
When you are at the beginning stages, make it a habit to count your stitches after each and every row. You don’t want to be adding them by accident and have your work grow wider than it should, nor do you want to let it narrow down because you are missing the first or last stitch. It is something that happens to most people, so counting is the only sure way to put a stop to it before it gets out of hand.
Learning to Read Your Crochet (A Huge Breakthrough)
There is a real sense of satisfaction in this as you get better at it. When you are just starting out your stitches will seem like a tangle, but eventually you come to appreciate the work.
One day you will be looking at what you have done and the structure will become apparent. You can make out the little V on top of every single crochet; that is where you put your hook under both sides for the next row.
It makes all the difference when you can see them properly.
Beginners usually find the first and last stitch of a row to be the trickiest bit. I would advise you not to go in blind and start the next row without thinking. Take a moment to stop and look at your piece before you do. That is my best advice.
Common Beginner Mistakes (And Why They’re Normal)
You’ll see some lopsided edges at first. They’ll sort themselves out once you get a handle on your tension.
And if a square doesn’t look like a square, don’t worry about it. It’s a matter of stitch count or how you’re holding the yarn, not a lack of skill.
Have to rip out the same bit for the fourth time? No harm done. That’s what you do in this craft. The yarn is fine, you haven’t made a mess of anything, so you just start over.
A mistake is just practice. End of story.
Finish Your Pattern Properly
Once you’ve put the final touches on a section or an entire project, snip your yarn and let there be a 15cm or so of tail. Put the yarn over your hook and draw the end right through the last loop, then give it a firm but easy pull to set it.
Pick up a yarn needle with the tail and run it in and out of some of the surrounding stitches. You can even reverse course a couple of times before you cut off what’s left. It’s the only way to be sure nothing comes apart and to give your piece a proper finish.
Take your time with it.
I know from experience that if you putter through this part, you’ll be left with some unravelling down the road. And that’s no good.
What to Crochet First (And What to Avoid)
YKeep it simple. One stitch, and you can let a few errors be.
There’s no better way to start than with a dishcloth. A scarf is fine as well; you’re just putting in row after row of the same thing, and that’s how you get your hands used to it. Even a plain square will do.
But put off the clothing for now. Don’t go for anything with shaping, or where you have to juggle colors, or work with a tiny hook and fine yarn. You’ll be in a position to handle all that down the road, once you’ve put some unassuming projects in the past.
A Realistic Timeline (So You Don’t Get Discouraged)
You’ll be in good company if you find the first few days a bit of a trial. It’s to be expected.
Give it a week or so and for the most part you’ll see a shift in your confidence. You won’t be an expert, but you’ll be at ease with the fundamentals.
Then, once you’ve put in some time, it becomes something you can actually have fun with, as opposed to trying to figure out an unsolvable riddle.
And don’t expect a straight line when it comes to making headway. One day everything will fall into place; the next you might not be able to get anything to work and you’ll have to let it go until the morrow.
There’s nothing wrong with that. It doesn’t mean you aren’t getting better.
Final Thoughts (From One Beginner to Another)
Crochet is not about being talented or creative or having patient hands naturally. It is about showing up and doing the thing even when it feels awkward, and accepting that the awkward phase is temporary.
If your stitches are uneven, you are learning. If your hands feel clumsy, they are adapting. If you undid the same row five times tonight, you are practicing.
That is enough. Really.
Oh, and one more thing I almost forgot. When you do finally make something that looks like an actual object, even just a small square, the feeling is genuinely wonderful. Worth all the awkward sessions that came before it…
I really hope this helped you and that you feel ready to pick up that hook!
If you have any questions or you just want to share how your first attempts are going, feel free to write in the comments below. I would love to hear from you.
Until next time,
Stay safe,
Katerina
🔥 Would you like to save this?
I’m Katerina Lithopoulou, co-creator of DIY Cozy Living. I’ve always loved the little things that make a space feel special. With a background in language and a passion for photography and cozy design, I enjoy turning everyday inspiration into simple ideas people can actually use.
My motto: “Cozy isn’t a trend — it’s a feeling.”

I’ve been crocheting about 15 years now. I only learned (at age 60) because my mom kept bugging me. Now I love it and know she smiles down in me every time I start a new project. I’m currently in a mosaic crochet phase. I wish I had this tutorial back then. It is so well written and so much positive reinforcement! And everything you say is spot on! So thank you!
WOW!!! We are so happy you liked it!!! It means the world to us. (Imagine our smiles reading your comment XD)
I liked the article. Do you have you tube channel or online coaching? I am interested.
It was very comprehensive and I feel like I learned something. Thank you
Thank you, this is very helpful! This is very relaxing to me, but I do get frustrated because I have been losing stitches, so my work has been a little uneven.
Thank you! As someone who’s always super self-critical, this is the article that I need to pick the hook back up. I’m that person that bought into the needing so much to start hype. This is such a well-written, and needed, article.
I’ve Crocheted before but your website give me more confidence. I can’t tell you how many books I have and don’t understand all of them as you mentioned like the different symbols of stitching. When I get home I’ll check to see if I have a number 4 needle. Unfortunately I couldn’t open tic toc learning in process.😬