
How to Turn a Basic Backyard Into a Patio You Never Want to Leave
The first time I tried to “upgrade” a patio, I made the classic mistake: I bought furniture.
A sofa set. A rug. Some lanterns. It looked decent in photos, but when we actually used the space, something felt off. The layout didn’t flow. The seating felt disconnected. The patio wasn’t uncomfortable — it was purposeless.
That’s when I realized something important: patios fail when they’re treated as decorated slabs instead of outdoor rooms.
Before we talk about specific ideas, we need to establish a foundation. A patio that works well is layered in three phases: structure, layout, and atmosphere. In this first part, we’ll focus on structure and spatial planning — the elements that determine whether your backyard feels intentional or accidental.
Without further ado, let’s dive right in!
Start With Purpose
Every strong patio design begins with clarity. Are you hosting large gatherings? Is this your quiet coffee corner? Do you need space for children to move safely? The function dictates everything from size to materials to furniture density.
A common mistake is designing for imaginary use. If you rarely host more than four people, building a dining zone for twelve wastes space and budget. Conversely, if you love entertaining, undersizing the patio leads to constant rearranging and frustration.
Before building, sketch how many people you realistically seat at one time. Measure your furniture footprint. Add at least three feet of clearance around primary traffic paths. This is not glamorous work, but it prevents regret.
Structural Patio Ideas (The Foundations That Change the Space)
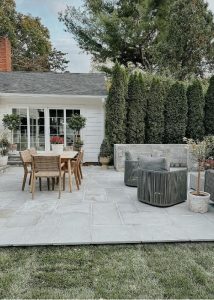
1. Expanding With Pavers
Interlocking pavers remain one of the most versatile and design-forward patio materials. They allow flexibility in pattern, color, and layout while offering long-term durability. Unlike poured concrete, individual pavers can be replaced if damaged, making maintenance more manageable over time.
This option works particularly well for homeowners who want a tailored, architectural appearance without committing to permanent stamped surfaces. Expect installation costs between $10–$25 per square foot, depending on region and material choice.
To design a paver patio well, consider extending it beyond your furniture grouping by at least three feet on all sides. This ensures chairs remain stable when pulled out and prevents the awkward “half on grass” problem. Incorporating a contrasting border can subtly frame the space and add visual polish without overwhelming the design.
Read Also: How to Make Your Home More Worth
2. Stamped Concrete for Seamless Surfaces
Stamped concrete offers the durability of poured concrete with added visual texture. It can mimic slate, stone, or brick while maintaining a continuous surface that discourages weed growth.
This option suits modern homes or larger backyards where a seamless look is preferred. Costs generally range from $12–$18 per square foot.
However, restraint matters. Highly dramatic patterns may date quickly, so subtle texture choices age better. Also consider expansion joints carefully; they can interrupt visual flow if poorly placed.
Stamped concrete is ideal for homeowners prioritizing low maintenance and clean lines over modular flexibility.
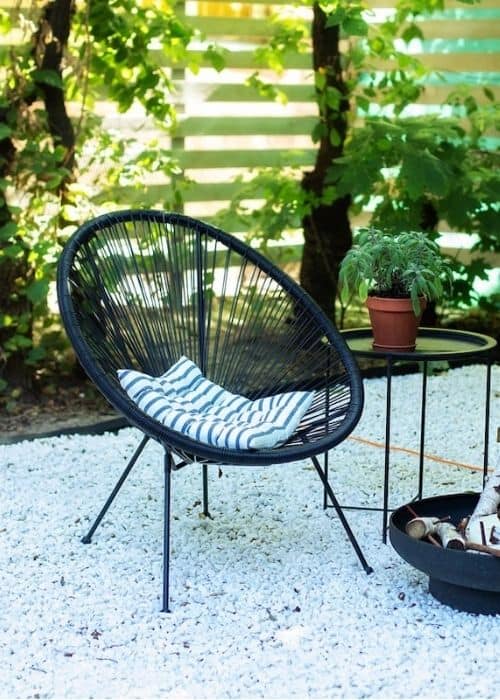
3. Gravel Patios With Defined Edges
Gravel is often dismissed as temporary or informal, but when installed correctly, it can feel intentionally European and charming. The key is containment. A gravel patio should always be framed with steel edging, brick borders, or stone perimeters to prevent migration.
At $3–$10 per square foot, gravel remains one of the most budget-friendly structural solutions. It is particularly effective for cottage-style homes or relaxed garden settings.
To elevate gravel visually, pair it with dark metal bistro furniture, structured planters, and overhead string lighting. Compacted pea gravel over landscape fabric ensures better stability and fewer weeds.
4. Multi-Level Patio Design
Introducing level changes adds dimension and purpose. Even a modest step-down into a lounge zone can psychologically separate dining from relaxing areas. Multi-level patios are especially effective in sloped yards where grading can be used strategically rather than resisted.
Costs vary significantly depending on excavation and retaining wall requirements, often beginning around $5,000.
This approach works best for larger yards and homeowners committed to long-term structural investment. Done correctly, it creates the feeling of multiple outdoor rooms rather than one flat expanse.
5. Built-In Bench Seating
Built-in benches maximize seating while reducing furniture bulk. Constructed from wood framing, masonry, or poured concrete, they anchor the perimeter of a patio and define edges clearly.
This solution is particularly useful for smaller patios where traditional sofas consume too much depth. Adding thick outdoor cushions and layered lumbar pillows softens the structure while maintaining durability.
Expect costs between $1,500–$4,000 depending on materials and size. Integrated planters at bench ends add symmetry and visual cohesion.
6. Pergola for Architectural Framing
A pergola shifts a patio from open yard to defined outdoor room. The overhead beams create vertical structure without fully enclosing the space, allowing airflow while framing the seating below.
Installed pergolas typically range from $2,000–$6,000. They are ideal for patios that feel visually exposed or lack shade.
To design a pergola effectively, consider adding climbing greenery, suspended lanterns, or retractable fabric panels. Scale matters — the pergola should feel proportional to the patio footprint rather than floating awkwardly above it.
Surface Material Comparison
Choosing the right foundation affects maintenance, longevity, and appearance. Here’s a practical overview:
| Surface Type | Cost Range | Maintenance | Durability | Best For |
|---|---|---|---|---|
| Pavers | Medium–High | Moderate | High | Defined entertaining spaces |
| Stamped Concrete | Medium | Low | High | Modern, seamless patios |
| Gravel | Low | Moderate | Medium | Budget-friendly charm |
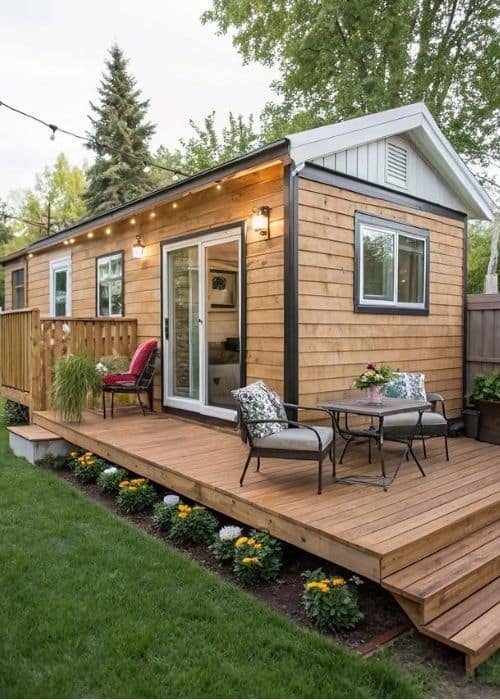
| Wood Decking | Medium | High | Medium | Raised or transitional spaces |
| Composite Decking | High | Low | High | Long-term durability |
Material choice should reflect climate and usage patterns. For example, wood decking may require frequent sealing in humid climates, while composite decking performs better long-term with minimal upkeep.
Layout Strategy: Turning Space Into Function
Structural elements set the base, but layout determines whether the patio feels usable.
7. Zoning With Outdoor Rugs
Outdoor rugs define areas without requiring construction. A large rug anchors furniture and signals a specific function — lounge, dining, or conversation.
Choose a rug large enough so at least the front legs of all seating pieces rest on it. Undersized rugs fragment the space visually. This solution works especially well on concrete or paver patios needing warmth and definition.
8. A Dedicated Dining Zone
Rather than pushing a table against the house wall, center it intentionally and allow circulation around it. Framing the dining area with planters or overhead lighting reinforces its purpose.
This works best for homeowners who regularly host meals outdoors. Consider a table material suited to your climate — powder-coated aluminum or teak offer strong durability with minimal maintenance.
9. Conversation-Focused Layout
Instead of lining furniture against perimeter walls, orient seating inward to encourage interaction. Circular or semi-circular arrangements create intimacy, particularly around a coffee table or fire feature.
This layout benefits families and hosts who value connection over passive seating. Leave clear walkways behind chairs to maintain ease of movement.
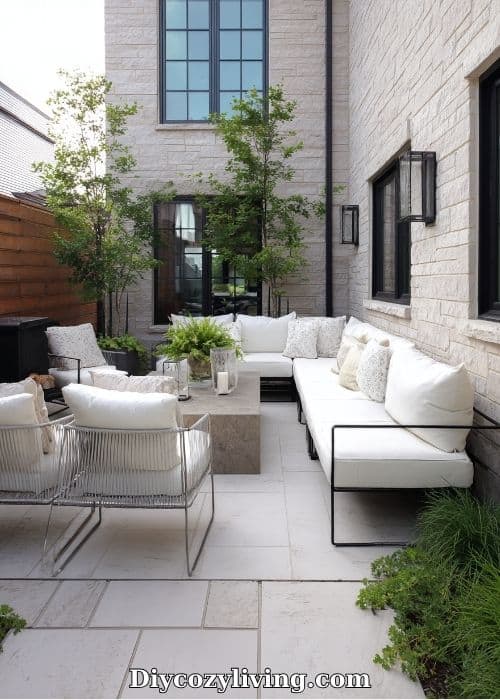
10. Corner Lounge Configuration
For compact patios, corner seating maximizes square footage efficiently. An L-shaped sectional placed into a corner frees up central space for movement or a small dining table.
Layer with vertical greenery behind the seating to create a soft backdrop. This approach works particularly well in urban or suburban settings where space is limited.
11. Patio-Garden Integration
Rather than isolating the patio from landscaping, blend them. Use raised beds, potted olive trees, lavender borders, or ornamental grasses to soften edges.
A patio surrounded by greenery feels immersive and calming. This design works well for homeowners who enjoy gardening and want the patio to feel connected to nature rather than detached from it.
12. Vertical Design Elements
Walls and fences offer opportunities often overlooked. Adding slatted wood panels, mounted lanterns, outdoor artwork, or climbing vines introduces height and texture.
Vertical layers prevent patios from feeling flat and unfinished. Even a simple trellis with climbing plants can dramatically shift visual impact.
13. A Fire Pit as the Emotional Anchor
A fire pit does more than add warmth. It creates a focal point and naturally pulls people into a circle. Humans are wired to gather around fire — it’s instinctual, communal, grounding.
There are three primary options:
- Portable metal fire pits ($150–$400): ideal for renters or flexible layouts.
- Built-in stone or concrete fire pits ($2,000–$5,000): permanent and visually grounding.
- Gas fire tables ($800–$2,500): clean-burning and low maintenance.
To design it well, maintain at least 3 feet of clearance around the pit and use low-profile seating so sightlines stay open. Gravel or pavers beneath the fire feature increase safety and visual cohesion.
This idea works especially well for families, frequent hosts, and anyone who wants their patio to feel usable beyond summer.
14. A Water Feature for Subtle Luxury
If fire creates intimacy, water creates calm. A small fountain or modern water wall introduces sound, which psychologically masks neighborhood noise and makes the space feel more private.
Tabletop fountains start around $80, while integrated water features can exceed $3,000. Even a simple ceramic basin fountain placed strategically near seating can elevate the sensory experience.
This is particularly effective in suburban environments where traffic or nearby homes reduce tranquility.
15. Retractable Shade Structures
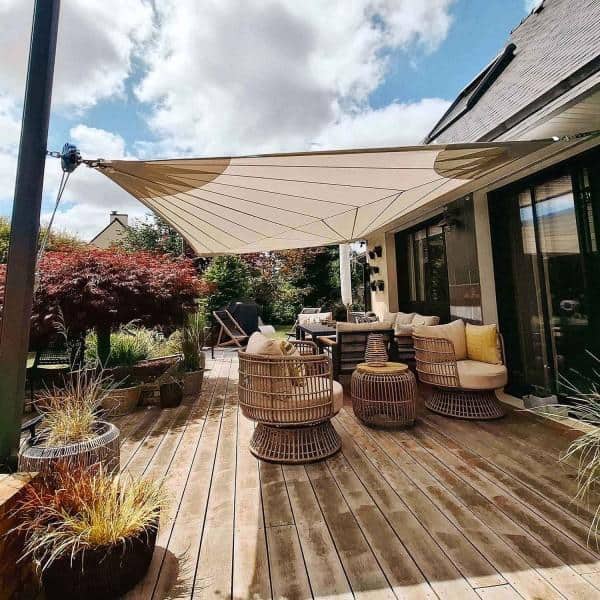
Umbrellas are functional, but they rarely look integrated. Retractable awnings or shade sails provide both sun protection and architectural interest.
Shade sails range from $100–$500 and create a contemporary look when anchored properly. Retractable awnings, installed professionally, can cost $1,500–$4,000 but dramatically increase usability in hot climates.
When designing for shade, consider sun angles during peak afternoon hours — not just midday.
16. Outdoor Curtains for Soft Division
Curtains add movement and softness to otherwise rigid spaces. Mounted on pergolas or covered patios, they provide privacy while maintaining airflow.
Choose UV-resistant outdoor fabric and neutral tones like ivory, sand, or soft gray. Avoid overly saturated colors unless they support a specific design theme.
This idea works beautifully for homes with close neighbors.
17. Privacy Screens That Feel Architectural
Instead of relying solely on fencing, consider vertical slatted wood panels, metal laser-cut screens, or tall planters with evergreen shrubs.
A slatted wood privacy wall can cost $800–$2,500 depending on size and material, but it doubles as a design feature. The key is spacing: narrow gaps allow airflow while blocking direct sightlines.
Read Also: 15+ Clever Garden Screening Ideas for Fast Privacy
Layering screens with plants creates depth rather than a flat barrier.
18. Layered Outdoor Lighting Strategy
Lighting determines whether a patio feels magical or sterile.
Effective patios use three layers:
- Ambient lighting (string lights, sconces)
- Task lighting (grill or dining area focus)
- Accent lighting (uplighting plants or architectural elements)
Warm white bulbs (2700–3000K) create a welcoming tone. Cooler light temperatures feel clinical and reduce evening comfort.
String lights alone are not enough. Combine them with ground lanterns or wall-mounted fixtures to avoid a “festival tent” look.
19. Statement Overhead Feature
A woven pendant light, modern chandelier rated for outdoor use, or oversized lantern can transform a dining patio instantly.
Expect to spend $200–$800 for a quality outdoor-rated fixture. Ensure it’s scaled appropriately — too small and it disappears; too large and it overwhelms.
This works best in covered patios or pergolas with electrical access.
20. Defined Color Palette
Outdoor spaces often fail because they lack cohesion. Choose a palette before purchasing furniture.
Examples:
- Warm neutrals + black accents + greenery
- Coastal tones (soft blue, sand, white)
- Earthy palette (terracotta, olive, wood)
Limit yourself to three dominant tones and one accent color. Consistency reads as sophistication.
21. Mixing Materials for Depth
A patio entirely composed of one material feels flat. Contrast creates visual interest.
Combine:
- Wood + metal
- Stone + fabric
- Concrete + woven textures
For example, a concrete patio softened by teak furniture and linen cushions instantly feels warmer.
22. Built-In Planters
Integrated planters frame patios and make them feel permanent. They can be constructed in stone, brick, or composite materials.
Built-in planters range from $1,000–$3,000 but eliminate the need for scattered pots. They also define edges and seating zones.
Choose low-maintenance greenery suited to your climate.
23. Seasonal Flexibility
Design for adaptability. Use pillow covers that can change seasonally, portable heaters for fall evenings, and lightweight furniture that can be rearranged.
A patio that only works for two months of the year is underutilized.
24. One Hero Piece
Every patio needs a focal point.
It could be:
- A sculptural fire bowl
- A bold outdoor sofa
- A dramatic pergola
- A large ceramic planter
Without a hero piece, patios feel like showrooms — not curated spaces.
25. The “Less but Better” Rule
The final idea isn’t about adding something. It’s about restraint.
Remove excess chairs. Clear unnecessary decor. Edit.
The most elevated patios often feel spacious because they aren’t overcrowded. Negative space is not emptiness — it’s breathing room.
Outdoor Material Comparison Guide
| Material | Cost Range | Durability | Climate Suitability | Maintenance |
|---|---|---|---|---|
| Teak | High | Excellent | All climates | Low |
| Aluminum | Medium | Excellent | Humid climates | Very low |
| Wicker (Resin) | Medium | Good | Covered areas best | Low |
| Steel | Low–Medium | Strong | Dry climates | Moderate |
| Outdoor Performance Fabric | Medium | High | All climates | Low |
Choose materials based on exposure. A fully uncovered patio requires different durability than a covered one.
Budget Scenarios (Realistic Planning)
$1,000 Refresh
- Outdoor rug
- String lights + lanterns
- New cushions
- Two large planters
Result: Warmer, more cohesive space.
$3,500 Upgrade
- New seating set
- Fire pit
- Shade sail
- Lighting layers
Result: Fully usable social patio.
$8,000 Transformation
- Paver expansion
- Pergola
- Built-in seating
- Lighting installation
Result: Outdoor room.
Common Patio Mistakes to Avoid
- Buying full matching furniture sets without considering scale.
- Ignoring sun patterns.
- Overcrowding small spaces.
- Using indoor fabrics outdoors.
- Forgetting drainage planning.
- Prioritizing aesthetics over comfort.
Comfort always wins long term.
Final Reflection
A patio isn’t square footage. It’s emotional square footage.
It’s where coffee tastes slower. Where conversations stretch longer. Where summer evenings don’t feel rushed.
When I redesigned ours, the biggest shift wasn’t the pergola or the lighting. It was intention. We stopped placing furniture randomly and started designing for how we actually live.
And that changed everything.
And this brings us to the end of this article…I hope you found it interesting and helpful. If you have any comments or questions feel free to write em down below and we will be more than happy to get back yo you.
Until next time,
Stay safe,
Tasos
I’m Anastasios Moulios, co-founder of DIY Cozy Living. I enjoy finding creative, practical ways to make small spaces feel warm, stylish, and lived-in. I started this blog with Katerina to share real ideas that make a home feel a little more personal and a lot more comfortable.
