
17 Easy Halloween Paper Crafts for Kids That Cost Almost Nothing

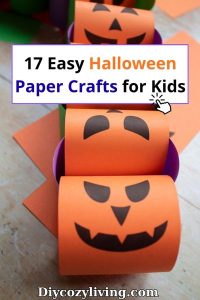
Paper is the most underrated Halloween craft supply in existence.
A pack of black and orange construction paper costs less than two euros, lasts the whole season, and somehow produces decorations that end up staying on the walls long after October is over. Maria once made a paper bat garland that I finally took down in December.
She noticed immediately.
These seventeen ideas run from things a four-year-old can manage with child-safe scissors to slightly more detailed projects for older kids who want a proper challenge.
Every single one uses supplies you either already have or can pick up for almost nothing. No glue guns required for most of them. No trips to a specialist craft shop. Just paper, scissors, and an afternoon.
What You Need Before You Start
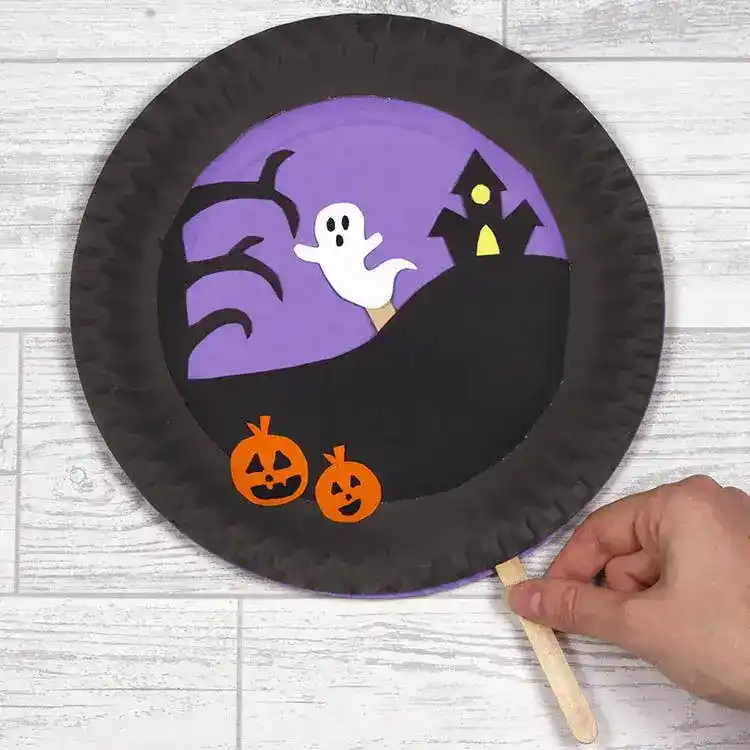
Most of these use the same small set of supplies, so gather everything first and you can move between projects without stopping.
Paper: Black, orange, and white construction paper covers almost every project here. A few need tissue paper or crepe paper. Printer paper works for anything that gets folded. Brown kraft paper is great for the vintage-looking projects if you have it.
Scissors: Child-safe scissors for younger kids. A sharper adult pair for anything detailed. A craft knife and cutting mat for the most intricate cuts, adults only.
Adhesive: A glue stick for most things. Double-sided tape for anything that needs to be neat on both sides. Clear tape for hanging.
Extras: Black marker for adding faces and details. Hole punch for threading string. Jute twine or black string for garlands and hanging decorations. Googly eyes for the characters that need them.
Paper Garlands
1. The Halloween Paper Garland
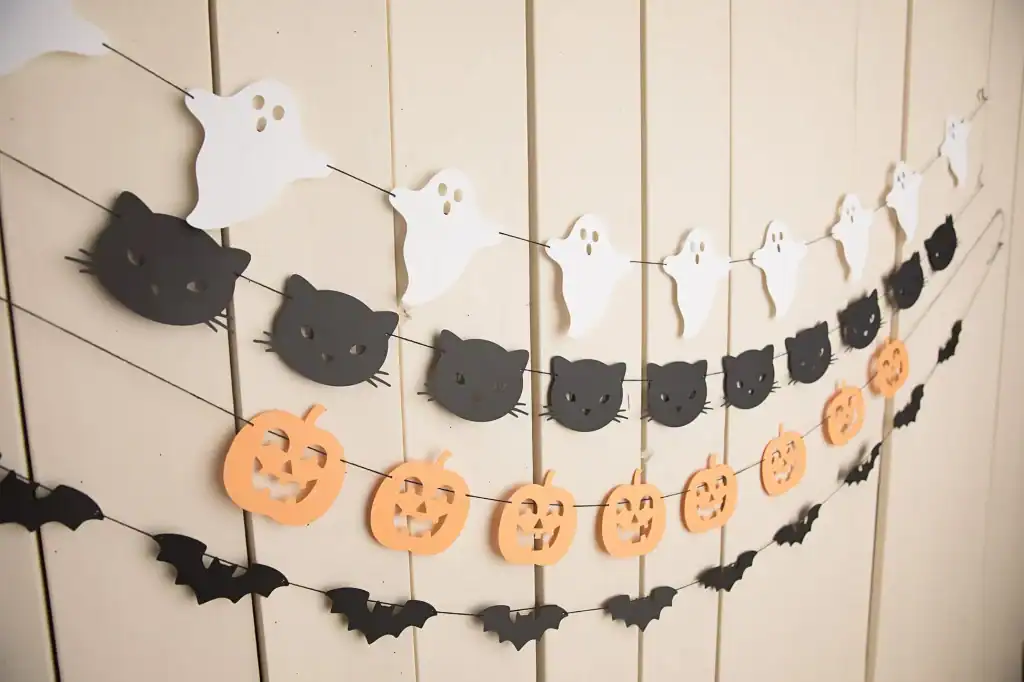
The garland is where we always start and where the girls always want to begin because it goes up immediately and makes the whole room feel different. Cut shapes from black and orange card, punch a hole at the top of each, and thread onto twine. Bats, ghosts, pumpkins, skulls, witch hats, cauldrons, all on one long string.
The full tutorial with twenty-one distinct Halloween character ideas, from the simple accordion-fold pumpkin chain to a cauldron bunting and an eyeball garland that Marina made me take down after two days, is in our DIY Halloween paper garland post. It covers how to hang each type without damage, which matters if you rent.
Ages: 5 and up for simple shapes, 8 and up for the more detailed characters. Time: 30 to 60 minutes for a full mantel length. What you need: Black, orange, and white card. Scissors. Hole punch. Twine.
2. The Accordion Pumpkin Chain
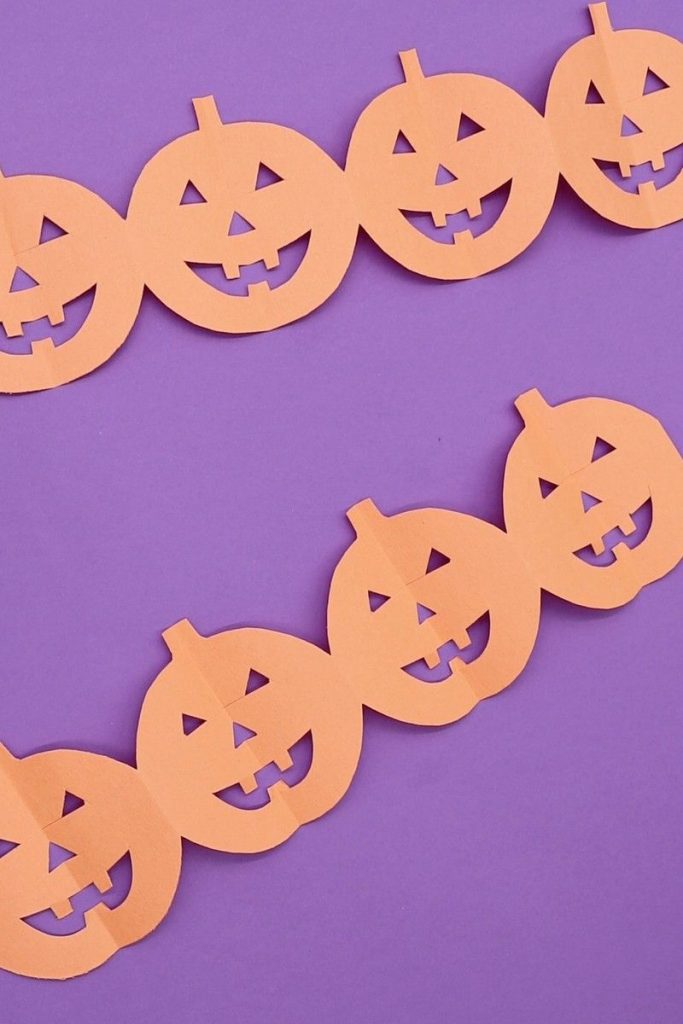
Fold a long strip of orange paper accordion-style, draw half a pumpkin against the fold making sure the sides touch the fold edges on both sides, and cut.
Open to a chain of connected pumpkins.
Add black marker triangle eyes and jagged smiles. This is the single most satisfying paper Halloween craft for kids who have never made one before, because the reveal when you unfold it is genuinely exciting every time.
Ages: 5 and up. Time: 10 minutes. What you need: Orange construction paper. Scissors. Black marker.
3. The Ghost Bunting
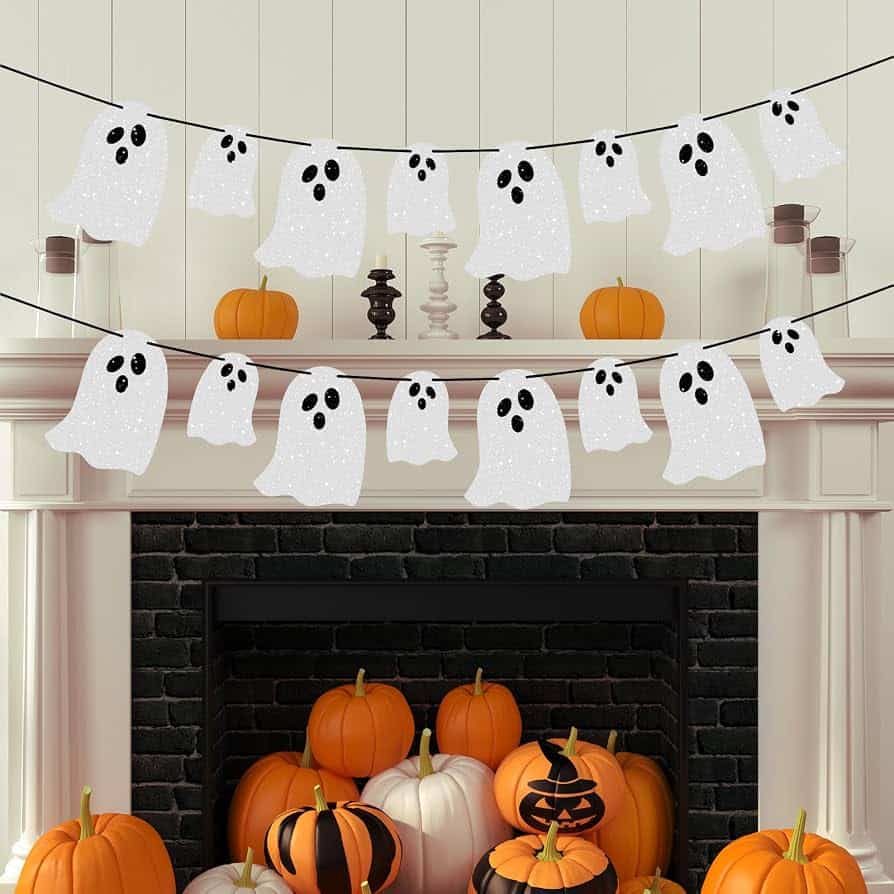
White tissue paper or crepe paper cut into rough ghost shapes and hung on a long piece of string.
Not accordion-folded, just individual ghosts with two black marker eyes, hung close together so they overlap slightly.
Very simple, very fast, and they flutter in a breeze which makes them look genuinely spooky against a window.
Ages: 4 and up. Time: 15 minutes. What you need: White tissue or crepe paper. Scissors. Black marker. String.
Spiderwebs
4. The Fold-and-Cut Spiderweb
This is the kirigami method that looks like magic.
Fold a square of paper in half four times to make a long thin wedge. Draw curved lines across it like the rungs of a ladder.
Cut along the lines without cutting all the way to either folded edge. Open carefully and you have a perfect circular spiderweb.
The full step-by-step with exactly how to fold, where to cut, and how to display it in seven locations around your home including the window-behind-lampshade shadow trick that Marina discovered, is in our how to make paper spiderwebs tutorial.
It covers parchment paper versus cardstock, how to flatten the web after unfolding, and the best ways to hang without damage.
Ages: 6 and up with supervision. Time: 10 minutes per web once you get the technique. What you need: Paper, preferably parchment or printer paper. Scissors.
5. Paper Plate Halloween Characters
Paper plates are the shortcut that makes the rest of the craft session feel easy.
The round shape already does half the work for you: a painted black plate with two pointed card ears is a cat, an orange plate with a marker face is a pumpkin, a white plate with black marker eye sockets is a skull, a green plate with bolt-shaped card sides is Frankenstein.
Stack a smaller plate on top of a larger one for a ghost with a round head. The starting point is always the same, paint the plate, let it dry, add the paper details.
Paper plates also work as bases for wreaths. Cut the centre out of a plate, wrap the ring in strips of orange and black tissue paper, and you have a small Halloween wreath for a bedroom door.
Maria made four of these in one afternoon and put one on her door, one on Marina’s door, one on the bathroom door, and tried to put one on the fridge. I said no to the fridge.
Ages: 3 and up. Time: 20 to 30 minutes including drying time. What you need: Paper plates. Paint in black, orange, white, and green. Construction paper for details. Googly eyes. Glue.
Paper Ghosts
6. The Tissue Paper Ghost
The classic ghost that every child should make at least once.
Scrunch a small ball of white tissue paper, place it in the centre of a larger square of white tissue, gather the tissue around the ball and tie with white thread to form the ghost’s neck and head.
Add two black marker eyes. Hang from a piece of string. Make twenty and hang them at different heights from a tension rod across a window.
The full tutorial with variations, display ideas, and how to make them in different sizes is in our how to make a paper ghost for Halloween post.
Ages: 3 and up. Time: 5 minutes each. What you need: White tissue paper. White thread. Black marker.
7. The Folded Ghost Chain
Fold a long strip of white paper accordion-style, draw half a ghost shape against the fold making sure the arms or sides touch both folded edges, and cut. Open for a chain of holding-hands ghosts. For windows, staircases, or above a doorframe. White paper, black marker eyes, instant Halloween.
Ages: 5 and up. Time: 10 minutes. What you need: White paper. Scissors. Black marker.
Paper Pumpkins
8. The 3D Paper Pumpkin
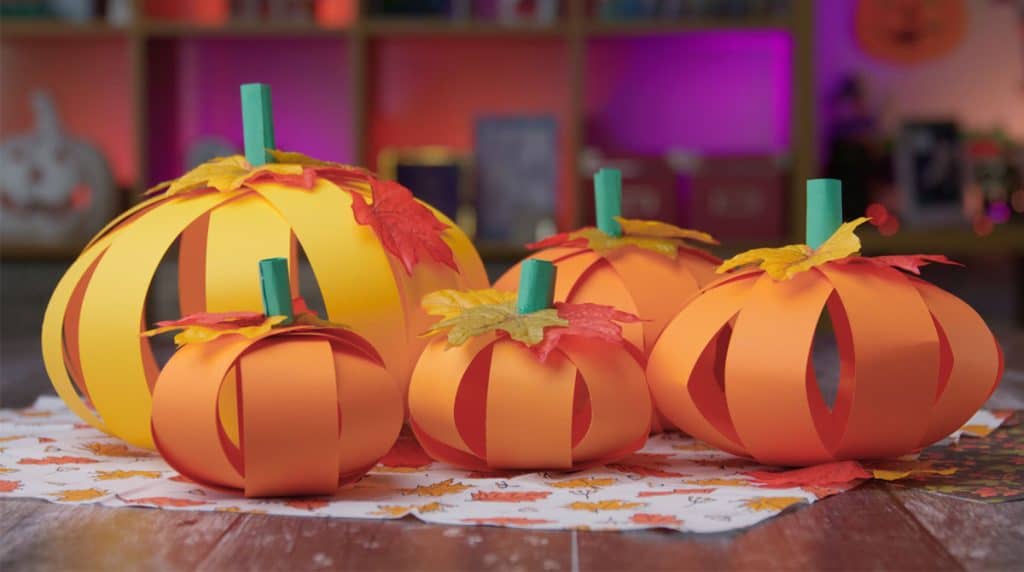
This is the more involved pumpkin project that produces something genuinely impressive for a mantel or shelf.
Cut strips of orange paper, fan them into a pumpkin shape, glue the ends together at top and bottom, add a green paper stem. The finished result looks almost like a real mini pumpkin from a distance.
The complete step-by-step with multiple pumpkin styles from the simple flat version to the full 3D round pumpkin is in our how to make a paper pumpkin tutorial.
Ages: 7 and up. Time: 20 to 30 minutes. What you need: Orange and green paper. Scissors. Glue stick or double-sided tape.
9. The Paper Bag Pumpkin
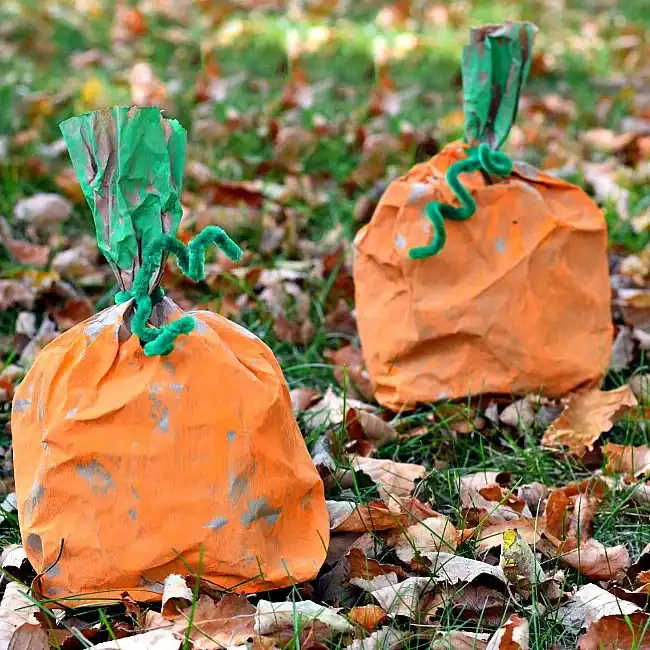
Stuff a brown paper lunch bag with scrunched newspaper to make a round shape, twist the top closed and tie with green string or pipe cleaner for the stem.
Paint or colour orange.
Draw a jack o’lantern face on the front.
Stand several on a windowsill or shelf. These are the most three-dimensional paper pumpkins with almost no skill required, and they look good grouped in different sizes.
Ages: 4 and up. Time: 10 minutes plus drying time if painted. What you need: Brown paper bags. Newspaper. Orange paint or orange paper. Marker.
🔥 Would you like to save this?
Origami
10. Halloween Origami Figures
Origami brings a different texture to paper Halloween crafts because the finished pieces are compact, architectural, and genuinely impressive.
A folded origami bat or pumpkin on a shelf looks like something you bought rather than made, which is exactly what you want. The folding itself is also quietly absorbing for older kids who need something more challenging than cutting and sticking.
Our halloween origami ideas for kids post covers bats, pumpkins, ghosts, witch hats, and gravestones with step-by-step folding guides for each. The bat is the best starting point for origami beginners.
Ages: 7 and up for most folds. Time: 10 to 20 minutes per figure. What you need: Square paper in black, orange, and white.
More Paper Crafts
11. The Toilet Paper Roll Characters
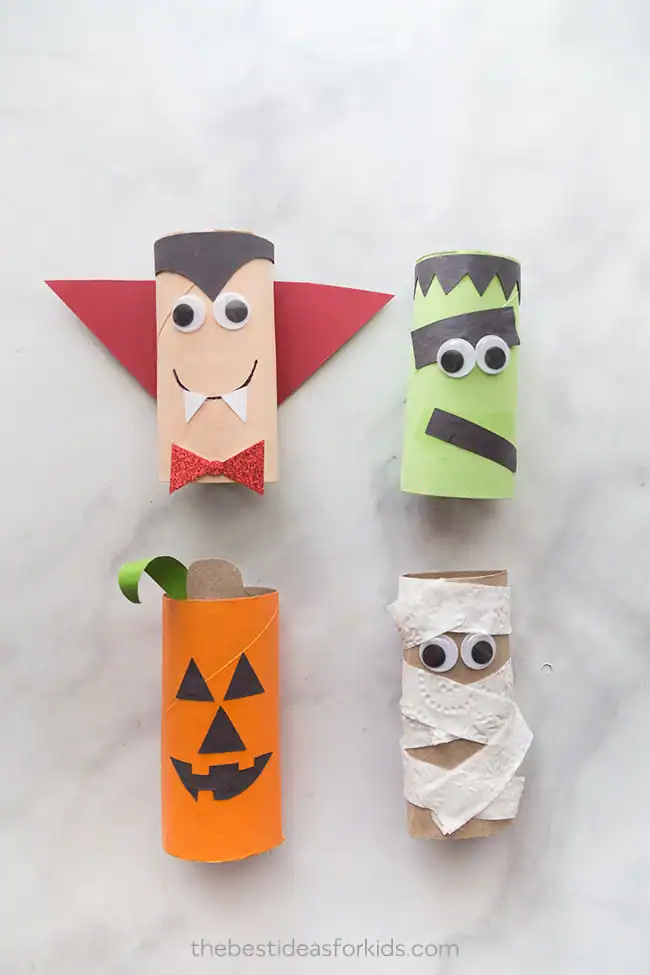
Empty toilet paper rolls become Halloween characters with a coat of paint and a few paper additions.
Mummies wrapped in tissue paper strips. Vampires with tiny paper capes. Frankenstein monsters with flat-top heads. Black cats with pointed card ears. They stand upright on a shelf or mantel and look deliberately charming rather than accidentally childish.
We made eighteen distinct Halloween characters from toilet paper rolls, from the classic mummy to an entire haunted house village, in our toilet paper roll Halloween crafts post. Every one is kid and adult friendly, and every one costs almost nothing.
Ages: 4 and up. Time: 15 to 30 minutes per character. What you need: Empty toilet paper rolls. Paint. Construction paper. Googly eyes.
12. The Paper Bat Mobile
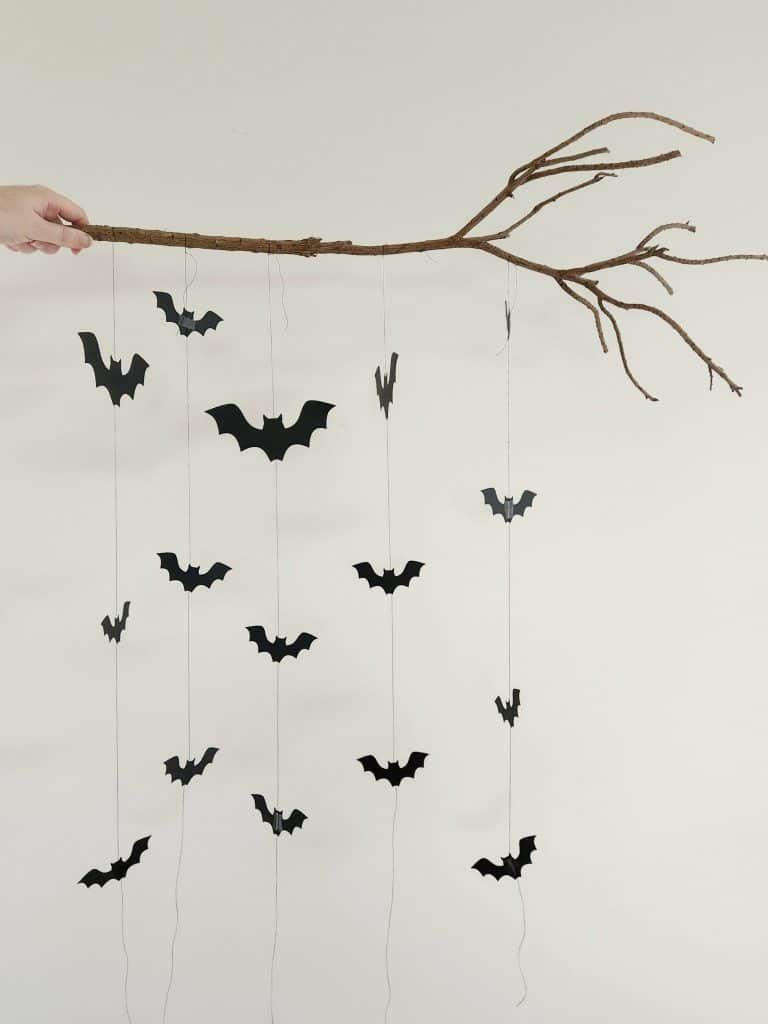
Cut bat shapes from black card, a rounded body with two spread wings, fold slightly down the centre so they look three-dimensional, and hang from a piece of black thread at different lengths from a stick or a piece of dowel.
The mobile hangs in a window or doorway and the bats spin slowly. Simple to make, striking to look at.
Ages: 5 and up. Time: 20 minutes. What you need: Black cardstock. Scissors. Black thread. A stick or dowel.
13. The Paper Lantern
Fold a rectangle of black or orange paper in half lengthwise.
Cut slits from the folded edge almost to the open edge, leaving about two centimetres uncut at top and bottom.
Open, roll into a cylinder, and tape or glue the short ends. The slits bow outward into a lantern shape. Thread several onto string alternating black and orange.
They look more finished than the effort suggests and they catch candlelight beautifully near a lit pumpkin.
Ages: 6 and up. Time: 10 minutes each. What you need: Black and orange card or construction paper. Scissors. Tape.
14. The Paper Witch Hat
Cut a large circle from black card and remove a smaller circle from the centre.
This becomes the brim. Roll a second piece of black card into a cone for the hat body and attach it to the brim.
Add a narrow strip of purple or orange card as the hat band. Stand several on a windowsill or use as table decor. Add a small buckle cut from gold or silver card for extra detail.
Ages: 6 and up. Time: 15 minutes each. What you need: Black cardstock. Scissors. Tape or glue. Purple or orange paper for the band.
15. The Paper Haunted House Village
Flatten a toilet paper roll slightly into a rectangular shape.
Cut a pointed rooftop from black card and attach to the top.
Draw or paint windows and a door. Make five or six in different heights and arrange as a Halloween skyline on a shelf, tallest in the middle, smallest at the front. Put a small battery tea light behind each window.
Ages: 6 and up. Time: 20 minutes for a full village. What you need: Toilet paper rolls. Black card. Paint or marker. Battery tea lights optional.
16. The Paper Black Cat
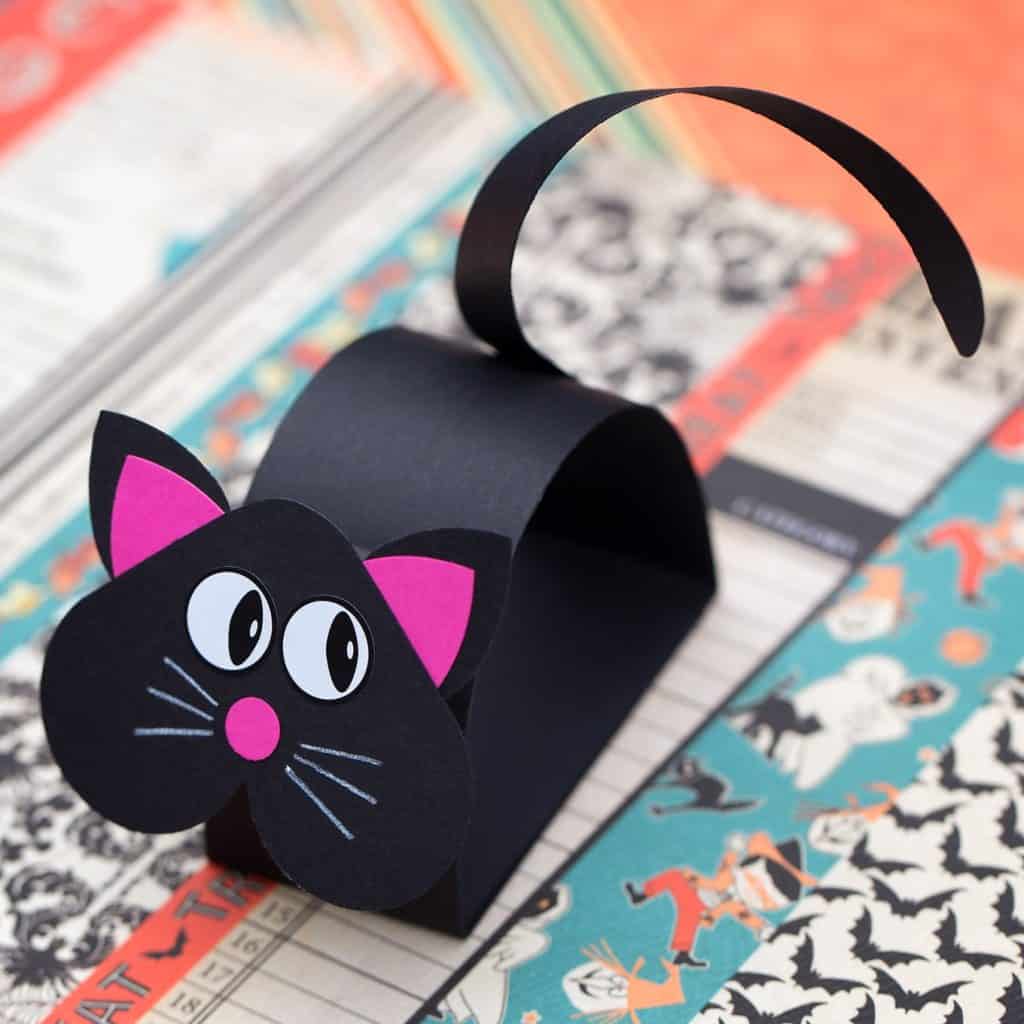
Cut a cat body from black card, a circle for the head, two pointed ears, a long curved tail. Layer and glue together.
Add two small green or yellow paper circles as eyes with black pupils, and three thin strips of black card as whiskers on each side.
Either stand them against a wall by bending a small tab at the base, or punch a hole at the top and hang. Make a row of them on a shelf facing slightly different directions.
Ages: 5 and up with help cutting the small pieces. Time: 15 minutes each. What you need: Black cardstock. Small pieces of green or yellow paper for eyes. Scissors. Glue.
17. The Mixed Paper Halloween Scene
The last project is really the sum of all the others.
Take your leftover paper, the orange scraps from the pumpkin chain, the black offcuts from the bat bunting, the white tissue from the ghost, and make a mixed collage Halloween scene on a piece of card or a paper bag.
A haunted house, a moon, bats in flight, a ghost floating past a window. No instructions needed. Just scissors, paper, and imagination.
This is the one Maria and Marina fight over who gets to design. I have stopped trying to make them share one and now give them a piece of card each. The results are always better than anything I would have planned.
Ages: 3 and up. Time: As long as they want. What you need: Whatever paper you have left.
Tips for Making Paper Halloween Crafts With Kids
Work in batches, not one at a time. Cut several garland shapes at once by folding paper into layers before cutting. It is faster and everything comes out the same size.
Set up a dedicated craft station before you start. A table with all the supplies already out means the kids can move between projects without stopping to find things.
Keep the scraps. Small offcuts of orange and black paper become eyes, noses, bow ties, and hats on the larger projects. The scraps box is often more useful than the fresh paper.
Acrylic paint dries much faster than watercolour on paper projects. If you are painting toilet roll characters, two thin coats of acrylic dry in minutes. Watercolour takes much longer and tends to buckle the card.
Display as you go. Putting the finished decorations up while you work keeps the momentum going. By the end of the afternoon the room already looks different, which makes the whole session feel worthwhile.
Frequently Asked Questions
What age are paper Halloween crafts suitable for? The tissue paper ghost (idea 6) and paper chain (idea 2) work from about age three with supervision. Most cutting-based projects suit ages five and up. The origami and detailed cutting projects like the spiderweb work best from age seven upward.
What paper is best for Halloween crafts with kids? Construction paper is the most forgiving for younger kids because it is easy to cut and folds cleanly. Cardstock holds its shape better for anything three-dimensional like the lanterns or witch hats. Tissue paper is best for ghosts and tassels. Parchment paper is the best choice for spiderwebs because it is thin and cuts through multiple layers cleanly.
How do you display paper Halloween crafts without damaging the walls? Small removable adhesive strips hold most flat decorations. For garlands and hanging pieces, a tension rod across a window frame means nothing touches the wall at all. Washi tape peels off cleanly from most painted surfaces.
How long do paper Halloween decorations last? Cardstock decorations stored flat between sheets of tissue paper last several seasons. Construction paper fades more quickly, especially near windows. Tissue paper ghosts and crepe paper tassels are really single-season items. The toilet paper roll characters survive surprisingly well if stored in a box.
Can you do these crafts if you have no craft supplies at all? Printer paper, a black marker, and clear tape is all you genuinely need for the spiderweb, the accordion chains, and the hanging ghost. Those three projects cover three completely different Halloween decoration types for essentially nothing.
Paper Halloween crafts with kids are one of those things that sounds like a simple rainy afternoon activity and somehow turns into the decorations you end up proudest of. The bat garland Maria made is still better than anything I bought that year. She knows it too.
Get the paper out. See what happens.
Thanks for reading.
Until next time,
Stay safe,


I’m Anastasios Moulios, co-founder of DIY Cozy Living. I enjoy finding creative, practical ways to make small spaces feel warm, stylish, and lived-in. I started this blog with Katerina to share real ideas that make a home feel a little more personal and a lot more comfortable.
