
15 Scary Halloween Front Porch Ideas That Will Stop Trick-or-Treaters in Their Tracks


Most Halloween front porches look the same. A couple of pumpkins by the door, a fake cobweb stretched across the railing, and an inflatable something that loses air by the second week of October. Perfectly fine. Nobody is going to remember it.
The porches that get talked about, photographed, and walked past twice are the ones that commit to an atmosphere. Not necessarily expensive. Not necessarily complicated. But intentional, layered, and genuinely a little unsettling.
These fifteen ideas lean properly scary rather than cute. All of them are visually strong enough to pin and photograph well. None of them are just pumpkins.
The Three Things That Make a Scary Porch Work
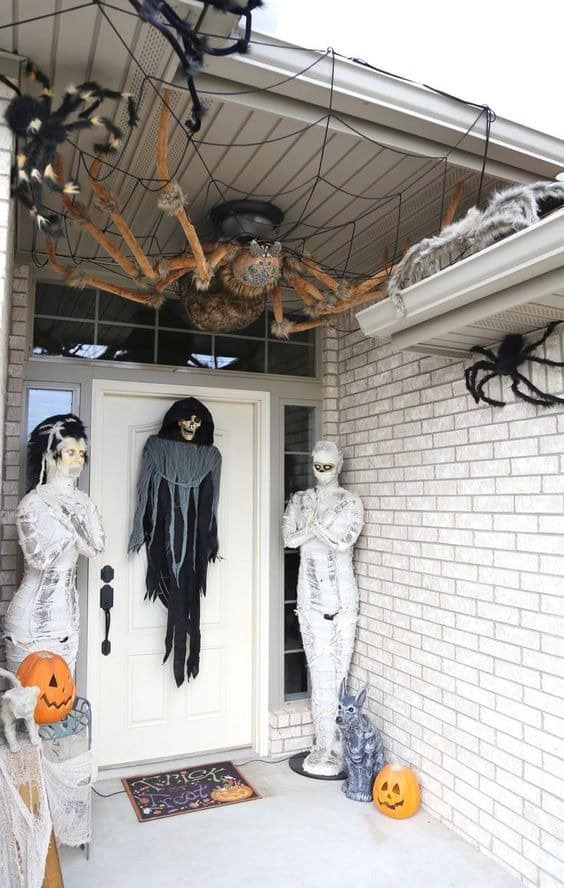
Lighting is everything. A scary porch without dramatic lighting is just a cluttered porch. Coloured spotlights (purple, green, deep red) aimed at your display from below or from the side change everything. Battery-powered LED spotlights cost very little and can be positioned anywhere. Add fog from a DIY fog chiller setup and the lighting becomes even more dramatic.
Height creates drama. Most porch displays stay at ground level. The scariest ones use the full vertical space: something hanging from the porch ceiling, something at mid-height on the railings, and something at ground level. A display that uses all three levels looks intentional and fills the space rather than sitting in one corner of it.
Commit to one colour palette. Black and orange is classic. Black and deep red is more unsettling. Black, white, and purple is the witch aesthetic. Picking one palette and sticking to it makes even a simple display look considered and dramatically more effective than a mix of every Halloween colour in the same space.
15 Scary Halloween Front Porch Ideas
1. The Floating Witch Hat Ceiling
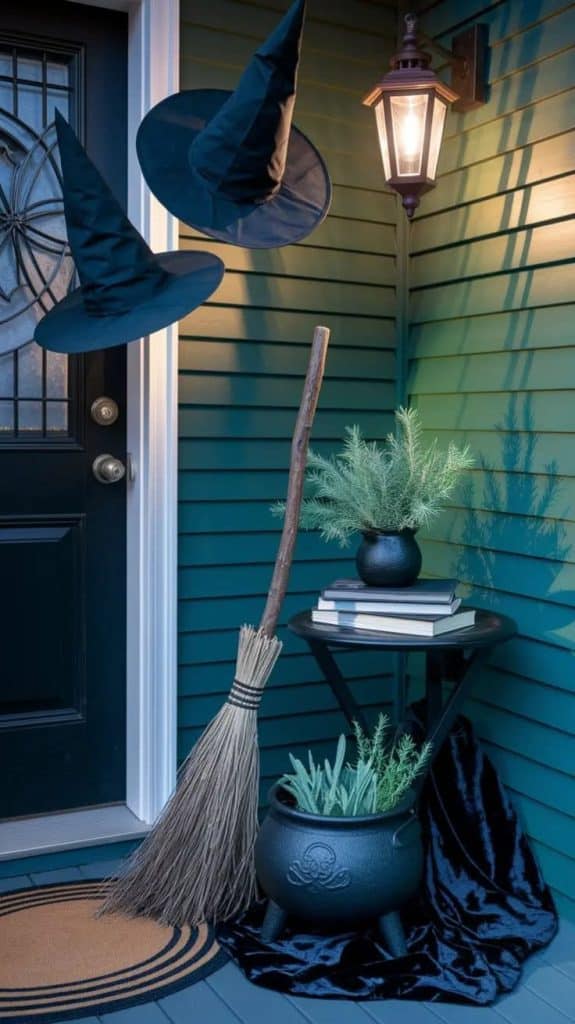
Black witch hats of different sizes suspended from the porch ceiling on invisible fishing line at different heights, so they appear to float. Add a warm orange or deep purple spotlight from below and the hats cast dramatic shadows across the ceiling and the front door. The effect at dusk when the hats are barely visible until the spotlight catches them is genuinely unnerving.
Why it photographs well: The looking-up shot from below, showing the floating hats against a dark porch ceiling with light filtering through, is one of the most saved Halloween porch images on Pinterest.
What you need: Black witch hats (the cheap ones work perfectly), clear monofilament fishing line, a tension rod or small hooks in the porch ceiling, and a purple or orange spotlight aimed upward from the porch floor.
2. The Graveyard Approach Path
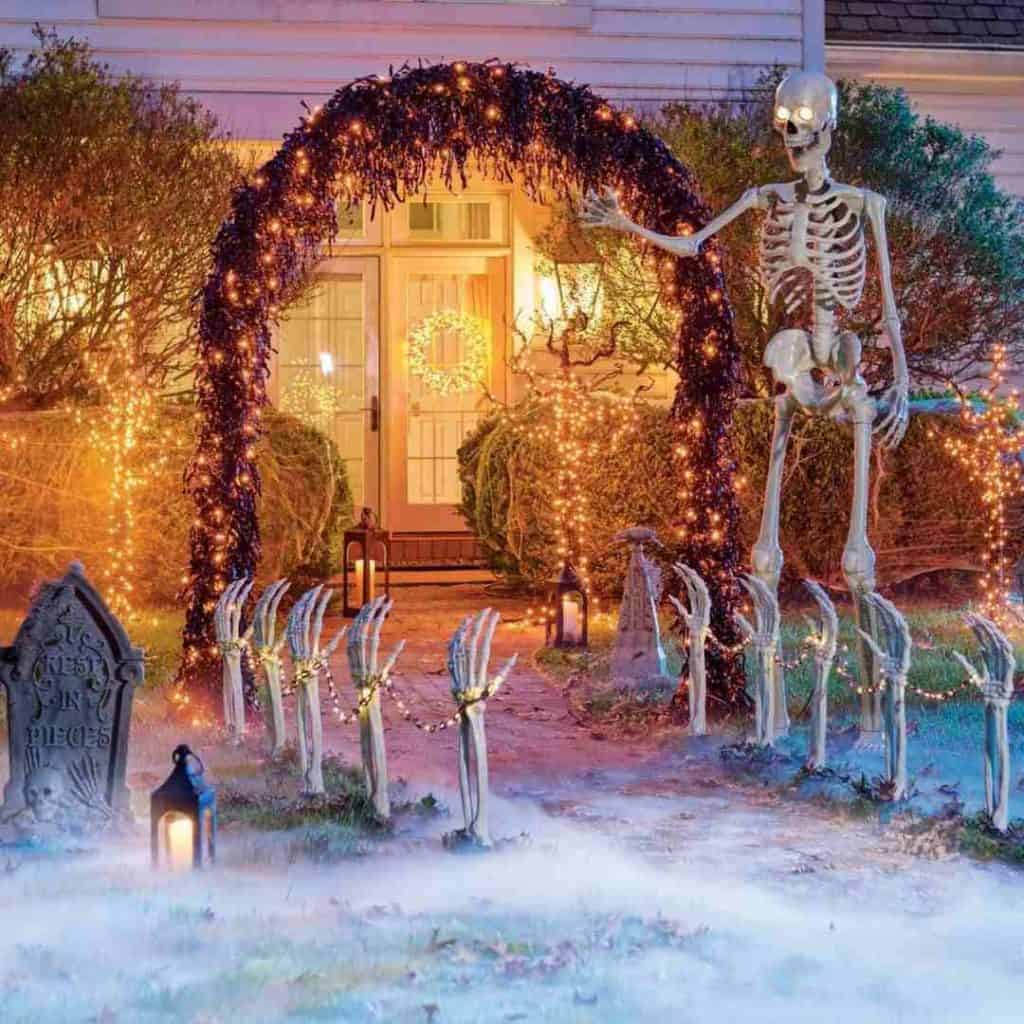
Line the path from the gate or sidewalk to the front door with DIY foam or cardboard gravestones pushed into the ground at slightly different angles, as if they have been there a long time and settled.
Add skulls at the base of each one, a plastic raven or crow perched on top of the tallest, and low lying fog rolling between them from a fog machine hidden at the base of the steps. Solar-powered stake lights in deep purple or red along the path edges complete the scene.
Why it photographs well: The leading-line composition, where the eye follows the path toward the lit front door through a graveyard, is naturally dramatic and pins well at any time of day.
What you need: Foam insulation boards for gravestones (cut to shape and paint grey), skulls, plastic ravens, fog machine setup, and coloured stake lights.
3. The Giant Spider Web Porch Takeover
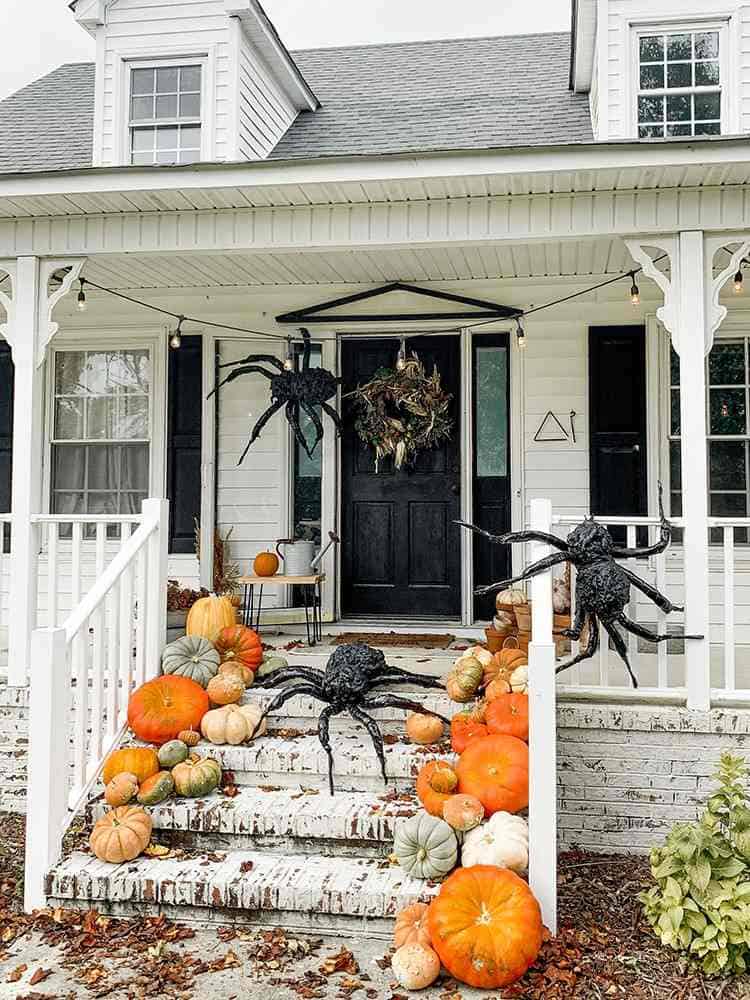
A large handmade spider web stretched across the entire front of the porch from corner to corner, with a giant black spider positioned at the centre.
The web is made from thick black rope or clothesline cord tied to hooks at the porch frame corners and at intervals along the railing.
The scale is what makes this scary rather than cute, a web that fills the whole visual field is genuinely unsettling in a way that a small prop web from a packet is not.
Why it photographs well: The symmetry of a full-width web framing the front door photographs as a strong, graphic image. Shot straight on, it is an immediate and dramatic pin image.
What you need: Black rope or paracord, hooks screwed into the porch frame or railing, and a large black spider prop (or make one from a black plastic bag stuffed with newspaper and pipe cleaner legs).
4. The Haunted Victorian Sitting Area
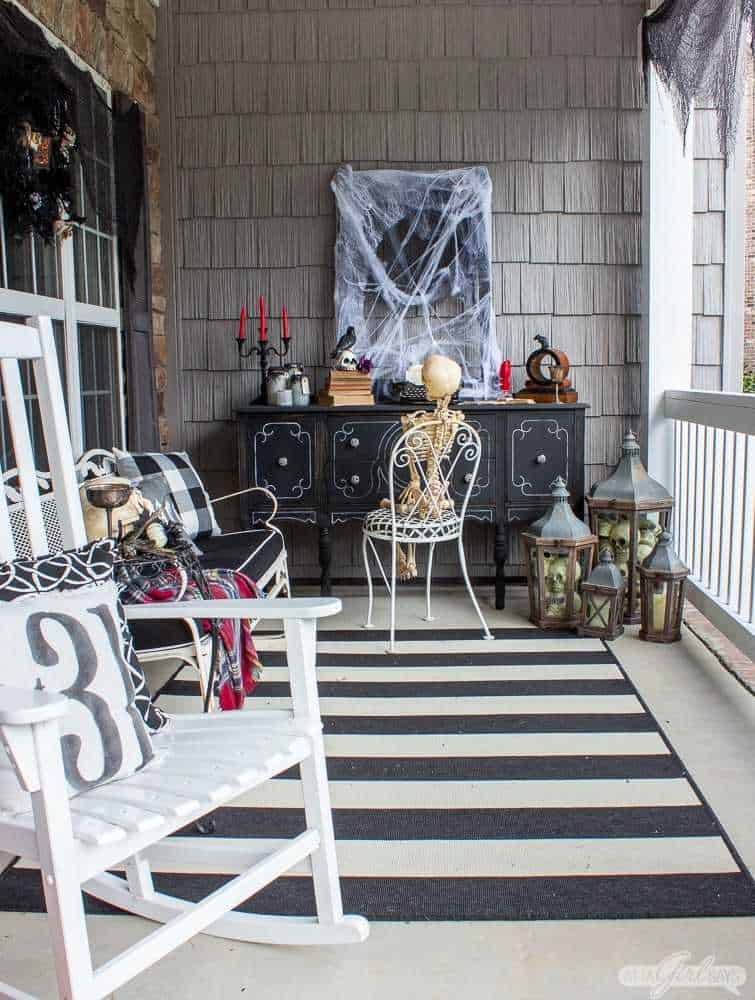
Two old chairs placed on the porch facing outward toward the street, dressed with tattered fabric and positioned to look occupied.
Fill them with skeleton figures posed naturally, one leaning slightly toward the other as if mid-conversation, one with a hand resting on the arm of the chair.
Add a small side table between them with a tea set, a skull candle holder, and a lantern. This is the setup that makes people do a double take at the end of the path before they realise what they are looking at.
Why it photographs well: The human scale and realistic posing makes this compelling in a way that abstract Halloween decor is not. The posed skeleton tea party photographs as a complete scene.
What you need: Two old chairs from a thrift shop or charity sale, two full skeleton figures, tattered fabric, a small table, a lantern, and old tea set props.
5. The Hanging Spirits
White fabric cut into ghost shapes stuffed lightly with plastic bags for volume, tied at the neck with twine, and hung from the porch overhang at different heights on invisible line so they move freely in the breeze.
Faces drawn or painted on in black, ranging from peaceful to screaming depending on how scary you want the effect.
At night with a blue or white spotlight aimed at them from below, moving fabric ghosts are one of the most atmospheric and genuinely spooky things you can put on a porch.
Why it photographs well: Moving fabric in outdoor light photographs with a sense of motion even in a still image, and the varying heights create natural visual interest.
What you need: White fabric or muslin cut into lengths, plastic bags for stuffing, twine, invisible line, hooks in the porch overhang, and black paint or markers for faces.
6. The Mummy Door
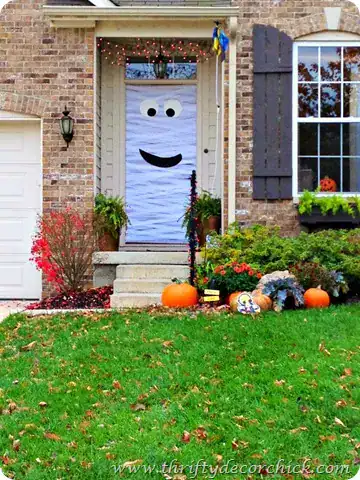
The front door itself wrapped in white gauze or cheesecloth strips in diagonal bands like a mummy, with two large googly eyes or painted circles near the top.
Fairy lights woven between the gauze strips so the lights glow through the wrapping at night.
The door you walk up to every day transformed into a mummy face that stares back at you.
Trick-or-treaters stop before they ring the bell.
Why it photographs well: The straight-on shot of a mummy door is immediately readable as a complete idea, and the fairy lights glowing through the gauze at dusk creates a warm, eerie effect that photographs beautifully.
What you need: White gauze or cheesecloth, fairy lights, tape or removable adhesive to attach to the door, and two large circles for eyes (paper, foam, or actual large googly eyes).
7. The Cauldron Centrepiece With Fog
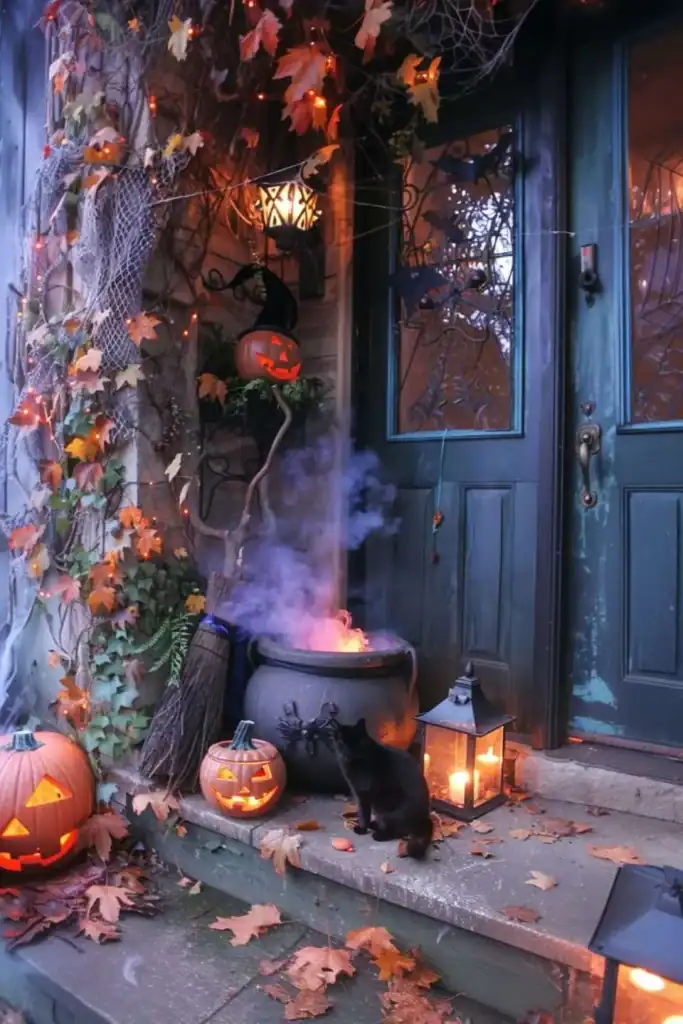
A large black cauldron placed centrally on the porch steps or at the base of the front door, filled with dry ice and hot water so fog pours over the sides and rolls down the steps. Battery-operated green lights inside the cauldron create the green glow effect. Surround it with black candles in holders of different heights, a few black roses in a vase, and some scattered skulls. The cauldron with active fog running out of it is one of the most dramatic single-object Halloween porch setups you can create.
Why it photographs well: The fog pouring over the sides of a glowing cauldron is a cinematic image that photographs as a complete scene in its own right.
What you need: A large black cauldron or black plastic bucket, dry ice (buy on the day, handle with thick gloves), hot water, green LED lights, black pillar candles, and skull props.
8. The Black Rose Arrangement
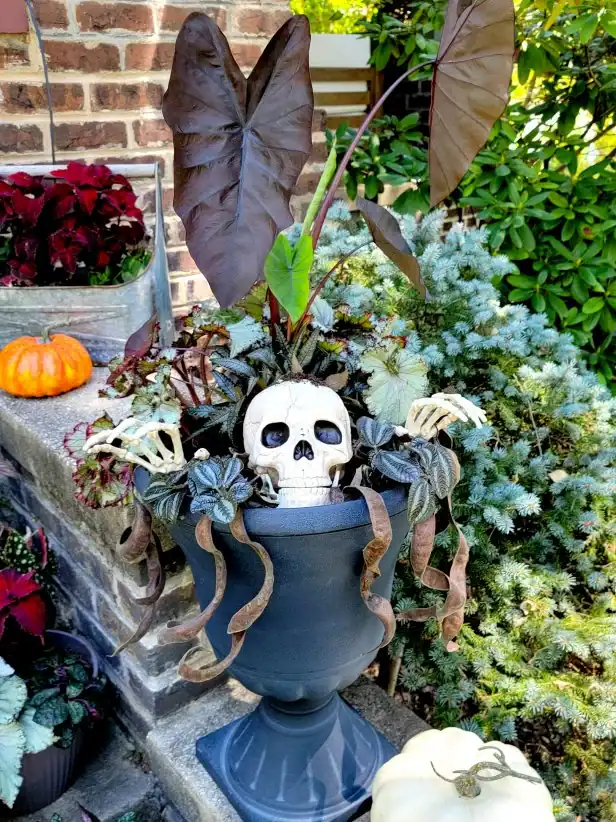
Nothing orange. Nothing bright. A collection of tall black vases and urns on the porch steps and flanking the front door, filled with black roses (spray-painted or artificial), dark dried botanicals, and black feathers.
Add deep red pillar candles in black holders between the vases and a black doormat. The restraint of this look is what makes it more genuinely unsettling than a cluttered orange-and-black setup.
🔥 Would you like to save this?
It reads as elegant in a way that suggests whoever lives there takes Halloween very seriously indeed.
Why it photographs well: The monochromatic dark palette with the red candles as the only colour contrast creates a very strong, editorial image.
What you need: Black vases and urns (spray paint cheap ones), artificial or spray-painted roses, dark dried botanicals, black feathers, deep red candles in black holders.
9. The Silhouette Window Scene
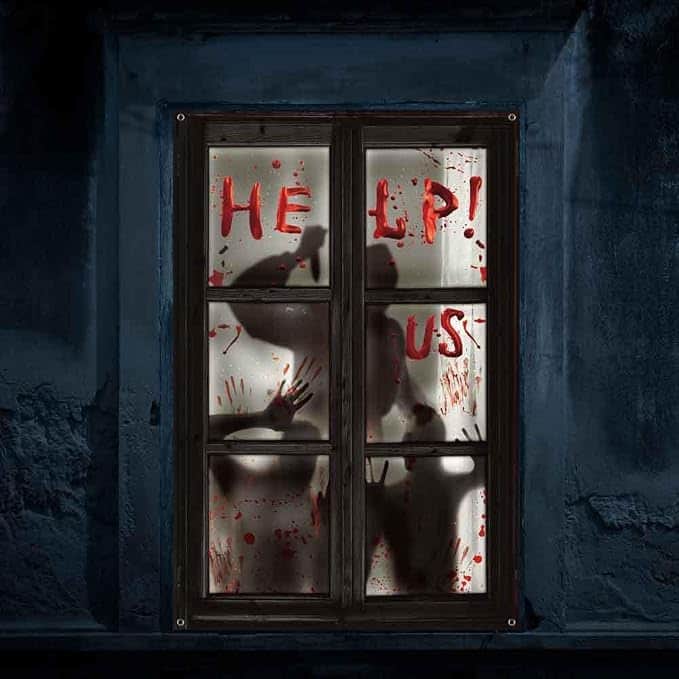
Cut silhouettes from black card or black plastic sheeting and tape them to the inside of the front windows adjacent to the door: a witch stirring a cauldron, a figure reaching outward, a row of ravens on a windowsill. When the room light is on behind them, the silhouettes are dramatic from the outside. When a coloured spotlight is aimed at the window from outside, they become even more striking. This is the porch idea that costs almost nothing and terrifies people the most.
Why it photographs well: The contrast of dark silhouettes against a lit window is a naturally graphic and dramatic image that reads clearly even as a small thumbnail.
What you need: Black card or black craft foam, scissors or a craft knife, and clear tape for attaching to the inside of the window.
10. The Scarecrow in the Chair
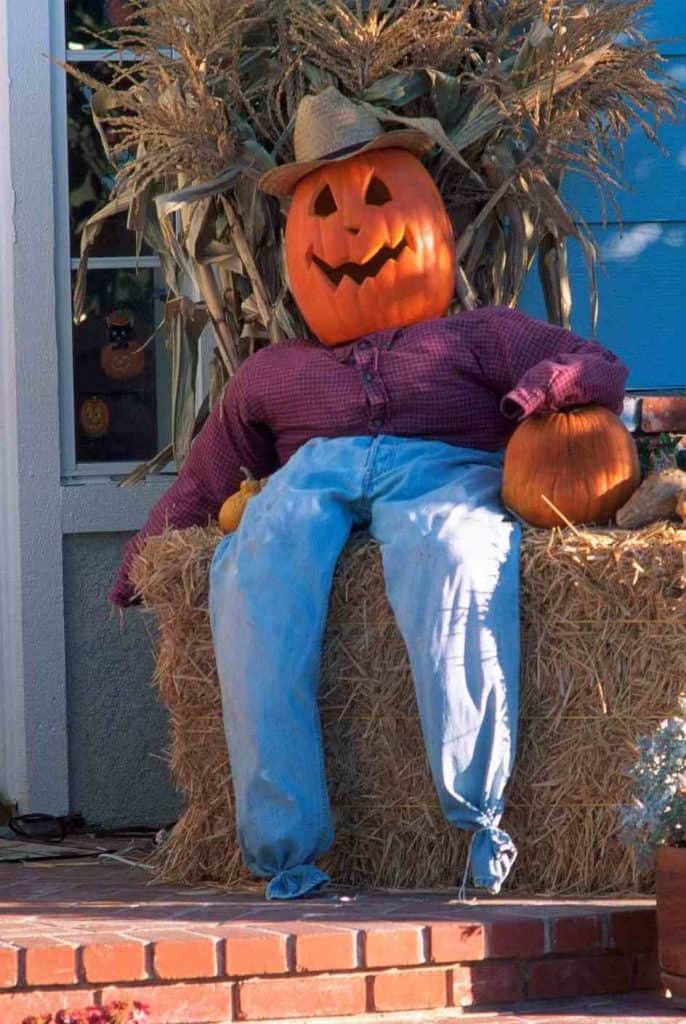
A life-sized scarecrow figure seated in a single rocking chair on the porch, dressed in old clothes stuffed with newspaper or plastic bags, with a carved or painted pumpkin for a head tilted slightly to one side.
Position it facing outward so trick-or-treaters approach from the front. In dim lighting with the head slightly bowed, people consistently mistake this for a real person sitting on the porch.
The rocking chair adds the extra detail that makes people stop.
Why it photographs well: The scale and the realistic seated posture creates an image with immediate narrative tension.
What you need: A rocking chair or old chair, old clothes from a charity shop, newspaper or plastic bags for stuffing, and a carved or painted pumpkin for the head.
11. The Dripping Candle Lantern Wall
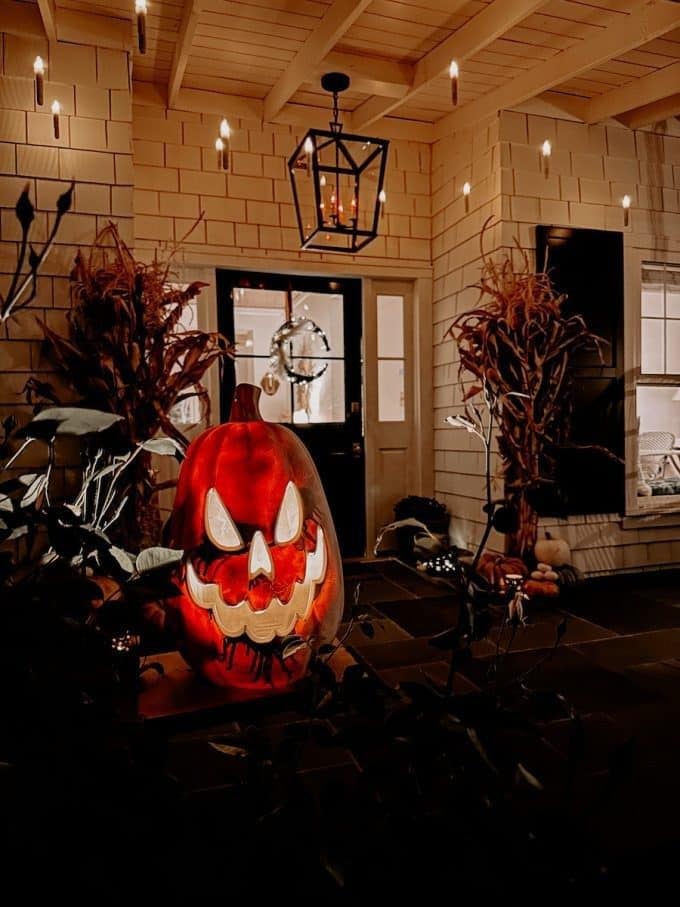
A row of hurricane lanterns or tall glass candleholders hung at different heights along the porch railing or mounted on the wall, each containing a thick white pillar candle with wax deliberately dripped heavily down the sides for an aged effect. The wax dripping can be replicated with a glue gun on artificial candles if you prefer. At night, the warm glow of multiple candles at different heights against a dark porch wall creates an atmosphere that is genuinely beautiful and slightly sinister at the same time.
Why it photographs well: Multiple light sources at different heights in a single shot creates depth and warmth that photographs as an instantly atmospheric image.
What you need: Hurricane lanterns or tall glass holders, white pillar candles (real or battery), a glue gun for artificial dripping wax on fake candles.
12. The Crow and Branch Perch
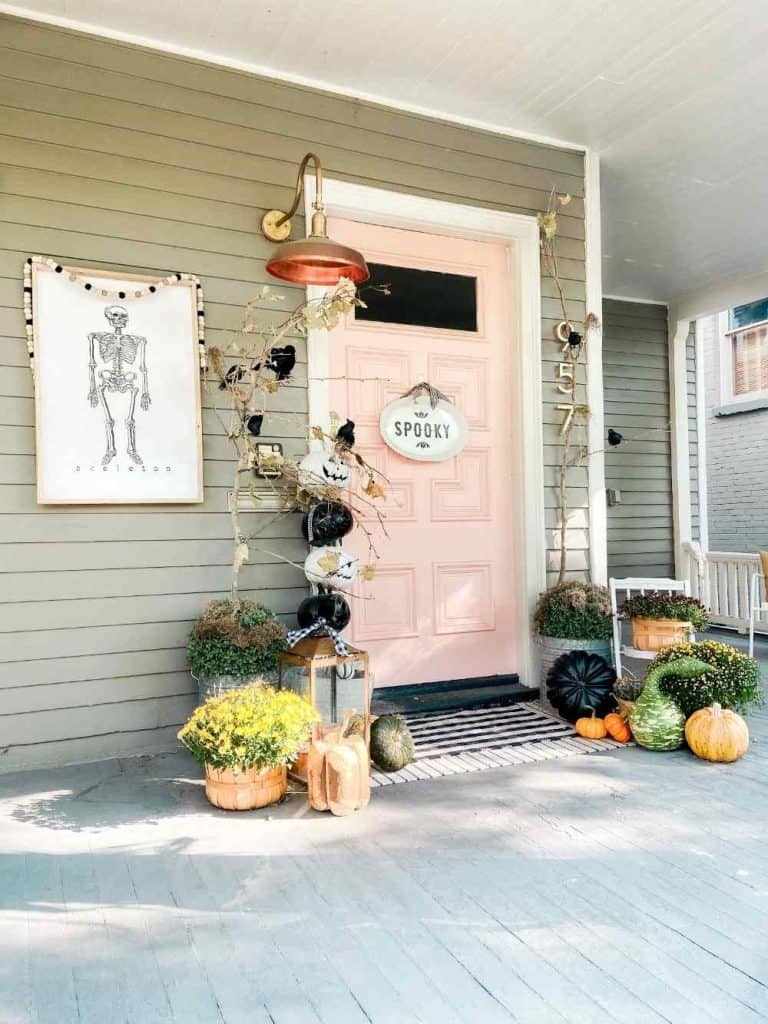
A large gnarled branch or piece of driftwood mounted horizontally above the front door or across the porch railing, with five or six black crow or raven props perched along it facing different directions.
Spanish moss draped over the branch adds texture. At night, the crows silhouetted against a lit porch ceiling look genuinely ominous.
The natural material of the branch grounds the display in a way that makes the fake crows look more convincing than they have any right to.
Why it photographs well: The row of crows on a branch is one of the most graphic and immediately readable Halloween images possible and photographs well at any light level.
What you need: A large branch (real, faux, or driftwood), black crow or raven props (widely available around Halloween), Spanish moss, and hooks or wire to mount the branch.
13. The Lit Pumpkin Tower
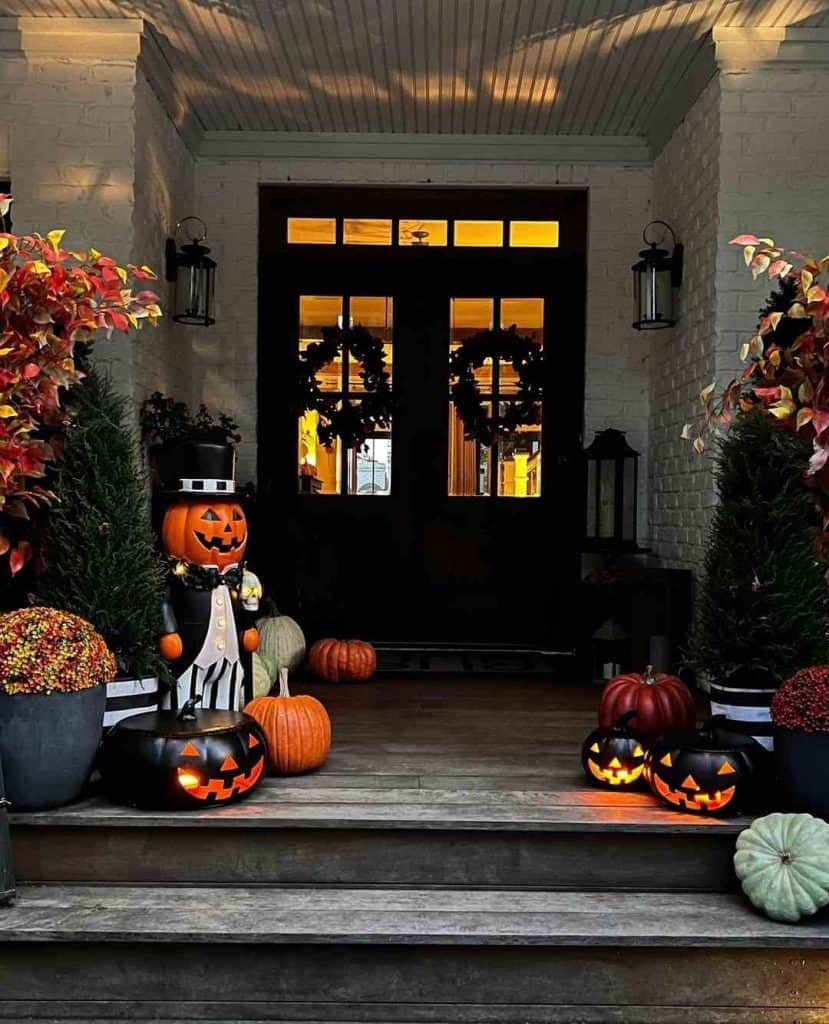
Instead of pumpkins scattered separately across the porch, stack them vertically into a tower with the largest at the base and smallest at the top, each one carved with a different face. A battery tea light inside each one so the entire tower glows from within. The faces carved at different expressions, some grinning, some screaming, some hollow-eyed, give the tower a genuinely sinister character that a row of identical jack-o-lanterns never achieves.
Why it photographs well: A vertical tower of carved glowing pumpkins is a strong compositional shape that photographs well from slightly below looking up, which makes it feel monumental rather than small.
What you need: Five to seven pumpkins of genuinely different sizes, carving tools, battery tea lights, and a flat stable surface or peg system to keep the stack secure.
14. The Dead Garden Urns
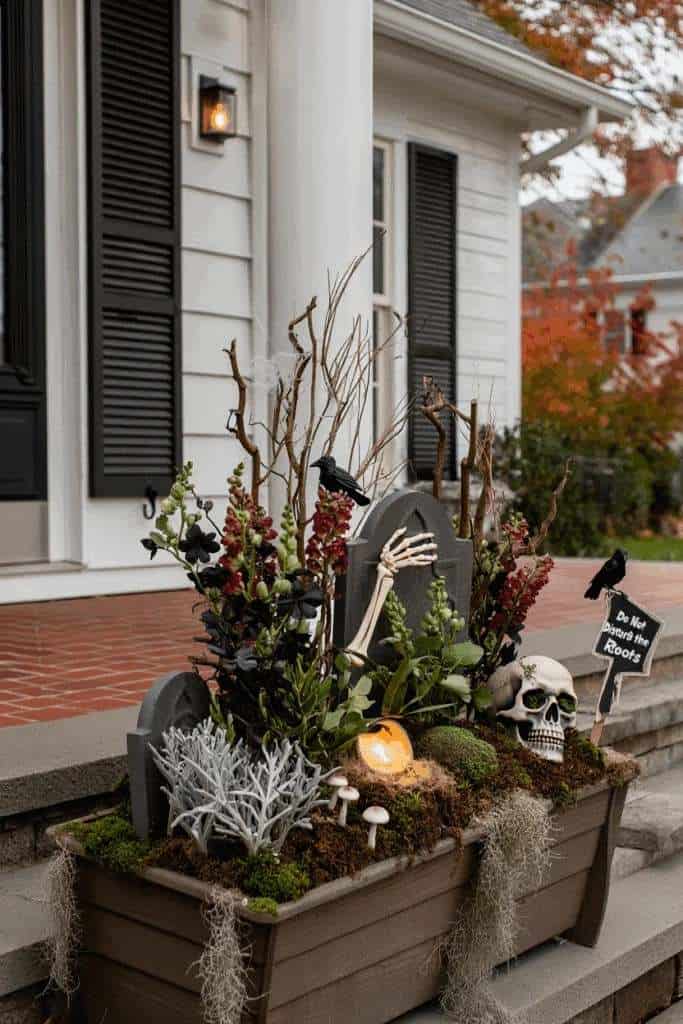
Large garden urns or terracotta pots at either side of the front door filled not with flowers but with dead-looking dried botanicals, bare branches, and black feathers, with a skull nestled at the base of each arrangement. The juxtaposition of a garden urn, which normally signals life and growth, filled with dead materials creates an uncanny effect. Add Spanish moss spilling over the sides of each urn. Black spray paint on cheap terracotta pots turns them dark and dramatic instantly.
Why it photographs well: The symmetrical placement of two matching urns flanking a front door is a classic architectural composition, and the dead-garden content subverts the expectation in a way that reads immediately in a photo.
What you need: Two large urns or terracotta pots, black spray paint, dried branches and botanicals, black feathers, Spanish moss, and skull props.
15. The Projection Spotlight Scene
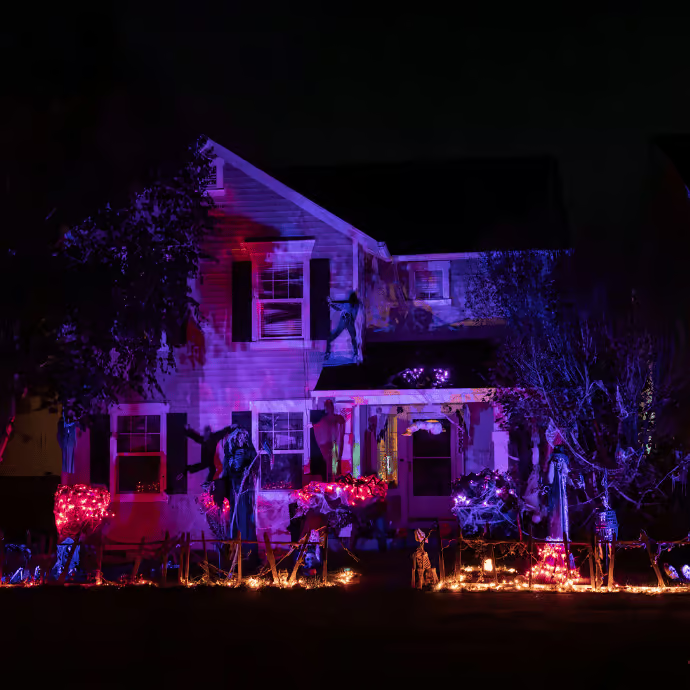
A Halloween projection spotlight aimed at the front of the house casts moving images, bats flying, ghosts drifting, spiders crawling, across the entire facade of the building.
Combined with any of the physical displays above, the moving projected images add a layer of animation that no static decoration can achieve. Modern Halloween projectors are inexpensive, weatherproof, and cover a large area. Aimed at a white or light-coloured wall, the effect at night is immediately dramatic.
Why it photographs well: The projected image on a house facade or white wall creates a scene that looks professionally set-dressed. The combination of a physical display in the foreground and the projected image in the background creates depth in a photo.
What you need: A Halloween projection spotlight (widely available from October, usually under 30 euros), an outdoor power source, and a light-coloured surface to project onto.
How to Layer These Ideas Into One Display
You do not need all fifteen. Three to five ideas combined thoughtfully is more effective than fifteen ideas scattered around the porch with no visual logic.
A strong porch display has: one hero element that reads from the street (the giant spider web, the cauldron with fog, the projection spotlight), one atmospheric layer at eye level (the hanging ghosts, the crow branch, the witch hat ceiling), and one ground-level detail that rewards a closer look (the graveyard path, the skull arrangements at the base of the urns, the scarecrow in the chair).
Add dramatic lighting to everything and you have a porch that looks intentional, atmospheric, and genuinely frightening in the best possible way.
Frequently Asked Questions
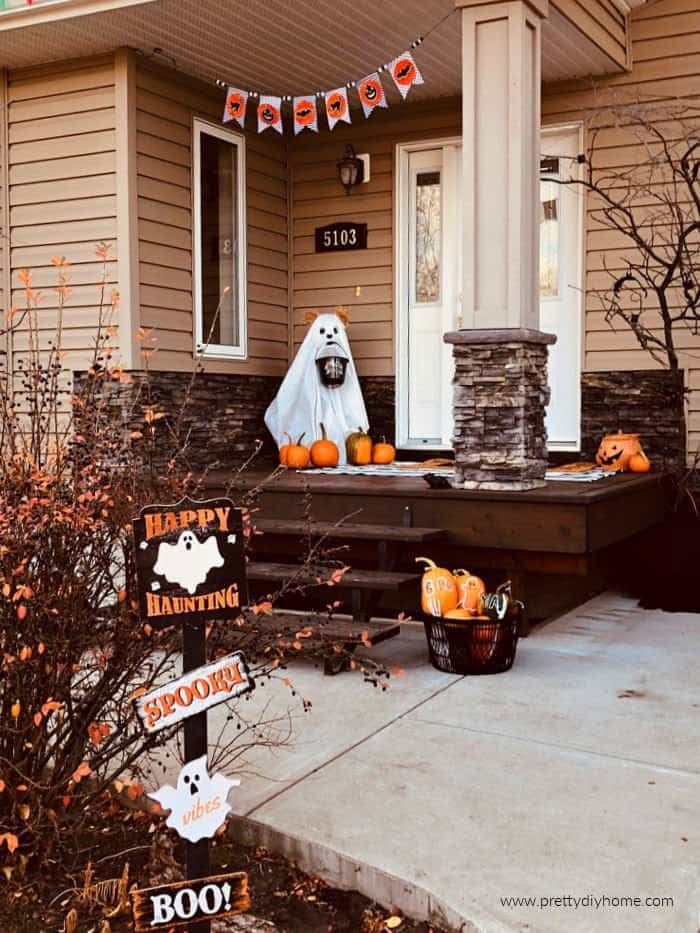
What makes a Halloween porch look scary rather than just decorated? Scale, height, and lighting. Displays that use the full vertical space of the porch, from the ceiling to the ground, look more dramatic than those at ground level only. Coloured spotlights aimed from below transform the atmosphere completely. And committing to one colour palette, typically black with one accent colour, makes a display look intentional rather than assembled from whatever was available.
Which of these ideas works for a small porch? The mummy door, the silhouette window scene, the floating witch hat ceiling, and the dripping candle lanterns all work in very small spaces because they use the door, windows, and ceiling rather than floor space. The crow branch mounted above the door works well in small porches too.
How do I make the porch scary for adults but not traumatise small children? The line between scary and too scary for young children is usually movement and scale. Giant spiders, life-sized seated figures, and realistic-looking skeletons tend to upset very young children. The crow branch, the glowing pumpkin tower, the lantern wall, and the witch hat ceiling read as atmospheric and Halloween-appropriate for all ages.
Which ideas are renter-friendly? The mummy door uses only gauze and removable adhesive. The silhouette window scene is taped to the inside of the window. The floating witch hats hang from a tension rod. The standing displays (cauldron, urns, scarecrow in a chair) are all freestanding. Most of these ideas require no drilling or permanent attachment.
How early should I set up the Halloween porch? Pinterest starts indexing Halloween content from August, but for a physical display, two weeks before Halloween is the sweet spot for maximum neighbourhood impact without the decor wearing out. Some of the dry ice and fresh flower elements are best done the day before or the morning of October 31st.
The year Tasos agreed to do the full graveyard path and the fog machine, he spent three evenings getting it right and then spent Halloween night watching from the window every time a group of children stopped at the gate before deciding whether to come up the path.
He will not admit he enjoyed it more than the children did.
Do it properly. Go scary. The porch you half-commit to is the one nobody photographs.

I’m Anastasios Moulios, co-founder of DIY Cozy Living. I enjoy finding creative, practical ways to make small spaces feel warm, stylish, and lived-in. I started this blog with Katerina to share real ideas that make a home feel a little more personal and a lot more comfortable.
