
How to Make Halloween Fog That Stays Low to the Ground (Without It Evaporating)


Halloween fog that drifts low across a graveyard or front yard and actually stays there is one of the most atmospheric things you can do to a space for October. It photographs beautifully, it makes trick-or-treaters stop at the gate, and it turns a yard with a few plastic gravestones into something genuinely spooky.
The problem is that most fog machines produce fog that immediately rises into the air and disappears. You press the button, a cloud comes out, and twenty seconds later you have nothing. This happens because the fog is warm when it leaves the machine, and warm fog rises.
The fix is simple, cheap, and takes about thirty minutes to set up. You cool the fog before it reaches the ground. Here is how.
Why Fog Rises (and How to Stop It)
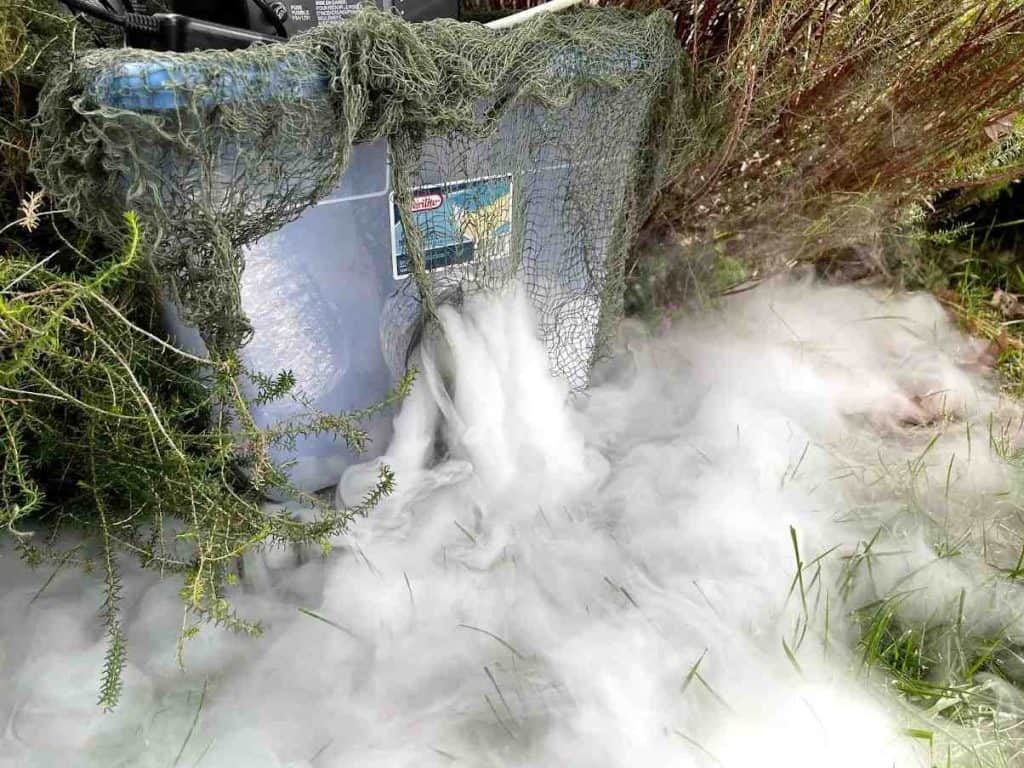
Fog machines heat liquid to create vapour. Warm vapour rises. To get fog that stays low and rolls across the ground you need to cool it immediately after it leaves the machine, before it has a chance to warm back up and drift upward.
The two methods below both solve this problem in different ways.
The first uses a fog machine with a DIY chiller made from supplies you can find at any hardware store.
The second uses dry ice and creates fog without a machine at all.
Both create the same effect: dense, cool fog that rolls along the ground rather than rising into the air.
What You Need
Method 1: Fog Machine With DIY Chiller (the most effective for large areas)
| Item | Notes |
|---|---|
| Fog machine | Get one with an automatic on/off switch if possible, so it runs hands-free all evening |
| Fog liquid | Standard fog fluid works. Skip the “heavy” or “low-lying” versions as they can clog the machine |
| Perforated landscaping pipe | 3 to 4 inch diameter with holes already in it. Black is better than white so it blends into the yard at night |
| Frozen water bottles | One per foot of pipe length. Standard 500ml bottles |
| Duct tape | To seal one end of the pipe |
| Outdoor extension cord | If the fog machine needs to reach from a sheltered spot |
| Black spray paint | Optional, to darken white pipe if that is all you can find |
Method 2: Dry Ice Fog (no machine needed, dramatic but shorter duration)
| Item | Notes |
|---|---|
| Dry ice | 2 to 4 kg for a typical front yard display, lasting 45 to 90 minutes |
| Large plastic or metal container | A bucket, bin, or punch bowl, the wider the better |
| Hot water | Tap water at the hottest setting works. The hotter the water the more fog you get |
| Thick gloves | Dry ice burns skin on contact. Never handle it without gloves |
| Tongs | For moving pieces of dry ice |
Method 1: The Fog Machine Chiller Setup
This is the method that covers a large area and runs all evening with minimal attention.
The method is simple. The fog machine creates fog but it goes up because it is very warm. To make it colder we put some bottles with ice right the machine has created the fog so that it makes the fog colder once it is out. This is the whole idea nothing complex.
You can see exactly how to do it below! (and then I write all the steps just in case you wanna be organized)
Step 1: Prepare the pipe
The night before Halloween, spray paint your pipe black if it is white. This helps it disappear against the ground at night.
Seal one end of the pipe completely with duct tape, making sure no air can escape from that end.
Step 2: Freeze the water bottles
Fill standard water bottles with water and put them in the freezer the night before. You need one bottle per foot of pipe, so a six-foot pipe needs six bottles.
Step 3: Set up the pipe in your display
Lay the pipe along the edge of your display with the sealed end away from the fog machine and the open end where the fog machine will sit. Try to position the pipe so it runs behind gravestones, along the base of a fence, or under low shrubs where it is least visible.
The holes in the pipe should face upward or sideways so the fog escapes across the ground rather than blowing directly down.
Step 4: Load the frozen bottles
Slide the frozen bottles into the pipe one by one from the open end. They should fit snugly and fill the pipe fairly evenly.
Step 5: Connect the fog machine
Place the fog machine at the open end of the pipe with the nozzle pointing directly into the pipe opening. You can secure it with duct tape if you want it fully fixed, but most people simply push it up against the opening.
Fill the fog machine with fluid according to the manufacturer’s instructions and plug it in.
Key tip: Position the fog machine in a sheltered location if possible, under a deck, behind a bush, against a wall. Most fog machines are not weatherproof.
Step 6: Turn it on
Once the fog machine has warmed up (usually three to five minutes), it will begin producing fog. The fog enters the pipe, is chilled by the frozen bottles, exits through the holes along the pipe, and rolls low across the ground.
How to tell it is working: The fog should emerge from the pipe holes at roughly ground level and drift outward rather than rising. If it is still rising, your bottles may not be frozen solidly enough or you may need more of them.
Method 2: Dry Ice Fog
🔥 Would you like to save this?
You will get a denser and more dramatic fog from dry ice than you would with a machine, though it is not as long lasting and demands to be handled with some care.
The principle: Put dry ice in warm water and it sublimates in a hurry, giving off a very cold, dense fog. Being so much colder than the surrounding air, this kind of fog does not rise; it sinks and rolls along the ground.
Step 1: Handling the dry ice
Purchase your dry ice for the day of use. Even in a freezer it has a habit of sublimating at two or three kg a day, so there is no point in buying it ahead of time. When you handle it, put on thick gloves since it will burn bare skin. And under no circumstances put it in anything sealed; the pressure will build up too quickly.
Step 2: Preparing the containers
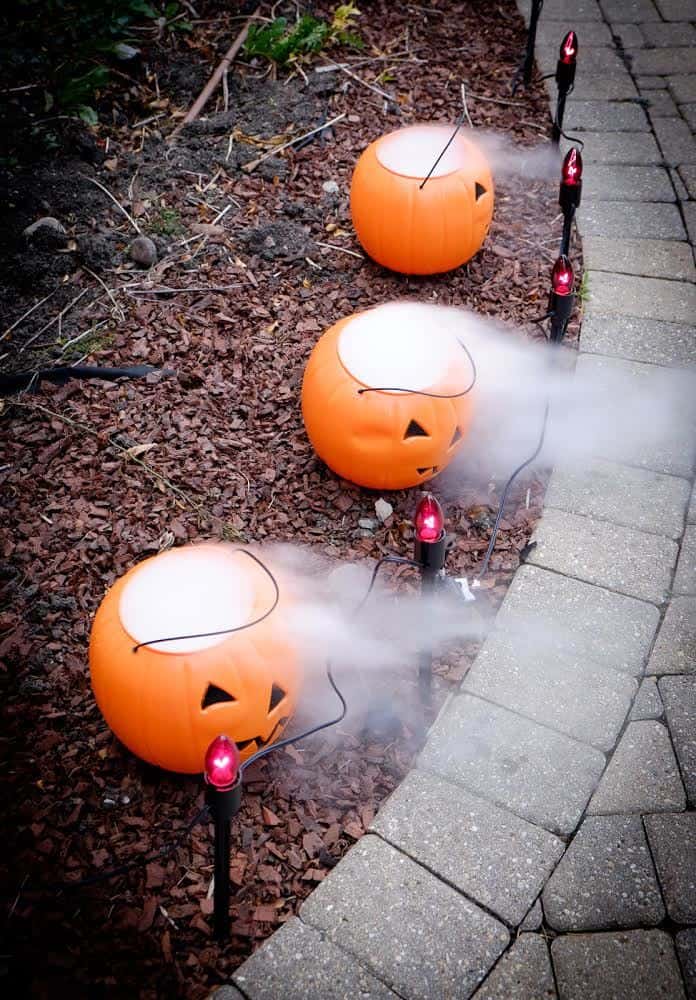
A wide plastic bin or punch bowl is preferable to a narrow bucket as the shallow profile allows the fog to spread. Place them where the effect is needed – at the foot of a gravestone, as a table centrepiece or lining a path.
Step 3: Putting it together
Half fill the container with the hottest water from the tap. With tongs, add in some dry ice. The fog will start right away and continue until the water cools to around 40 degrees C or the ice is used up. If the water gets too cool and the fog thins out, top it up with hot water. You can expect a batch to run for 20 to 40 minutes depending on the size of the ice and volume of water.
Lighting for a Dramatic Effect
Without proper lighting, fog is all but invisible. It is the one thing most overlook, yet it is what separates an impressive display from something that looks unremarkable.
| Colour | What it gives you | Where to use it |
|---|---|---|
| Orange | A classic, warm Halloween feel | Porch steps, front yard |
| Purple | Something supernatural and eerie | Graveyard set pieces |
| Green | Toxic or swamp-like | Cauldrons |
| Red | Threatening and dramatic | The entrance to a haunted house |
| Blue | Ghostly and cold | Pathways |
| White | Clean | Any scene |
The trick is to light the fog from the side or underneath. Light from above simply goes through it. Side lighting makes the density of the fog glow. A spotlight at ground level where the fog is rolling out is ideal. Battery LED spotlights are inexpensive and in the right Halloween colour they can be put anywhere without the need for extension cords across the lawn.
Troubleshooting
Fog is rising when it should be low
It is coming out of the pipe or container too warm. With a fog machine, make sure the water bottles are properly frozen, not just cold, and add more if the pipe is warm. For dry ice, use larger chunks and hotter water.
Little fog coming from the pipe despite the machine running
Your pipe may be longer than the machine can power. A 400-watt unit will do about six feet of pipe. If you need more length, put in a small fan to push it or run two machines.
Fog vanishes on exit
Usually wind. Even a slight breeze will blow it away before it has a chance to settle. Find a sheltered position or put up a windbreak with some straw bales or potted plants.
The machine stops and starts
Do not worry, that is how they are designed. Most will put out fog for half a minute or so then take a break to reheat. It is not broken. For a steady stream of fog one has to have a higher wattage unit or put two machines to work in sequence.
Running out of fog liquid:
This is common with the budget models whose 250ml reservoirs are only good for forty-five to sixty minutes at most. The fix is to get a machine with a larger tank or one that can be fitted with an external container and extension tubing. Or simply keep some extra fluid on hand to top up as the evening goes on.
Machine won’t start after being put away:
Chances are old fluid has clogged the heating element. Before you store the machine at the end of the season, flush it with a mixture of water and white vinegar and let it run until nothing but clean water is coming out.
Safety Notes
Fog machines:
Operate with the knowledge that the nozzle will be hot. Make sure children and pets are kept at a distance and orient the machine so the nozzle is pointed into the pipe and not where it can be reached.
Dry ice:
Thick gloves and tongs are a must when handling it. Do not put dry ice in anything sealed and keep it from children and pets. It is also not for unventilated indoor areas since it will displace the oxygen.
Outdoor use:
While the pipe and display can be outside, the machine itself should be sheltered from any rain or dew; most consumer units are made for indoors after all.
Extension cords:
Stick to outdoor-rated ones and do not have them running through wet grass or puddles.
Frequently Asked Questions
What is the best way to get low-lying fog without a machine?
Put some dry ice in a wide container of hot tap water. You will get a dense fog rolling across the ground. Change the water once it cools to keep it going.
How long does the frozen water bottle trick hold up?
About two to three hours in the pipe, give or take, depending on the temperature. On a warm night they will defrost sooner so have a spare set in the freezer.
How much fluid is required?
Figure on a standard pint per machine; that will see you through three or four hours with a 400-watt model. A gallon covers a full evening.
Is it alright to run a fog machine inside?
You can, but be aware the output may set off smoke detectors in an enclosed room. If you do, ventilate the area and disable the detectors. Leave the dry ice for outdoors.
Any tips for concealing the equipment?
A black pipe along the base of a fence or behind some gravestones is hard to see at night with the right Halloween lighting. Put some hay bales or other props around the machine itself.
Will the wind be a problem?
It will be. Even a slight breeze will scatter the fog before it settles. Find a spot that is sheltered or put up a windbreak with some straw bales or potted plants on the side the wind is coming from.
Which machine should I get for Halloween?
For a typical front yard a 400-watter will do. Go for one with an automatic switch so you don’t have to be standing there pressing a button. For longer runs or more ground to cover, a 700 to 1,000-watt model is better.
We made do with what we had the first year we did the graveyard display. Tasos stood back for five minutes and watched the fog roll over the yard in silence before remarking that we ought to have a bigger machine. He was right about that. But by the time someone came to the door the girls had put in about forty walks through it, so I considered it a success.
For more Halloween front yard and outdoor decorating ideas, our Halloween front porch decor post covers everything else that makes an outdoor Halloween display genuinely impressive. And if you are setting up a Halloween party alongside the outdoor display, the full party theme guide is here.

I’m Anastasios Moulios, co-founder of DIY Cozy Living. I enjoy finding creative, practical ways to make small spaces feel warm, stylish, and lived-in. I started this blog with Katerina to share real ideas that make a home feel a little more personal and a lot more comfortable.
