The Christmas Gnomes I Started Making and Cannot Seem to Stop

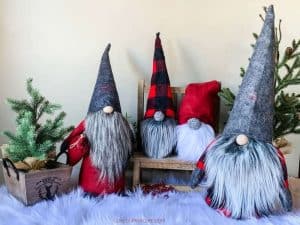
Gnomes arrived in our house uninvited.
That sounds more dramatic than it is. What happened was that Zina gave Maria a small felt one she’d found somewhere, and Maria put it on the bookshelf, and then the following year Marina decided she wanted one too, and somewhere in the process of making Marina’s gnome I started looking at all the different versions you could make and fell into a rabbit hole I didn’t entirely expect.
Gnomes, it turns out, are one of the best Christmas crafts to make. Not because they’re easy — some of them are, some of them aren’t — but because the basic formula is so forgiving. A hat, a nose, a beard. You can make that from almost anything. Sock, yarn, felt, pinecone, mop head, scrap wood. Every material gives you a completely different result and all of them look like they belong at Christmas.
Here are the ten I think are worth your time, with the ones most people ask about answered as honestly as I can.
The Basic Gnome Formula!
Every gnome on this list follows the same three-part structure. Once you understand it, you can adapt any of the ideas here to whatever materials you have.
| Part | What it does | Typical material |
|---|---|---|
| Hat | Tall, pointed. Usually 2/3 of the gnome’s total height | Felt, fabric, sock, cardboard cone |
| Nose | The personality. Slightly oversized reads best | Wooden bead, pompom, cork, button |
| Beard | Covers most of the body | Faux fur, yarn, cotton batting, mop head |
The body underneath can be anything with weight — a stuffed sock, a rolled piece of fabric, a pinecone, a wine bottle, a wood block. The beard hides it. Nobody needs to know.
The Sock Gnomes (Sew and No-Sew)
Christmas Gnomes from Socks — Sew and No-Sew Instructions
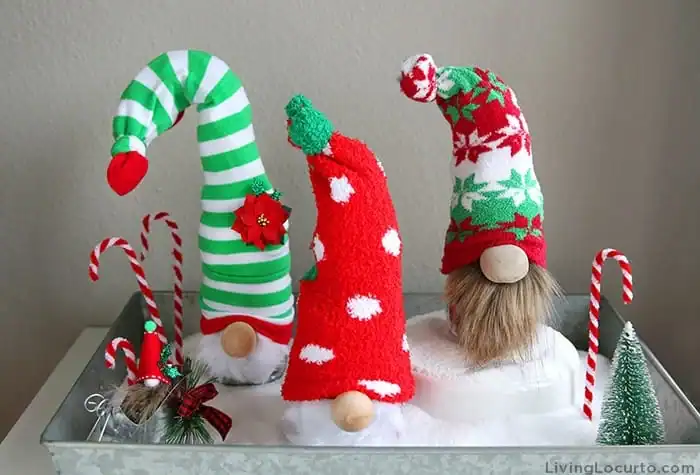
The starting point for almost everyone.
A sock is already roughly the right shape for a gnome body. You fill it, tie it off, attach a hat cut from another sock or a piece of felt, and glue on a nose and a beard. The no-sew version uses a hot glue gun throughout. The sewing version adds a stitched seam for a cleaner finish — worth doing if you have the time.
People always ask: Which socks work best?
Knee-high socks give you more length to work with. Thick, stretchy socks hold their shape better than thin ones. Patterned socks — stripes, Fair Isle, plaid — look more interesting than plain ones once the gnome is finished. Tasos cleaned out a drawer of mismatched socks last December and I turned eight of them into gnomes in a single afternoon.
People also ask: How do you stuff it?
Rice is traditional — it gives the base weight and the gnome stays upright. Dry sand works. Dried beans work. If it’s going to be a tree ornament rather than a standing figure, polyfill is lighter and easier to hang.
Variations:
- Standing gnome for a shelf or mantelpiece
- Hanging ornament version (lighter stuffing, loop at the top)
- Pair of gnomes in matching socks for a Mr and Mrs set
The Natural Material Gnomes
Pine Cone Christmas Gnome Ornaments
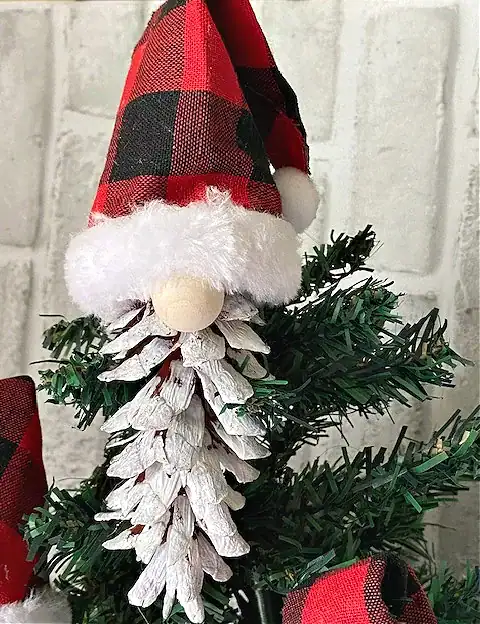
A pinecone as the body, a small cone hat made from felt or card, a pompom or wooden bead for the nose, a small tuft of faux fur or cotton for the beard.
People always ask: Do I need to prepare the pinecone first?
Yes. Bake them first at 120°C for about an hour to kill any insects (this matters more if you’ve collected them from outside) and to close the scales slightly, which gives you a cleaner surface to work on. Let them cool completely before you start gluing.
People also ask: How do you get the hat to stay on?
A point of hot glue at the base of the hat, pressed firmly into the top scales of the pinecone, holds well. For something more secure, push a toothpick through the base of the hat and into the pinecone before gluing.
These work as tree ornaments, tied with twine through the top of the hat. They also look very good grouped in a small bowl or basket — a little colony of gnomes living among the pinecones.
The Yarn and Pompom Gnomes
DIY Yarn Gnome Christmas Ornaments
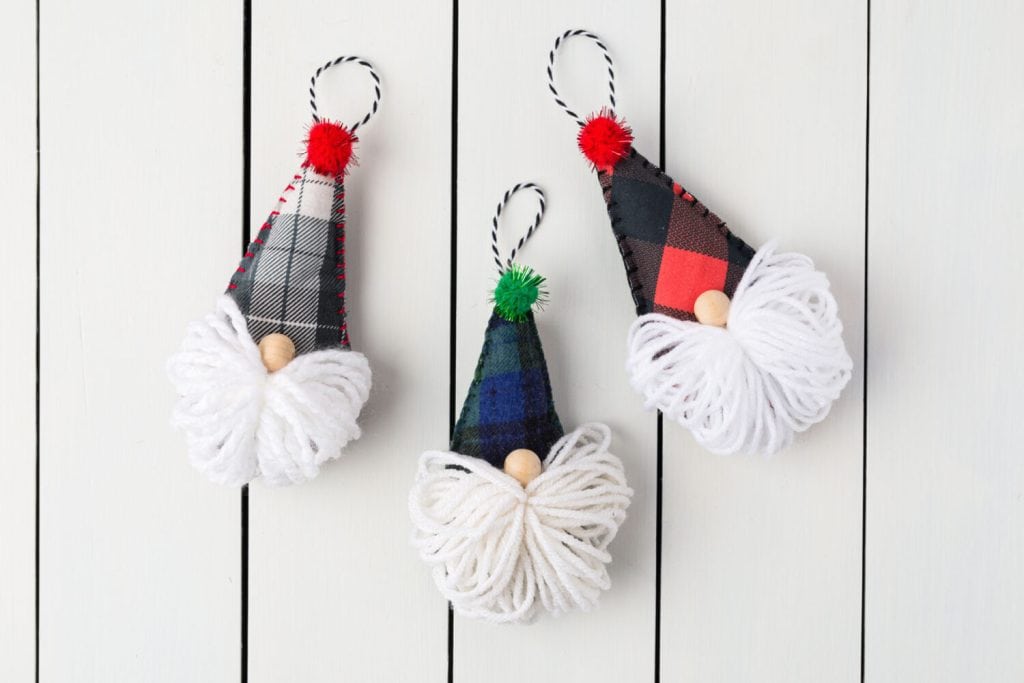
The hat is yarn wrapped around a cardboard cone. The beard is a yarn tassel. The nose is a small pompom. The body barely exists — it’s all hat and beard.
People always ask: What pattern is best for the yarn?
The version that photographs best uses two colours alternating to create a buffalo check or stripe effect on the hat. It looks more difficult than it is — you just change colours every few wraps.
The colour combinations that work:
| Hat colour | Beard colour | Nose colour | Overall feel |
|---|---|---|---|
| Red + white | White | Red | Classic Christmas |
| Green + cream | Cream | Gold | Traditional |
| Burgundy + blush | White | Blush | Soft, modern |
| Tartan/plaid (fabric) | White | Berry red | Scottish/rustic |
People also ask: How long does it take?
About 30–45 minutes per gnome once you’ve made your first one and understand the process. In multiples they go faster.
Little Gnome Pom Pom Ornaments
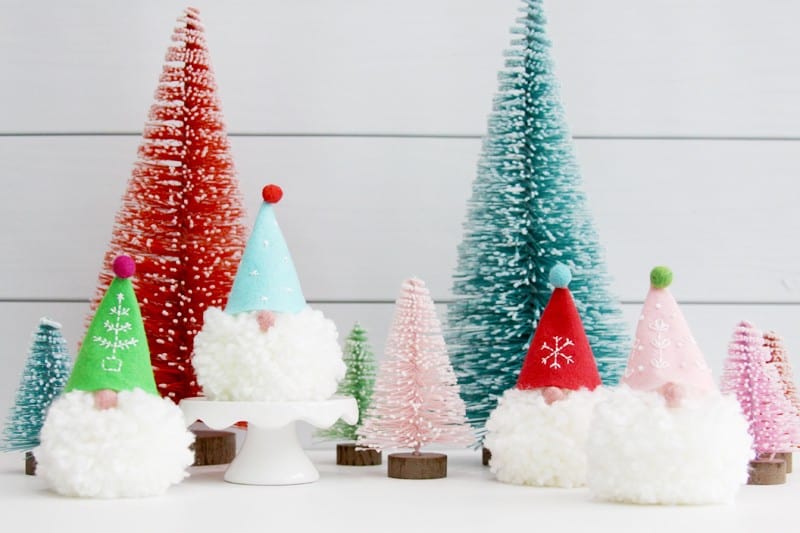
The simplest version on this list.
Three pompoms — one large for the body, one medium for the head, one small for the hat tip — stacked and glued. Faux fur trim for the beard. A tiny pompom nose.
People always ask: Is this actually stable?
Hot glue holds it well enough for a tree ornament. If you want something that will last for years without the pompoms separating, run a thin wooden skewer through the stack before gluing, and trim it flush at the top and bottom.
These are the ones to make with children. There is no technique involved. You glue things together and you have a gnome.
The Character Gnomes
How to Make an Adorable and Easy DIY Grinch Gnome
The basic sock or fabric gnome construction, but the faux fur beard is painted green. Santa hat in red, oversized, slightly askew. Grumpy expression optional.
People always ask: Does painting faux fur actually work?
Yes, with the right paint. Fabric paint works best — it stays flexible when dry. Acrylic paint works but can stiffen the fur if you apply too much. Apply it in thin layers, working against the grain of the fur so the colour reaches the base.
🔥 Would you like to save this?
People also ask: What shade of green?
The original Grinch is a specific yellow-green, not a forest green. Mixing yellow into bright green gets you there. The painting doesn’t need to be perfect — a slightly uneven green reads more natural against the fur texture.
Maria made one of these at twelve and was very proud of the expression she painted on the nose pompom. She gave it to Tasos. He kept it.
The Repurposed and Upcycled Gnomes
DIY Mop Gnome Ornament
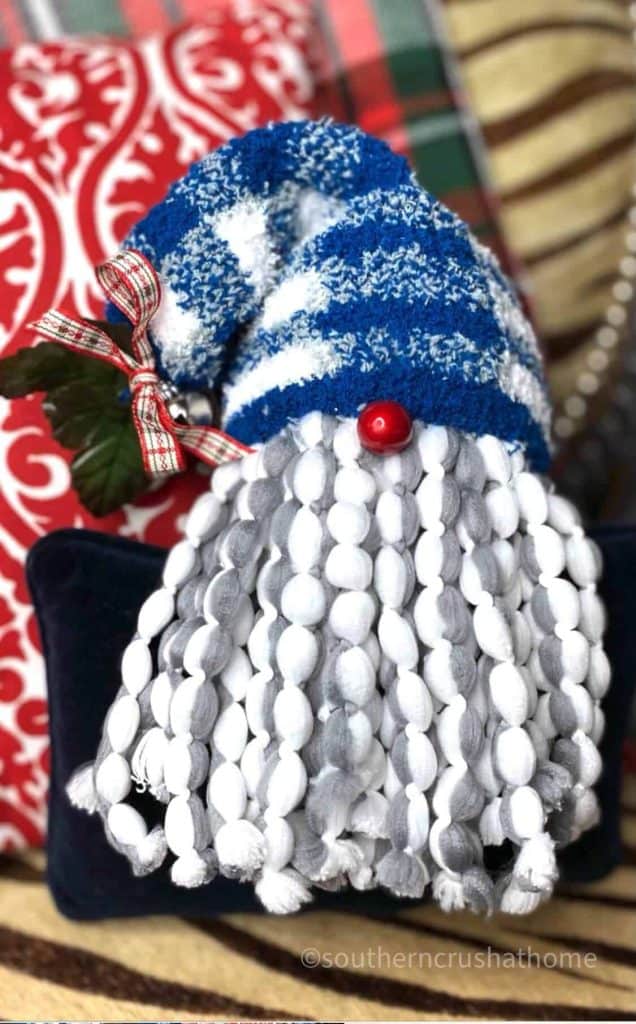
A dollar store or thrift shop mop head, disassembled into its individual yarn strands, becomes the beard and body of a gnome. Hat from a sock or fabric. Nose from a pompom or bead.
People always ask: Which type of mop?
Cotton string mop heads have the right texture — soft and slightly frayed. Synthetic mop heads work less well because the strands are too uniform and bright. If you can’t find a cotton mop head, a skein of thick craft yarn unravelled gives you the same effect.
People also ask: Isn’t this unhygienic?
Use an unused mop head, obviously. But also: you’re making it into a Christmas decoration, not a salad.
This is one of the more distinctive gnomes on the list because the mop beard has a specific texture and weight that you can’t really replicate with other materials. It looks genuinely different.
The Fabric Gnomes
Buffalo Check Christmas Gnome
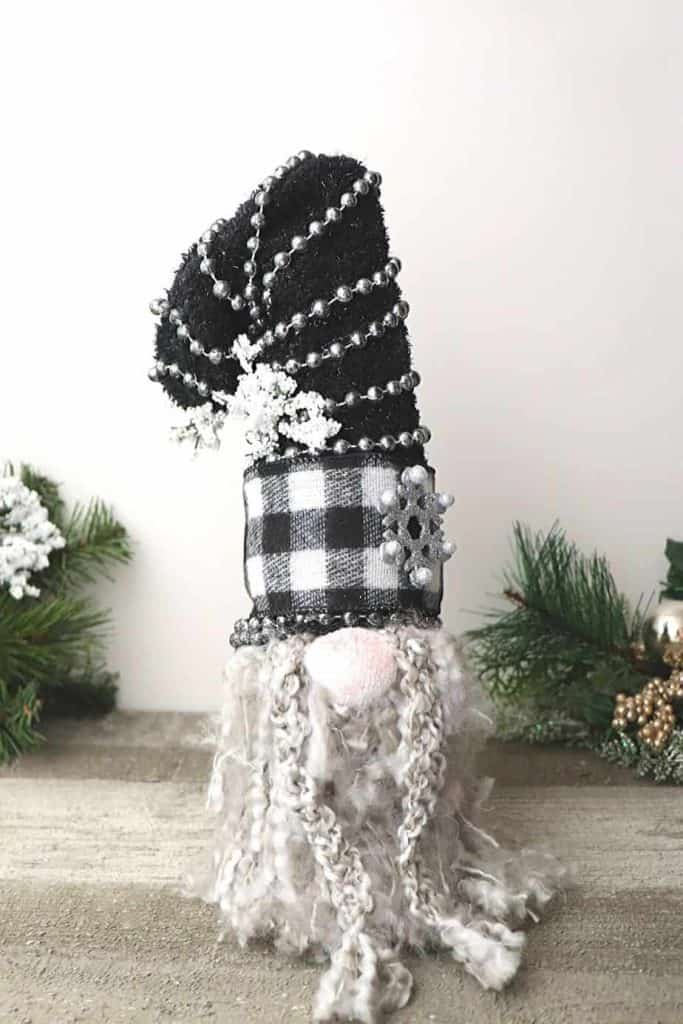
Buffalo check fabric for the hat — the oversized, extra-long kind that droops to one side. Faux fur beard. Pompom nose. Body stuffed with rice or polyfill.
People always ask: Where do you get buffalo check fabric?
Fabric shops carry it by the metre. Dollar stores often have it in December. Old buffalo check shirts, pyjama bottoms, or cushion covers from charity shops can be cut up and used, which also keeps the cost down.
People also ask: How long does the hat need to be?
The proportions that look best: hat length should be at least twice the body height. Gnomes with short hats look like elves. Gnomes with very long hats that droop at the tip look like the real thing.
Felt Christmas Gnome with Free Pattern
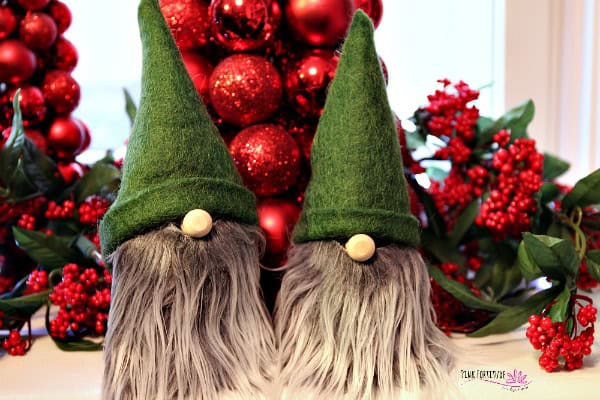
Felt is one of the easiest fabrics to work with because it doesn’t fray. You cut, you glue or stitch, and the edges stay clean.
People always ask: Is sewing required?
Most patterns work with either stitching or fabric glue. Stitching gives you cleaner seams and a gnome that will last longer. Fabric glue is faster and doesn’t require any equipment beyond patience while it dries.
People also ask: What thickness of felt?
Craft felt from a dollar store is thin and flimsy. Wool felt or a heavier felt holds its shape much better and looks significantly more polished. It costs more per sheet but you use very little of it.
The Bigger Projects
Christmas Gnome Wreath DIY
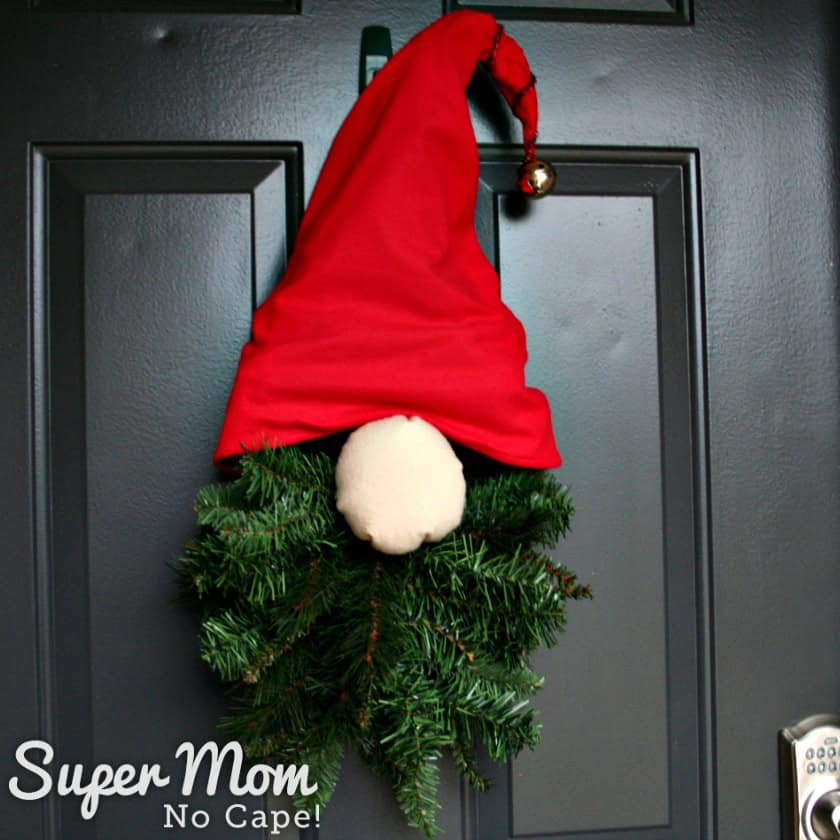
Instead of a traditional pine wreath on the front door, a wreath form decorated with one or more gnomes nestled into greenery, berries, and ribbon.
People always ask: How many gnomes?
One large central gnome, framed by greenery and a ribbon bow, looks intentional and balanced. Three smaller gnomes arranged at points around the wreath (top, lower left, lower right) creates a family-feel display. More than three starts to look crowded unless the wreath is very large.
People also ask: Do the gnomes need to be secured permanently?
Yes. Gnomes hung on a front door are exposed to wind, rain, and anyone who bumps the door too hard. Wire them to the wreath form in addition to gluing, and use weatherproof materials — a plastic-based faux fur rather than cotton, a hat made from outdoor fabric. If the whole thing goes inside on a cabinet door or over the fireplace, standard craft materials are fine.
What makes it look finished:
- Matching ribbon colour between the gnome hat and the wreath bow
- Greenery that echoes the hat colour (dark green eucalyptus with a forest green hat, silvery olive with a grey hat)
- Nose colour that picks up from the berries or ribbon
Gnome Bottle Toppers
Small gnomes constructed to sit on top of a wine bottle as a gift decoration. Hat deep enough to slide over the bottle neck, body wrapping around the upper shoulder of the bottle, beard at the front.
People always ask: What keeps it on the bottle?
The hat is made slightly smaller than the bottle neck so it grips by friction. A small elastic band inside the hat base holds it more securely if it seems loose.
People also ask: Can this be reused?
Yes — the bottle topper can be removed from the bottle and kept as a standing gnome decoration or tree ornament afterwards. Tell the person you’re giving it to. Otherwise they’ll feel obligated to keep the bottle for the decoration’s sake.
Marina decided these were the gifts this year. She has assigned me specific tasks. I am making the hats.
Making Multiple Gnomes at Once
The most efficient way to make a batch is to work in stages rather than completing one gnome at a time.
- Cut all the hats first
- Stuff all the bodies at once
- Glue all the noses
- Attach all the beards in one session
- Final details last
Working this way, ten gnomes takes about the same time as making four individually.
The size is also worth standardising if you’re making a set. Pick one height and stick to it — a group of gnomes in graduating sizes looks intentional, but a random collection of different heights just looks mismatched.
One Last Thing
Gnomes don’t have to be perfect. That’s the whole point of them.
The slightly crooked hat. The beard that’s a bit thicker on one side. The nose that landed a fraction off-centre. All of it reads as charm rather than error, which is not something you can say about many Christmas crafts.
Make them imperfect. Put them on the shelf. They’ll be there next December.
Save this so you know where to find the tutorials when you’re ready to start.

I’m Katerina Lithopoulou, co-creator of DIY Cozy Living. I’ve always loved the little things that make a space feel special. With a background in language and a passion for photography and cozy design, I enjoy turning everyday inspiration into simple ideas people can actually use.
My motto: “Cozy isn’t a trend — it’s a feeling.”
