
20+ Simple 1-Hour Crafts for Adults That Look Way Better Than Expected
Sometimes you need a creative escape — but you don’t have an entire afternoon to dedicate.
That’s where 1-hour crafts come in: short enough to fit into a busy schedule, long enough to feel satisfying and productive.
These projects are designed for adults of all skill levels — men and women alike — and can be completed with minimal setup. The best part? They’re fun, rewarding, and let you experiment without pressure.
Why 1-Hour Crafts Work for Adults
“Creativity doesn’t wait for that perfect moment. It fashions its own perfect moments out of ordinary ones.” – Bruce Garrabrandt
Adults often avoid crafts because they think projects take too long or require special skills. One-hour crafts remove that barrier. Benefits include:
- Immediate satisfaction – You finish a project and feel accomplished.
- Stress relief – Focusing on making rather than multitasking is meditative.
- Skill-building – Each small project teaches techniques you can expand on later.
- Flexibility – These crafts can be decorative, practical, or purely playful.
Preparing Your Space and Materials
Before starting, gather everything you need to avoid wasting precious minutes searching for items. Here’s a quick checklist:
- Workspace – A table or desk with enough room for tools and materials. Protect surfaces with newspaper or a silicone mat.
- Basic tools – Glue, scissors, paintbrushes, markers, and any small crafting knives you might need.
- Materials – Collect your crafting materials in one spot. This makes switching between projects seamless.
- Optional extras – Rulers, stencils, tweezers for small items, and aprons to protect clothing.
Quick Tip: Use containers or trays to hold small pieces so nothing gets lost during your 1-hour window.
How to Approach 1-Hour Crafts
- Set a timer – 60 minutes keeps you focused and prevents overthinking.
- Start with a story or purpose – Even small projects feel more meaningful if you know why you’re making them.
- Embrace imperfection – Small quirks often make your craft unique and visually interesting.
- Layer and plan – Think of your craft in stages: base, structure, detail, finishing touches.
20+ Creative 1-Hour Craft Ideas for Adults
1. Painted Plant Pots
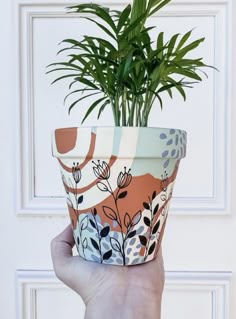
Turn plain terracotta or ceramic pots into mini works of art that brighten your space.
Materials: Terracotta pot, acrylic paints, brushes, painter’s tape (optional), sealer, small plant or succulent.
Steps:
- Clean the pot to remove dust or debris.
- Apply a base coat in your chosen color and let dry 5–10 minutes.
- Add patterns, shapes, or quotes. Use painter’s tape for clean geometric designs.
- Seal with clear acrylic spray.
- Plant a succulent, herb, or small flower.
Tips: Use complementary colors if making multiple pots. Imperfections make them feel handmade and charming.
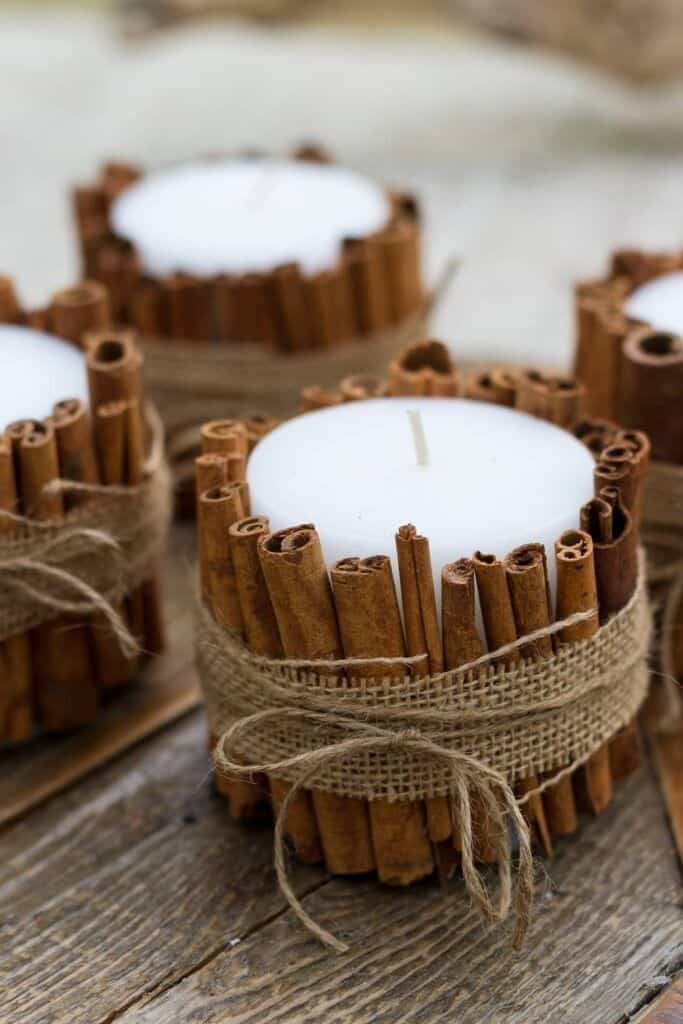
2. Handmade Soy Candles
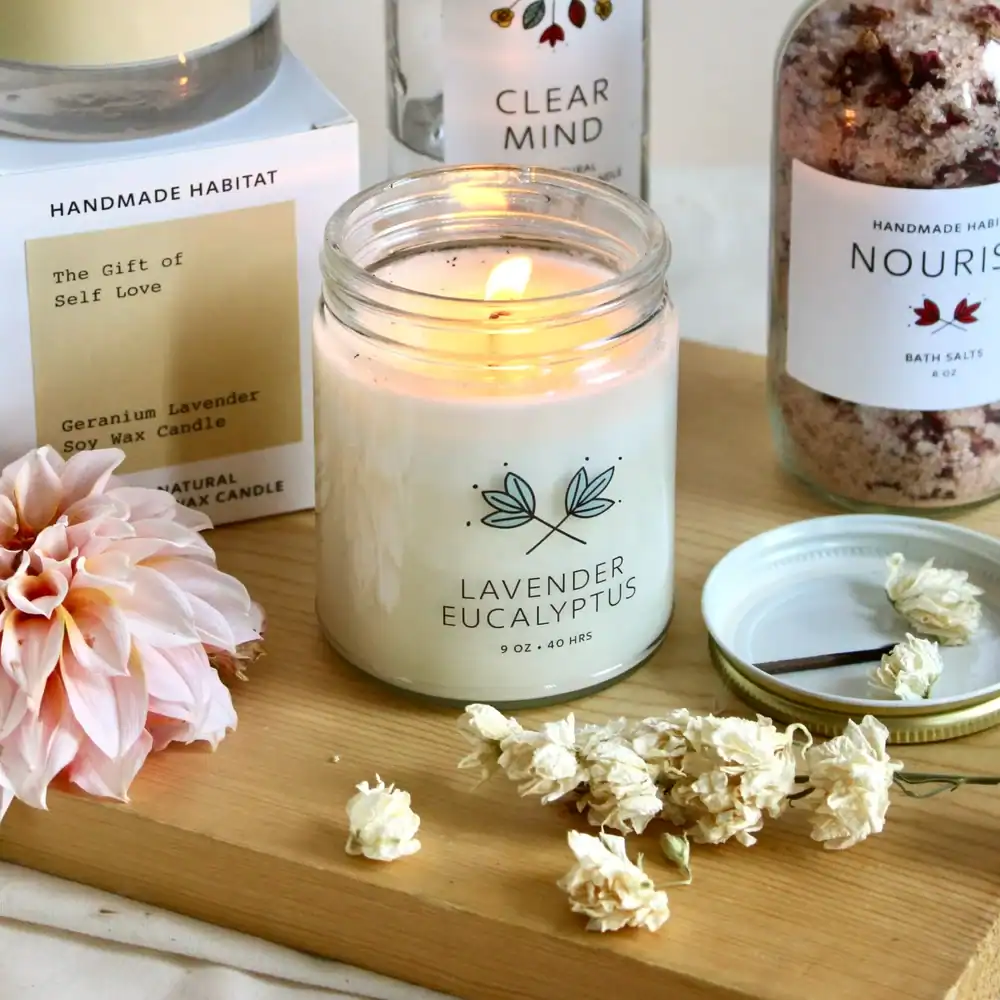
Candles are relaxing, practical, and easy to personalize.
Materials: Soy wax, candle wick, small glass jar, essential oils, thermometer, stirring stick.
Steps:
- Melt wax in a double boiler or microwave in short intervals.
- Place wick in the center of your jar.
- Add a few drops of essential oil to the melted wax.
- Pour wax into the jar, holding the wick in place.
- Let it cool completely and trim the wick.
Tips: Add dried flowers or cinnamon sticks for extra charm. Use a timer: working quickly keeps the wax smooth.
You can also read my full step by step guide on how to create candles like these at home, here!
3. Personalized Coasters
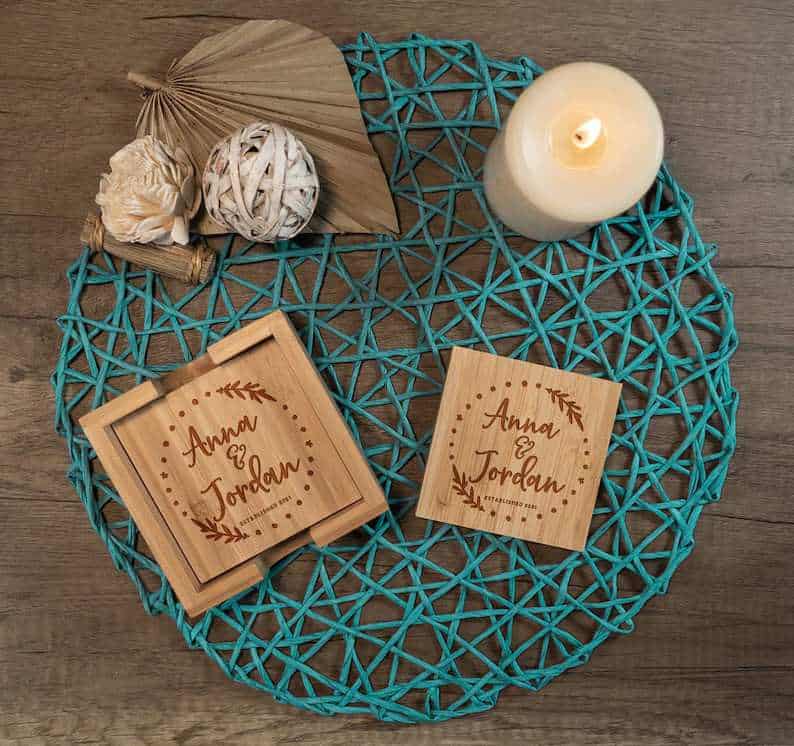
Stylish coasters protect surfaces while doubling as home décor.
Materials: Cork coasters, acrylic paint or paint markers, sealer, stencil (optional).
Steps:
- Clean cork surfaces.
- Apply a base color if desired.
- Add designs, patterns, or initials using paint or markers.
- Let dry, then seal with a clear coat.
Tips: Stick to two main colors to avoid a busy look. Perfect as a quick gift.
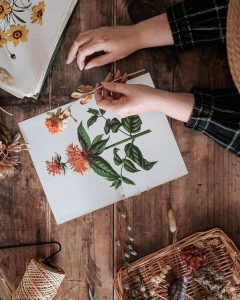
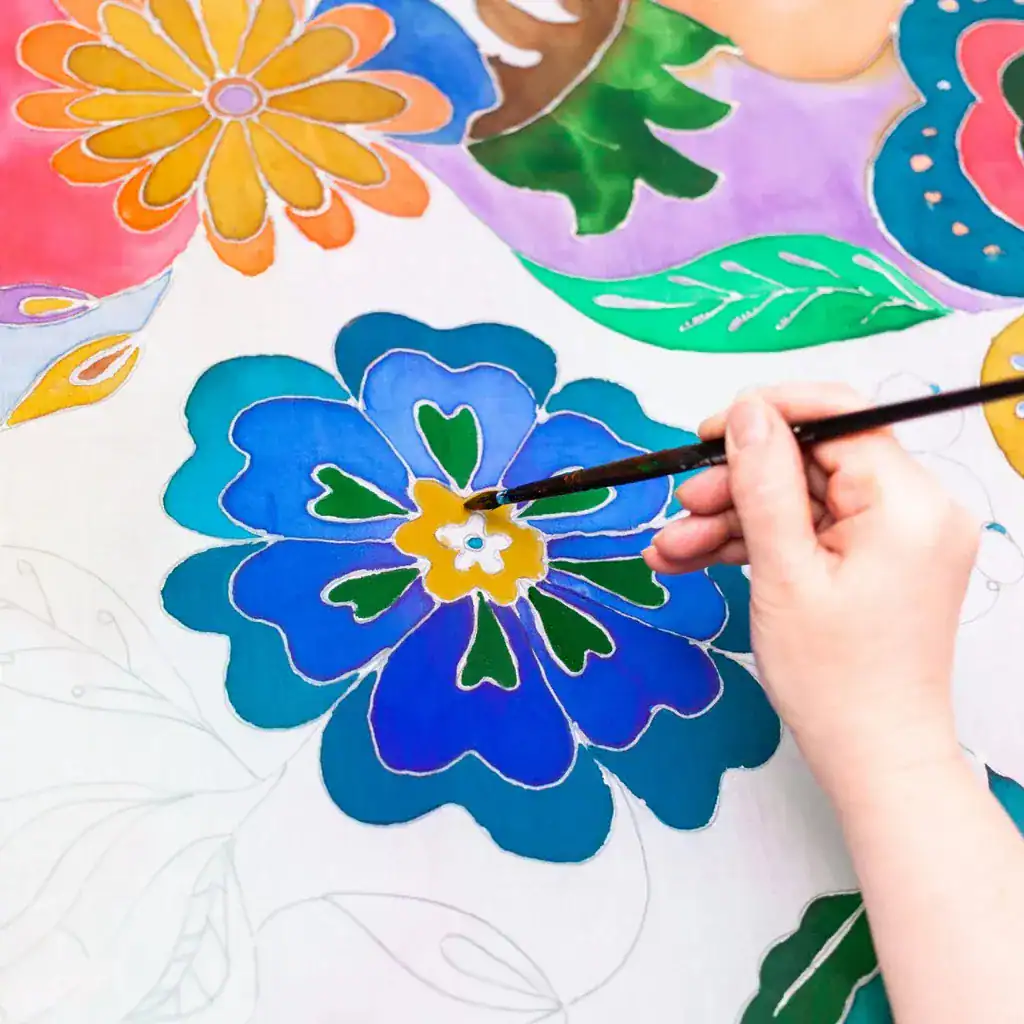
4. DIY Wall Art on Canvas
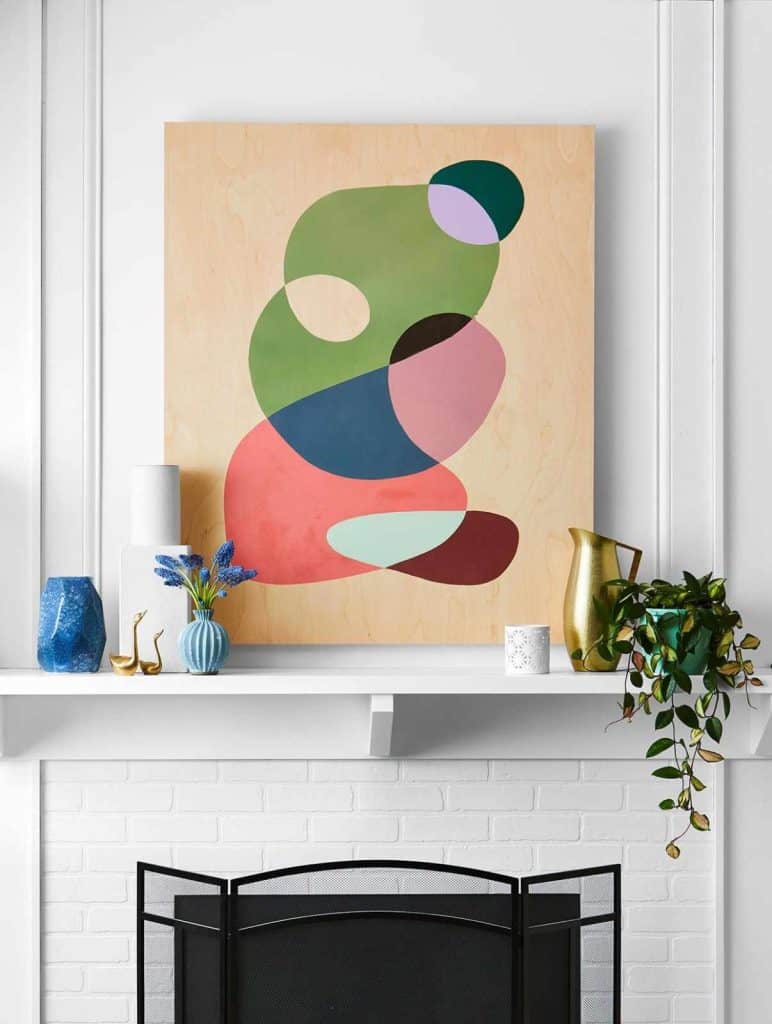
Even beginners can create professional-looking art in under an hour.
Materials: Small canvas, acrylic paints, brushes, painter’s tape, optional stencils.
Steps:
- Plan your design or color palette.
- Paint a background layer and let it dry briefly.
- Add shapes, lines, or patterns using stencils or tape for clean edges.
- Add finishing touches with small brushes or metallic paints.
Tips: Abstract art is forgiving — don’t stress about perfect lines. Try a limited color palette for cohesive results.
5. Macramé Keychains
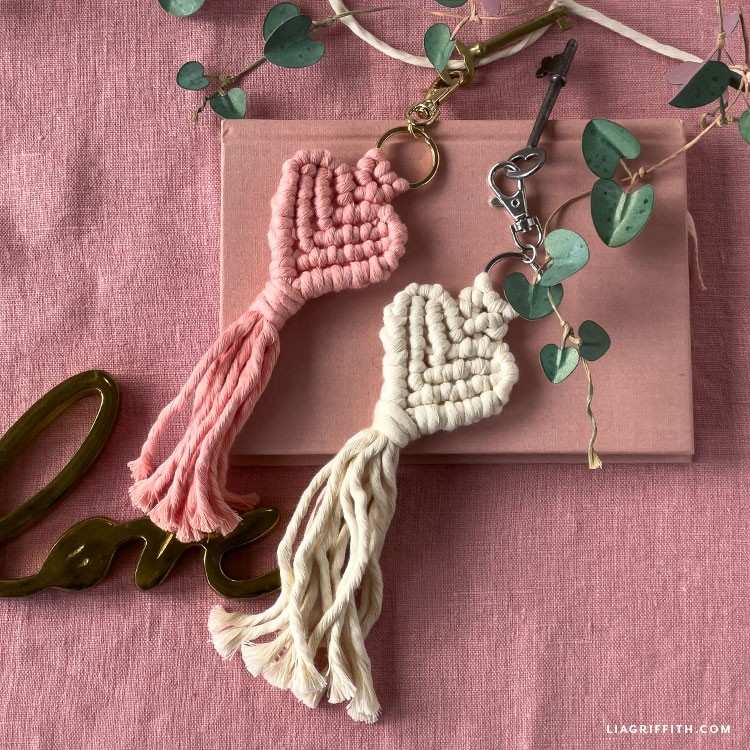
Boho-style keychains are quick and teach basic knotting techniques.
Materials: Macramé cord, key ring, scissors, optional beads.
Steps:
- Cut 3–4 lengths of cord, about 12 inches each.
- Attach cords to the key ring using a lark’s head knot.
- Practice square knots or spiral knots to form the body.
- Add beads for decoration, then trim ends neatly.
Tips: Keep it tight but not too stiff. These make great gifts or decorative accents for backpacks.
6. Decorative Mason Jars
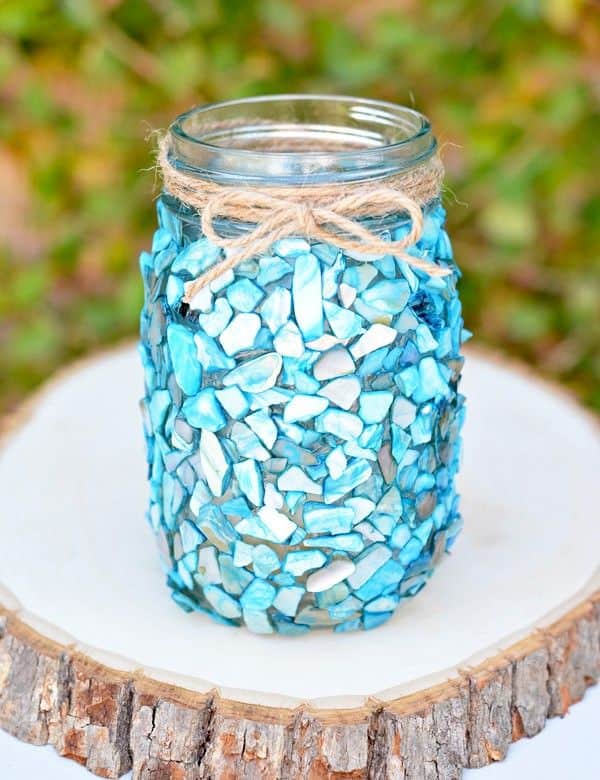
Mason jars can be transformed into vases, candle holders, or storage containers.
Materials: Mason jars, acrylic paint, ribbon or twine, optional sand or shells.
Steps:
- Clean jars and remove labels.
- Paint the outside in your chosen design (ombre, solid color, or patterns).
- Wrap the rim with twine or ribbon.
- Fill with sand, pebbles, or use as a vase for flowers.
Tips: Try layering sand or colored salt for a visually striking effect.
7. Handmade Greeting Cards
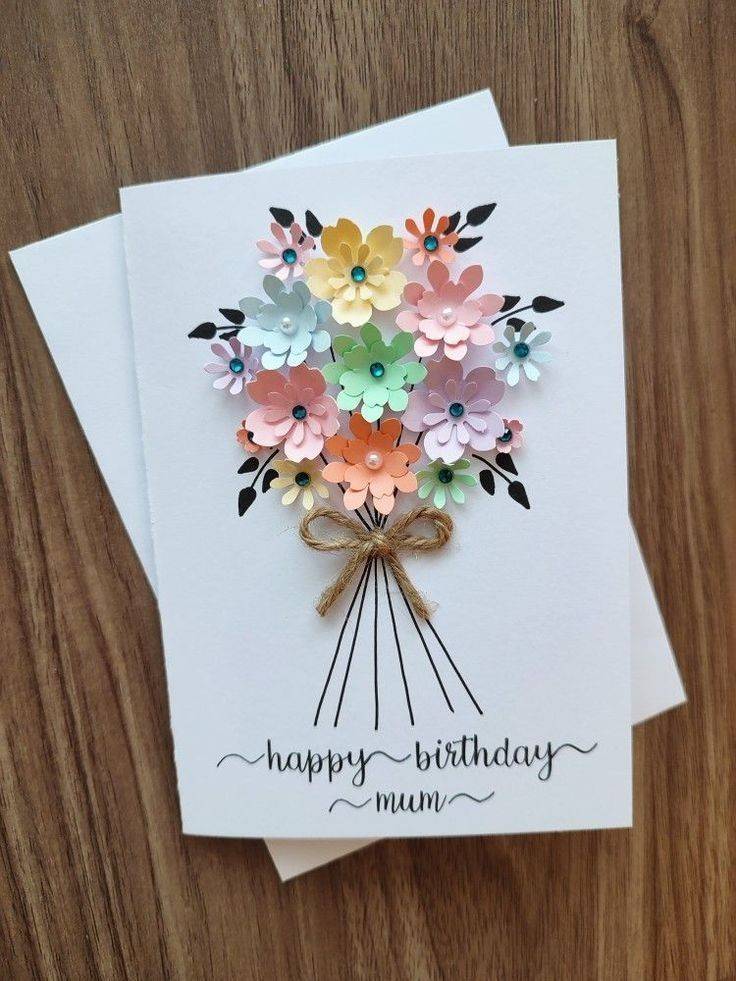
Custom cards are thoughtful, quick, and personal.
Materials: Cardstock, markers, stamps, stickers, scissors, glue.
Steps:
- Fold cardstock to create a card base.
- Sketch or stamp a design on the front.
- Add lettering or embellishments using markers or stickers.
- Write a personal message inside.
Tips: Use metallic pens for highlights. Cards can be themed for birthdays, holidays, or just because.
8. Beaded Bracelets or Necklaces
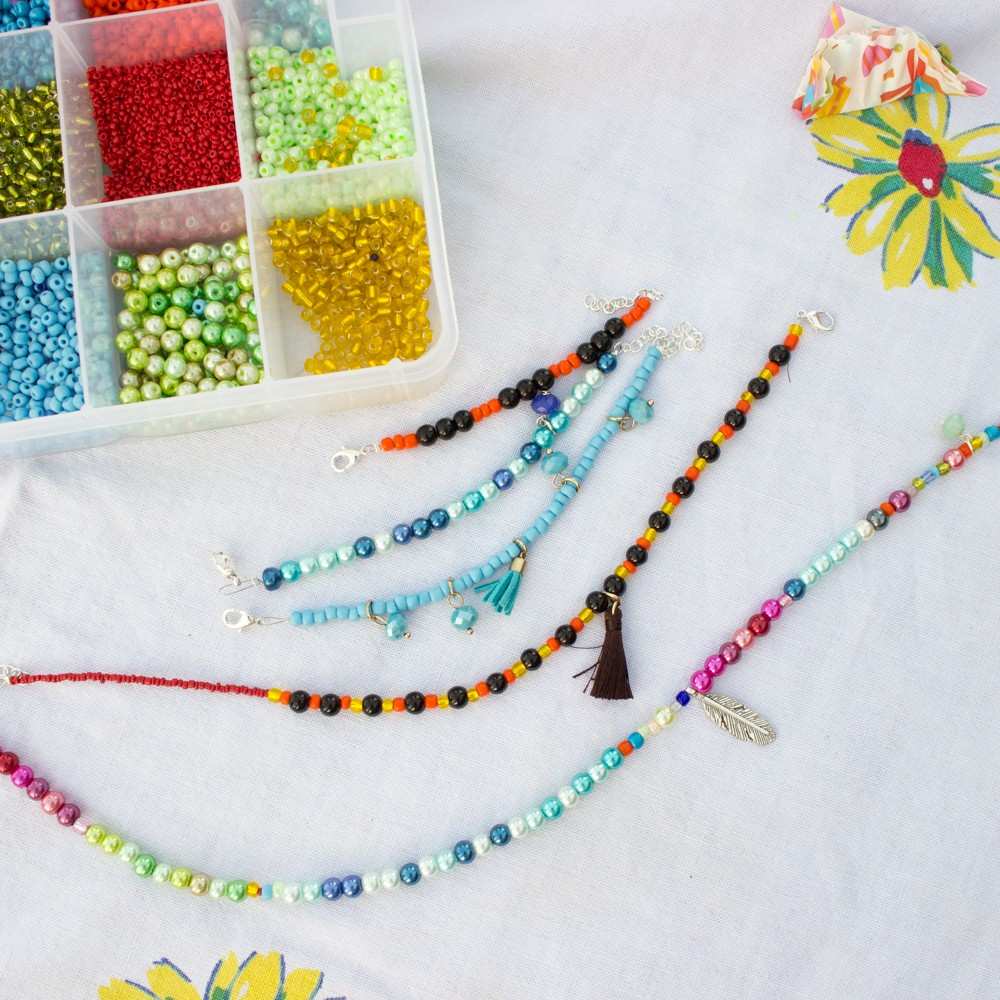
Simple jewelry is satisfying and customizable.
Materials: Beads, elastic cord, scissors, optional charms.
Steps:
- Cut elastic cord to desired length.
- String beads in a pattern or randomly.
- Tie ends securely with a square knot.
- Add charms if desired.
Tips: Mix bead textures (wood, glass, metal) for visual interest. Elastic cord makes it easy for beginners.
9. Upcycled T-Shirt Tote Bags
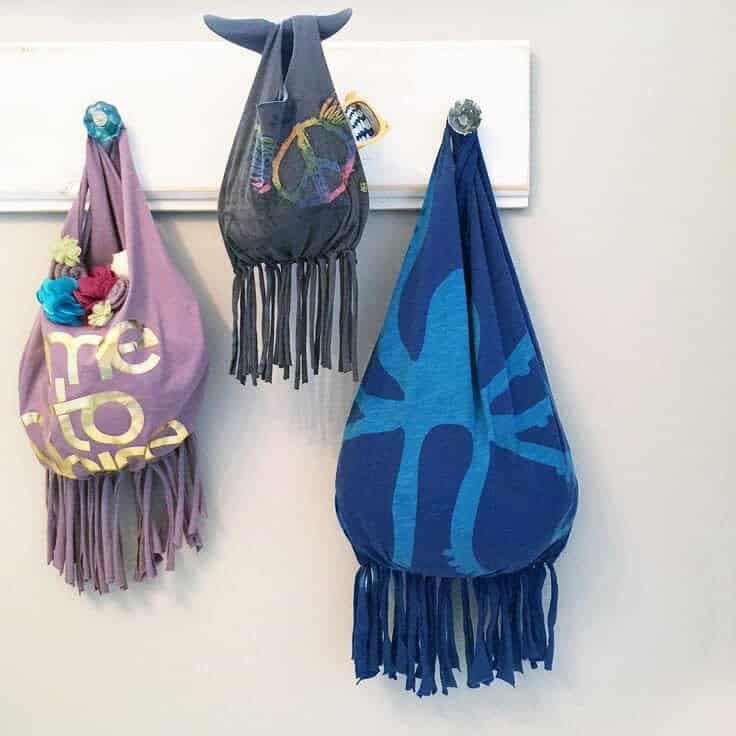
Give old t-shirts a second life.
Materials: Old t-shirt, scissors, optional fabric glue.
Steps:
- Cut off sleeves and neckline.
- Tie the bottom edges together to create the base.
- Reinforce with fabric glue if desired.
- Optional: decorate with paint or patches.
Tips: No sewing is required. Great for casual errands or gifts.
10. Mini Zen Gardens
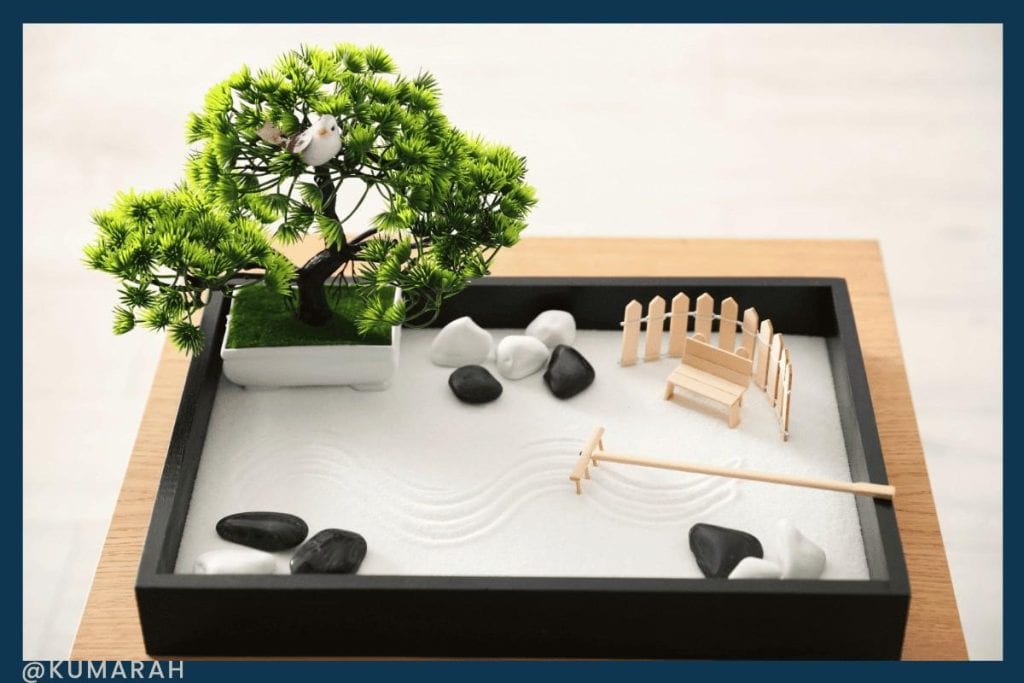
Create a calming desktop landscape in under an hour.
Materials: Small container, sand, pebbles, miniature rake, optional figurines.
Steps:
- Fill container with sand as the base.
- Arrange pebbles or small plants to create focal points.
- Add miniature figurines if desired.
- Use a small rake or fork to create patterns in the sand.
Tips: Change designs daily for relaxation. Keep it simple — negative space is calming.
11. Resin Jewelry or Paperweights
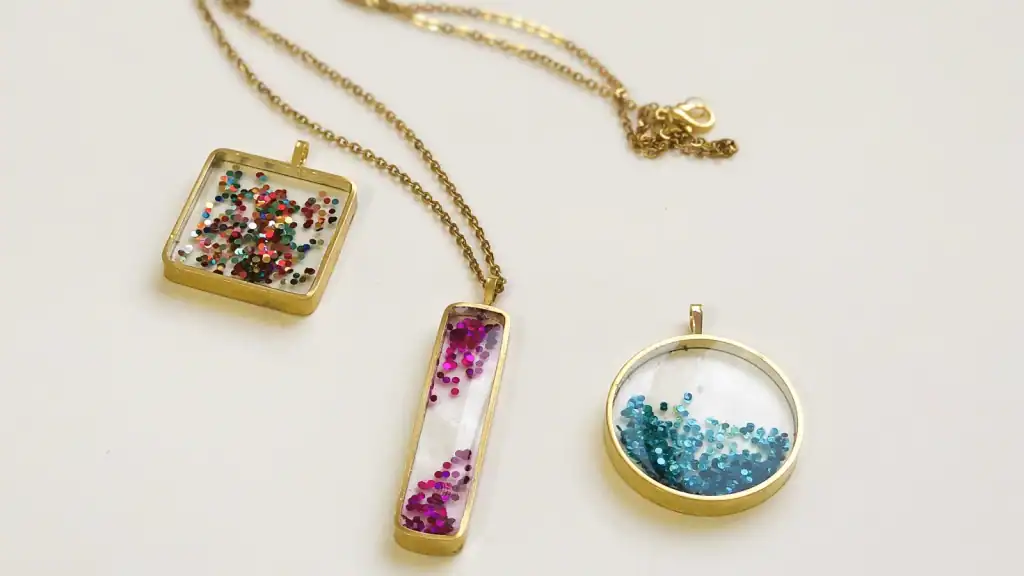
Create elegant, professional-looking resin pieces quickly.
Materials: Epoxy resin, silicone mold, disposable cup and stir stick, gloves, optional glitter, pigments, or pressed flowers.
Steps:
- Mix resin and hardener according to package instructions.
- Pour a small amount into your mold to create a base layer.
- Add decorative elements like glitter, pigment drops, or small pressed flowers.
- Fill the rest of the mold with resin and let it cure for 30–60 minutes (depending on resin type).
- Remove from mold and sand any rough edges if needed.
Tips: Wear gloves and work on a protected surface. Use toothpicks to position tiny elements precisely. Resin jewelry makes beautiful gifts or desk accessories.
12. Hand-Painted Mugs
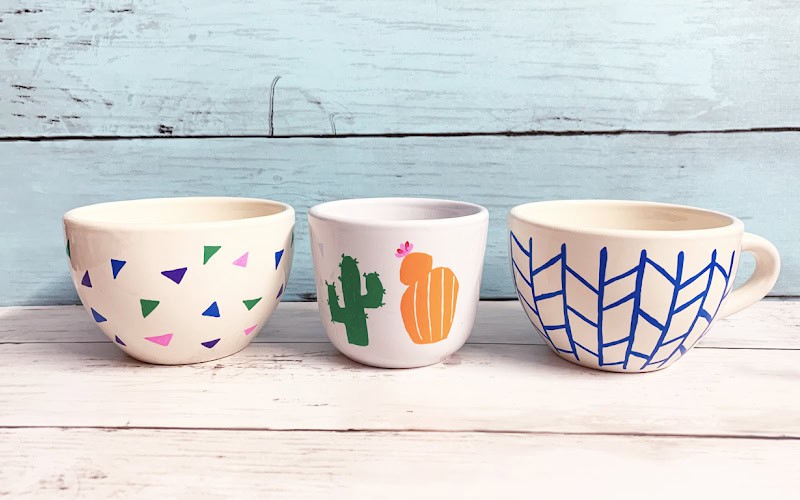
Custom mugs are practical, fun, and simple to make.
Materials: Plain ceramic mug, porcelain paint or markers, oven (optional), stencils (optional).
Steps:
- Clean the mug with soap and water, drying thoroughly.
- Sketch your design lightly with pencil if desired.
- Paint directly on the mug or use stencils for patterns.
- Let dry, then bake according to paint instructions to set.
Tips: Keep designs simple — small motifs or initials work best. Avoid painting the inside to keep it safe for drinking.
13. Clay Desk Accessories
Air-dry clay is fast, forgiving, and versatile.
Materials: Air-dry clay, rolling pin, small cutting tools, paint (optional), sealer (optional).
Steps:
- Knead clay to soften it.
- Shape into small bowls, pen holders, or coasters.
- Use tools or stamps to add texture or patterns.
- Let dry according to clay instructions (usually 30–60 minutes for small items).
- Optional: paint or seal for longevity.
Tips: Keep pieces small to ensure quick drying. Imperfect edges add charm.
14. Photo Collage Frames
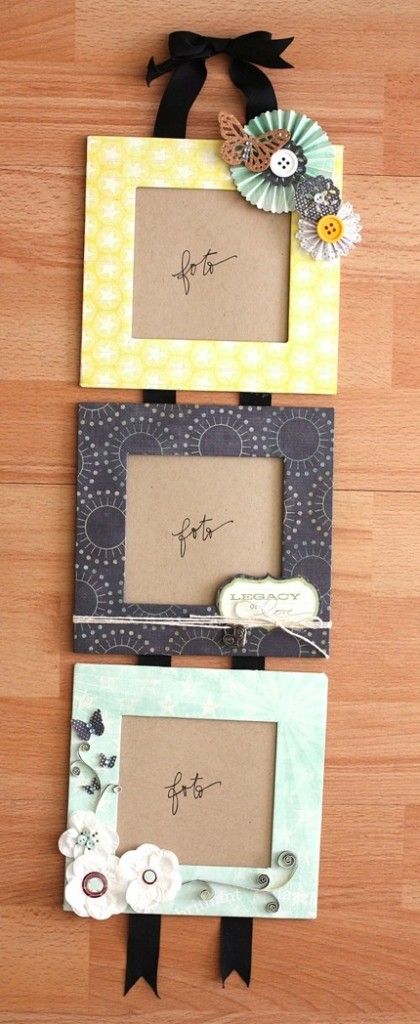
Turn favorite memories into a creative display.
Materials: Picture frame, photos, scissors, glue, markers, optional embellishments like stickers or washi tape.
Steps:
- Print or select small photos.
- Arrange them on a mat or directly on the frame backing.
- Glue down securely.
- Add embellishments or decorative borders if desired.
- Reassemble frame and display.
Tips: Layer photos for depth. Mix sizes for visual interest. Perfect for gifts or office décor.
15. Embroidery Hoop Art
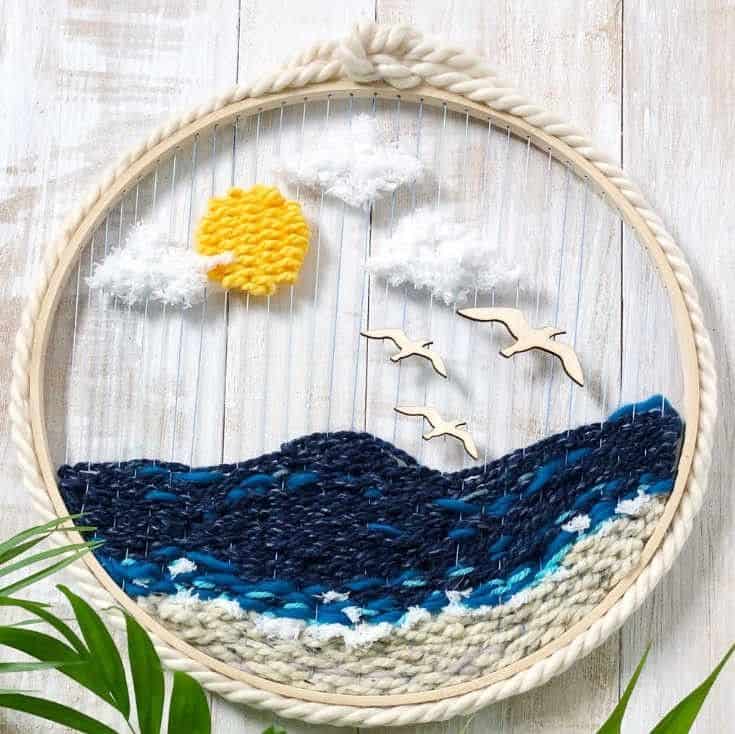
Quick embroidery is calming and decorative.
Materials: Small fabric square, embroidery hoop, needle, embroidery floss, scissors.
Steps:
- Stretch fabric in the hoop.
- Choose a simple pattern (flower, geometric shape, word).
- Use basic stitches like backstitch or running stitch to complete the design.
- Trim excess fabric and display in the hoop.
Tips: Simple designs are best for 1-hour projects. Add small beads for extra flair.
16. DIY Bookmarks
Perfect for book lovers and easy to customize.
Materials: Cardstock, markers, ribbons, stamps, stickers, glue.
Steps:
- Cut cardstock to bookmark size (approx. 2” x 6”).
- Decorate with drawings, lettering, or stickers.
- Punch a hole at the top and add a ribbon or tassel.
- Optional: laminate for durability.
Tips: Use bold colors or metallic pens to make them pop. Great for gifts or personal use.
17. Fabric Scrap Key Fobs
A quick way to use leftover fabric while making functional crafts.
Materials: Fabric scraps, key rings, glue or sewing supplies, scissors.
Steps:
- Cut fabric into a strip (approx. 1” x 6”).
- Fold over key ring and secure by stitching or gluing.
- Fold and sew or glue ends neatly.
- Optional: add decorative beads or charms.
Tips: Use contrasting fabric colors for visual interest. Quick, practical, and makes a great small gift.
18. Painted Rocks
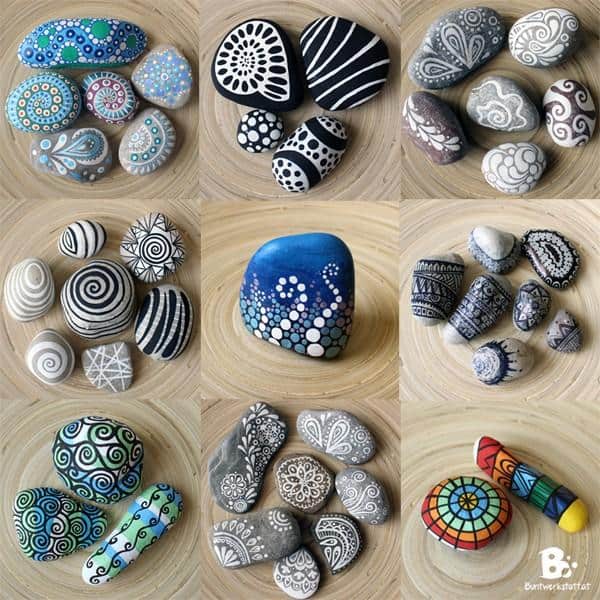
Decorative rocks add whimsy to homes or gardens.
Materials: Smooth rocks, acrylic paint, brushes, sealer.
Steps:
- Wash and dry rocks.
- Paint designs, patterns, or inspirational quotes.
- Let dry and seal for outdoor durability.
Tips: Use a limited color palette for cohesion. Great for paperweights, garden markers, or gifts.
19. Simple Origami Projects
Minimal materials, maximal creativity.
Materials: Origami paper or any square paper, optional markers for decoration.
Steps:
- Follow step-by-step folding instructions for animals, flowers, or geometric shapes.
- Flatten creases carefully to maintain shape.
- Optional: decorate folded pieces with pens or markers.
Tips: Start with simple designs; intricate shapes may take longer than one hour. Mini origami can be used in jars, frames, or as gifts.
20. Cork Board Magnets
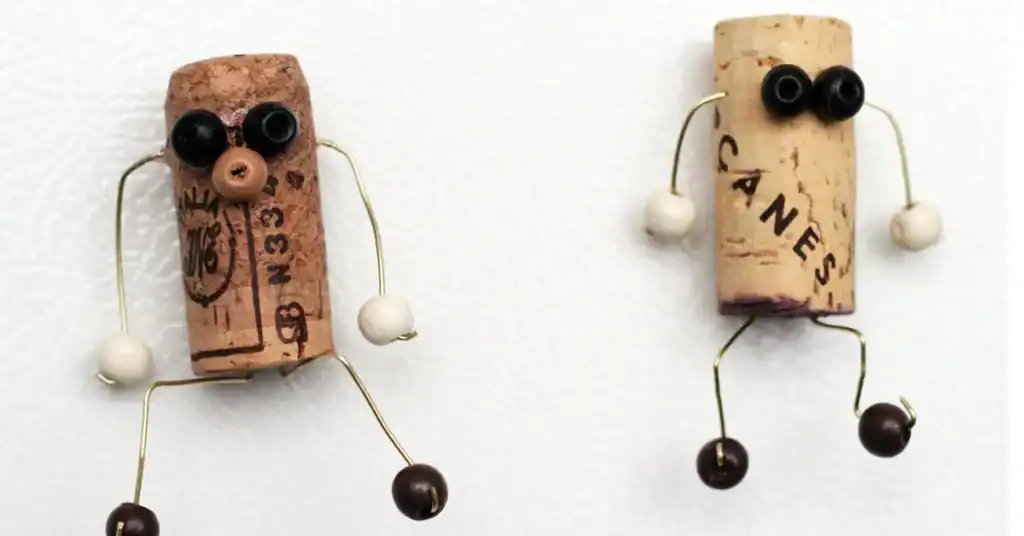
Combine function and creativity for your fridge or office.
Materials: Cork rounds, small magnets, glue, paint, markers, decorative elements.
Steps:
- Cut cork into small rounds if not pre-cut.
- Decorate with paint, markers, or small embellishments.
- Glue magnets to the back.
- Let dry and use immediately.
Tips: Fun for displaying photos or notes. Mix textures like glitter, metallic paint, or pressed flowers.
21. Decorative String Art
Visual and modern, yet simple for beginners.
Materials: Small wooden board, nails, hammer, colored string, optional pencil for sketching a shape.
Steps:
- Sketch a simple outline on the board.
- Hammer small nails along the outline.
- Wrap string around nails to form patterns or fill shapes.
- Secure string ends with knots.
Tips: Start with simple shapes like hearts, stars, or letters. Less is more — don’t overfill.
22. Quick Leather Crafts
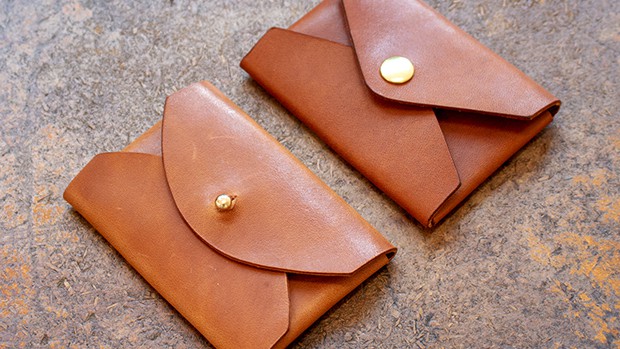
Leather is surprisingly approachable for small crafts.
Materials: Small leather scraps, scissors, hole punch, cord or key ring, optional stamps.
Steps:
- Cut leather into desired shape for keychain, tag, or cord holder.
- Punch a hole for attachment.
- Stamp initials or designs if desired.
- Attach key ring or cord.
Tips: Leather adds a premium feel with minimal effort. Perfect as gifts or practical items.
Finishing, Customization, and Elevating Your 1-Hour Crafts
Once your craft is complete, a few intentional finishing touches can transform it from “finished” to “polished and professional.” The table below summarizes key finishing techniques, when to use them, and tips for maximizing impact.
| Technique | Purpose | How to Apply | Tips & Notes |
|---|---|---|---|
| Embrace Imperfections | Adds character and uniqueness | Accept small asymmetries, uneven strokes, or slightly crooked knots | Focus on overall composition; small “flaws” often enhance charm |
| Layer & Combine Materials | Adds depth, texture, and interest | Layer paint, fabrics, moss, beads, or string | Avoid overcrowding; 1–2 layers usually look best |
| Color Coordination | Creates visual cohesion | Choose 2–3 complementary colors for each project | Neutral bases with accent colors make crafts pop |
| Personalization | Makes the craft unique and memorable | Add initials, quotes, names, or small motifs | Even one small detail can transform a project from casual to meaningful |
| Seal & Protect | Ensures longevity and durability | Use clear acrylic sprays, epoxy resin, or lamination | Follow manufacturer instructions and allow proper drying time |
| Presentation & Display | Elevates perceived quality | Group items in trays, baskets, or shelves; wrap gifts thoughtfully | Coordinated displays instantly look professional |
| Seasonal Adaptation | Keeps projects relevant and fresh | Change accents, colors, or small décor pieces for seasons | Example: glittery rocks in winter, pastel pots in spring |
| Mini Series or Sets | Creates cohesive collections | Make multiple complementary items in one session | Works well for gifts, décor sets, or small home displays |
| Add Functionality | Enhances usability | Turn coasters, mugs, or jewelry into practical items | Functional crafts are more likely to be used and appreciated |
| Document Your Work | Tracks progress and inspires creativity | Photograph creations, maintain a notebook of ideas | Encourages experimentation and creates a visual archive |
Why These Finishing Techniques Matter
Even the simplest 1-hour craft benefits from intentional finishing. Applying color coordination, layering, or personalization makes a piece feel considered rather than rushed. Functional or seasonal adaptations increase usefulness and longevity.
Additionally, presenting multiple small crafts as a set or series makes them feel like part of a cohesive collection rather than a single random item. This is particularly impactful if you’re gifting or decorating a space.
How to Apply These Techniques Across Projects
- Painted Pots & Rocks: Embrace texture, seal with acrylic spray, and layer subtle patterns.
- Jewelry & Keychains: Combine materials like beads and twine, add initials, and polish ends neatly.
- Paper & Fabric Crafts: Coordinate colors, add small personal touches, and optionally laminate or frame.
- Zen Gardens & Display Pieces: Layer natural elements, leave negative space for visual rest, and arrange in sets for aesthetic impact.
Pro Tip
“A craft isn’t complete until you’ve considered how it will live in your home or life.”
Think about how your craft interacts with its environment. Even a one-hour project can feel premium if it complements your space, fits a purpose, and shows intentionality.
Conclusion
Crafting doesn’t have to be complicated or time-consuming to be meaningful. As someone who has spent countless hours exploring creativity in small bursts, I can honestly say that even one hour of focused making can be surprisingly fulfilling.
Whether you’re painting a pot, stringing a bracelet, or arranging a tiny Zen garden, these projects are more than just “things to do.” They’re little moments of calm, play, and self-expression in a busy world.
The joy comes not only from the finished piece but from the act of creating — the colors, textures, and tiny decisions that make it yours.
My hope is that this guide inspires you to pick up your materials, give yourself permission to experiment, and embrace the imperfections. Don’t overthink it — just start. You’ll be amazed at how much satisfaction a single hour of creativity can bring.
Happy crafting,
Katerina Lithopoulou


I’m Katerina Lithopoulou, co-creator of DIY Cozy Living. I’ve always loved the little things that make a space feel special. With a background in language and a passion for photography and cozy design, I enjoy turning everyday inspiration into simple ideas people can actually use.
My motto: “Cozy isn’t a trend — it’s a feeling.”
