
How to Upcycle Old Suitcases into Stylish Side Tables: A Step-by-Step Guide to Sustainable Decor

In an era where sustainability meets creativity, upcycling has emerged as a beloved way to breathe new life into forgotten items.
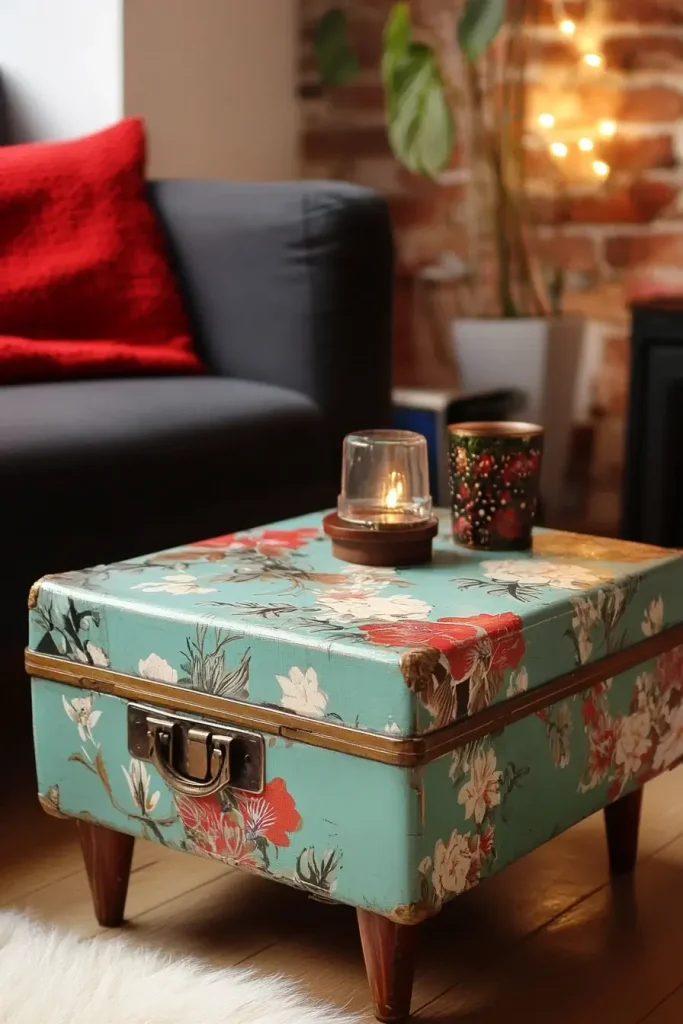
Old suitcases, often tucked away in attics or thrift stores, hold immense potential to transform into chic, functional side tables.
This project not only reduces waste but also adds a touch of vintage charm to your home. Whether you’re a DIY novice or a seasoned crafter, this guide will walk you through creating a unique conversation piece that marries practicality with style.
Why Upcycle Suitcases?

Suitcases, with their sturdy frames and nostalgic appeal, are ideal for upcycling.
Their compact size and built-in storage make them perfect for side tables. By repurposing them, you divert waste from landfills and create a one-of-a-kind furnishing.
Each suitcase carries a history—imagine a 1960s hardcase adorned with travel stickers or a retro floral print from the ’70s becoming a centerpiece in your living room. Plus, the project’s affordability (often under $50) makes it accessible to all.
Materials and Tools Needed
Gather these essentials before starting:
- An old suitcase: Opt for hard-shell for durability; check for structural integrity.
- Table legs: Hairpin, wooden, or casters (4–6 inches tall).
- Hardware: L-brackets, screws, washers.
- Sandpaper (medium grit) and primer/paint (spray or acrylic).
- Decorative materials: Fabric, wallpaper, stencils, or decals.
- Tools: Drill, screwdriver, measuring tape, paintbrushes.
- Optional: Glass cut to size, adhesive lining, knobs, or LED lights.
Pro Tip: Source suitcases from flea markets, eBay, or family storage. Clean thoroughly with a mix of water and vinegar, and let dry.
Step-by-Step Guide
1. Preparing the Suitcase
- Clean & Repair: Scrub the interior/exterior. For leather cases, use a conditioner. Repair broken hinges or latches with strong adhesive.
- Reinforce Structure: If the base is weak, glue a plywood panel inside for stability. Sand rough edges for a smooth finish.
2. Attaching the Legs
- Positioning: Flip the suitcase upside down. Mark leg placements 2–3 inches from each corner.
- Drill & Secure: For wooden legs, drill pilot holes to prevent splitting. Attach using L-brackets and screws. For hairpin legs, screw directly into the case. Ensure legs are even using a level.
3. Designing the Exterior
- Paint: Lightly sand the surface. Apply primer, then 2–3 coats of paint. Let dry between layers. Matte finishes offer a vintage look; metallics add glam.
- Decorate: Use stencils for geometric patterns, decoupage vintage maps, or adhere fabric with mod podge. Highlight original details like straps or labels.
4. Functional Additions
- Lining: Line the interior with adhesive fabric or wallpaper for a polished look.
- Glass Top: Protect the surface with a custom-cut glass pane (secured with adhesive pads).
- Storage: Use the suitcase’s compartment to stash remotes or magazines. Add a small latch lock for security.
- Lighting: Install battery-operated LED strips inside for a cozy glow.
Creative Design Ideas
- Vintage Globe-Trotter: Preserve travel stickers; pair with brass legs and a leather handle.
- Boho Chic: Paint in terracotta or sage, add macramé trim, and line with patterned fabric.
- Modern Minimalist: Opt for sleek black hairpin legs and a monochrome palette.
- Shabby Chic: Distress white paint, add floral decals, and crown with a lace doily.
Stacked Suitcases: For a bold statement, stack varying sizes and secure with adhesive. Use as a nightstand or entryway console.
Styling Tips
- Place beside a sofa for a coffee table alternative, or use as a bedside table in a guest room.
- Pair with a velvet armchair and floor lamp for a retro reading nook.
- Group multiple suitcase tables in different designs for eclectic flair.
Conclusion
Upcycling old suitcases into side tables is more than a craft—it’s a celebration of creativity and sustainability.
Each piece tells a story, blending function with artistry. Whether you embrace a rustic patina or a glossy modern finish, your creation will be a testament to mindful living.
So raid that attic, unleash your imagination, and give those dusty cases a second journey—this time, as the star of your home decor.
I’m Anastasios Moulios, co-founder of DIY Cozy Living. I enjoy finding creative, practical ways to make small spaces feel warm, stylish, and lived-in. I started this blog with Katerina to share real ideas that make a home feel a little more personal and a lot more comfortable.
