Call us: +306949885346

How To Paint Your Ceiling Without Mess or Stress
Painting a ceiling may seem like a daunting task, but with the right approach, it can be an enjoyable and rewarding home improvement project.
Whether you’re tackling a new paint job or refreshing an old one, mastering the art of ceiling painting can elevate the entire look of your space.
This guide will walk you through the entire process—from preparation to finishing touches—ensuring you achieve a smooth, flawless finish.
Before Starting The Painting Process
Before painting your home, understanding some basic principles is essential to achieving a smooth and professional-looking finish. Here’s what you need to know:
Surface Preparation
- Clean walls and ceilings thoroughly to remove dust and dirt.
- Patch any holes or imperfections with spackle, then sand to a smooth finish.
- For glossy surfaces, lightly sand to help paint adhere better.
Select the Right Tools
- Brushes: Use quality brushes for crisp, clean edges.
- Rollers: Choose a high-quality roller to avoid streaks.
- Painter’s Tape: Helps protect areas you don’t want to paint.
Work in Small Sections
- To maintain a smooth finish, paint in manageable sections, typically 3-4 feet at a time.
Start from the Top
- Begin with the ceiling, painting edges first (“cutting in”) and then filling in the large surfaces. This avoids drips on freshly painted walls.
Choose the Right Finish
- Flat/Matte: Ideal for ceilings and walls as it hides imperfections and prevents glare.
- Semi-gloss/Satin: Best for trim, doors, and high-traffic areas.
Master the Technique
- Use a “W” or “M” pattern when rolling paint. This distributes the paint evenly, avoiding streaks or uneven coverage.
- Fill in the gaps with smooth, vertical strokes to create a uniform coat.
Be Patient
- Allow each coat to dry thoroughly before applying the next to ensure a smooth and flawless finish.
By following these foundational steps, you’ll be well on your way to painting your home like a pro, even if it’s your first time!
1. Essential Tools and Materials for Ceiling Painting
Before you even begin to think about the technique, you’ll need to gather the right materials. Painting a ceiling requires specific tools to ensure that the job is done efficiently and with high-quality results. Here’s a breakdown of what you’ll need:
| Tool/Material | Purpose |
|---|---|
| Paint | Ceiling paint typically comes in flat or matte finishes to reduce reflections and hide imperfections. Choose a washable, durable paint for rooms that need regular cleaning. |
| Roller & Cover | A high-quality roller with a nap (thickness) suited to your ceiling’s texture will ensure an even coat. For flat ceilings, use a 3/8-inch nap; for textured ones, opt for a thicker nap (1/2 inch or more). |
| Extension Pole | An extension pole allows you to reach higher areas without a ladder. This is particularly helpful for larger rooms or high ceilings. |
| Angled Brush | Use an angled brush for cutting in around edges and corners, where the roller can’t reach. |
| Paint Tray | Helps hold your paint and keeps it ready for easy application onto your roller. |
| Drop Cloths | Protect your floors and furniture from spills and splatters. |
| Painter’s Tape | Ensures straight, crisp lines around trim, edges, and where the ceiling meets the wall. |
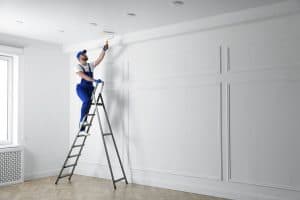
| Ladder | If your ceiling is particularly high, you may need a ladder in addition to the extension pole for some precise work. |
2. Preparing the Room for Painting
Proper preparation is essential for a smooth and clean painting process. Without it, you risk making the job harder and could end up with a messy finish. Follow these steps to ensure your painting space is ready:
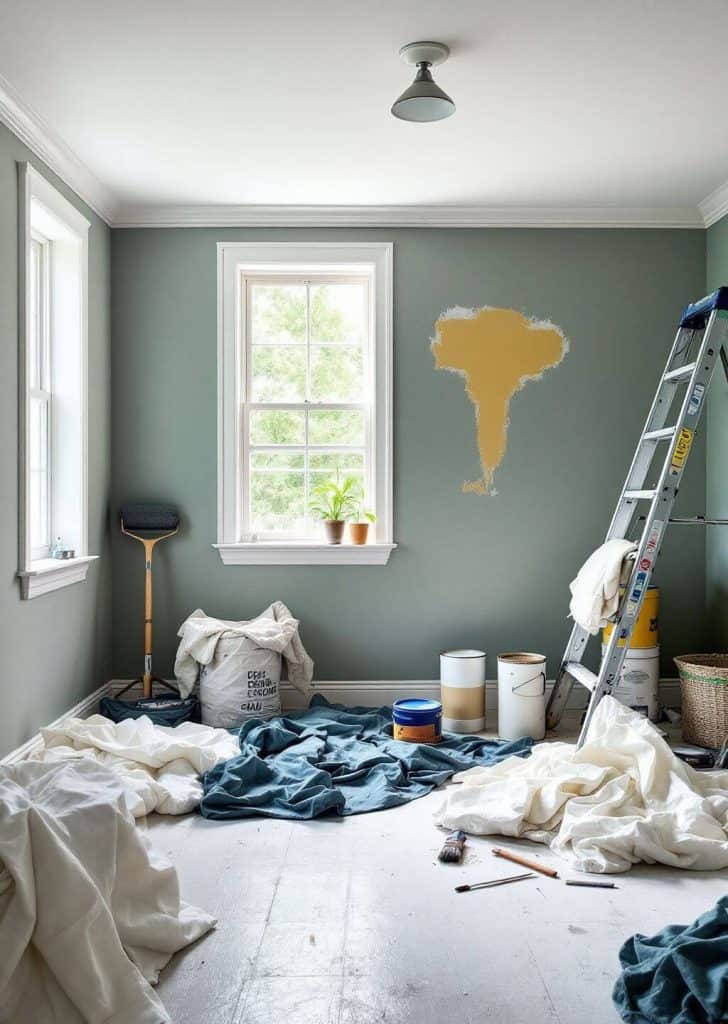
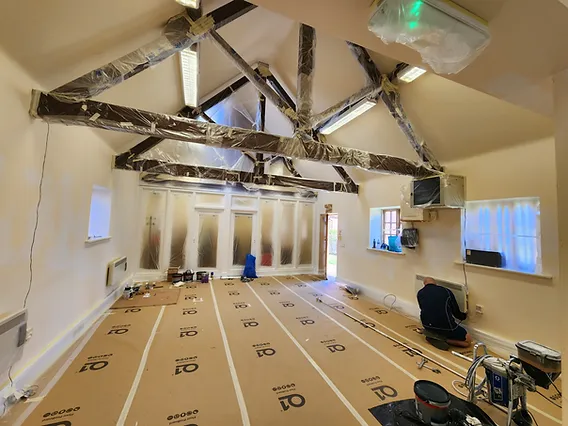
2.1 Clear the Room and Protect the Floor
Begin by moving furniture out of the way as much as possible. If there are large, immovable pieces, cover them with plastic or drop cloths. Make sure the floor is also protected—spread a drop cloth or plastic sheeting across the floor to catch any splatters.
2.2 Mask the Edges
Apply painter’s tape around the edges where the ceiling meets the walls, baseboards, and trim. A steady, straight line is critical, and painter’s tape helps to keep your lines clean and sharp. This also helps you avoid accidentally painting over areas you want to leave untouched.
2.3 Clean the Ceiling Surface
Dust is a common issue, and it can prevent your paint from adhering properly. Use a long-handled duster or a vacuum with a brush attachment to remove dust, cobwebs, and dirt. If there are any stains or marks, clean them with soapy water and allow the ceiling to dry thoroughly before moving on.
2.4 Prime the Ceiling (if needed)
Priming helps with coverage and ensures that the paint will adhere properly, especially on new drywall, areas with stains, or ceilings that are a different color. Choose a stain-blocking primer if you’re covering water stains, smoke damage, or any dark colors that could bleed through the paint.
3. How To Paint Your Ceiling Like A Pro
With preparation out of the way, it’s time to begin painting. Below are the detailed steps to ensure your ceiling looks like it was done by a professional:
3.1 Choose the Right Paint
Ceiling paint typically comes in flat or matte finishes. These finishes are ideal because they absorb light, reducing glare, and they help to hide imperfections in the ceiling. If you need durability, opt for a washable, mildew-resistant paint, especially in kitchens and bathrooms.
3.2 Cut in the Edges
Start by using an angled brush to cut in around the edges of the ceiling, including the corners where the ceiling meets the walls and the trim. This process will create a clean, defined line where your roller can’t reach. It’s important to be patient and take your time with this step to avoid messy edges.
3.3 Use the Roller for the Rest of the Ceiling
Once the edges are done, move to your roller. Begin in one corner of the room and load your roller with paint. Roll it in the tray to ensure even coverage.
- Use the W or M Technique: Load your roller and start by applying the paint in a W or M pattern on the ceiling. This ensures that the paint is applied evenly. Then, fill in the W or M by rolling straight lines in the same direction.
- Work in Small Sections: Avoid painting too large of an area at once. Work in manageable 3×3-foot sections. This will prevent paint from drying unevenly or causing roller marks.
- Roll in Long, Smooth Strokes: Apply the paint in long strokes, making sure to overlap each pass slightly. This ensures a smooth, even coat without any gaps.
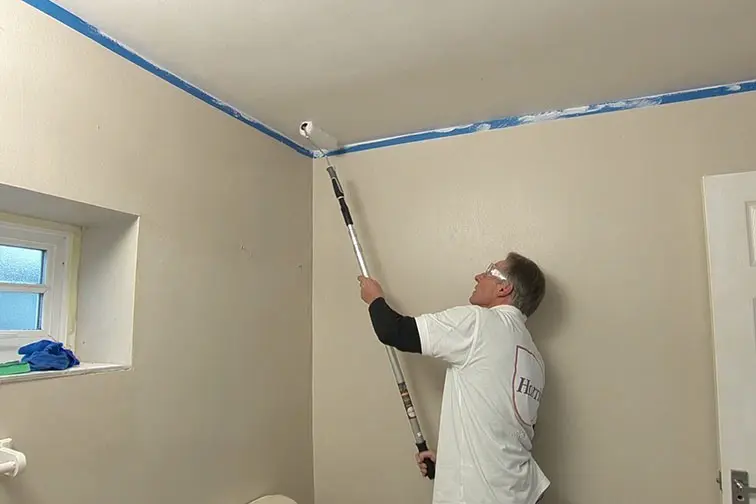
3.4 Use an Extension Pole for Reach
If your ceiling is high, an extension pole will make the process much easier. It eliminates the need for a ladder and allows you to paint the ceiling comfortably. Extend the pole to the desired length and maintain a steady hand when rolling to avoid drips.
3.5 Avoid Drips and Lap Marks
Drips can be inevitable, but you can minimize them with proper techniques:
- Don’t overload the roller with paint—just a thin layer at a time.
- Paint in sections to prevent overlap where paint from the previous section might be drying unevenly.
- If you see a drip or smudge, fix it immediately with a brush or sponge before it dries.
3.6 Drying and Recoating
Allow the first coat to dry completely before applying a second coat. The drying time varies based on the paint and humidity, but it typically takes 2 to 4 hours for the first coat to dry. Apply a second coat using the same techniques. Sometimes, a third coat might be necessary depending on the color or finish you’re going for.
4. Special Considerations for Textured Ceilings
If you’re painting a textured ceiling (like popcorn or stucco), you’ll need to adjust your approach:
- Use a Thicker Roller Nap: A thicker roller (1/2 to 3/4 inch) is ideal for textured ceilings. It will help you get into the grooves and recesses of the texture, ensuring full coverage.
- Take Your Time: Textured ceilings require more careful rolling. Work in smaller sections to ensure that each area is painted thoroughly. Too much pressure can damage the texture, so roll lightly to avoid disturbing the surface.
5. Final Touches and Cleanup
Once you’ve applied all coats and the paint has dried, remove the painter’s tape carefully. Take your time to peel it away at a 45-degree angle for clean, sharp lines. If any paint has bled under the tape, use a small brush to touch up the areas.
Finally, clean your brushes, rollers, and any tools you’ve used. You can clean your roller covers by rinsing them under warm water or using a brush cleaner for better results.
Frequently Asked Questions (FAQs)
1. Can I paint a ceiling without primer? While it’s possible to paint a ceiling without primer, it’s generally not recommended, especially for new or stained ceilings. Primer ensures better adhesion, prevents stains from bleeding through, and improves the durability of the finish.
2. How do I avoid roller marks when painting a ceiling? To avoid roller marks, apply paint in long, even strokes and work in small sections. Overlap each stroke slightly to ensure smooth, consistent coverage. Always keep your roller loaded with enough paint to cover the surface without overloading it.
3. What is the best type of paint for ceilings? Flat or matte finishes are ideal for ceilings because they hide imperfections and reduce glare. Look for paints that are mildew-resistant and washable, especially for kitchens or bathrooms where moisture is present.
4. How do I clean up after painting a ceiling? Clean your brushes, rollers, and other tools with warm water and soap if using water-based paint. For oil-based paints, use mineral spirits or a dedicated solvent cleaner. Always clean immediately after use to prevent paint from hardening on the tools.
5. Should I paint the ceiling before the walls? Yes, it’s generally easier to paint the ceiling first. If you paint the walls first, it’s harder to avoid getting ceiling paint on them. Painter’s tape can protect edges, but starting with the ceiling makes the job smoother overall.
6. How long should I wait between coats of ceiling paint? Drying times vary, but it’s typically safe to apply a second coat after 2-4 hours. Ensure the first coat is completely dry to avoid smudging and ensure an even finish.
Conclusion

Painting a ceiling can be a messy, but ultimately rewarding project. By following these detailed steps, using the right tools, and applying the proper techniques, you can transform any room with a freshly painted ceiling.
Whether you’re painting over a flat, smooth surface or tackling a textured finish, with the right prep and patience, your ceiling will look crisp, clean, and professionally done.
Enjoy your new look, and remember, a freshly painted ceiling can completely change the ambiance of your home!
I’m Anastasios Moulios, co-founder of DIY Cozy Living. I enjoy finding creative, practical ways to make small spaces feel warm, stylish, and lived-in. I started this blog with Katerina to share real ideas that make a home feel a little more personal and a lot more comfortable.
