

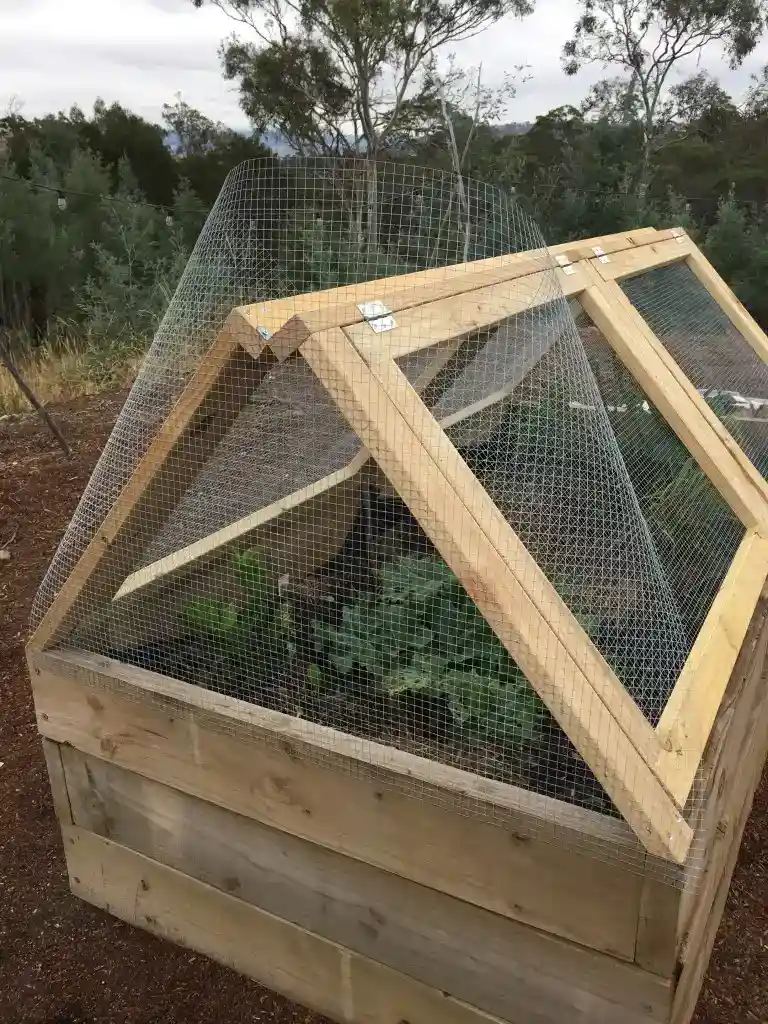
A raised garden bed cover is one of the smartest ways to protect your veggies from pests, heavy rain, strong sun, or cold snaps.
Adding hinges makes it even easier to open and close without dismantling the whole frame every time you want to weed or harvest.
Whether you’re growing lettuce, strawberries, or tomatoes, a hinged garden cover can keep your plants safer—and your gardening simpler.
This guide will walk you through how to build a durable, lightweight, and weather-resistant cover with hinges.
Let’s start!
🌱 Why Choose a Hinged Cover?

Raised bed covers come in various styles—hoop tunnels, cold frames, floating row covers—but a hinged lid offers effortless accessibility:
- Pest protection: hardware cloth or chicken wire keeps rabbits, squirrels, and birds out.
- Season extension: clear poly or horticultural fleece can raise soil temperature 6–10 °F, allowing early planting or fall harvests.
(The Spruce, Better Homes & Gardens) - Weather shielding: Protects plants from hail, heavy rainfall, or scorching sun.
- Ease of use: Hinges eliminate the need to remove or reassemble covers each time—no struggle, no tool needed.
- Customizable design: Use your cover as a frost‐tunnel early or ventilation shelter mid‑summer by propping it open.
🧰 Getting Started: Supplies & Planning
Planning upfront saves time and frustration. This isn’t about fancy finishes—it’s about longevity, light weight, and structural integrity.
Materials for a 3′ × 6′ bed hinged cover:
- (8) 2×2 or 1×2 boards, e.g. 72″ long (frame perimeters & cross‑supports)
- Diagonal corner braces (~5″ pieces)
- Exterior‑grade screws, pilot holes, or pocket‑hole joinery
- Hardware cloth or chicken wire (match bed height-width)
- Exterior staples or galvanized staples
- 3–4 outdoor‑rated brass hinges
- Barrel bolts or prop-arm support
- Optional: gas struts to hold lid open
Essential tools:
- Miter or circular saw
- Drill & bits/pocket‑hole jig
- Staple gun & wire cutter
- Measuring tape & pencil/measuring jig
Tip: if you’re building multiple covers, build one per bed rather than one large one—easier to lift and works better on raised soil. This method is based on Instructables’ hinged-cover plans with double doors, but you can adapt to a single lid hinge. (hydrangeatreehouse.com)
✂️ Step 1: Measure, Sketch & Cut Wood

Start by measuring the inside and outside dimensions of your raised bed. Decide if you want the cover to rest inside the top edge or overlap it slightly on all sides.
Sketch a simple top-down layout including length, width, and how many supports or hinge points you want. For wide beds (>3 ft), add at least one center support beam to prevent sag.
To cut the wood:
- Use a miter saw for clean, accurate 90° angles.
- Mark cuts clearly with a pencil and square.
- Clamp wood to a stable surface before cutting.
- Measure twice—cut once. Small inaccuracies add up.
If you only have a circular saw, use a cutting guide or straight edge to ensure straight lines.
Before assembling, lay out all your pieces and test the fit like a puzzle. This helps you catch issues before fastening.
🏗 Step 2: Build & Reinforce the Frame

Lay out your cut boards. Drill pilot holes or use pocket‑hole jig and glue/screw boards together to form the top frame.
- Add cross‑beams or center supports if width > 2.5 ft.
- Install diagonal corner braces for rigidity, especially if doors are used. These prevent sagging.
If you plan double-door configuration (front hinged panels), leave the front side without braces to allow swing radius. Once secure, dry-fit the assembled frame atop the bed box to ensure fit.
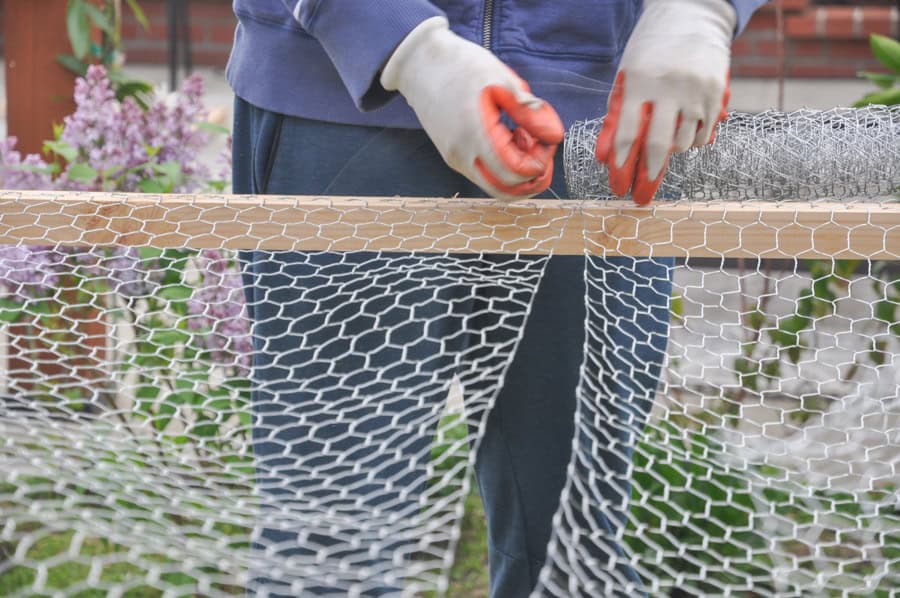
🔧 Step 3: Attach Wire or Cover Material
Depending on your garden goals:
- Hardware cloth (¼″ or ½″) for pest protection
- Polyethylene sheeting for frost/season extension
- Horticultural fleece (row cover) placed over hoops or lids for insect/frost shielding (Savvy Gardening)
Secure material using galvanized or stainless exterior staples:
- Starting at one corner, pull taut and staple every few inches.
- Overlap panels slightly and secure edges in place to prevent gaps.
- Fold under raw edges or hammer in staples fully and clip exposed wire edges.
If using poly sheeting, be mindful of tear points in wind; reinforce edges with wooden strips or heavy staples.
A different example
🔗 Step 4: Install Hinges & Latch Mechanism
Mount hinges along the edge where the lid meets the bed frame.
- Spread hinge leaf fully, mark screw holes, drill pilot holes, and mount with brass or stainless screws. Use 2–4 hinges depending on lid width. (thesun.ie, Instructables)
- If using double doors, use equal spacing and align top edges flush.
You may optionally install a brass barrel bolt or hook-latch at the open edge to secure the cover during windy weather.
⚖️ Step 5: Test, Adjust & Prop Open
Lift the lid (or doors) and check for smooth operation:
- Balance: If lid sags or drags, add support arm or gas struts.
- Gas struts are excellent: they hold the lid open and reduce hinge strain.
- Alternatively, install eyebolt with chain or wood prop arm—simple and effective.
Make minor adjustments to hinge depth or bolt alignment as needed.
❄️ Protecting Against Frost and Extending Season
Hinged covers serve double-duty as season extenders:
• Floating Row Cover or Fleece Over Hoop (within lid):
Supports under fleece create a slightly warmer microclimate—effective down to 28 °F. Sheets or fleece should never rest directly on foliage (can damage leaves under frost load). (Better Homes & Gardens, Southern Living)
• Poly Tunnel in Cold Climates:
Within the lid, install thin PVC hoops and cover with poly sheet to form a mini greenhouse effect—tunes soil temperature up to 10 °F warmer.
Leave cover closed overnight and open mid-day to prevent overheating. Ventilation is key.
🧹 Maintenance Tips & Weatherproofing
- Use exterior-rated screws, hinges, and staples to prevent rust.
- Seal or paint wooden frame each season.
- Check mesh staples annually and re-secure as needed.
- If you disassemble for winter, store indoors to prolong life.
- Use lightweight silicone sealant along staple line on poly to reduce tears.
🧠 FAQ & Common Questions
Can I build this on my own?
Absolutely—no advanced wood skills required. A weekend project with basic tools.
How steep should the lid angle be?
A slight slope helps rain run off; aim for a few inches rise toward the back.
Is hardware cloth better than chicken wire?
Yes—hardware cloth has smaller grid and stronger light gauge to resist gnawing.
Can I build without hinges?
You can—but hinged lids significantly simplify access when weeding or harvesting.
✅ Final Thoughts
With a hinged cover, your raised garden transforms from seasonal space to year‑round fortress—guarded against pests, frost, and weeds, and yet totally accessible.
Building one yourself from simple materials gives you full control over size, materials, and functionality. Soon after completion, you’ll understand why this small addition can dramatically improve your garden’s yield and health.
THE END. YOU ”VE MADE IT!!!
I’m Anastasios Moulios, co-founder of DIY Cozy Living. I enjoy finding creative, practical ways to make small spaces feel warm, stylish, and lived-in. I started this blog with Katerina to share real ideas that make a home feel a little more personal and a lot more comfortable.
