
How to Build a DIY Wood Step Stool (Easy, Sturdy & Beautiful!)
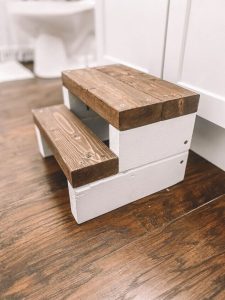
A wooden step stool is one of those classic DIY projects that’s both incredibly practical and surprisingly satisfying to make.
Whether you need a little boost to reach high cabinets, help your child wash their hands, or simply add rustic charm to your home, a DIY wood step stool is the perfect weekend project.
In this guide, we’ll walk you through everything — from materials and measurements to step-by-step instructions and finishing touches.
🛠️ Why Build Your Own Wood Step Stool?
Before diving into the build, let’s talk about why a DIY wooden stool is worth the effort:
- Custom size for your home or space
- Cheaper than store-bought — often under $20!
- More durable than most plastic options
- Satisfying beginner project (no fancy tools needed)
📏 Materials & Tools You’ll Need
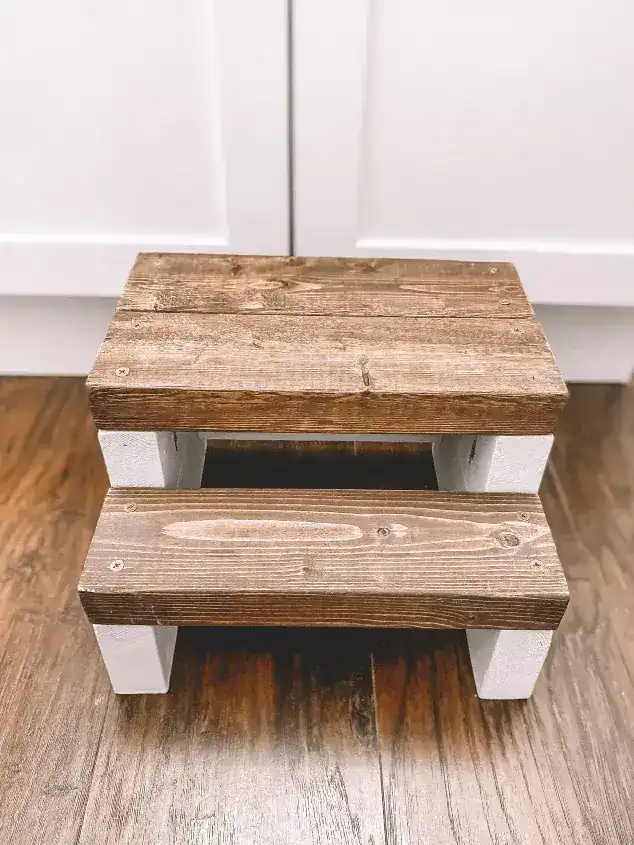
Here’s a list of what you’ll need to build a two-step stool (ideal height for kitchens, bathrooms, and kids’ rooms).
🧱 Materials:
| Material | Quantity | Notes |
|---|---|---|
| 1×8 board | 6 feet | Pine or poplar are good for beginners |
| Wood screws (1 ¼”) | 12–16 | Drywall or decking screws |
| Wood glue | Small bottle | For extra strength |
| Wood filler | Optional | To fill screw holes |
| Sandpaper (120 & 220) | 2 sheets | For smoothing |
| Stain or paint | 1 small can | Your choice for finishing |
| Polyurethane (optional) | 1 small can | For a protective coat |
🔧 Tools:
- Saw (hand saw or circular saw)
- Drill and drill bits
- Tape measure
- Clamps (optional but helpful)
- Screwdriver or impact driver
- Pencil
✂️ Step-by-Step: How to Build Your Wood Step Stool
Let’s break this down into easy, beginner-friendly steps.
Step 1: Cut Your Wood
You’ll need the following pieces:
| Piece | Quantity | Dimensions |
|---|---|---|
| Top step | 1 | 18″ × 7.5″ |
| Bottom step | 1 | 15″ × 7.5″ |
| Side supports | 2 | 14″ × 7.5″ (angled base) |
| Step riser front | 1 | 12″ × 5″ |
| Back support | 1 | 12″ × 5″ |
Use a tape measure and pencil to mark your cuts. If using a circular saw, clamp the board for safety.
Pro tip: For extra stability, angle the bottom of your side supports by 10–15° for a splayed leg design.
Step 2: Sand All Edges
Use 120-grit sandpaper to remove splinters and rough edges, then finish with 220-grit for a smooth surface. This step is crucial, especially if kids will be using the stool.
Step 3: Assemble the Frame
- Attach the side supports to the bottom step using wood glue and screws.
- Screw in the step riser front piece between the side supports under the top step position.
- Attach the top step to the side supports, centered over the riser and back support.
- Add the back support between the side pieces to brace the structure.
Clamp everything in place before drilling to avoid shifting.
Step 4: Fill, Sand Again, and Prep for Finish
- Use wood filler to cover screw heads if you want a cleaner look.
- Let it dry completely.
- Give the entire piece a final sanding before finishing.
Step 5: Stain or Paint
Choose a stain or paint color that fits your decor style:
| Style | Recommended Finish |
|---|---|
| Farmhouse | White paint + distressed sanding |
| Rustic | Dark walnut stain + satin poly |
| Modern | Matte black or gray paint |
| Kids’ Room | Bright, bold paint colors |
After staining or painting, allow to dry thoroughly. Apply a coat or two of polyurethane for added protection.
💡 Design Variations

Want to personalize your stool? Try these ideas:
- Add a handhold cut-out on the top step for portability.
- Use decorative edge trim or router the corners.
- Personalize it with a name or stencil for kids.
- Make it foldable using hinges (advanced project).
💲 Cost Breakdown (Approx.)
| Item | Estimated Cost |
|---|---|
| Wood board | $8–12 |
| Screws & glue | $3–5 |
| Stain or paint | $5–10 |
| Sandpaper & filler | $2–3 |
| Total | $18–30 |
✅ Final Tips
- Always measure twice before cutting.
- If making it for kids, round all edges and avoid sharp corners.
- Choose a finish that is non-toxic if used by toddlers.
- For outdoor use, seal with a waterproof polyurethane.
📌 Save It for Later!
Want to revisit this guide when you’re ready to build? Pin it now and come back later! A DIY wood step stool is the perfect blend of form, function, and fun woodworking.
🔨 Ready to Get Building?
You don’t need to be a carpenter to build something practical and beautiful. A wooden step stool is a great way to practice your DIY skills and add a custom touch to your home.
With just a few tools, some creativity, and a bit of patience, you’ll have a finished project you’ll be proud to show off.
I’m Anastasios Moulios, co-founder of DIY Cozy Living. I enjoy finding creative, practical ways to make small spaces feel warm, stylish, and lived-in. I started this blog with Katerina to share real ideas that make a home feel a little more personal and a lot more comfortable.
