
How to Build a DIY Playhouse in Your Backyard (Step-by-Step)

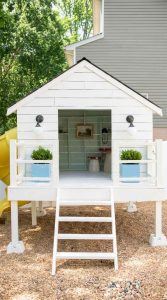
Maria asked for a playhouse for three birthdays in a row before Tasos finally ran out of reasons to wait.
The fourth birthday he said yes, and we spent a weekend in the backyard with a pile of lumber, a sketch on graph paper, and more determination than experience.
It turned out better than either of us expected and the girls have spent more time in it than in their actual bedrooms ever since.
This guide covers everything you need to plan, build, and finish a basic backyard playhouse. It is written for someone with basic DIY confidence, a drill, and a weekend to spare. Not for a professional builder.
Before You Build: Four Questions to Answer First
1. Do you need a permit? In most places a small backyard structure under a certain size (often 10 square metres or 100 square feet) does not need a building permit. Check with your local council or municipality before you start. Getting this wrong is the most expensive mistake you can make.
2. Where will it sit? Choose a spot that is visible from the house so you can see the kids while they play. Check for underground utilities before you dig anything. Avoid positioning directly under a large tree where falling branches or excessive leaf drop create problems.
3. What size do you need? A 6×6 foot footprint is the minimum for a usable playhouse and the easiest for a first build. A 6×8 gives more room and is only marginally harder to build. For reference, the Hamilton Park Home playhouse featured above is 6×6 with the platform sitting 50 inches off the ground.
4. Elevated or ground level? An elevated platform playhouse (like a small treehouse without the tree) is more exciting for kids and adds a slide or climbing feature easily. A ground-level playhouse is simpler to build and safer for very young children. This guide covers a ground-level structure, which is the right starting point for most people.
What You Need
Materials List (for a 6×6 foot ground-level playhouse)
| Component | Material | Quantity |
|---|---|---|
| Foundation | Concrete deck blocks | 4 to 6 |
| Floor frame | 2×6 pressure-treated lumber | 6 lengths at 8 ft |
| Floor decking | 1×6 decking boards or 3/4 in plywood | To cover 6×6 ft |
| Wall framing | 2×4 pressure-treated lumber | 18 to 20 lengths at 8 ft |
| Siding | Fence pickets or T1-11 siding | Enough for 4 walls |
| Roof | Corrugated metal, polycarbonate, or shingles | To cover roof area |
| Roof framing | 2×4 lumber for rafters | 6 lengths |
| Trim | 1×4 boards | 10 to 12 lengths |
| Fasteners | Exterior screws 2.5 in and 3.5 in | 5 lbs each |
| Fasteners | Lag bolts for structural connections | 20 to 30 |
Total estimated cost: Around 300 to 500 euros or dollars for materials, depending on your local lumber prices. Starting with a free or cheap second-hand playset base (check Facebook Marketplace or local classifieds) can bring this down significantly.
Tools You Need
- Circular saw or miter saw
- Power drill and bits
- Level (both a spirit level and a long straight edge)
- Tape measure and square
- Hammer
- Safety glasses and gloves
Step 1: Prepare the Ground
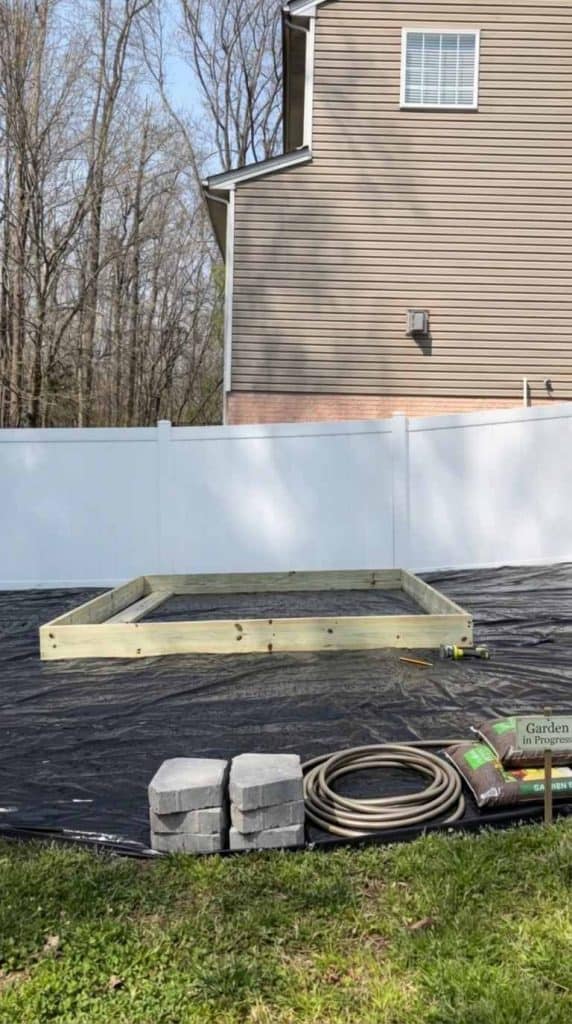
Clear the area of grass and level the ground as much as possible. You do not need a perfectly flat surface but you need it close. A difference of more than 2 to 3 inches across the footprint will make the rest of the build much harder.
Place concrete deck blocks at the four corners and at the midpoints of any span over 4 feet. Deck blocks sit on the ground surface and the floor frame sits on top of them. No digging required for a small playhouse, though you can dig and pour concrete footings for a more permanent structure.
Key tip: Check that your deck blocks are level with each other before you build anything on top of them. Use a long straight board and a spirit level across them. Adjusting a block now takes two minutes. Adjusting it after the floor is framed takes much longer.
Step 2: Build the Floor Frame
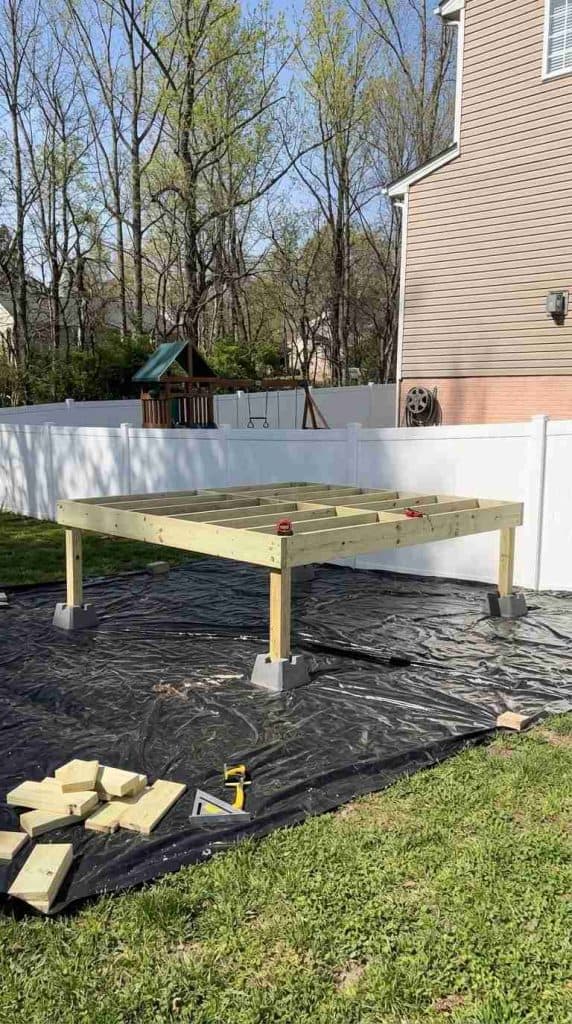
Cut your 2×6 pressure-treated lumber into two pieces at 72 inches (6 feet) for the long sides and two at 69 inches for the short ends (the 69 inches accounts for the thickness of the long side boards). Frame a rectangle and screw together with 3.5-inch exterior screws through pre-drilled pilot holes.
Add interior joists spaced 16 inches on centre between the short ends. Crown each joist (the slight natural curve in the lumber) facing upward so the floor does not sag over time.
Lay your floor decking across the top of the frame and fasten with screws. If using plywood, use exterior-grade 3/4-inch sheets. If using decking boards, leave a small gap between each board for drainage.
| Check | How |
|---|---|
| Square | Measure diagonals, they should be equal |
| Level | Long level across the frame in both directions |
| Secure | All joists fastened at both ends |
Step 3: Frame the Walls
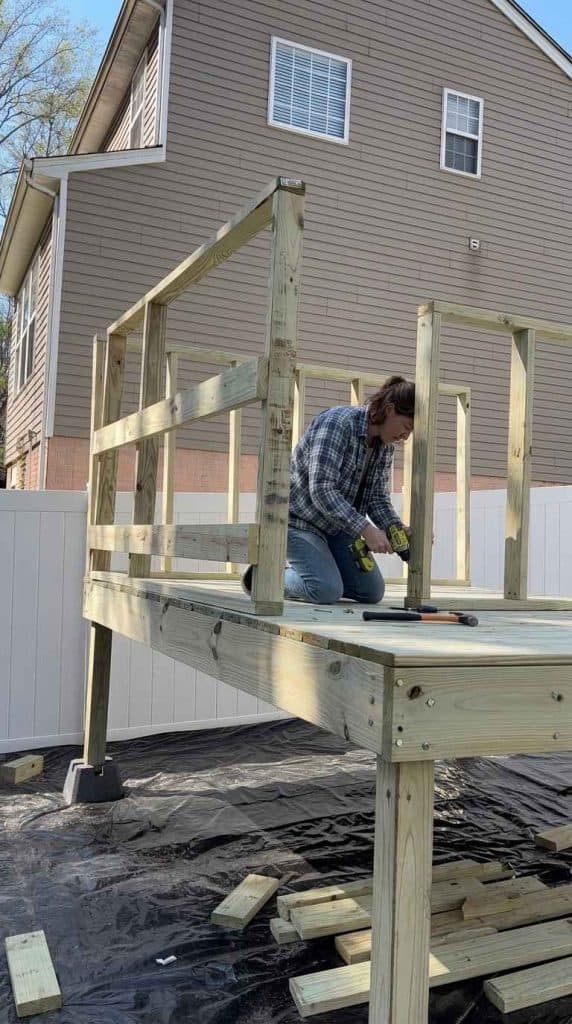
Wall framing is the same process as interior house framing at a smaller scale. Each wall is a rectangle of 2×4 lumber: a bottom plate, a top plate, and studs in between spaced 16 inches on centre.
Wall heights: The Hamilton Park Home playhouse used 5-foot walls, which is comfortable for children and allows most adults to enter. Taller walls (6 feet) feel more spacious but require more material and make the roof taller.
Build each wall flat on the ground before standing it up. Mark and cut your window openings as part of the framing, not after. Frame a header above each window opening using doubled 2x4s.
Standing the walls:
- Stand the back wall first and brace it temporarily with a diagonal board propped to the ground
- Stand each side wall and screw to the back wall at the corners
- Stand the front wall last
- Check plumb on all four walls before securing permanently
Key tip: Pre-drill all your pilot holes before driving screws. This prevents the wood from splitting, especially near the ends of boards.
🔥 Would you like to save this?
Step 4: Add the Roof
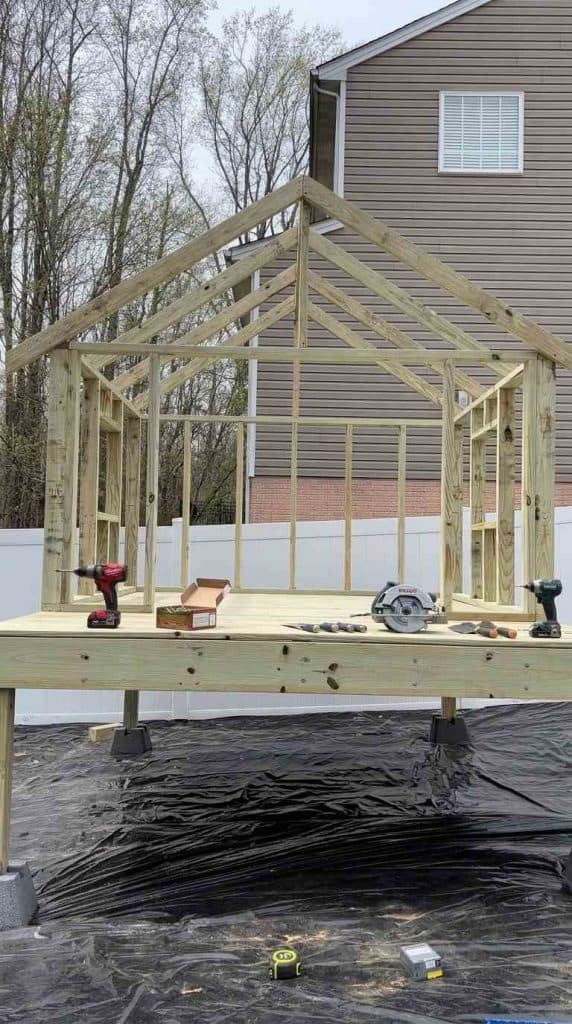
The roof is the most technical part of the build. A simple single-slope (shed) roof is the easiest option. A peaked gable roof looks more like a traditional house but requires cutting angled rafters.
For a single-slope roof:
- One wall is taller than the opposite wall by 12 to 18 inches to create the slope
- Rafters run from the high wall to the low wall
- A 3:12 pitch (3 inches of rise for every 12 inches of run) is a good starting slope for drainage without being too steep
For a gable roof:
- Both side walls are the same height with a triangular gable above
- Rafters meet at a central ridge board running the length of the roof
- Cut the rafter angles with a speed square at a 4:12 pitch for a classic look
Roofing materials to consider:
| Material | Cost | Difficulty | Durability |
|---|---|---|---|
| Corrugated metal | Low | Easy | High |
| Polycarbonate panels | Medium | Easy | Medium, allows light through |
| Cedar shingles | Medium | Medium | High, looks beautiful |
| Asphalt shingles | Low | Medium | High |
Key tip: Overhang the roofing material 2 to 3 inches beyond the wall framing on all sides. This keeps rain off the walls and away from the foundation.
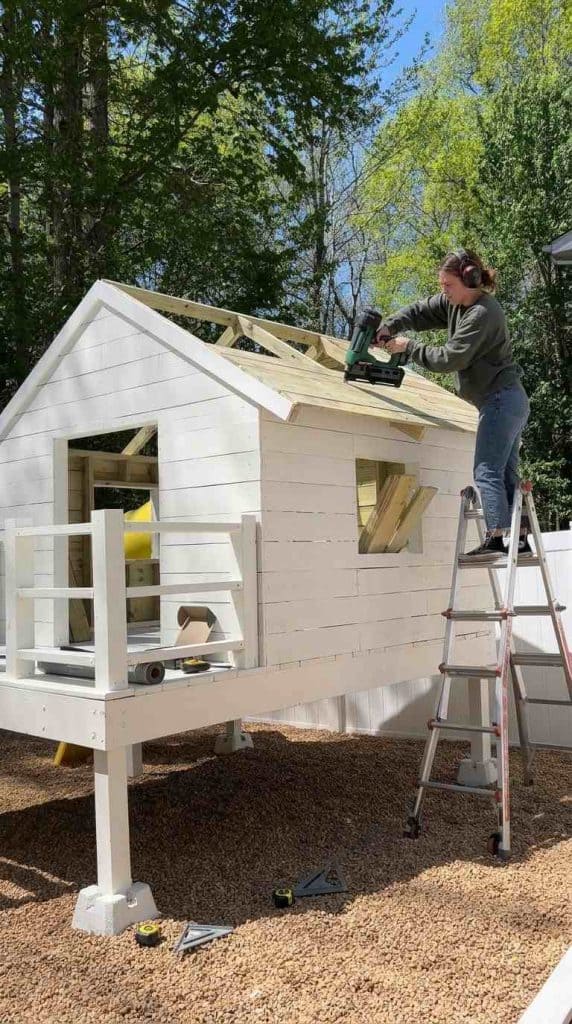
Step 5: Add Siding
Fence pickets (the pointed top boards used in garden fences) are the most economical siding option and work extremely well for a playhouse.
They are already the right width, easy to cut, and look charming. Overlap each picket slightly as you stack them up the wall and nail or screw them into the studs behind.
Stain or paint the boards before installing them rather than after. This is the single most time-saving tip in the whole build. You can stain all four sides of every board quickly while they are flat, rather than trying to get the back face of installed siding.
Trim out all the corners, window openings, and the front edge with 1×4 boards. This covers the raw edges of the siding and gives the playhouse a finished, intentional look.
Step 6: Finishing Touches
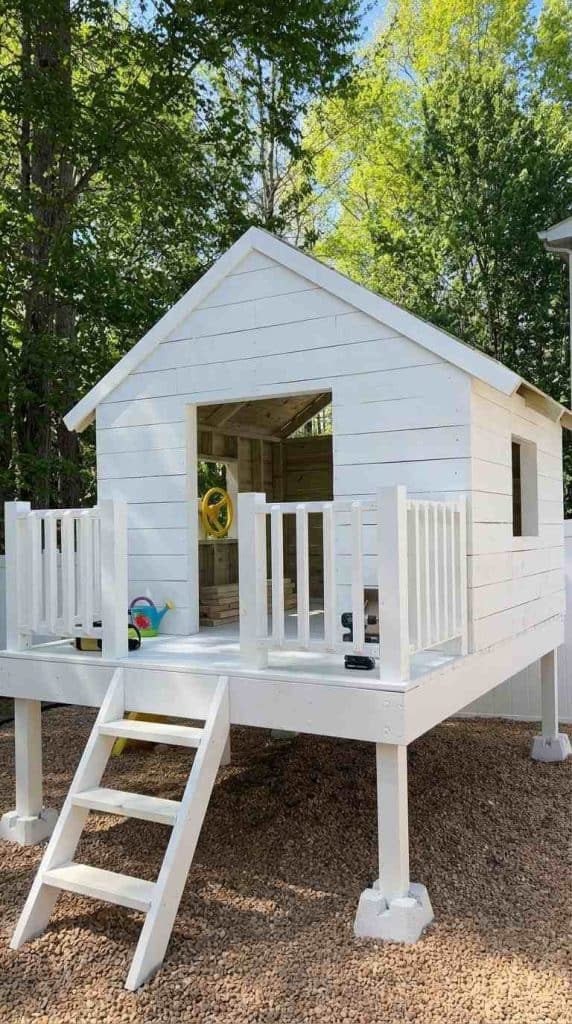
This is where the playhouse goes from a structure to something the kids will actually love.
Functional additions:
- A pulley and bucket system for hoisting toys and snacks up to an elevated platform
- A chalkboard on the back wall (chalkboard paint on a sheet of plywood screwed to the wall)
- A simple Dutch door (a door split horizontally so the top half opens separately) made from plywood framed with 1x material
- Shutters made from 1×4 boards hinged to open outward from the windows
Styling that makes it look designed:
- Window boxes planted with herbs or flowers at the window openings
- Outdoor string lights along the roofline
- An outdoor rug on the deck area
- A small sign above the door with the kids’ names or a playhouse name
- Curtains inside hung on screws at equal spacing along the top of the opening
Common Mistakes to Avoid
- Skipping the square check on the floor frame. Everything built on top of an out-of-square floor is harder to fit and looks off.
- Using untreated lumber in contact with the ground. It rots quickly. All lumber in contact with the ground or within 6 inches of it must be pressure-treated.
- Installing siding before staining. Staining after installation takes three times as long.
- Making the door too small. A door shorter than 4.5 feet means adults cannot get inside, which matters when something needs fixing or a child needs help.
- Ignoring the roof overhang. No overhang means rain runs straight down the siding and into the foundation.
Frequently Asked Questions
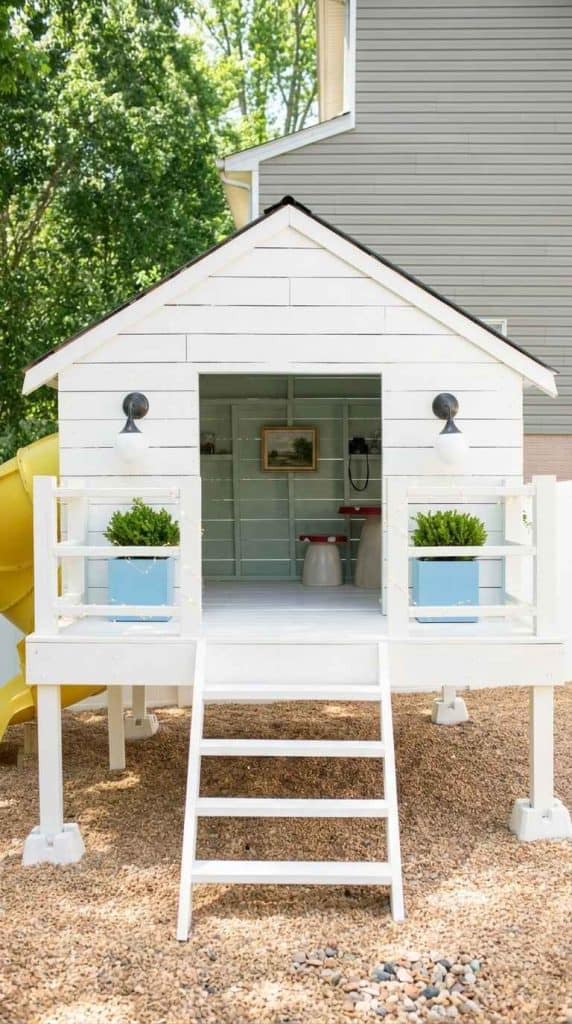
How long does it take to build a DIY playhouse? A basic 6×6 ground-level playhouse takes two adults one full weekend to frame, side, and roof. Add another half day for finishing touches. Having a second person makes the wall-raising step significantly easier.
What wood should I use? All structural lumber and anything in contact with the ground should be pressure-treated. For siding, fence pickets or cedar boards are both good choices. Use exterior-rated screws throughout, not interior drywall screws which rust quickly outdoors.
Does a backyard playhouse need a permit? This varies by location. Most small structures under 10 square metres do not require a permit, but always check with your local authority before building. Getting it wrong is the most expensive mistake you can make.
How much does a DIY playhouse cost? Starting from scratch with new lumber, expect 300 to 500 euros or dollars for materials for a basic 6×6 playhouse. Starting with a free or second-hand playset base (widely available on local marketplaces) can reduce this to 150 to 300. The Hamilton Park Home build above used a free Craigslist playset as the base and spent approximately 300 dollars total on lumber, roofing, and stain.
How do I make it safe for young children? Keep the platform height low (under 50 inches for toddlers), use railing with gaps no wider than 4 inches so small heads cannot get stuck, sand all cut edges smooth, and check all fasteners are fully driven with no protruding sharp points. Check the structure seasonally as wood moves with weather changes.
Tasos still maintains it was his idea all along. I have the graph-paper sketch to prove otherwise. The girls have stopped asking us to include them in decisions about the playhouse and have begun making those decisions themselves, which is probably the whole point.
Build it now. Let them grow into it.

I’m Katerina Lithopoulou, co-creator of DIY Cozy Living. I’ve always loved the little things that make a space feel special. With a background in language and a passion for photography and cozy design, I enjoy turning everyday inspiration into simple ideas people can actually use.
My motto: “Cozy isn’t a trend — it’s a feeling.”
