
How to Build a DIY Fairy Garden: 6 Easy Steps for Beginners
Fairy gardens aren’t just nostalgic. They’re grounding.
There’s something deeply calming about creating a small world with your hands. It slows your thinking. It pulls you out of productivity mode and into observation. You’re not trying to optimize — you’re trying to notice.
For adults especially, fairy gardens offer a rare kind of creativity: one without pressure. There’s no audience, no performance, no expectation of perfection. You can spend ten minutes adjusting a tiny path and feel oddly restored afterward.
That’s why fairy gardens keep coming back. Not because of trends — but because they answer a need people don’t always know how to name.
Step-by-Step Guide: How to Create Your Own DIY Fairy Garden
Creating your own fairy garden can feel overwhelming at first. With so many miniatures, plants, and materials available, it’s easy to end up with a cluttered or incoherent design. That’s why following a step-by-step approach ensures that every element you add has purpose, scale is consistent, and your fairy garden feels alive rather than “stuffed.”
Here’s a complete guide in six steps, from planning to finishing touches.
Step 1: Choose Your Location and Container
The first step in building your fairy garden is deciding where it will live. Location influences almost every other choice — materials, scale, and type of garden.
- Outdoor gardens work well in garden beds, at the base of trees, or even on tree stumps. Outdoor gardens benefit from natural textures like moss, soil, fallen leaves, and small branches. However, you’ll need durable materials that can withstand sun, rain, and wind.
- Indoor gardens are perfect for tables, windowsills, shelves, or large decorative trays. You have more control over lighting and can include delicate items without worrying about weather damage.
- Containers: Your container should act as a frame for the scene. Wide shallow containers give you space for winding paths and multiple elements. Tall or layered containers encourage vertical storytelling and create a sense of height. Containers can be anything from a classic terracotta pot, a vintage drawer, a teacup, or even a lantern.
Tips:
- Ensure your container has drainage if you’re using live plants.
- Pick a container that complements the story you want to tell — rustic for woodland, pastel for cottagecore, sleek for minimalist.
Step 2: Plan Your Story and Layout
Every great fairy garden begins with a story. Ask yourself: Who lives here? What do they do? Where do they go?
- Storytelling: Even a simple sentence can guide your design — for example, “A tiny woodland fairy lives here, traveling along winding moss paths to gather herbs.” This helps determine what type of accessories, plants, and pathways you need.
- Sketch a rough layout: It doesn’t have to be perfect. Map out where the main house, paths, plants, and features will go. Decide which areas will be focal points and which will remain quiet spaces.
- Balance: Leave some open areas for visual rest. Too many miniatures can make the garden look overcrowded and chaotic.
Tips:
- Think in layers: ground layer (soil, moss), mid-layer (plants, fences, mushrooms), and upper layer (trees, branches, hanging decorations).
- Place your focal point first — usually a house, door, or fairy figure — and scale everything else around it.
Step 3: Prepare the Base and Materials
Now that you have a plan, it’s time to lay the foundation.
- Soil or substrate: Fill your container with a base that matches your plants. Use potting soil for live plants, sand for desert or beach gardens, or a mixture of moss and soil for woodland gardens.
- Texture: Introduce natural textures from the start. Pebbles, small stones, bark chips, moss, and sand provide visual interest and help make the miniature objects feel part of the world.
- Hardscape elements: Before adding miniatures, place any fixed features like pathways, bridges, or raised beds. Glue or press them lightly into the soil to prevent shifting.
Tips:
- Keep heavier objects toward the back or center to avoid tipping.
- For indoor gardens, line the container with a waterproof layer if it doesn’t have drainage.
Step 4: Add Miniatures and Accessories
Now comes the fun part — bringing the story to life with miniatures.
- Houses and doors: Start with your main structure. Ensure its scale matches the rest of the elements. Tiny fairy doors can be tucked into moss-covered rocks, tree stumps, or the sides of containers.
- Pathways: Add paths made of tiny pebbles, sand, or bark chips. Curved paths feel more natural than straight lines. They guide the eye and suggest movement.
- Furniture and figures: Benches, tables, tiny tools, and fairy figures add life. Place them thoughtfully — don’t scatter them randomly. Ask yourself: “Does this piece belong here, or is it competing with the focal point?”
- Natural elements: Incorporate moss, small plants, succulents, or miniature flowers. Balance height and color for visual interest.
Tips:
- Mix natural and artificial materials carefully. Too many bright plastic elements can break the magic.
- Leave some gaps — negative space creates breathing room and makes the scene feel more real.
Step 5: Add Finishing Touches and Details
Details transform a good fairy garden into a great one. These are the subtle touches that make people stop and notice.
- Lighting: Small LED lights or glow-in-the-dark accents give a magical feel, especially in indoor or evening gardens.
- Weathering and aging: Slightly sanding furniture, letting moss creep over objects, or darkening pathways adds realism. Imperfection is your friend.
- Seasonal accents: Tiny pumpkins for fall, pastel flowers for spring, or artificial snow in winter keep your garden dynamic.
Tips:
- Avoid overdoing it. One or two well-placed details make a bigger impact than ten scattered items.
- Consider adding movement hints: a tilted chair, a door slightly ajar, or a tiny trail of pebbles.
Step 6: Care and Maintenance
A fairy garden isn’t static; it evolves over time. Proper care keeps it beautiful and magical.
- Outdoor gardens: Allow weathering to happen naturally — moss spreads, bark ages, colors soften. Check for drainage, protect delicate miniatures from wind, and replace any damaged pieces.
- Indoor gardens: Dust regularly, water plants as needed, and prune overgrown greenery. Rotate seasonal accents to keep the scene fresh.
- Observation: Part of the joy is noticing changes over time. Let plants grow slightly over paths, allow moss to creep on stones, and watch your miniature world develop character.
Tips:
- Treat your fairy garden like a living art piece. Small adjustments over time are more powerful than trying to perfect it in one sitting.
- Document your changes with photos; seeing the evolution enhances the storytelling aspect.
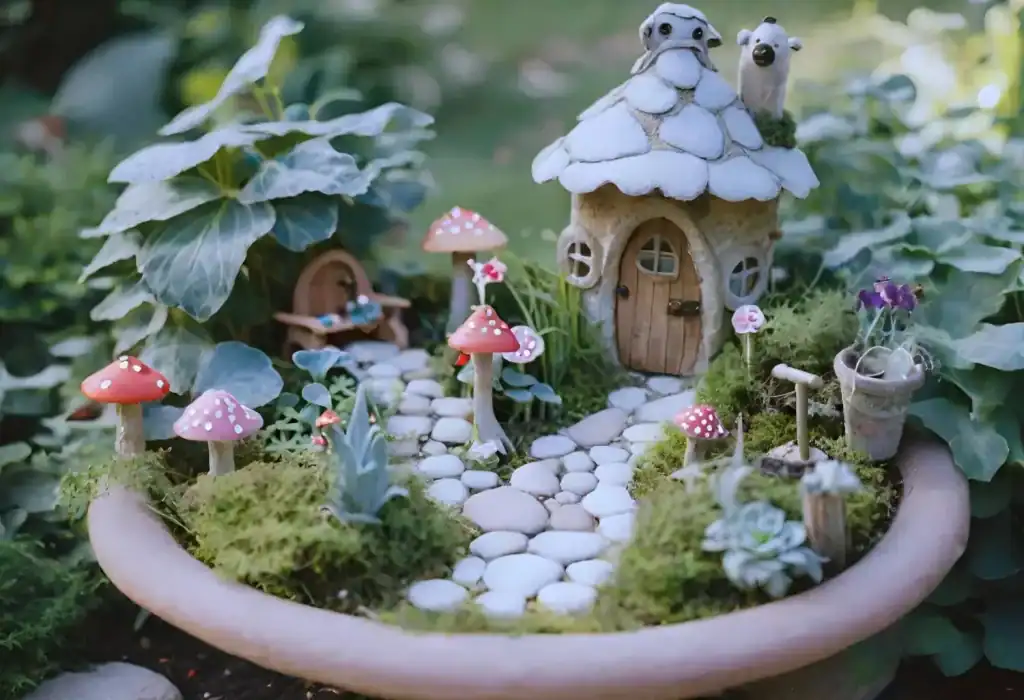
5 Stunning DIY Fairy Garden Ideas
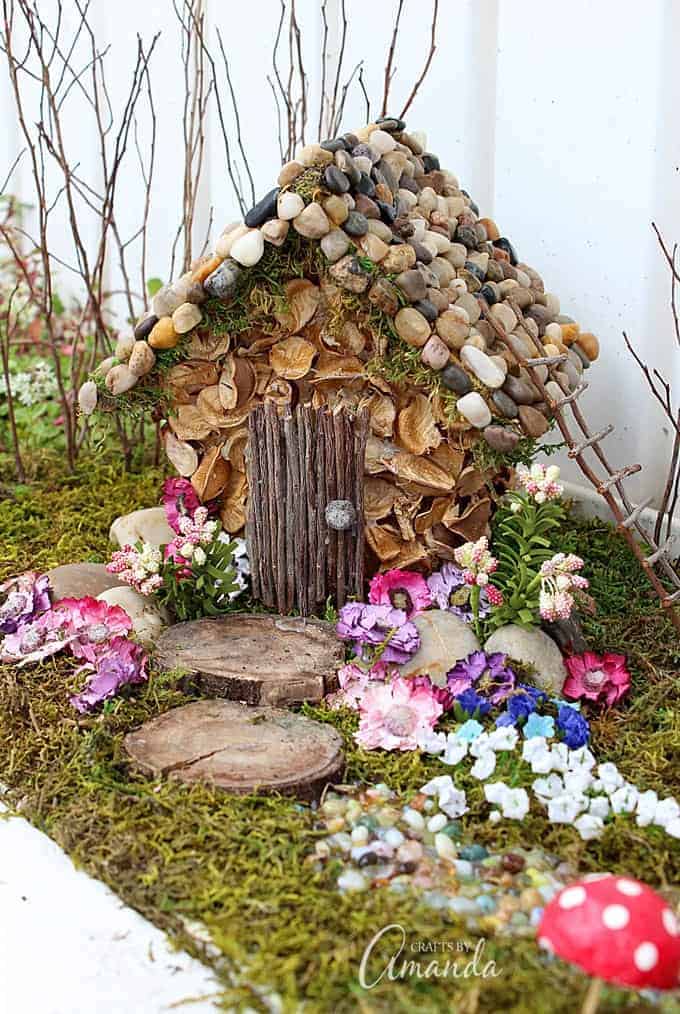
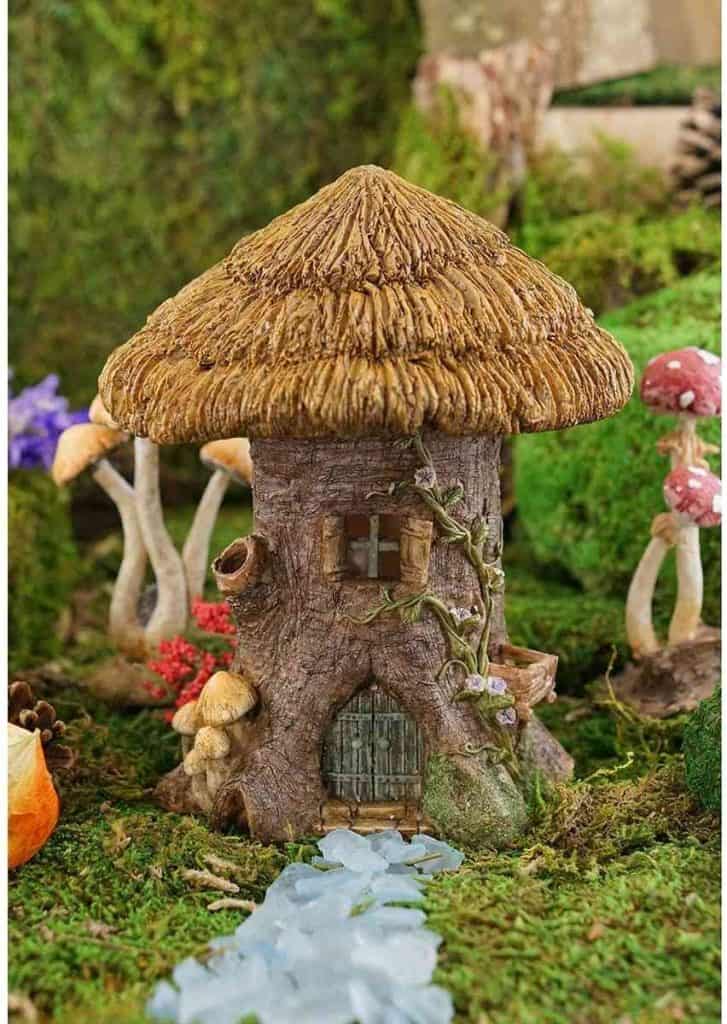
Woodland Fairy Garden (The Timeless Classic)
A woodland fairy garden is classic for a reason: it looks alive the moment you place it. The secret is layering. Start with a moss or soil ground layer, then add small plants, pebbles, and tiny paths.
Trees, branches, and twigs create vertical interest. Curved paths, uneven moss, and fallen leaves make it feel discovered rather than staged. Stick to earthy colors — greens, browns, muted grays — with occasional tiny bright accents like a mushroom or flower.
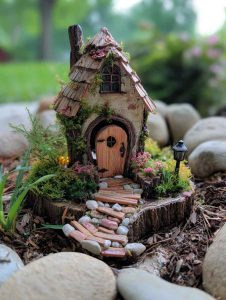
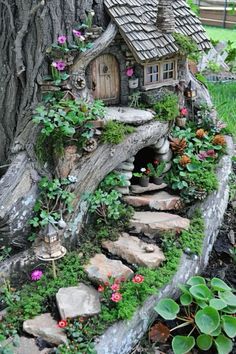
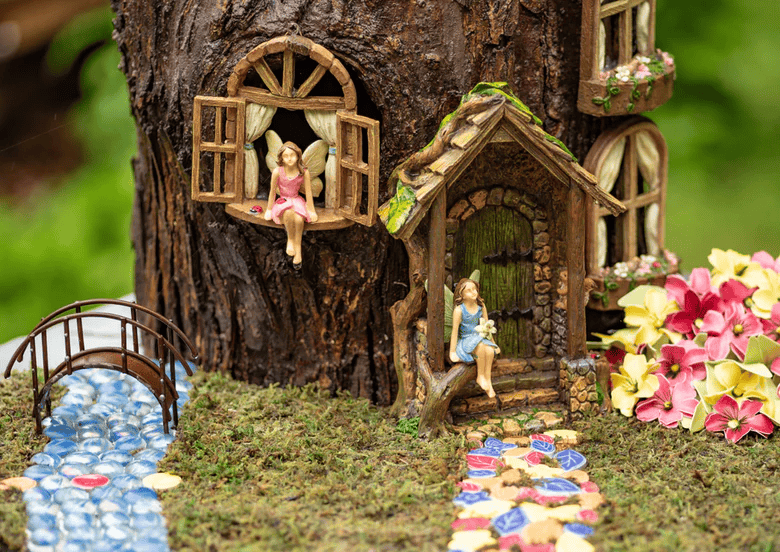
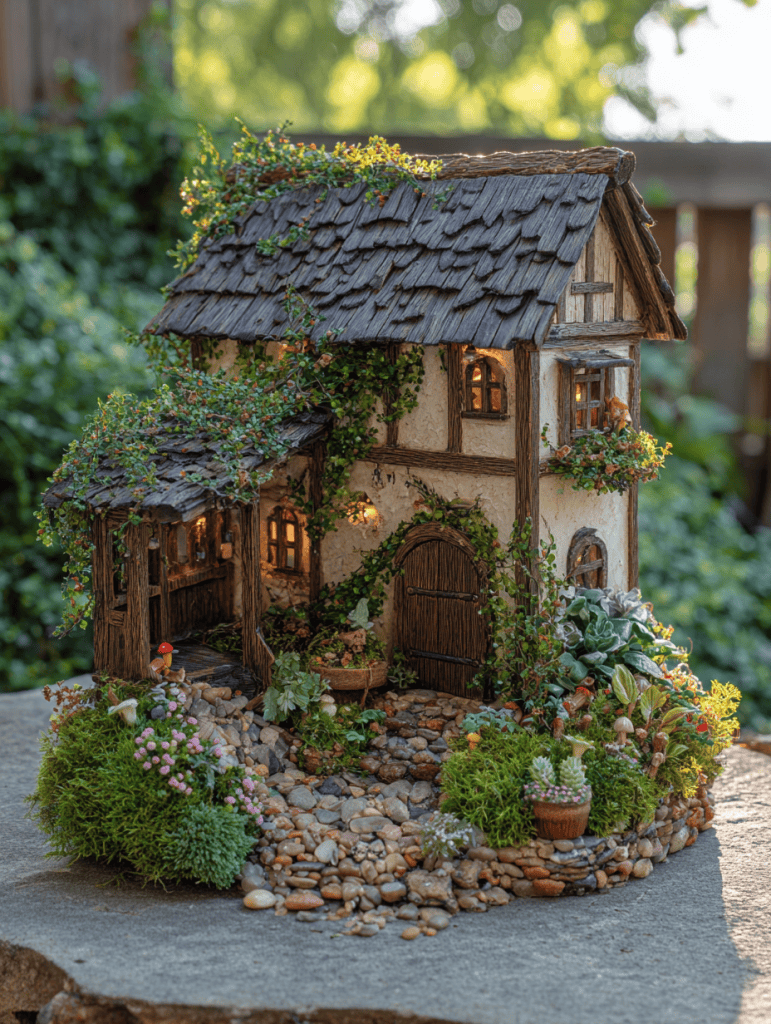
Enchanted Tree Stump Fairy Home
Using a tree stump as a base immediately grounds your garden in reality. Hollow the top slightly or carve a door into the side to create a miniature home. Scale is crucial: small doors, tiny furniture, and moss around the base make the home believable. Add tiny steps or a winding moss path to integrate it naturally with the surrounding landscape. Imperfections — like slightly tilted doors or uneven bark — enhance charm.
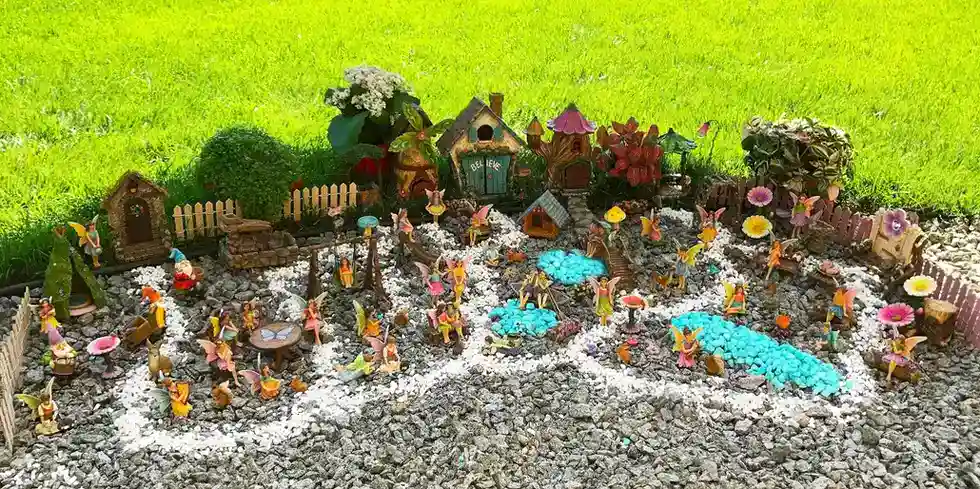
Cottagecore Fairy Garden Village
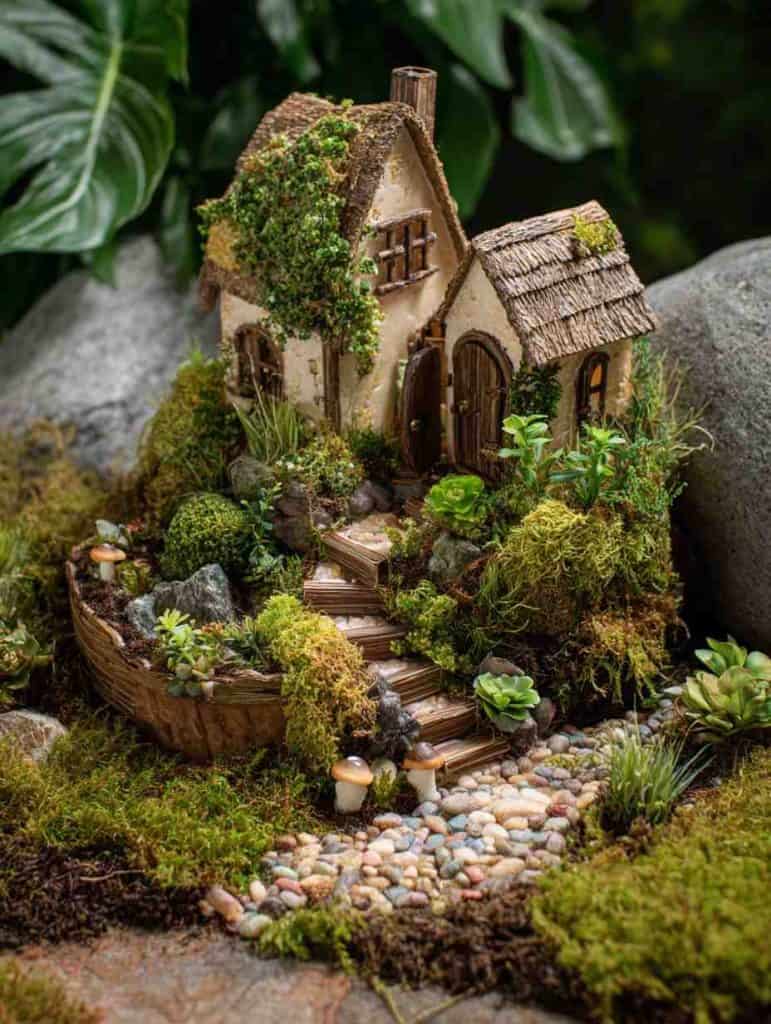
Cottagecore fairy gardens emphasize comfort and domestic charm. Think pastel houses, tiny fences, miniature tools, and tiny tables or benches.
The key is creating a lived-in look: slight tilts in fences, weathered roofs, and natural textures like moss or bark. Limit bright colors; soft, muted pastels make the scene feel gentle rather than sugary. One strong focal piece, like a central cottage, anchors the story.
Minimalist Fairy Garden for Modern Spaces
Minimalist gardens strip down to essentials. Focus on one main element — a house, door, or single fairy figure — and use negative space strategically.
Smooth stones, limited greenery, and a simple color palette create calm and elegance. Minimalism works especially well indoors, in small containers or on shelves where clutter would overwhelm the space.
Fairy Gardens in Lanterns
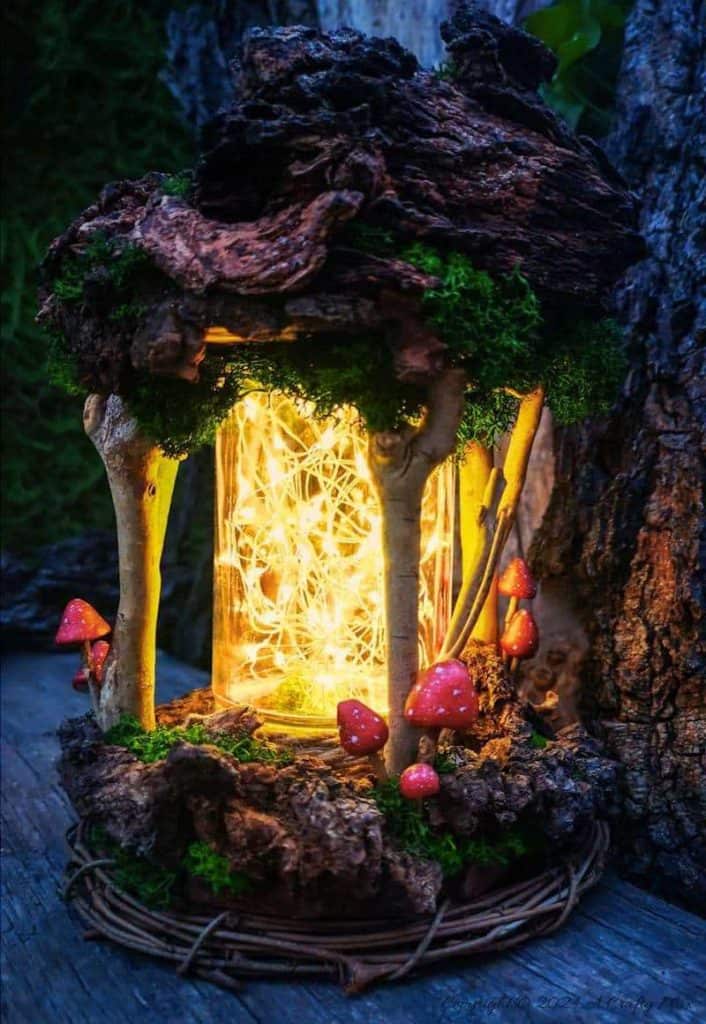
Lanterns create contained magic, almost like a display case. Remove glass panels or leave them partially open for easy access. Small houses, moss, tiny paths, and fairy figures all fit inside, and adding LED tea lights gives subtle glow. Great for indoor display or evening ambiance.
How to Make Fairy Gardens Look Handcrafted, Not Crafty
The difference between a garden that feels magical and one that feels like a weekend project often comes down to restraint. Store-bought miniatures, brightly colored plastic, and excessive decoration scream “craft project.” Handcrafted fairy gardens feel intentional, cohesive, and timeless.
Key principles:
- Edit instead of add: one carefully placed object can carry the scene. Remove anything that doesn’t support your story.
- Repeat materials: consistency in wood, moss, stones, or color unifies the scene.
- Embrace imperfection: slightly crooked doors, uneven fences, and natural variation make it believable.
Even small handmade additions — like a carved door, tiny twig fence, or stone path — dramatically elevate the feel of your garden. Imperfection isn’t a flaw; it’s a design choice.
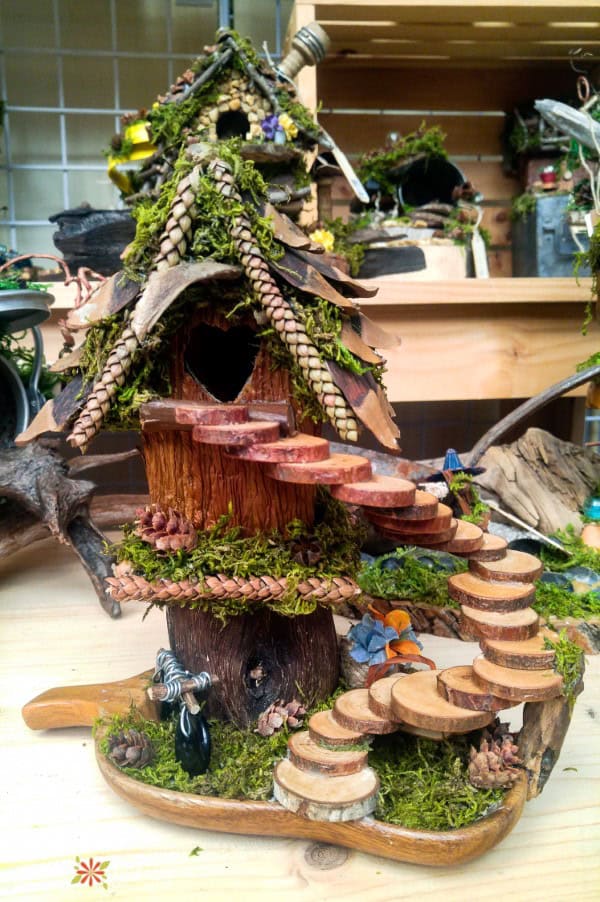
Advanced DIY Details That Transform Your Garden
Creating even a single custom piece adds personality and depth. Ideas include:
- Doors and windows cut from scraps of wood
- Twig or bark fences
- Layered stone pathways or miniature steps
- Roofs made from bark, moss, or slate
Weathering and aging techniques — light sanding, staining, or moss growth — add realism over time. Store-bought miniatures will blend seamlessly when paired with even one handcrafted element, making the scene feel cohesive.
Common Fairy Garden Mistakes and How to Fix Them
Many issues arise from enthusiasm rather than skill. The main culprits:
- Overcrowding: too many miniatures compete for attention. Remove or consolidate.
- Style mixing: combining cottagecore, mystical, and whimsical in one space can feel chaotic. Stick to one or two cohesive styles.
- Scale inconsistency: objects that are too large or too small break the illusion.
- Color overload: limit bright accents to one or two items.
A simple rule: if it doesn’t serve the story, it doesn’t belong.
Maintenance and Letting Time Work for You
Fairy gardens improve with age, especially outdoors. Moss spreads, stones weather, and colors soften naturally. Instead of fighting this, design with aging in mind: choose materials that gain character over time.
Indoor gardens need occasional dusting, plant trimming, and repositioning. Seasonal refreshes — swapping small accents or rotating plants — keep them feeling alive without rebuilding the whole garden.
Budget vs Investment: Where to Spend and Where to Save
You don’t need to buy every miniature or accessory to create a beautiful fairy garden. Spend where it makes a visible impact:
- Focal structures: houses, tree stumps, bridges
- Durable containers: wide trays, lanterns, crates
- Natural materials: moss, bark, stones
Save on seasonal accents, small decorative items, and accessories you plan to rotate. A fairy garden looks expensive when it feels intentional, not when it costs more.
Designing for Adults, Kids, or Shared Spaces
Fairy gardens can appeal to everyone, but the design varies by audience:
- Adults: muted palettes, minimal figures, subtle storytelling
- Children: bright colors, playful characters, interactive elements
- Shared spaces: balance whimsy with cohesion, making it accessible and magical for all ages
Adjust durability accordingly. Outdoor gardens may need sturdier pieces for kids, while indoor adult gardens can favor delicate textures.
Why Fairy Gardens Are More Than Decoration
Creating a fairy garden isn’t just a hobby — it’s a form of mindfulness. Working on a small world slows your mind, encourages observation, and sparks creativity without pressure. These tiny spaces offer an outlet for storytelling, imagination, and quiet reflection. That’s why adults keep returning to them: they’re not just cute, they’re restorative.
Final Thoughts on the Step-by-Step Process
Creating a fairy garden is as much about the process as the finished product. Following these six steps ensures your miniature world is:
- Cohesive and intentional
- Balanced in scale and color
- Alive with story and subtle details
- Easy to maintain and evolve
The beauty of a fairy garden lies in its imperfections and the care you put into it. By planning, layering, and editing thoughtfully, even a small container can hold an entire magical world.

I’m Katerina Lithopoulou, co-creator of DIY Cozy Living. I’ve always loved the little things that make a space feel special. With a background in language and a passion for photography and cozy design, I enjoy turning everyday inspiration into simple ideas people can actually use.
My motto: “Cozy isn’t a trend — it’s a feeling.”
