
How to Build a Decorative Planter Box for Under €30

I need to tell you about the porch at the house in Volos. It’s a lovely porch, truly. There’s the bench, the lanterns, fall blankets, and Maria and Marina have their annual disagreement in October over the pumpkins. Tasos put in a firepit two years ago and once you’re sitting around it, no one will move.
It didn’t have something, though, until fairly recently, a planter on each side of the front door.
I had a very clear idea of what I wanted, a picture in my head. I wanted two matching white planters, one each side of the door, with something green and a bit showy spilling out. You know, the sort of planters that give you the impression someone has given the porch a lot of thought.
So I started looking for them.
*sigh*
You get that feeling, don’t you, of finding something perfect and then being totally knocked back by how much it costs, to the point of needing to sit down? Well, the planters I discovered online were gorgeous. And €90. Each. For a box. A wooden box to be full of compost.
I was in the hall, staring at the price on my phone for ages.
Then, I called Tasos.
What You Need
I told Tasos what I wanted. He looked at my reference photo. He nodded slowly in the way he does when he’s already calculated something in his head and is waiting for the right moment to tell me it’s simpler than I think.
“I can make those,” he said.
This is how the project began. He would build them. I would supervise. We both understood this arrangement completely and had no further discussion about it.
Here’s what he used:
Materials:
- 4 pieces of 12mm plywood cut to 40cm x 55cm (the four sides)
- 1 piece of 12mm plywood cut to 42cm x 42cm (the bottom)
- 8 pieces of 2cm x 7cm x 44cm pine strip (for the trim — 4 at the top, 4 at the bottom)
- Exterior white paint
- Primer
- Wood caulk
- Nails
- Sandpaper
Total from the timber yard: €27.40
I already had the paint and primer. Which meant the wood was essentially the entire cost. €27.40 for two planter boxes that look like something from a garden shop in Kolonaki.
Step 1: Nail the Sides Together
Tasos took two of the 40cm x 55cm plywood pieces and lined them up at a right angle.
I watched from the doorway with a coffee.
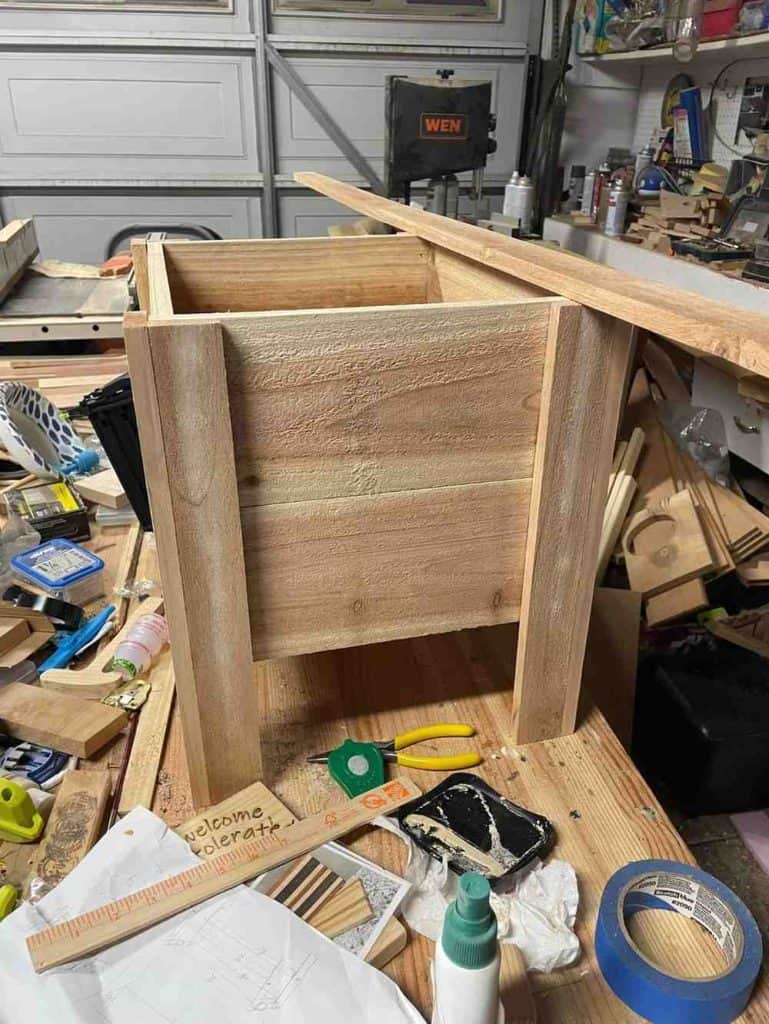
He nailed them together along the edge — a nail every 8 to 10 centimetres. Then he added the third side, then the fourth, until he had an open box sitting on the workbench looking already exactly like what I’d imagined.
This step took about fifteen minutes. I finished my coffee.
Step 2: Attach the Bottom
The 42cm x 42cm piece goes on the bottom.
The edges of the bottom piece should line up flush with the outside of the box — not recessed inside it, flush with it. Nail it in place around all four edges.
Important: Tasos drilled four small drainage holes in the bottom before attaching it. I suggested this. He had already planned to do it. We both claimed credit silently.
Step 3: Sand the Rough Edges
Once the box is together it will have rough edges where the plywood sheets meet. Sand these down — not to perfection, just enough that the trim will sit flat against them and the paint won’t catch on anything.
At this point the box already looks like a planter. A plain, unfinished planter, but unmistakably the right shape. Marina came out at this point and declared it beautiful. She is an excellent audience.
Step 4: Add the Trim
This is the step that turns a plywood box into something that looks designed.
Take 4 of the pine strips and attach them level with the top edge of the box — one on each side, lined up at right angles at the corners, nailed into place. These create a frame around the top of the planter that gives it that clean, architectural look.
Repeat with the remaining 4 strips at the bottom of the box.
The corners of the trim pieces may not meet perfectly. Tasos’s didn’t. This is completely normal and is not a problem.
That’s what caulk is for.
Step 5: Caulk and Sand
Put wood caulk in any little spaces at the angled corners of the trim and where the boards join together. You don’t need to be perfect with it, actually put a bit too much on, and then smooth it with your finger, and then leave it to dry.
Once everything is dry, sand the whole thing again. It should feel lovely and smooth and strong. As you touch it, if your hand bumps on any points, sand those spots once more.
Honestly, this is a step most how-to guides skip, and it truly is what separates a planter that looks made at home from one that looks shop-bought.
Step 6: Prime and Paint
Prime first. Let it dry completely — not mostly dry, completely dry. I cannot tell you how many times I have watched someone paint over primer that wasn’t quite dry and regretted it. Let it dry.
Then two coats of exterior white paint. We used exterior paint because the Volos porch gets weather — wind off the sea, rain in winter, heat in summer — and I wanted these to last more than one season.
Between coats, lightly sand again with fine sandpaper. The second coat goes on smoother and the finish looks more professional than you’d expect from something built on a Saturday morning.
Let the second coat dry fully before you move the planters to their final spot. Again — fully, not mostly.
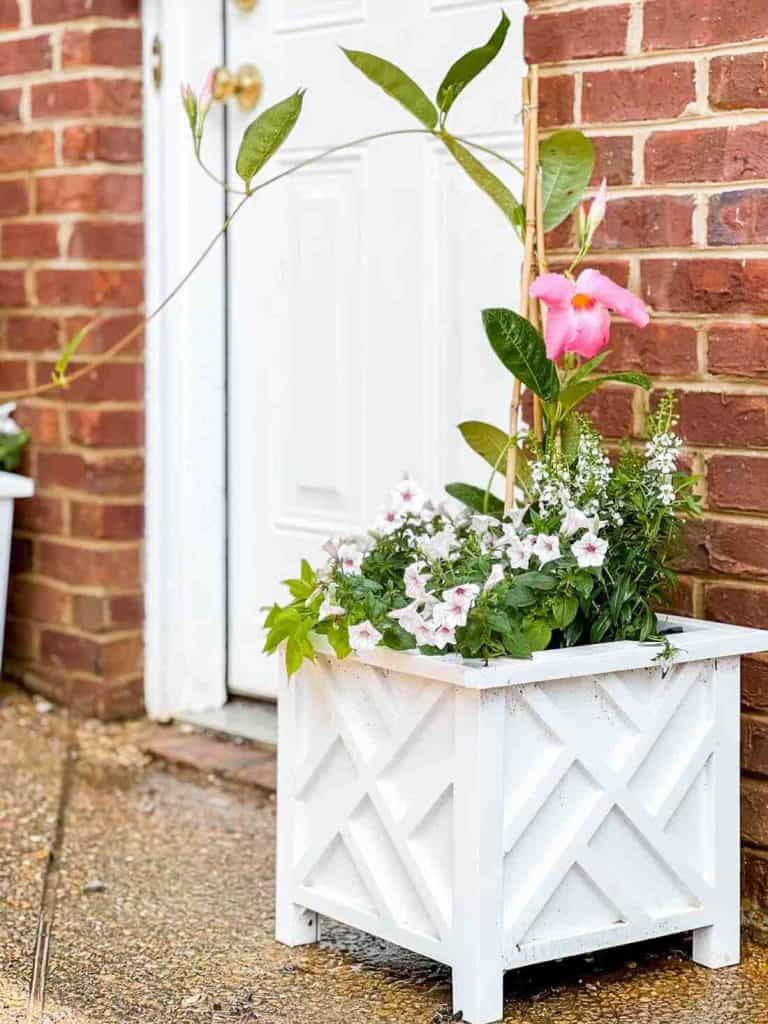
The Finished Result
€27.40.
Two planter boxes, white, exactly the size I wanted, exactly the style I wanted, flanking the front door of the Volos porch exactly the way I’d imagined.
I put a topiary in each one. Tasos carried them into position. Maria said they looked good. Marina said they looked professional — which is, as I’ve mentioned before, her highest compliment.
Tasos looked at them for a moment with the particular expression he has when something has turned out well and he knows it.
He didn’t say anything. He didn’t need to.
The porch looked exactly right.
A Few Things Worth Knowing
Use exterior paint even if your planter is under a covered porch. Moisture finds its way in regardless and exterior paint handles it significantly better.
If you want to age the look rather than keep it crisp white — a light sand after the final coat of paint, followed by a coat of clear wax — gives the planter a slightly worn, vintage finish that looks beautiful on a rustic porch.
And if your trim corners don’t meet perfectly: caulk. Always caulk. Caulk is the answer to every small imperfection in a painted wood project and I will stand by this opinion indefinitely.
Total Cost
Wood from the timber yard: €27.40
Paint and primer: already had them.
The satisfaction of walking past €90 planter boxes online and knowing you made better ones for less than €30: considerable.
That’s all I have for today. If you make these, I’d love to see them — leave a comment below or tell me what you put in yours. And if you have questions about the dimensions or the build, ask away

I’m Katerina Lithopoulou, co-creator of DIY Cozy Living. I’ve always loved the little things that make a space feel special. With a background in language and a passion for photography and cozy design, I enjoy turning everyday inspiration into simple ideas people can actually use.
My motto: “Cozy isn’t a trend — it’s a feeling.”
