
How I Make Scented Candles at Home — The full, friendly, science-backed guide (so you can, too)
I can still recall making my very first scented candle – the glue gun shaking in my hand, a small oil mark on the table I really like, and the satisfying moment the flame finally settled into a stable burn.
Following lots of melting, testing – and quite a few candles given away – I now have a method I find reliable, doesn’t cause trouble, and is, in truth, very enjoyable.
This guide is written as if I were chatting to a friend over a coffee: I’ll take you through what I do, stage by stage, giving you the exact ratios and temperatures I employ, clarifying why I make these choices – so you can experiment with confidence – and including advice I’ve gained from mistakes.
I also let on my SECRET wax recipe, which took over six months to MASTER.
PLEASE BE SURE TO FOLLOW EVERY STEP, in order to create something lovely and safe. Don’t try your own stuff because you most probably will mess up.
Quick overview — what you’ll need
(If you already have some experience, skim — but don’t skip the safety bullets.)
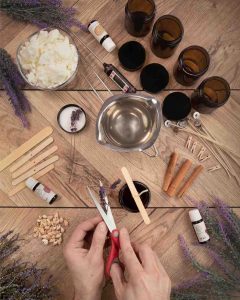
Essentials I keep on my work table:
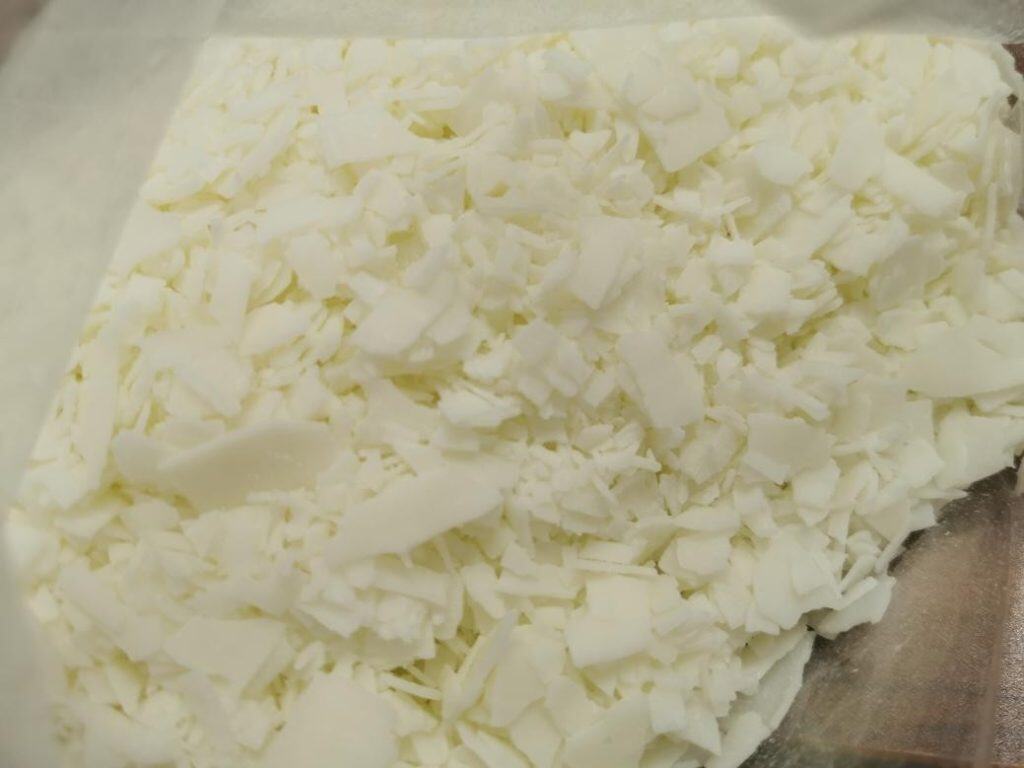
On my workbench I always have a wax of some sort, so either soy wax in flake form, paraffin wax as pellets, or a coconut and soy blend (and I’ll explain the blend in a bit).
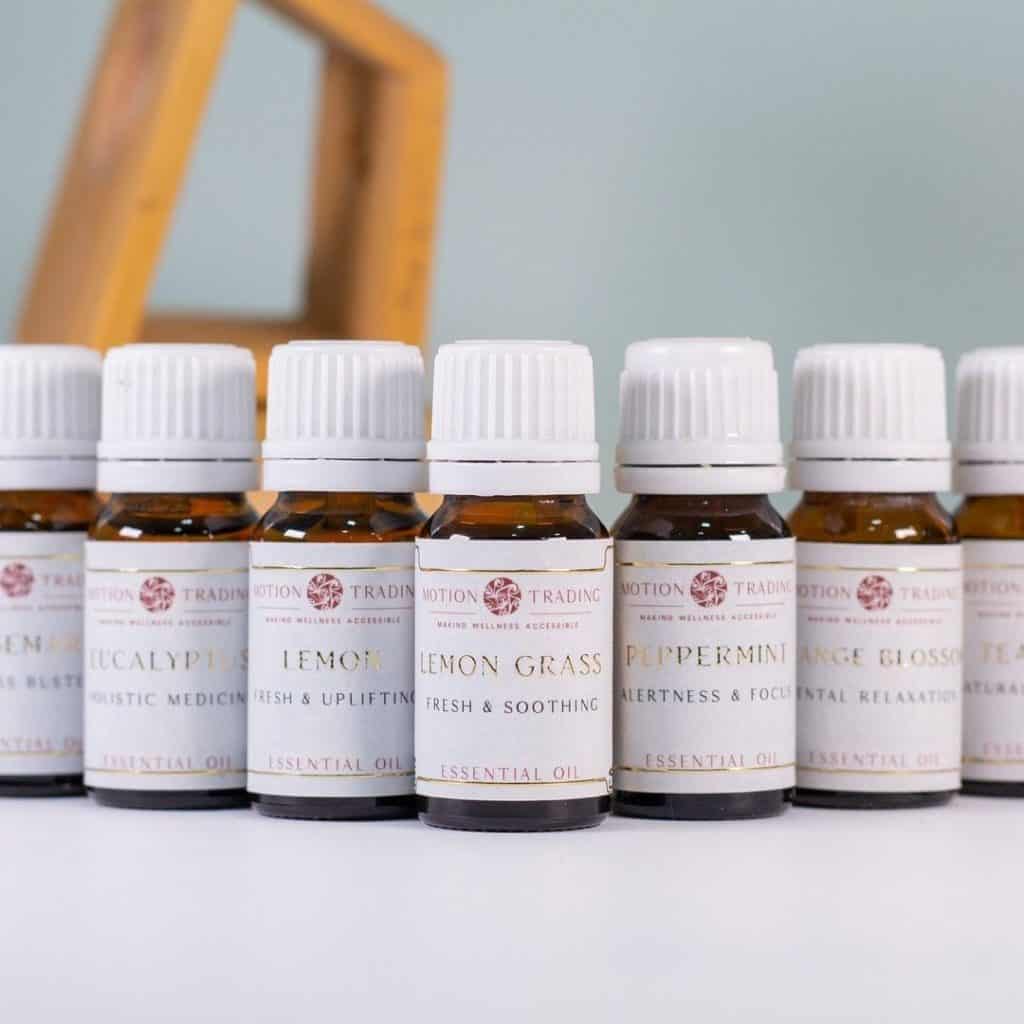
I also have fragrance oils made for candles, or essential oils that are safe for candles. Then there are wicks – lots of sizes, and ideally they’ll already have the tags and little stickers to hold them in place, or have metal feet.
I melt the wax in a double boiler or a pot only for wax, and for really big amounts I use an electric dye pot. A digital thermometer is important (being accurate to within one degree Celsius is really handy).
A metal or glass jug to pour the hot wax from is needed, as are containers of some kind, for example glass jars, tins or molds.
Keeping wicks in the middle of the jar is vital for an even burn and no tunneling. To keep the wicks centered in the container as the wax sets, I use a wick centering tool or wooden chopsticks, which are easy to use and inexpensive.
You’ll also need scales to get the wax and scent quantities perfectly right. Plus labels, gloves, and if your fragrance is very strong, a respirator mask (though I don’t use one).
Safety essentials:
And for safety? Have a fire extinguisher (a Class B one is best) very near to where you are, and good ventilation. I open a window when I pour in a strong scented oil. Most importantly, don’t ever leave melting wax on its own.
Choosing your wax (the foundation)
The wax you choose alters how your candle appears, how long it burns, how well it keeps scent, and how it behaves with the wick.
What I use most and why:
- Soy wax (from plants) – ok for beginners (not great). It’s from a renewable source, burns more coolly (therefore less smoke), and usually keeps scent well in container candles. It generally has a lower melting point (about 45–60 °C), so it makes a smooth, creamy melted area. It has imperfections.
- Paraffin wax – the traditional option. It keeps a very high scent load and makes a strong scent dispersal (how far the scent travels), but it can create more smoke and is from oil. The easiest way of making candles.
- Coconut-soy mixes – my personal choice for jars: they combine a clean burn with good scent dispersal and a neat surface (I reveal my recipe below)
- Beeswax – costly and naturally scented (honey scents). Very good for long burns and nearly smokeless performance, but not good if you want to add heavy scents.
If you intend to sell candles, do trial batches of the precise wax combination you decide on – small changes in wax blends affect wick size and fragrance load.

Keep in mind. Soy wax (which I bet you wanna choose) will not burn as good as a parafin wax because you know, it’s soy.
Now, I will do something that probably I shouldn’t but who cares life is short.
Here is my blend that took me over 400 tests to make and it is flawless. It is 80% Soy + coconut (it is ready-made) + 20% parafin. This blend fixes ALL the problems that the 100% natural candles have (frosting, holes, ugly top surface, uneven burn and many more).
Fragrance and essential oils — what to know
Fragrance oil vs essential oil:
- Fragrance oils are formulated for candles: they’re created to withstand container heat, are consistent, and often give stronger throw.
- Essential oils are natural but vary batch to batch, and some don’t tolerate the heat of burning well (they can accelerate wick mushrooming or not vaporize cleanly).
Two key numbers I always check:
- Flash point — the temperature at which the oil gives off enough vapor to ignite. Never exceed the safe handling temperature when mixing.
- Fragrance load (phr or %) — how much fragrance the wax can hold. A typical range I use:
- Soy: 6–10% (by weight)
- Paraffin: up to 12–15%
- Blends: around 8–12%
My go-to fragrance-mixing rule (works like a charm): start at 6% fragrance load for initial tests (safer and less likely to sweat), then push to 8% if the scent is too weak, and test a batch at 10% only if both the wax manufacturer and your small burn tests say it’s stable.
Practical tip: weigh everything. If you plan to make a 500 g candle and you want 8% fragrance, that’s 500 × 0.08 = 40 g fragrance oil. Use a scale, not tablespoons.
Wicks: tiny but critical
Wick selection is the single most common reason candles behave badly (tunneling, soot, small melt pool). Wick choice depends on:
- Wax type
- Container diameter
- Fragrance load (more oil often needs a bigger wick)
- Additives (hidden additives can raise melt pool depth)
Common wick types:
- Cotton flat braid (LD, CD sizes) — common for soy and blends.
- Wood wicks — pretty crackle and a wide, even melt pool, but they need extra testing for fragrance load.
- Core wicks (cotton with paper or zinc core) — stiffer, good for bigger containers.
My rule of thumb when testing sizing: make a small candle with the wick you think will work, then run a burn test for 2–3 hours.
Check the melt pool reaches the edge in the first full burn cycle (avoid “tunneling”). If the pool is too small, move up one wick size; if it smokes or has a too-large flame, step down.
Wick tip: always trim the wick to ~1/4 inch (6–7 mm) before lighting — that keeps soot down and gives a steady flame.
Equipment & setup — the way I arrange the table
I set up a dedicated “candle corner”:
- Heat-resistant mat.
- Scale and thermometer within reach.
- Prepped containers lined up (wicks attached).
- Melting pot on a stove or electric hot plate.
- Clean cloths and labels ready.
For small batches, I use a double boiler: the indirect heat prevents scorching. For larger batches, I use an electric wax melter/dye pot with a temperature controller.
Pro tip: label a batch immediately with wax type, fragrance, % load, wick size, melt temp, and date. You’ll thank yourself during troubleshooting.
Step-by-step: the method I use (simple 500 g jar example)
This is a full walk-through for one 500 g jar (adjust quantities for batch or smaller candles):
1. Prep
- Attach wick to jar bottom (wick sticker + a dab of hot glue if needed).
- Center the untrimmed wick with a centering tool or clothespin.
2. Measure
- Weigh 450 g wax (for a 500 g finished weight I account for some fragrance).
- Weigh fragrance for 8% load → 500 g × 0.08 = 40 g.
3. Melt
- Slowly melt the wax in a double boiler to the recommended pour temperature for your wax (common ranges):
- Soy blend or Soy: ~85-90 °C to melt fully, then cool slightly before adding fragrance.
- Paraffin: ~75–85 °C.
- Stir gently and consistently.
4. Cool & add fragrance
- Reduce heat. Bring wax down to the fragrance addition temperature (often 65-70 °C for soy; always follow the wax manufacturer’s guidance).
- Add fragrance oil (40 g) and stir gently for 1 minute to ensure even distribution. I count — a steady 80-100 rotations at medium speed so that you don’t form air bubbles.
5. Pour
- Pour at the recommended temperature (for soy: often 60–65 °C). Pour slowly and steadily into the jar.
- Leave a 1 cm headspace on the top.
6. Secure wick and cure
- Keep wick centered. Let candles cool undisturbed for at least 12–24 hours at room temperature. I avoid moving them.
- Once set, trim wick to ~6–7 mm.
7. Cure time
- I wait 3–7 days before the first burn for soy candles (this gives the fragrance time to bind to the wax and improves cold/hot throw). Some makers cure up to 2 weeks for maximum strength — but I do a 3-day minimum test.
Below, there is an example. Not perfect but you will get an idea. (Follow the steps and the specific numbers and blends I talked about for best results).
Curing, testing, and burn testing — the science behind it

“Curing” is where the liquid fragrance molecules become evenly dispersed in the solidified wax matrix. It affects both cold throw (smell when unlit) and hot throw (smell when burning). A proper cure stabilizes scent molecules and reduces “sweating” (oily circles on the wax surface).
My testing routine:
- Cold throw test: sniff the candle after 24 hours and again after 72 hours.
- Hot throw test: burn for 2 hours after 3–7 days of cure; stand in another room to assess how the scent fills space.
If scent is weak:
- Increase fragrance load by 1–2% for the next batch.
- Try a different fragrance or blend a stronger base/heart note into your recipe.
If scent is overpowering or causes smoking:
- Reduce fragrance load and/or choose a different wick.
Scientific note: the volatility of fragrance components (how easily they vaporize) determines scent throw; lighter molecules travel further but may fade faster. That’s why many commercial fragrances are carefully balanced blends.
Troubleshooting common problems (and what I do)

You won’t have these problems if you follow my advice and copy the blend I revealed above.
- Tunneling — Melt pool doesn’t reach the jar edge.
- Solution: use a slightly larger wick, increase full initial burn time (let the candle burn until the melt pool reaches the edge at first burn), or slightly raise fragrance amount if the oil is suppressing the melt pool.
- Sooty or smoking wick:
- Solution: trim to 6–7 mm, reduce fragrance load, move to a slightly smaller wick size.
- Mushrooming (black buildup on wick):
- Often caused by too much fragrance or certain fragrance components. Reduce fragrance, switch fragrance, or choose a different wick.
- Sweating (oily surface):
- Caused by excess fragrance or poor compatibility. Lower fragrance percentage or test a different wax. (Don’t put more fragrance than what I told you. Maximum 9-10%. Optimal 8%).
- Cracking or frosting (white film on surface in soy wax):
- Mostly cosmetic. Frosting is natural in soy; rapid cooling increases it. Avoid moving candles while cooling; store in a stable temperature.
Again if you follow the steps I mention you will NOT face these problems but it’s good to know, so that you respect the free knowledge and the headaches you avoided by reading this article.
Scent blending — how I create balanced scents
I approach scent like composing a three-note chord: top, heart, and base notes.
- Top notes: light, volatile (citrus, lavender). First you smell them.
- Heart (middle) notes: body of the scent (rose, cinnamon, herbals).
- Base notes: heavy and long-lasting (vanilla, sandalwood).
A simple blending starting point I use:
- 30% top, 50% heart, 20% base.
Example: to create a warm autumn blend:
- Top: orange peel (30%)
- Heart: clove/ cinnamon (50%)
- Base: vanilla/ sandalwood (20%)
Always test at smaller loads first (4–6%) to ensure compatibility, then scale up.
Coloring, labels and presentation
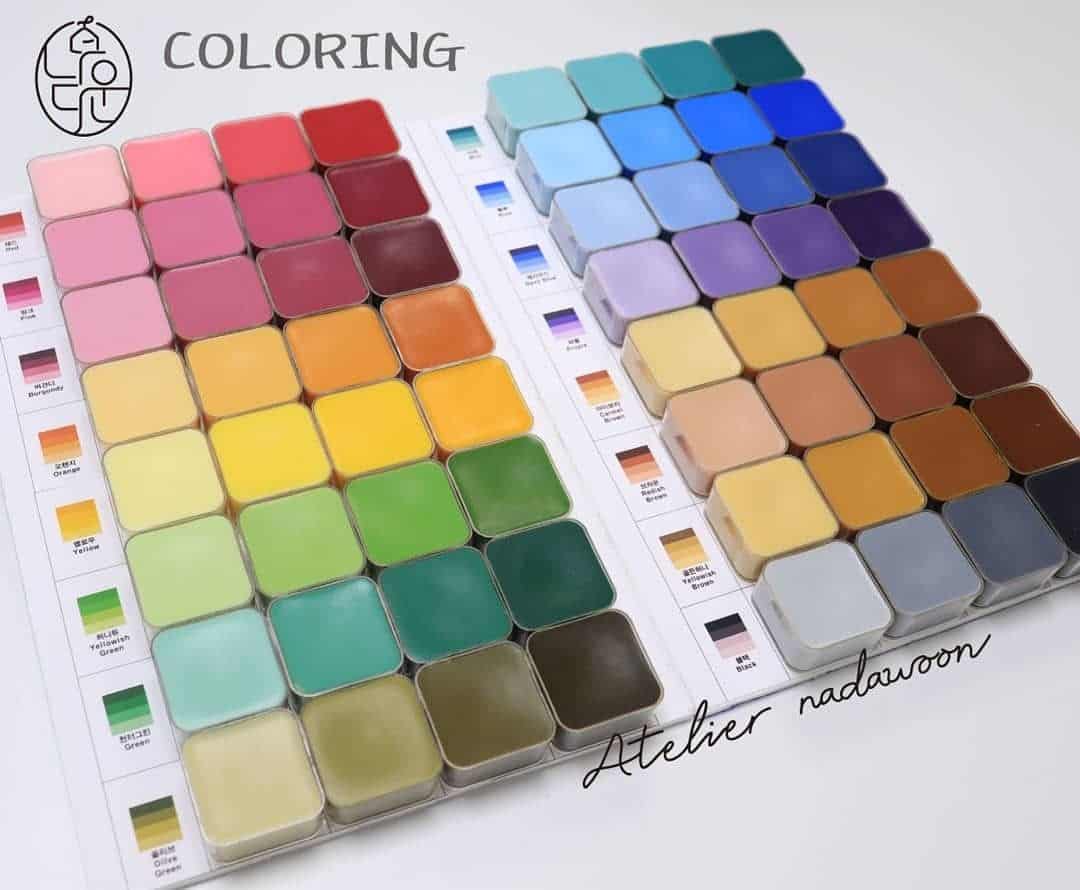
- When coloring with candles, use dyes created for wax, and either liquid or block types will work. Remember, the color will get stronger as the wax gets colder, so don’t use too much at first.
- For a really neat look on your jars, give the glass a polish after the candle has hardened, but before you put a label on.
- On your labels, put the type of wax, what the smell is, the size of the wick, the percentage of fragrance, and a warning about burning safely. Something like “trim the wick to 1/4 of an inch before you light it”, and this is especially important if you’re going to sell them.
Safety, regulations and environmental notes
A few responsible practices I always follow and recommend:
- Always use fragrance oils and dyes specifically for candles. Oils for soap or cosmetics don’t necessarily burn well in a candle.
- Make sure the room has good airflow. When you burn test candles, they give off fumes, so get some fresh air in your workspace.
- If you want to sell your candles, look at the International Fragrance Association (IFRA) for how much of each scent is safe to use and if there are any limits, and at the National Candle Association (NCA) for the best ways to do things in the candle industry.
- Some fragrance ingredients can cause allergies. If you’re selling, you need to tell people with sensitivities this.
- Get rid of wax left over from trimming by recycling it, and wipe up any spills with something to soak them up. Do not wash them down the sink.
And a bit of science: candles as they burn release carbon dioxide and water when they burn completely. When they don’t burn completely, they create soot (which is carbon) and small amounts of other substances. Choosing the right wick and keeping it trimmed helps make sure the candle burns as completely as possible.
Science note: Candle emissions and indoor air quality are an area of active research. Complete combustion yields CO₂ and H₂O; incomplete combustion produces soot (carbon) and trace organic compounds. Proper wick selection and trimming reduce incomplete combustion.
Scaling up & small business tips (if you want to sell)
If you’re thinking of selling:
- Start by making each batch the same way, every time, and keep very detailed records of batch numbers, temperatures, how long things took, the wick and the batch number for your fragrance.
- Get someone else to burn test your candles, or follow the ISO standard testing methods for candles. (These exist, and if you’re selling a lot of candles, you will want to be sure they work as you expect).
- Think about insurance, what the rules are for labels in your area, and if someone was hurt by your candle, what your responsibility would be.
- When you figure out your price, include the cost of your time and the materials. Handmade candles can be a bit more expensive, but it takes a lot of work to make them.
My favorite wax blends to try (beginner to advanced)

Beginner: Clean Citrus Jar (500 g jar)
- Wax: soy+ coco(80%) + 20% parafin at 8% fragrance
- Fragrance: lemon essential / fragrance blend (cold test first). I like vanilla too.
- Wick: cotton flat braid, size 2 (test)
- Pour temp: 60–62 °C
- Cure: 3–5 days
Intermediate: Warm Spice (500 g jar)
- Wax: coconut-soy blend, 8% fragrance
- Fragrance: orange peel 30%, cinnamon 40%, vanilla 30%
- Wick: cotton core wick, size designed for 8 cm diameter jar
- Cure: 7 days for full hot throw
Advanced: Woodwick Crackle Candle
- Wax: soy coco 80% +20% parafin (this is a staple) for wood wicks (manufacturers sell recommended blends)
- Fragrance: vetiver + cedarwood + bergamot
- Wick: wooden, wide slat (pre-treated)
- Note: wood wick recipes require extra testing; follow wood wick manufacturer guidelines.
Frequently asked questions
How long should I wait before burning a homemade candle?
For candles with soy wax, I give at least three days to ‘cure’ and usually a full week for those with a lot of different types of wax in them.
How much fragrance oil should I add?
Regarding how much perfume to put in, with soy wax you should begin by using 6 to 8 percent fragrance oil in relation to the weight of the wax. Only increase the amount after you’ve actually lit the candle and seen how it burns.
Can I use essential oils?
You can use essential oils, absolutely. But you need to pick ones that can withstand the heat and really test them out. Lots of scents are specifically designed for candles, and are more reliable and safe.
Why is my candle tunneling?
Candle tunneling happens most often because the wick is too thin or you didn’t burn the candle for long enough the first time to melt all the wax right to the sides of the glass.
Where to learn more — good sources I reccommend
If you’d like to read more, these groups and kinds of literature were helpful to me and are good next steps:
- National Candle Association (NCA) – sensible industry advice and safety best practice.
- International Fragrance Association (IFRA) – scent ingredient safety and levels of use which are advised.
- Technical literature on burning and indoor air quality – look in journals such as Chemical Research in Toxicology, Journal of the Air & Waste Management Association, and health of the environment publications for research about candle emissions.
- Wax producers (e.g. suppliers which give technical data sheets) – they publish melting points which are advised, scent loads and pour temperatures for their waxes.
- (If you want, I can bring up the latest NCA or IFRA pages and specific technical data sheets for the precise wax make you plan to use – state the make and I’ll get their recommended temperatures and load ranges.)
(If you want, I can pull up the latest NCA or IFRA pages and specific technical data sheets for the exact wax brand you plan to use — say the brand name and I’ll fetch their recommended temps and load ranges.)
Final practical checklist (things that make the difference)
- Make sure the place you’re working is airy and tidy.
- Have your scales, thermometer and pouring jug all ready to go.
- The wicks need to be the right length and be positioned in the middle of their containers.
- Weigh the wax, and measure your fragrance in grams.
- Pour the wax at the temperature recommended, and gently stir in the fragrance for two or three minutes. Don’t rush the stirring, because you will get air bubbles, and I bet you don’t want those, right?
- Once poured, leave the candles to cool and don’t touch them while cooling, and write down all the details of this batch.
- Then, let the candles cure (sit) for three to seven days for the scent to fully blend with the wax.
- Before lighting, trim the wick to about six or seven millimeters.
- Finally, do one or more two hour burn to be completely sure everything is perfect
My closing thought (and a tiny dare)

Making candles is equal parts craft and chemistry — that’s what makes it so addictive for me.
It’s forgiving enough to start on a kitchen table, but layered enough that you can spend years tinkering and still find new subtleties.
If you have any questions about the candles, lemme know. I am pretty good at candle making cause I had a candle business in the past, therefore don’t hesitate to ask me even if you think that your question is stupid, trust me it is not. You are just a beginner.
Until next time,
Stay safe,
Tasos
I’m Anastasios Moulios, co-founder of DIY Cozy Living. I enjoy finding creative, practical ways to make small spaces feel warm, stylish, and lived-in. I started this blog with Katerina to share real ideas that make a home feel a little more personal and a lot more comfortable.

I was an avid candle maker in my teenage years. That was 50 years ago. I’m getting ready to retire and I’m wanting to dive into candle making as a hobby and maybe a little more. We didn’t have many wax options in those days. Thank you so much for all the knowledge and research you shared. I may be reaching out to you in the future. ❤️
We are so glad you liked it Cynthia! <3
Very good information. Thank you for sharing
Thanks you so much, Kathy!
I am very new to candle making. I just read your post and I think that it will be helpful to me. Thank you for sharing this information
Thank you, Pat. If you run into any problems (which is possible) don’t hesitate to ask me and we will figure it out together.