
How I Made a Garden Hose Holder With a Post and Reel (For Under €40)
I want to tell you something before we get into this.
For two years, two years, I stepped over the same garden hose every time I walked into the garden. It was just there.
Dumped on the ground in that particular way garden hoses have, taking up exactly as much space as possible while also managing to look like something you might trip over at 7am before your morning coffee!
Tasos had opinions about this, of course. His opinion was that this was not a problem at all.
His opinion was that the hose was fine. His opinion was delivered with the same calm confidence he uses when he tells me the dining table fits the room, and we all know how that ended.
So I decided to fix it myself!
The Part Where I Went to the Hardware Store With No Plan
This is a thing I do. I decide something needs to happen, I go to the hardware store full of energy and intentions, and then I stand in an aisle for twenty minutes holding something I don’t recognise while a very patient employee tries to understand what I’m asking for.
This time was different. This time I had a photo on my phone.
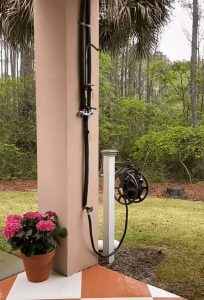
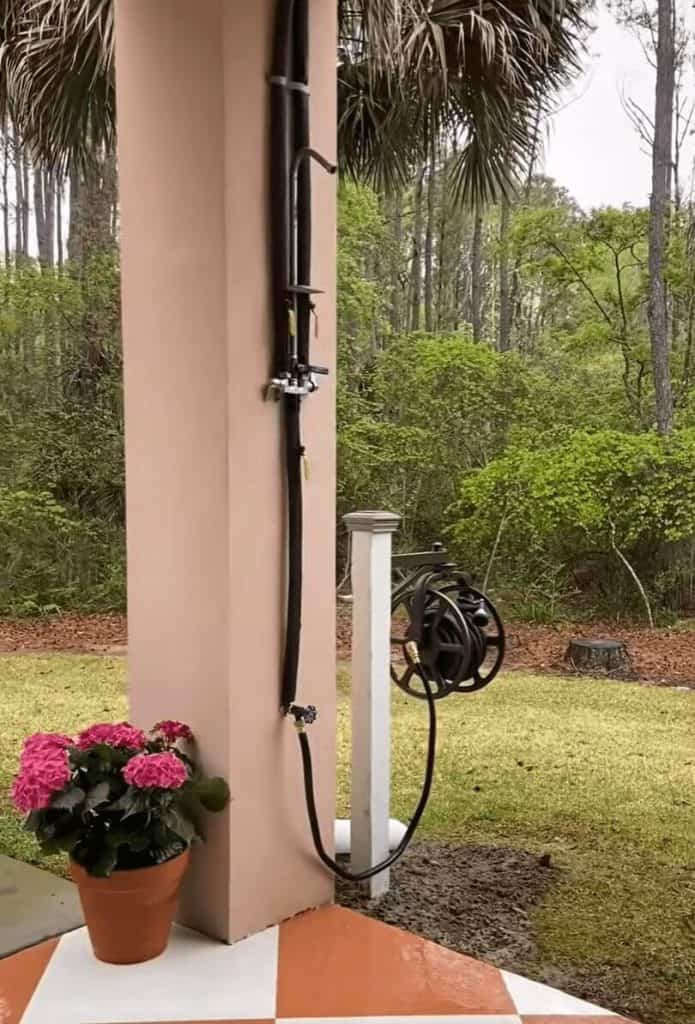
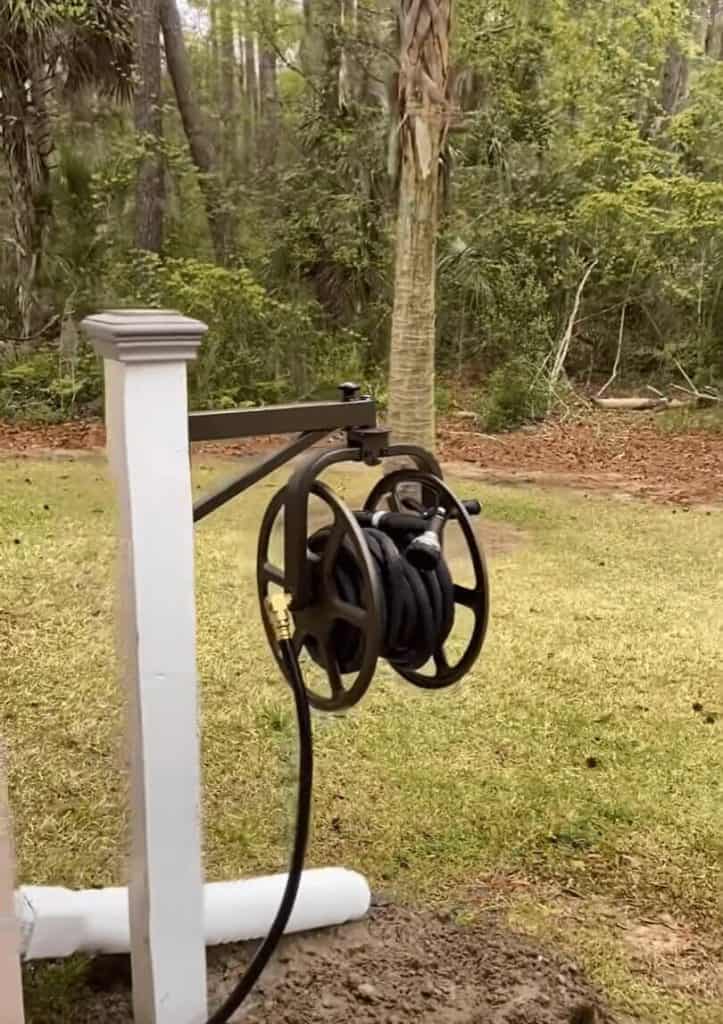
I showed it to the man at the hardware store. A white post, set into the ground. A metal hose reel on a bracket arm. The whole thing looking neat and permanent and like someone had actually thought about it.
He looked at it. He nodded. And then he walked me to exactly the right aisle.
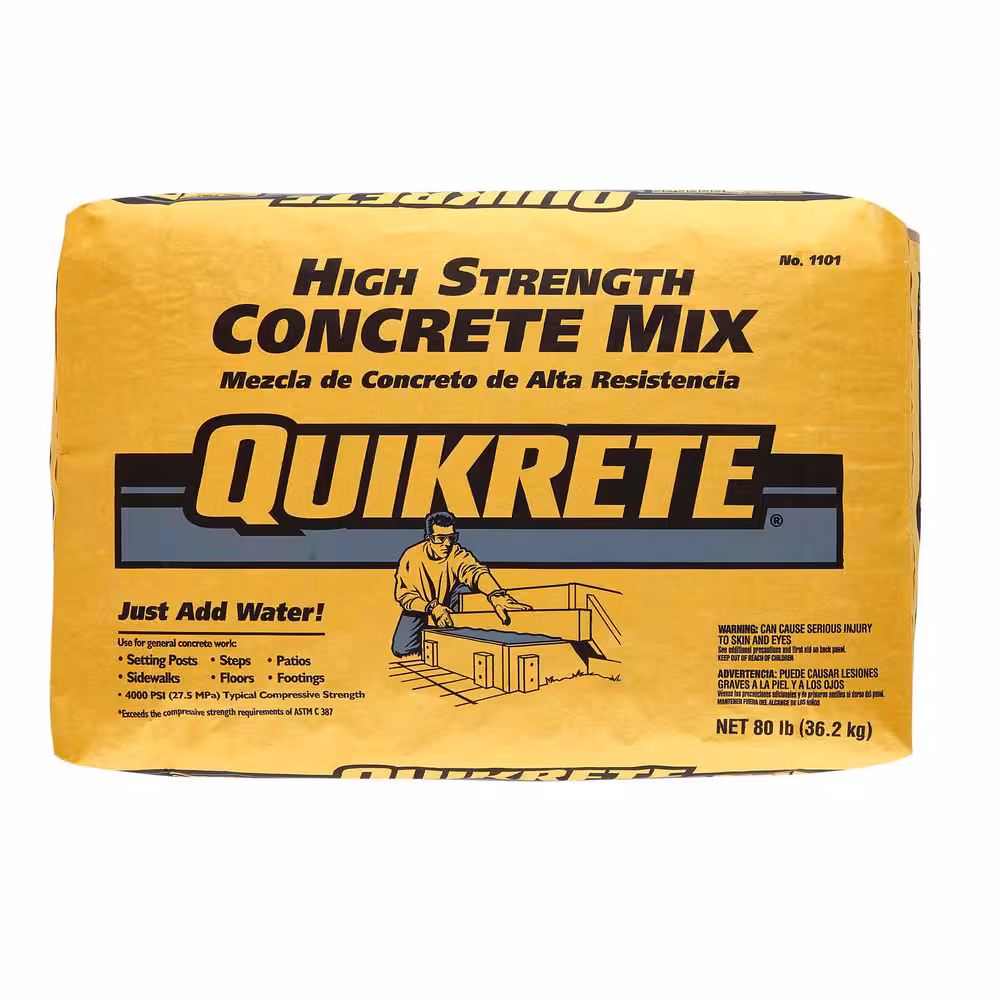
A decorative vinyl post. A hose reel bracket. A bag of fast-setting concrete.
The whole thing cost less than €40.
What You”ll Need
So, before I explain how I built my hose holder, let me list everything you’ll require, and I mean everything (not counting things you’d probably have in your garage already).
You’ll need a decorative post for the garden, vinyl or wood, with a top on it. I have a white one about one and a half meters high, and it’s important to get something that looks as if it was deliberately put there, not just a spare bit of wood.
Also get a metal bracket for the hose reel itself. Importantly, it should have a part that spins around, so you can pull the reel out to use the hose and then swing it neatly back into place.
I think the dark bronze colour is lovely and is good at concealing water stains.
One small bag of concrete that sets quickly will be sufficient. You’ll want this to stop the post from falling over when someone (and they will) gives the hose a pretty good tug.
A drill with drill bits for brickwork is what you’ll use to fix the bracket to the post.
A spade in order to dig the hole for the post.
A spirit level, this is not optional. I will explain why shortly.
How I Made It (Including What Didnt Work At First)
Step one: Choose the right spot
That seems pretty straightforward, but it isn’t.
You really have to consider the water source, the length of your hose, and if the post will appear to fit in the place you’re putting it, or just look as though you’ve planted it there for lack of anything better to do.
I went for a location by the garden tap, a little to one side, so it isn’t the very first thing you notice from the window. It’s near enough to be helpful, but far enough to seem as though I’d given it some thought.
Step two: Dig the hole.

The hole needs to be deep enough that the post won’t move. Roughly 40-50cm is standard for a post this height. Use the spade, take your time, and try not to hit anything unexpected underground.
I hit a root.
It took twenty minutes to deal with the root. This is not in any tutorial I have ever read and I think it should be.
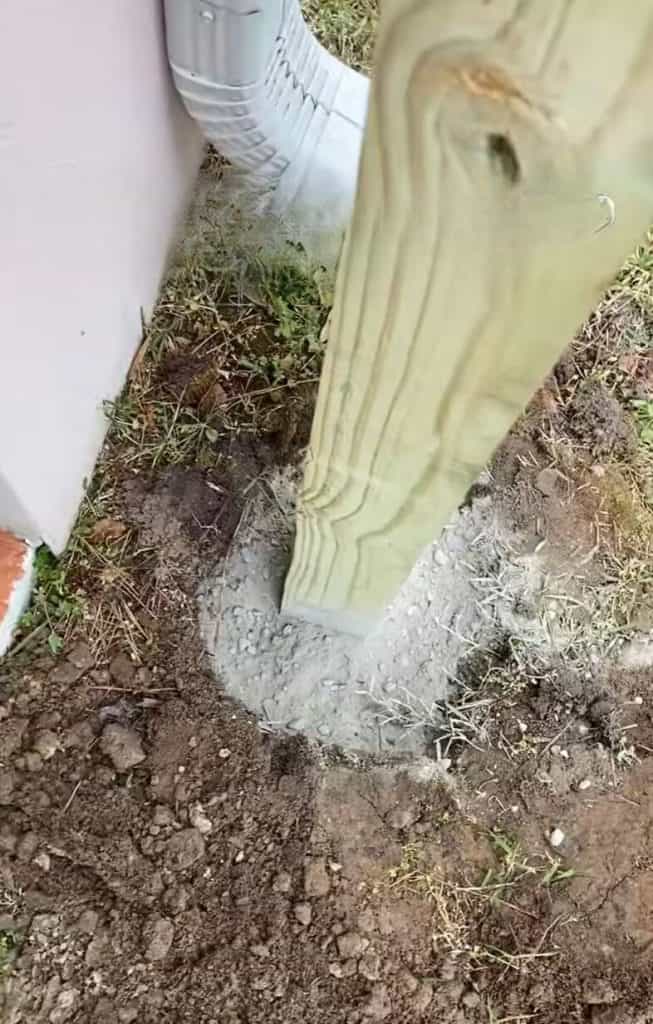
Step three: Set the post in concrete.
Place the post in the hole. Before you pour the concrete — and I cannot stress this enough — check that the post is straight. Check it from the front. Check it from the side. Get someone to look at it from a distance.
This is the step that required Tasos.
I asked him to check if the post was level. He said it looked fine. I said I wanted to use the spirit level. He said it was unnecessary. I handed him the spirit level.
It was not level.
He adjusted it. He didn’t say anything. I didn’t say anything. We both understood what had just happened.
Mix the fast-setting concrete according to the instructions on the bag and pour it into the hole around the post. Do not move the post while the concrete sets. This is where most people go wrong — they pour the concrete, feel good about it, and then nudge the post just slightly to make it look better and undo everything.
Leave it for at least an hour. I left mine overnight because I had learned from past experience that patience in this step saves a great deal of trouble in every other step.
Step four: Attach the bracket.
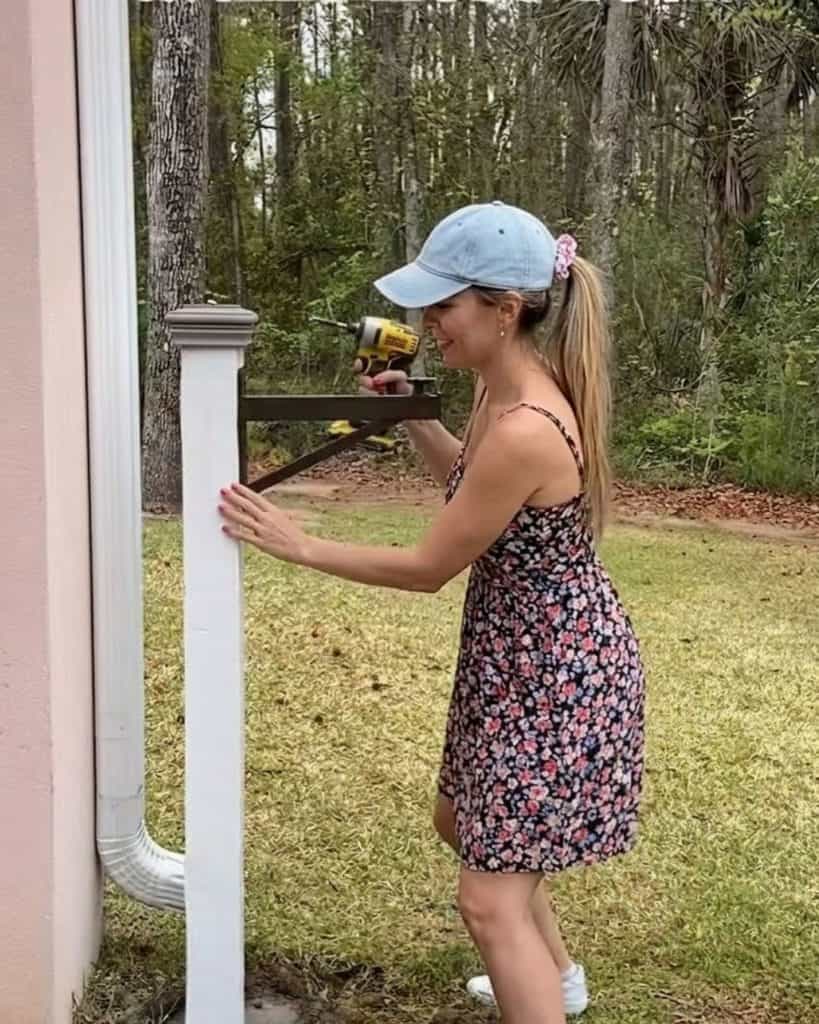
Right, once the post is firmly in place, you can get the hose reel bracket on. Nearly all of these brackets include screws and a mounting plate. So, put the plate on the post at the height you’d like, use a pencil to mark the screw holes, and then drill into the post.
The height is actually quite important! If it’s too low, it’ll be awkward to wind the hose up. Too high, and pulling the hose out will get on your nerves each day. I put mine up so the reel is about at hip height, which means it’s within easy reach for winding, and the hose doesn’t scrape along the ground and get muddy when it’s hanging.
Now, fix the bracket to the plate, make sure it’s properly attached, and tug on it strongly. Only when you’re sure it’s solid should you put any hose on it.
Step five: Wind the hose.
Hook the nozzle end onto the reel and begin winding. The reel rotates — work with it. Keep the coils tight and even so the hose doesn’t bunch on one side.
Garden hoses have strong opinions about direction and they will let you know. Work with the natural curve rather than against it. Once you find the direction it wants to go, the whole thing takes about a minute.
What It Looks Like Now
It looks like it was always there.
That’s the thing I wasn’t expecting. The white post, the dark reel, the bracket arm — it looks like a proper garden feature, not like a problem I solved on a Tuesday because I was tired of stepping over something on the floor.
The hose is off the ground. Tasos walked past it the first day and said it looked good. He said it with the particular tone he uses when he has decided something is better than the way it was before, without committing to the position that the previous situation was a problem. I’ve known this man a long time. I understand the dialect.
Maria walked past it without noticing, which is the highest possible compliment for a garden fixture. Marina stopped and looked at it for a moment.
She said it looked professional.
She’s eight. She knows what she’s talking about.
A Few Things I’d Do Differently
If I were starting again, I’d buy the bracket before choosing the post — not the other way around. Different brackets have different mounting requirements and it’s much easier to match the post to the bracket than to discover mid-project that the bracket you loved doesn’t fit the post you already bought.
I’d also spend a little more on the reel itself. Mine works well, but I’ve since seen versions with a guide arm that keeps the hose winding evenly without you having to manage it manually. The price difference is not significant. The daily convenience is.
And I’d dig the hole slightly deeper than I thought necessary.
The root was a surprise. Deeper holes tend to avoid roots. This is hard-won knowledge I am passing on to you freely.
The Honest Version of Why This Mattered
I spend a lot of time writing about the inside of a home — the rooms, the walls, the colours, the way a shelf is arranged. The garden I tend to treat as secondary. Something to get to eventually.
But we spend a lot of time in that garden. The girls water the plants out there, arguing pleasantly about whose turn it is. Tasos sits outside in the evenings and stays longer than he intended. We eat out there in summer more often than anywhere else.
It deserved more than a hose on the ground.
One afternoon and less than €40. That’s all it took to make a space feel like someone actually cared about it.
I don’t know why I waited two years. Actually — I do. I kept thinking it needed to be a bigger project. Something more complex. Something that justified the attention.
It didn’t.
Sometimes the fix is just a white post and a man at the hardware store who knows exactly which aisle you need.
And that’s it for today! Lemme know your thoughts!!!
Until next time,
Stay safe,


I’m Katerina Lithopoulou, co-creator of DIY Cozy Living. I’ve always loved the little things that make a space feel special. With a background in language and a passion for photography and cozy design, I enjoy turning everyday inspiration into simple ideas people can actually use.
My motto: “Cozy isn’t a trend — it’s a feeling.”
