
17 Homemade Wooden Christmas Decorations That Make Your Home Feel Like a Winter Cabin

There’s something about wood that just makes Christmas feel more real to me.
Not the plastic, not the tinsel — the wood.
The warmth of it, the texture, the way it smells when you’re working with it in a heated kitchen while it’s cold and grey outside. My mother Zina always had a few wooden pieces in her Christmas décor, and I grew up thinking they were just old-fashioned.
Now I’m the one hunting down wood slices at the craft store and dragging Tasos to the timber yard in November.
This collection of homemade wooden Christmas decorations is everything I love about the season: projects that are genuinely doable, that look beautiful, and that you’ll actually want to keep year after year.
Some of these I’ve made myself. Some are on my list for this year. All of them belong in a cozy home.
Quick Overview
| Decoration | Skill Level | Best For |
|---|---|---|
| DIY Wooden Christmas Village | Intermediate | Mantel or shelf display |
| Easy DIY Wooden Christmas Trees | Beginner | Table or windowsill |
| DIY Wooden Nativity | Intermediate | Fireplace or entryway |
| Wood Burned Christmas Tree Garland | Beginner | Staircase or mantel |
| Christmas Cut Out Wooden Candle Holder | Beginner | Dining table centerpiece |
| Christmas Tree Wood Lantern | Beginner | Porch or living room |
| DIY Iced Faux Gingerbread Birdhouses | Beginner | Tiered tray or windowsill |
| Wood Slice Christmas Tree Sign | Beginner | Front door or gallery wall |
| Outdoor Christmas Trees with Lights | Intermediate | Garden or porch |
| Wood Slice String Art Ornament | Beginner | Christmas tree |
| DIY Wood Bead Ornaments | Beginner | Christmas tree or garland |
| DIY Rustic Wood Candle Holders | Beginner | Any surface |
| Easy DIY Wooden Christmas Ornaments | Beginner | Christmas tree |
| DIY Farmhouse Scrap Wood Block Houses | Beginner | Tiered tray or shelf |
| DIY Wood Slice Holiday Wreath | Intermediate | Front door or wall |
| Wooden Advent Calendar with Cricut | Intermediate | Any wall or shelf |
| Santa Claus Wall Hanging | Intermediate | Living room wall |
DIY Wooden Christmas Village
A wooden Christmas village is the kind of decoration that stops people in their tracks.
When we had family over last year, my daughter Maria spent twenty minutes rearranging the little houses on our mantel before she was happy with the layout. I completely understood — there’s something irresistible about a miniature world you built yourself.
These village pieces are typically cut from pine boards or plywood, then painted in muted, Scandinavian-inspired tones: cream, dusty blue, soft red.
What makes it special: Add tiny LED fairy lights inside or behind the houses and they glow from within on dark winter evenings. It looks absolutely magical.
People always ask: Do I need woodworking experience for this?
Not really. If you can cut a straight(ish) line and sand a rough edge, you can make a wooden village.
Start with simple rectangular house shapes with triangular roofs — no fancy curves required. Once you’re comfortable, add details like window cutouts or chimney pieces.
Variations:
- Paint in classic red and white for a traditional look
- Leave the wood natural and add just a dusting of white paint for a snowy effect
- Use scrap wood offcuts to make the pieces feel more rustic and varied
Easy DIY Wooden Christmas Trees
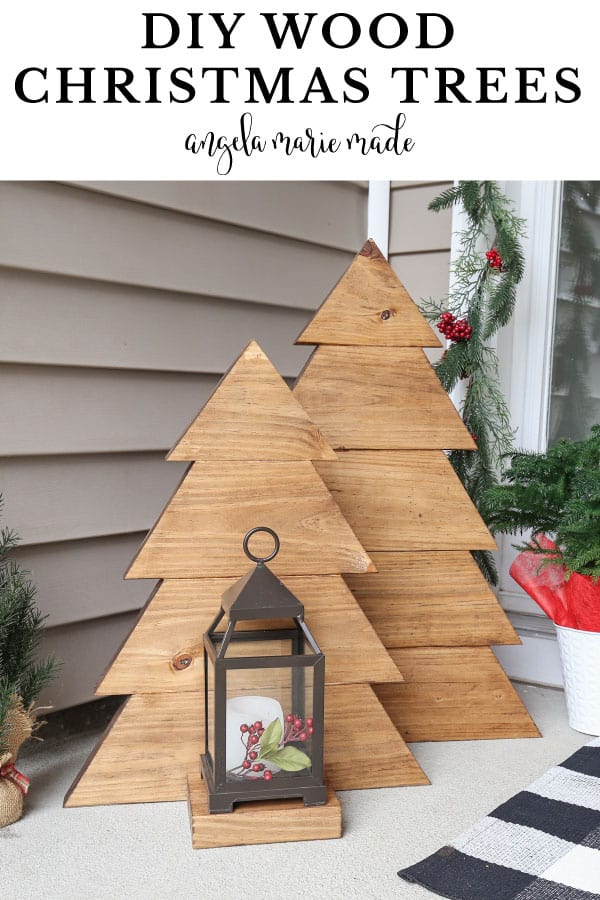
This is the project I recommend to everyone who tells me they’re “not crafty.” Because you don’t need to be. A wooden Christmas tree is essentially a triangle — you can cut it from a single piece of plywood, or stack graduated pieces of wood to create a layered 3D effect. Either way, it takes an afternoon and costs almost nothing.
I made a set of three different-sized trees for our windowsill, painted them in white with gold star toppers, and they’ve been out every Christmas since.
People always ask: What paint works best on wood?
Chalk paint is my absolute favourite for this kind of project — it goes on beautifully, dries quickly, and gives that lovely matte, slightly aged finish. You don’t even need to prime first. For outdoor pieces, use exterior acrylic and seal with a weatherproof topcoat.
Variations:
- Stencil on snowflakes or polka dots before sealing
- Add small hooks and use the trees as ornament displays
- Make a whole forest in graduated heights for a more dramatic display
How to Make a Simple DIY Wooden Nativity
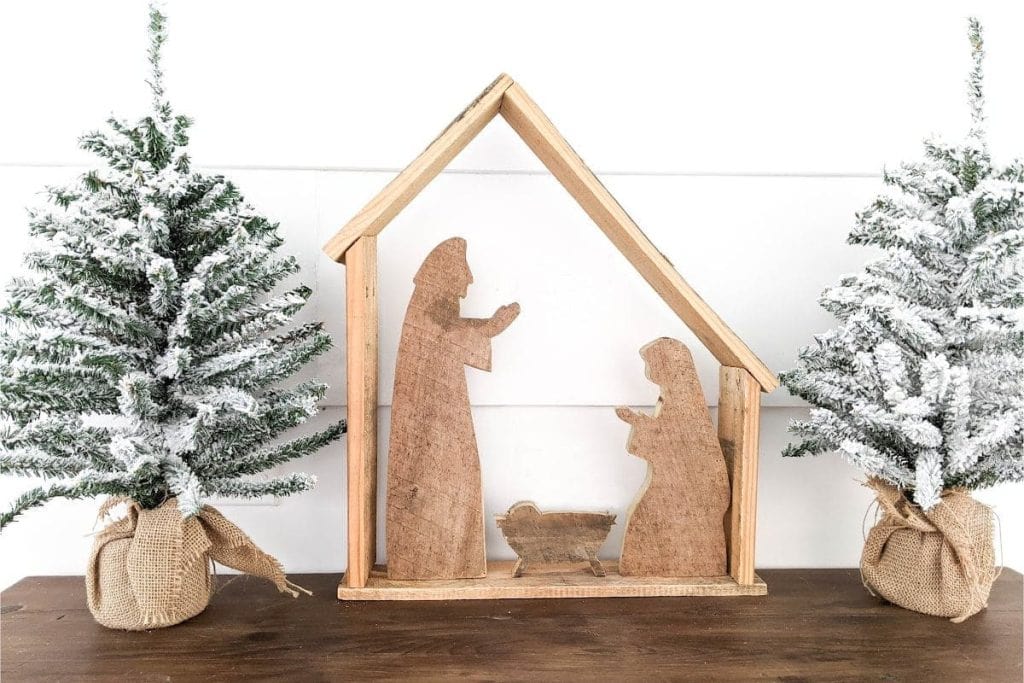
I’ll be honest — I wasn’t sure I could pull this off. A nativity felt like it required real skill. But the simple silhouette style, cut from thin plywood, is completely achievable even if you’ve never used a jigsaw before.
The figures are flat cut-outs: Mary, Joseph, the baby, a star overhead. Stained in walnut or left as raw wood, they’re quietly beautiful.
My mother Zina teared up a little when she saw ours. She said it reminded her of the one her own mother had. That’s the kind of reaction you can’t buy.
People always ask: Can I make this without power tools?
Yes — you can find pre-cut wooden nativity silhouettes at many craft stores or on Etsy, then simply sand, stain, and arrange them yourself. The “making” part then becomes the finishing and displaying, which is still deeply satisfying.
Variations:
- Add a star cut-out on a dowel rod above the scene
- Use a shadow box frame to create a contained nativity display
- Paint the figures in gold for a more modern, decorative look
DIY Wood Burned Christmas Tree Garland
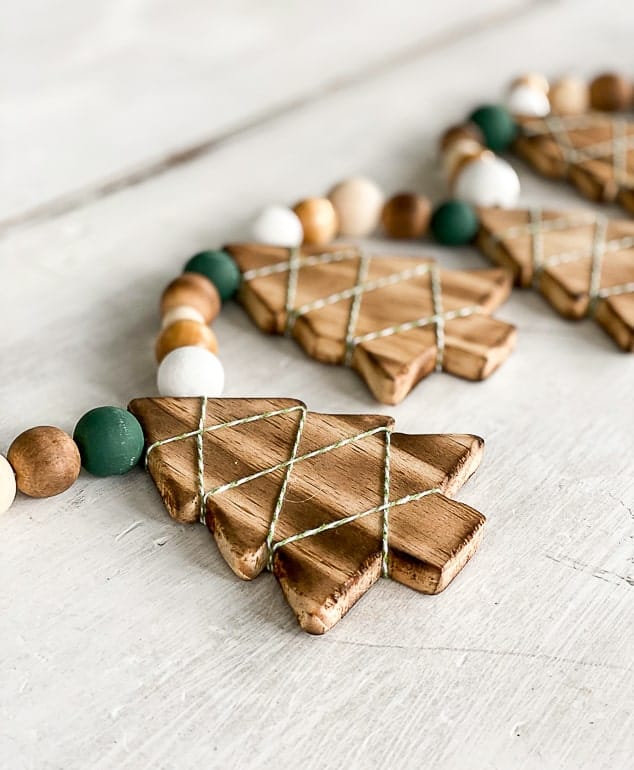
Wood burning (pyrography) sounds intimidating but it’s genuinely one of the most relaxing crafts I’ve discovered. You use a simple wood burning tool — inexpensive to buy — to draw designs onto thin wood slices or tags. For this garland, you burn a simple Christmas tree outline onto each piece, thread them onto twine, and hang it along a mantel or staircase.
People always ask: Is wood burning safe to do at home?
Yes, with basic precautions: work in a well-ventilated space, keep a damp cloth nearby, and never leave the tool unattended while hot.
The tool tip gets very hot but as long as you’re careful and focused, it’s perfectly safe. I do mine at the kitchen table while the girls are at school.
Variations:
- Burn different designs on each piece — stars, snowflakes, reindeer
- Alternate wood slices with dried orange slices for a natural, fragrant garland
- Add a small watercolour wash of green paint before burning for a subtle colour effect
Christmas Cut Out DIY Wooden Candle Holder
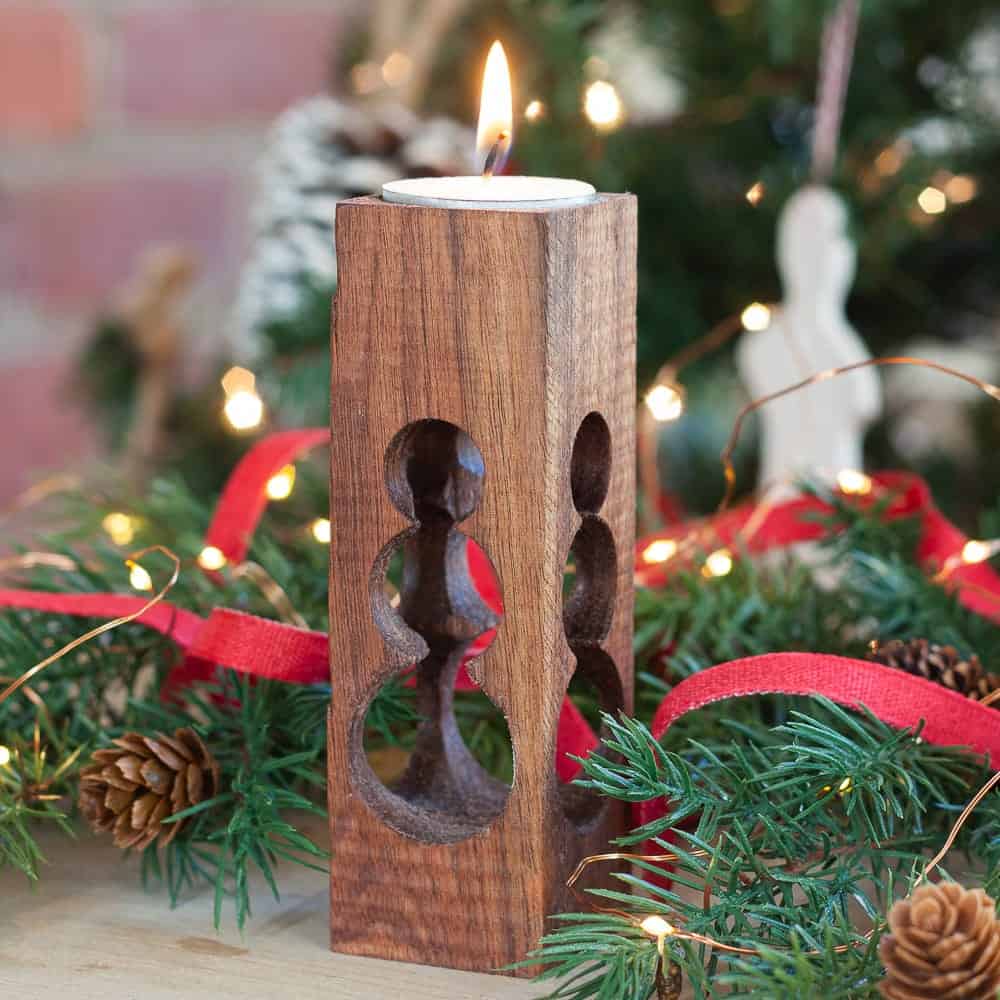
These are one of the simplest projects on this list and one of the most effective. Take a piece of scrap wood, drill or cut out a hole to hold a taper or pillar candle, and carve or paint a Christmas design on the front — a tree, a star, the word “JOY.” That’s it. The candlelight does the rest.
Line three of them along your dining table at different heights and it looks like something from a Nordic Christmas market.
People always ask: Is it safe to use real candles in wooden holders?
Never leave burning candles unattended, and always make sure the candle sits securely in the holder with no wobble. For a completely worry-free version, use LED taper candles — they flicker realistically and you can leave them on all evening.
Christmas Tree Wood Lantern
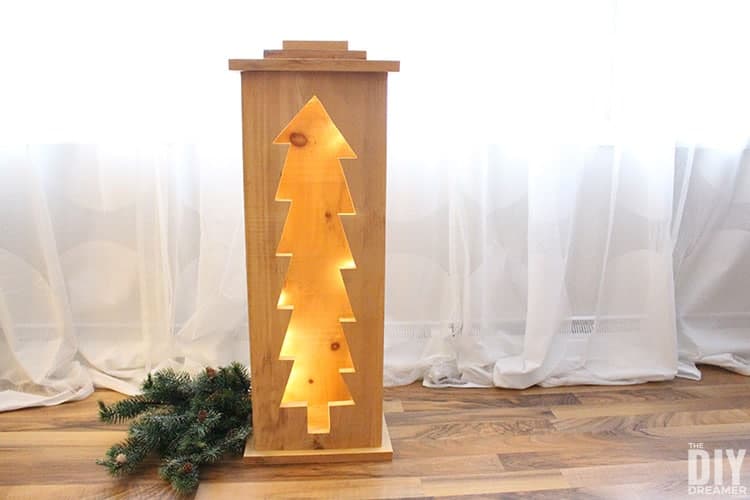
Take a basic wooden lantern (bought or built from four pieces of thin wood and a base), paint or stain it, and add a Christmas tree cut-out to one or more sides so the light shines through. The effect when lit from inside is absolutely stunning — that tree shape glowing in warm amber light against a dark wall.
I have two of these on either side of our front door and every single neighbour has asked where I bought them.
People always ask: Where do I get the Christmas tree cut-out shape?
You can cut it yourself with a jigsaw using a printed template, use a Cricut machine if you have one, or buy pre-cut wooden shapes from a craft store and attach them to the lantern panel. All three options work beautifully.
DIY Iced Faux Gingerbread Birdhouses
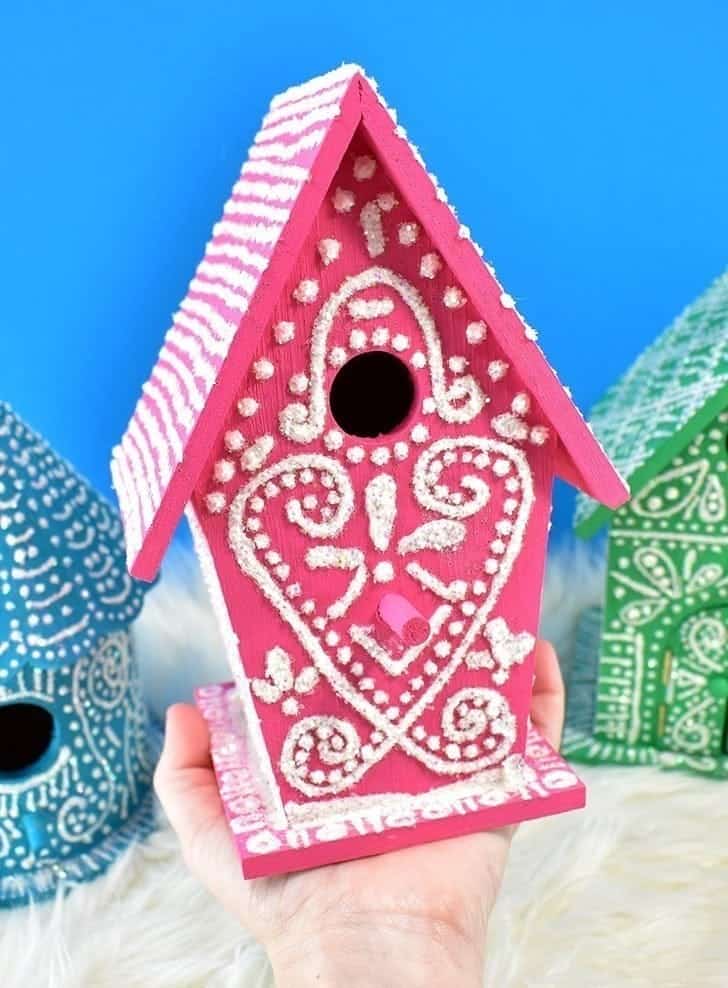
These are so charming they make me happy just thinking about them. Take a small wooden birdhouse (craft stores sell them unfinished for very little), paint it in warm gingerbread brown, then pipe on “icing” using a mix of white craft glue and baking soda, or white dimensional fabric paint. Add candy-coloured buttons, faux snow, miniature candy canes.
They look absolutely delicious. My daughter Marina once tried to eat one. She was four, to be fair.
People always ask: What gives the best “icing” effect?
White dimensional fabric paint squeezed straight from the bottle gives the most realistic icing drip effect and dries to a nice slightly-shiny finish. White puffy paint works too. For a chunkier snow texture, mix white acrylic paint with baking soda until it reaches a thick paste consistency.
🔥 Would you like to save this?
Easy DIY Wood Slice Christmas Tree Sign
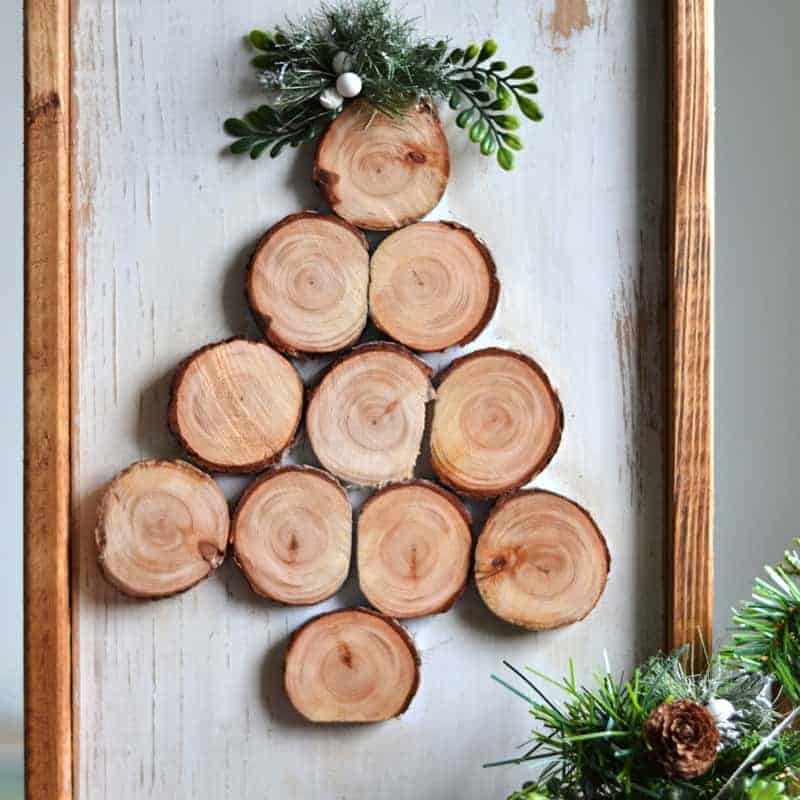
Cut a large wood slice in half to create a flat-backed piece that hangs easily on a wall or door. Paint or wood burn a Christmas tree on the front, add a simple greeting — “Merry Christmas,” “Joy,” “Noel” — and finish with a hanging loop of twine or leather cord.
It takes under an hour including drying time, and it looks like it belongs in a Pottery Barn catalogue.
Variations:
- Use a whole uncut wood slice for a round version
- Add a wreath of dried flowers or greenery around the edge
- Personalise with your family name and the year
DIY Outdoor Christmas Trees with Lights
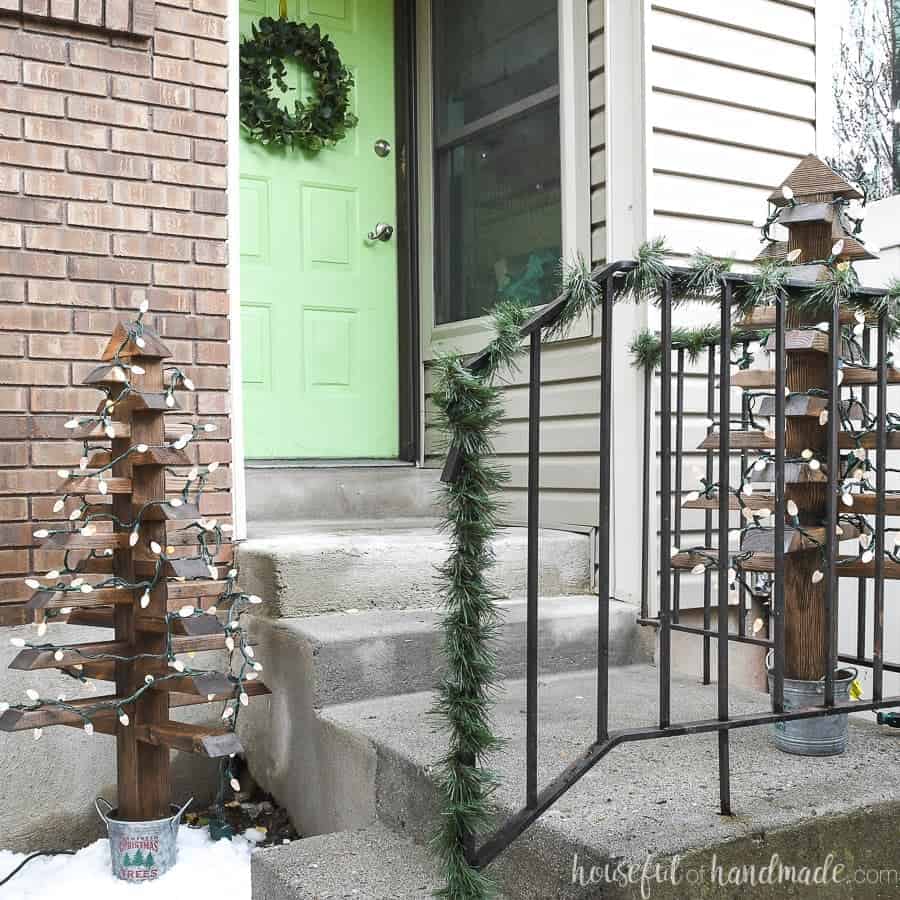
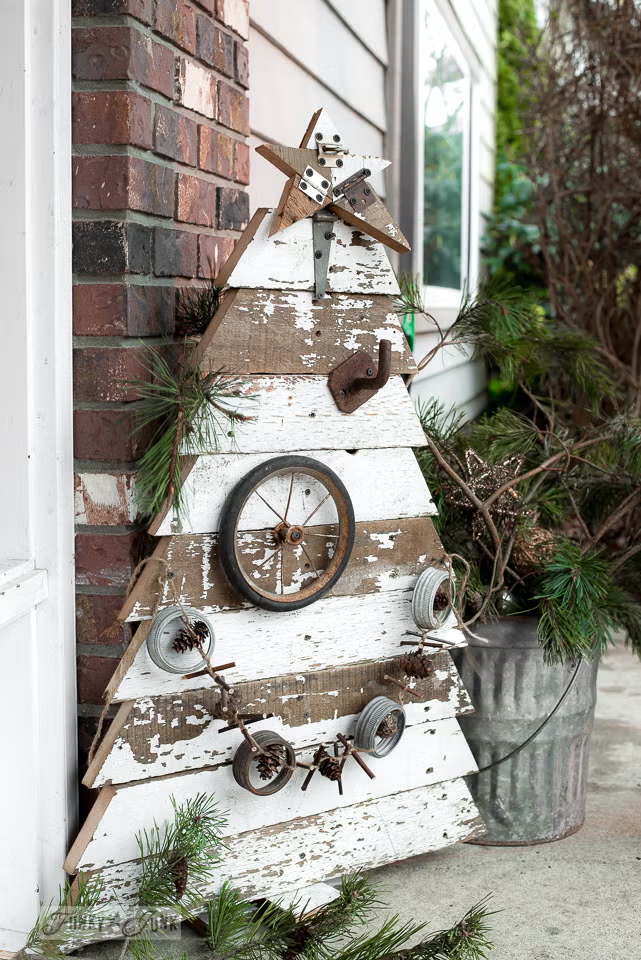
These are the statement piece. Built from timber planks or fence posts arranged in a triangle and secured to a weighted base, they’re planted in the garden, on the porch, or either side of the front door. String lights are wound around them and suddenly your outdoor space looks like a Christmas card.
Tasos built ours two years ago on a Sunday afternoon with scrap timber from the garage. They go up every first of December and the girls fight over who gets to help plug in the lights.
People always ask: How do I keep them stable in wind?
Sink the base post into a bucket of fast-setting concrete, or build a wide cross-base from heavy timber. For large trees, guy wires attached to stakes in the ground give extra security in bad weather.
Wood Slice String Art Ornament
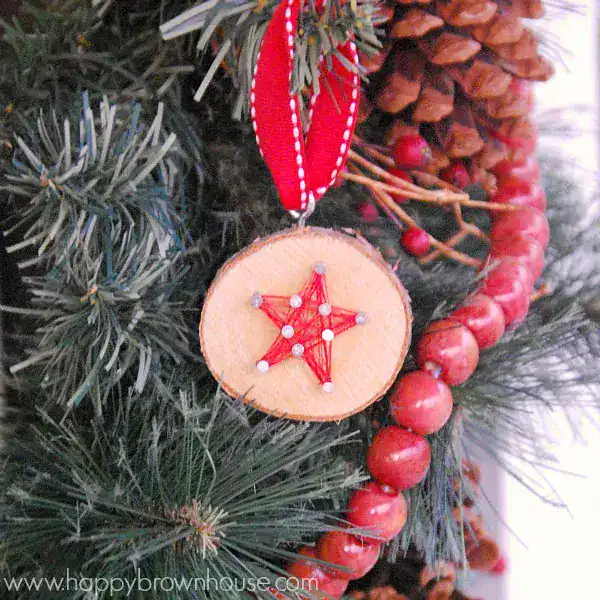
String art on a wood slice sounds complex but it’s one of the most beginner-friendly crafts on this list. Hammer small nails into a wood slice in your chosen shape — a Christmas tree, a star, a heart — then wind coloured embroidery thread between the nails to fill in the shape. Hang with a loop of ribbon.
People always ask: What thread works best?
Embroidery floss gives the most colour variety and the finest detail. Thin baker’s twine gives a more rustic, natural look. Metallic thread adds a beautiful festive shimmer but can be slightly trickier to work with.
DIY Wood Bead Ornaments
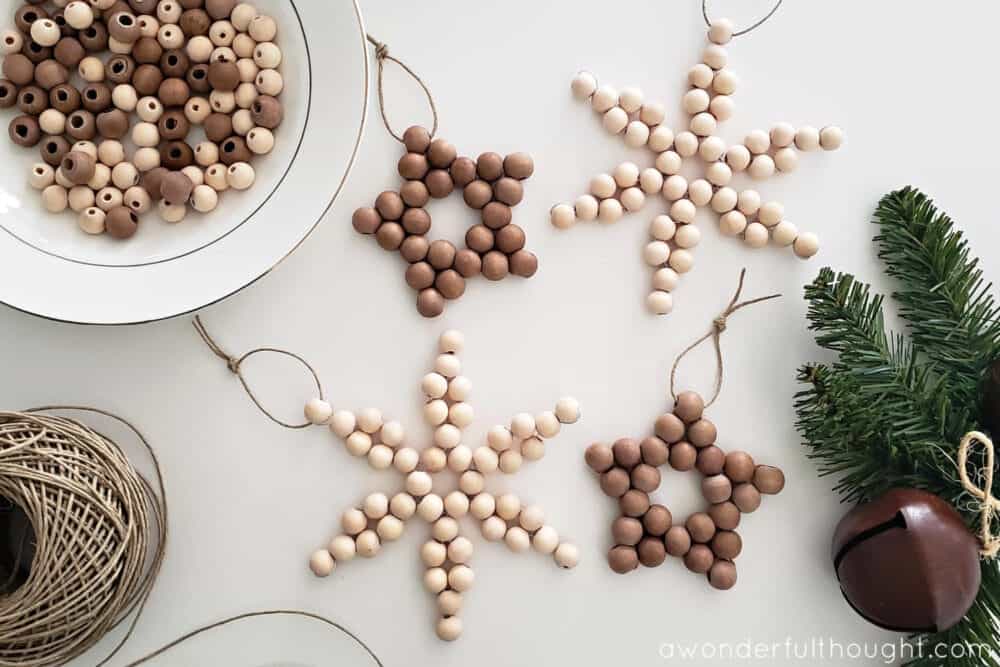
Thread large wooden beads onto wire or string in a Christmas tree or wreath shape, secure the ends, and you have a simple, beautiful ornament that looks lovely on the tree or as a gift topper. Paint the beads first in your colour palette, or leave them natural for a Scandinavian look.
These are also a wonderful craft to do with children — Marina makes them every year and always insists on choosing her own bead colours.
DIY Rustic Wood Candle Holders
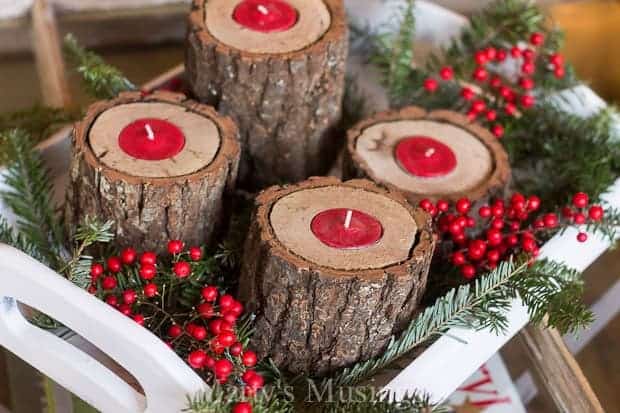
Cut a log or thick branch into sections of varying heights, drill a candle well in the top of each, and group them together on a tray with some greenery and berries. The effect is so simple and so beautiful — completely natural, completely cosy.
People always ask: What kind of wood is best?
Any hardwood with an interesting grain works well — birch is lovely for its pale colour and visible rings, cedar for its warm red tones and gentle scent. Driftwood pieces work beautifully too if you can find them the right shape.
Easy DIY Wooden Christmas Ornaments
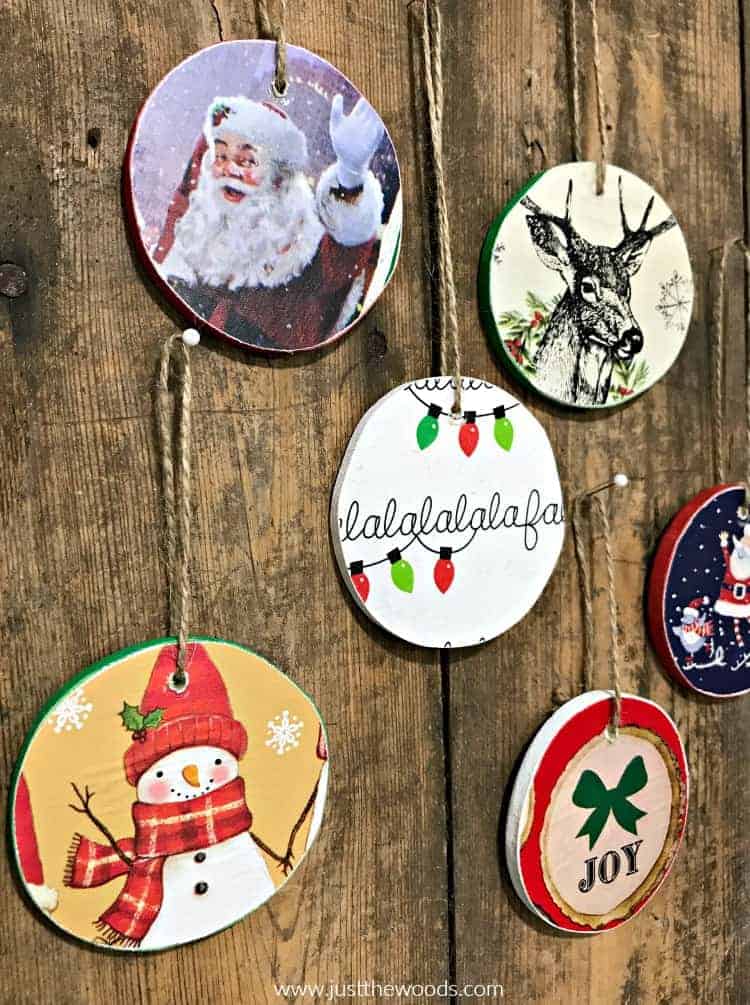
Cut simple shapes from thin plywood — stars, trees, hearts, bells — sand smooth, paint or stain, add a loop of ribbon. They’re quicker to make than you’d expect and look beautiful layered on the tree alongside more traditional ornaments.
Variations:
- Stamp with holiday patterns before sealing
- Use a Cricut to add personalised text or names
- Make a matching set as a handmade gift for a friend or teacher
DIY Farmhouse Scrap Wood Block Houses
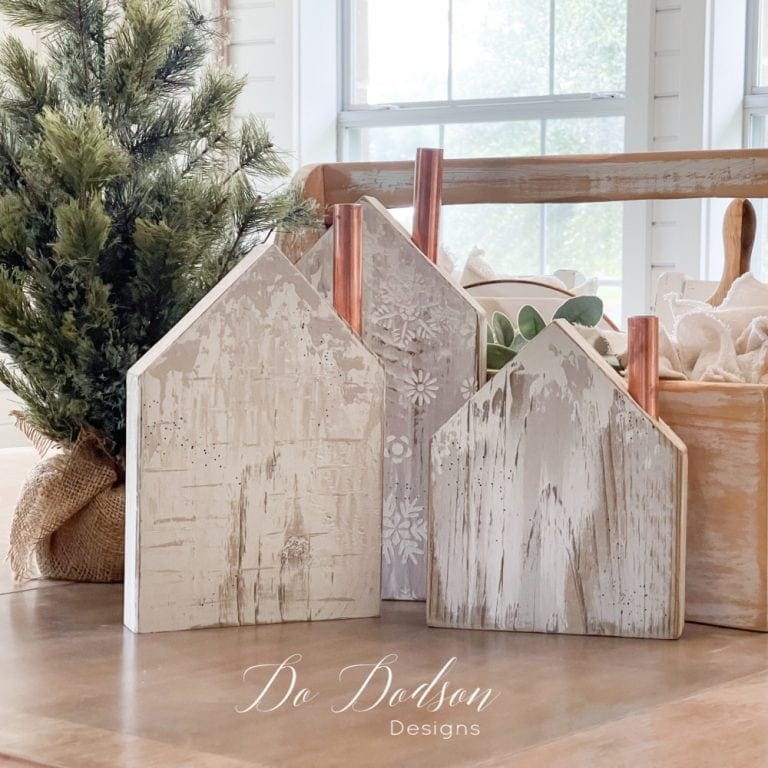
These little block houses are made from small pieces of scrap wood — literally offcuts from other projects — shaped into house silhouettes, painted white or cream, and arranged in a row on a shelf or tiered tray. They look like a tiny snowy village and cost almost nothing to make.
This is a brilliant use for any scrap timber you have lying around. I made a set from offcuts after Tasos built new shelving in the garage and they’re some of my favourite decorations.
DIY Wood Slice Holiday Wreath
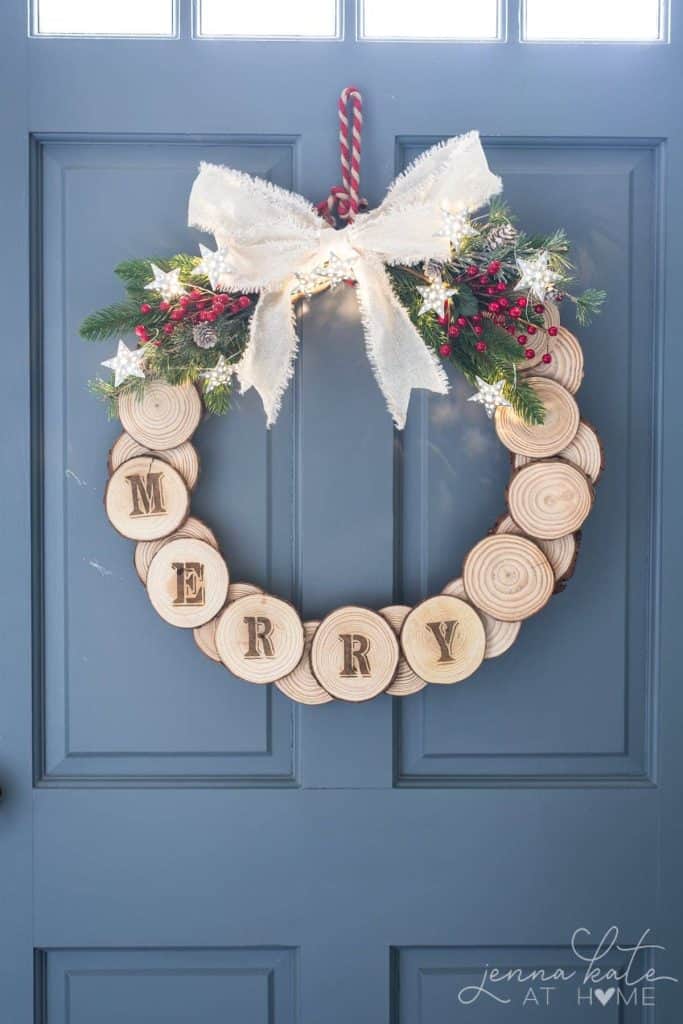
Instead of a traditional grapevine wreath base, arrange small wood slices in a circle, glue them together, and decorate with greenery, berries, ribbon, and a bow. The wood gives it a natural, earthy quality that feels a little different from the typical wreath — more woodland, more rustic.
People always ask: How do I get the wood slices the same size?
You don’t need to — a mix of sizes actually looks more natural and interesting. If you want more uniformity, look for pre-cut wood slice packs at craft stores; they typically come in consistent sizes.
Wooden Advent Calendar with Cricut
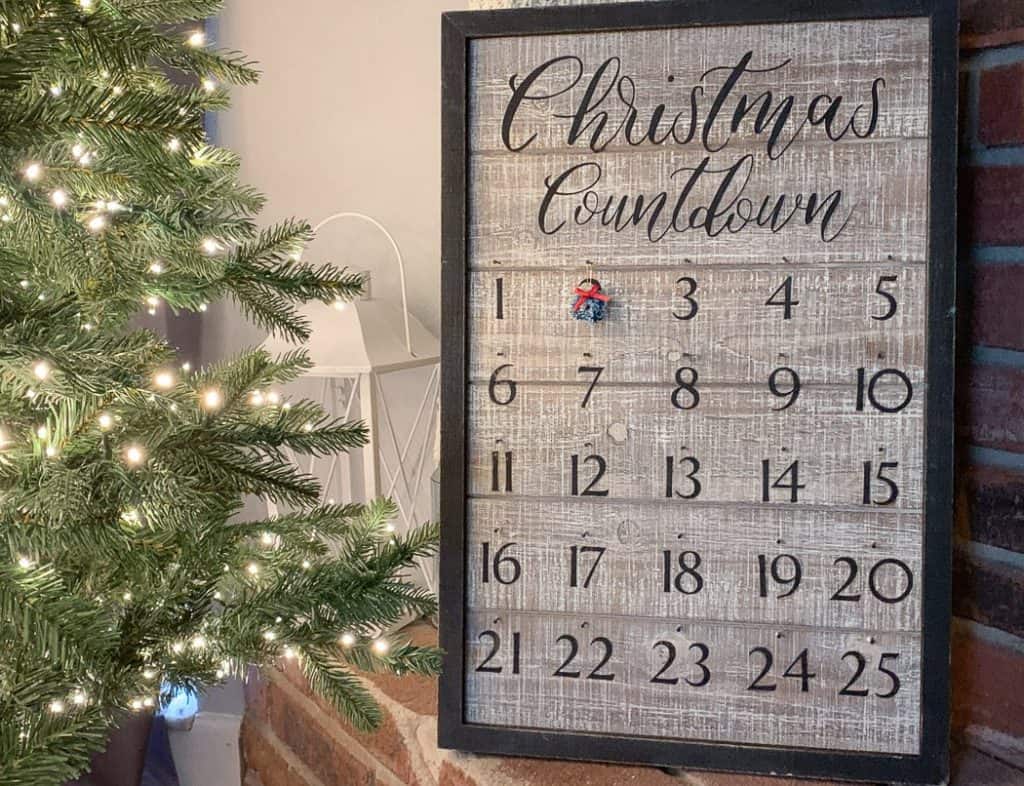
A wooden advent calendar is the kind of project that takes a weekend to make and then lasts for decades.
The basic version: 24 small wooden boxes or drawers, numbered with a Cricut machine or hand-painted, mounted on a frame or displayed on a shelf. Fill with small treats, notes, or activities each year.
Ours has been going for five Christmases now. The girls still race downstairs every morning in December to open their number.
People always ask: Do I need a Cricut for this?
Not at all — you can stamp, stencil, or hand-paint the numbers onto each box. A Cricut makes it faster and more precise, but the project is entirely doable without one. Plain wooden boxes from a craft store are the starting point either way.
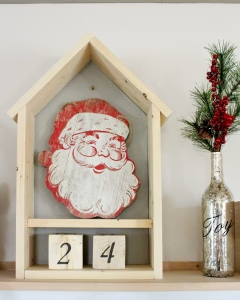
DIY Reclaimed Wood Santa Decoration
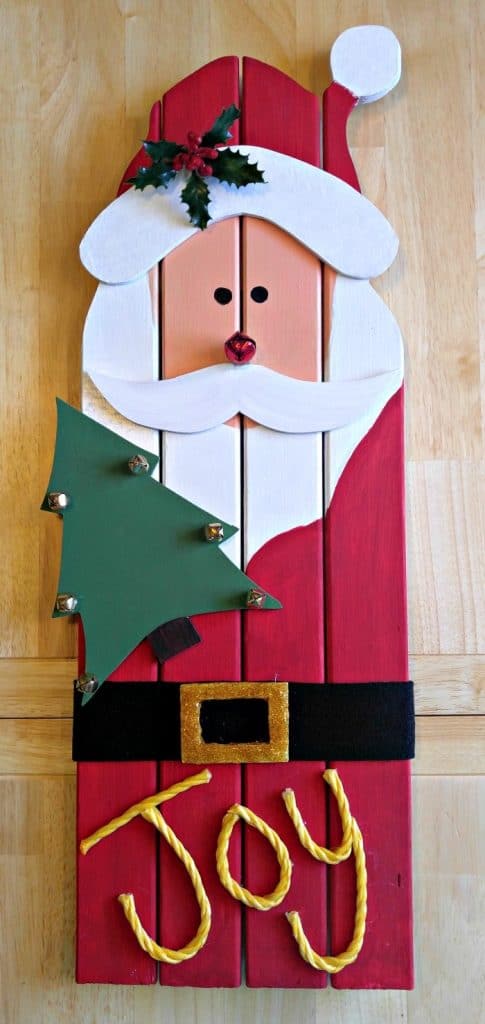
Cut or paint a Santa face onto a piece of reclaimed wood, the rougher and more weathered the better.
His white beard becomes texture, his red hat a painted band across the top, his rosy cheeks a couple of dots of blush-coloured paint. Hang with rope or leather cord and you have a statement piece for any wall in the house.
Reclaimed wood from old pallets, barn boards, or even driftwood gives this the most character. The imperfections in the wood become part of the design.
People always ask: I’m not confident painting faces — any tips?
Use a simple, stylised Santa face rather than a realistic one — two dot eyes, a curved smile, a triangle nose. Alternatively, find a printable Santa face template, trace the outline onto the wood in chalk, then paint within the lines. It’s much more forgiving than it sounds.
Wood crafts have this beautiful quality of aging well. The paint chips a little, the wood darkens slightly, the edges get worn — and somehow that all just makes them look better.
These aren’t decorations you’ll replace next year.
They’re the ones that end up wrapped carefully in tissue paper in December, the ones your children will recognise before the box is even fully open.
That’s the kind of Christmas decorating I’ll always love most.
Thanks for reading,


I’m Katerina Lithopoulou, co-creator of DIY Cozy Living. I’ve always loved the little things that make a space feel special. With a background in language and a passion for photography and cozy design, I enjoy turning everyday inspiration into simple ideas people can actually use.
My motto: “Cozy isn’t a trend — it’s a feeling.”
