The Christmas Craft Ideas That Look Handmade in the Best Possible Way!

I have a shelf in the living room that I started calling the December shelf sometime around Maria’s seventh Christmas.
Every year, somewhere in the first week of December, I start putting things on it.
Some of them I’ve made, some of them the girls have made, some of them Zina has pressed into my hands at some point over the years with the phrase for your collection. The shelf is not curated in any artistic sense. It’s just the accumulation of twenty years of Christmases, all in one place.
I say this because when I look at Christmas crafts, that’s what I’m thinking about. Not the Pinterest version. The version that ends up on the shelf. The one that someone made on a rainy Sunday afternoon with materials from the kitchen drawer, that still looks good ten years later.
These 21 ideas are the ones I think are worth your time!
Let’s dive right in!
Before You Start

Most of the crafts here use the same core supplies. If you gather these once, you can make the majority of the list without another trip to the shop.
| Material | What you’ll use it for |
|---|---|
| Pinecones | Gnomes, door decor, candle holders, jar decoration |
| Wood slices | Santa ornament, snowman ornament |
| Twine or rustic rope | Tying, looping, hanging |
| Wooden beads | Trees, ornaments, tassels |
| Yarn (green, white) | Trees, tassels |
| Popsicle sticks | Sleds, mini trees |
| Paint (red, white, black, flesh tones) | Multiple projects |
| Hot glue gun | Almost everything |
| Small embellishments (beads, bells, bows) | Finishing details |
One more thing people always ask: do these hold up year to year? Most of them do, if you store them carefully. Anything with real natural materials like dried oranges, fresh pinecones, is more about the season you make them than lasting forever.
Everything else, made well, can go in a box and come out the following December looking the same as when you packed it.
Natural Materials: The Easiest Starting Point
There’s something about using things that come from outside that makes Christmas crafts feel less like craft and more like decoration.
These five are all built around pinecones, dried fruit, stones, and sticks.
Rustic Pinecone Door Decoration
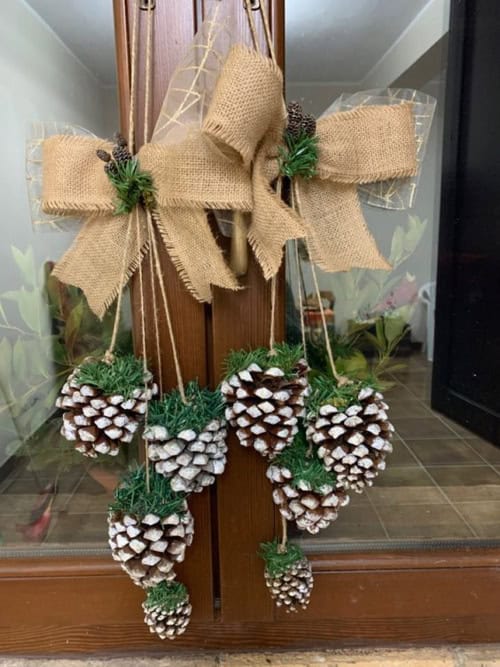
Frosted pinecones, a cluster of greenery, a burlap bow. That’s the whole thing.
People always ask: Where do I get frosted pinecones? You can buy them pre-frosted, or you can do it yourself with spray paint in a pale silver-white. Hold the can about 30cm away and apply in short bursts — you want suggestion of frost, not complete coverage.
Variations:
- Burlap bow for farmhouse style
- Velvet ribbon for something richer
- Plaid ribbon for a traditional Christmas feel
- Leave it unscented, or add a drop of pine essential oil to the back for a subtle smell
This works equally well as a wreath alternative on the front door, hung inside on a cabinet, or propped in a basket by the entrance.
Pinecone Gnomes
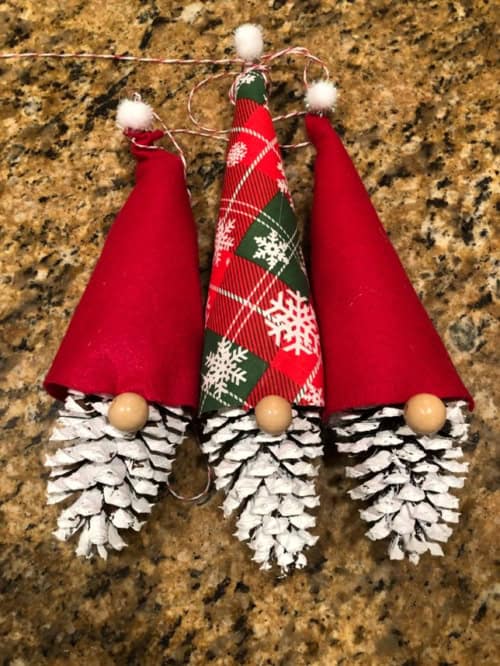
Frosted pinecones as the gnome body, a simple cone hat, a small bead for the nose.
People always ask: Do I need to make the hat? No. Felt cone party hats from a craft shop work perfectly, or you can roll a piece of felt into a cone and glue it. The proportions matter more than the hat itself — a tall, narrow hat reads as gnome; a short, wide one reads as elf.
These sit beautifully grouped in threes on a mantelpiece or windowsill. Maria made hers a family. She gave them names. They’ve been on the shelf every year since.
Dried Orange and Cinnamon Ornament
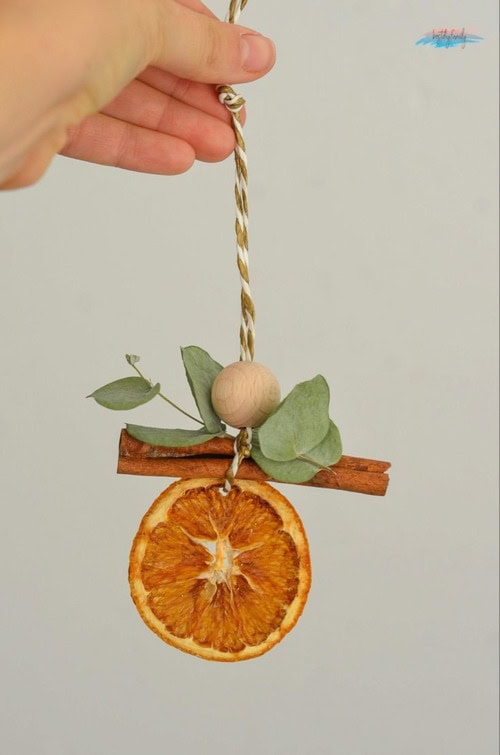
A dried orange slice, a cinnamon stick, a sprig of eucalyptus, tied together with rustic twine.
People always ask: How do I dry the oranges? Slice them about 5mm thick and lay them on a baking rack in the oven at 80°C for 4–6 hours, turning once halfway through. They’re done when the flesh is dry and the edges are slightly darkened but not burnt.
People also ask: How long do they last? Properly dried, they can last several years if stored somewhere dry. The smell fades after the first season but the look stays.
These are genuinely one of the nicest things you can make quickly. The smell alone makes it worth doing.
Festive Robin Painted Stones
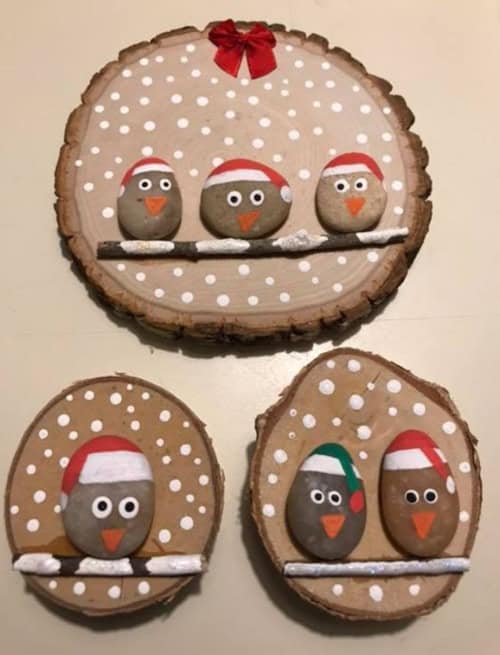
Smooth garden stones painted with robin designs, positioned on a small branch arrangement with a wood slice base.
People always ask: Do I need to be able to paint? No. The robin is simple shapes — a round body, a red chest, small stick legs. What makes it work is the positioning on the branch, not the painting quality. An imperfect robin on a real stick reads as charming.
Materials that make a difference:
- Acrylic paint works best on smooth stones
- A thin brush for the legs and beak
- A sealant coat when dry, or they chip easily
Pinecone and Lace Mason Jar
A mason jar, a candle inside, fake snow at the base, a ribbon of lace around the outside, a pinecone or two glued on.
People always ask: Can I use a real candle? Yes, but keep the lace below the jar’s shoulder and never leave it unattended. A flameless LED candle eliminates the question entirely, and at night it looks the same.
This is a good one to make in multiples. Three on a windowsill or along a mantelpiece creates an effect a single one doesn’t.
Wood Slice Ornaments
Wood slices have become one of my favourite bases for Christmas ornaments. They’re weighty, they have a natural warmth, and they look like they belong in the season.
Santa Face Wood Slice
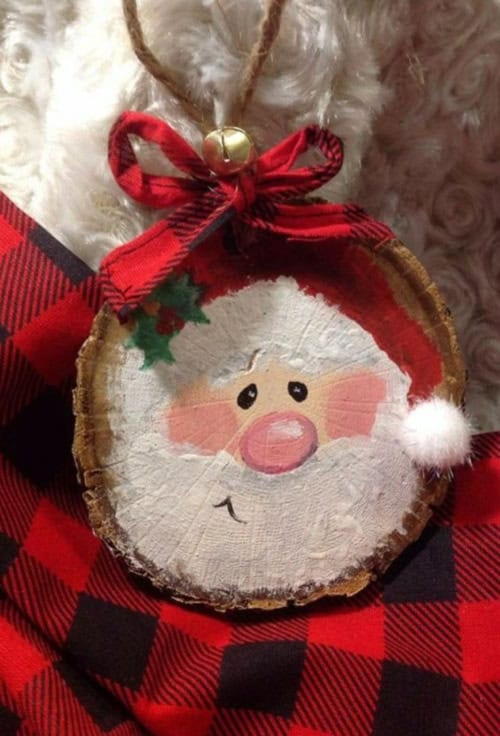
Painted Santa — rosy cheeks, white beard, red hat — with a twine loop for hanging.
People always ask: What size wood slice? Anything between 6–10cm diameter hangs well on a tree. Smaller gets fiddly to paint; larger starts to weigh branches down.
The painting order matters:
- Base coat the whole slice white
- Paint the red hat area
- Paint the skin tone face
- Add the beard and hat trim last
- Eyes, rosy cheeks, and nose as final details
People also ask: Can children make this? Yes, though the face requires a steadier hand. Younger children can do the base coat and colour blocking; an adult can add the features. Makes a good joint project.
Cheerful Snowman Wood Slice
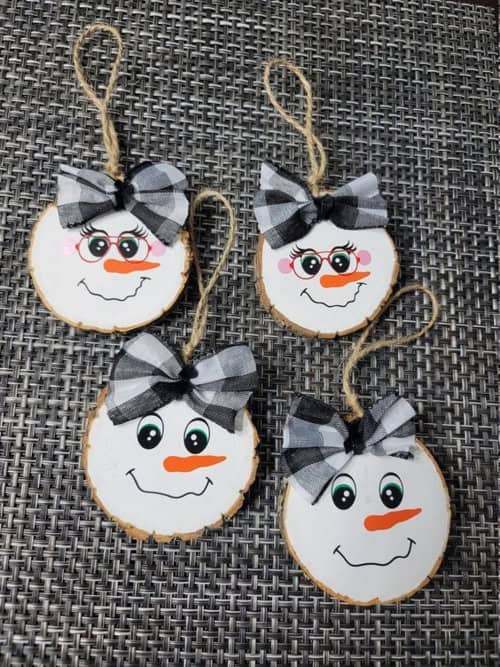
Same base, different design — stacked snowballs, stick arms, a hat, a scarf, and a bow at the top instead of a hanger loop.
Variations:
- Classic white and black with carrot nose
- Pastel version (lavender scarf, mint hat) for a softer look
- Named snowmen, written small in the scarf area, for gifts
People always ask: How do I get the face details small enough? A toothpick dipped in paint is more precise than any brush for the dot eyes and buttons.
Yarn and Twine Trees
Colorful Yarn Christmas Trees
Small yarn trees, wrapped tight, with tiny beads as ornaments and a twine base.
The look depends almost entirely on your yarn colour.
| Yarn Colour | Effect |
|---|---|
| Traditional green | Classic tree |
| Deep forest green | More natural |
| Cream or white | Snow-covered feel |
| Mix of green shades | Most textured and realistic |
People always ask: How do you make the tree shape? Most patterns use a wire armature — a simple cone shape — that you wrap yarn around. Others use a styrofoam cone. Both work; styrofoam is easier but wire gives you a slightly cleaner silhouette.
Twine Loop Trees
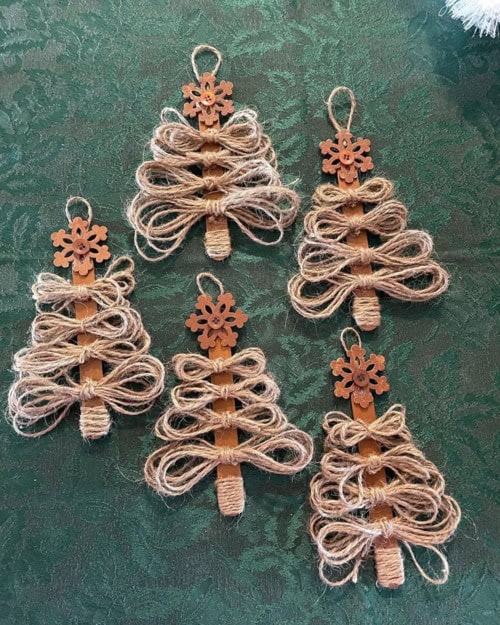
Triangle-shaped trees formed from twine loops around a popsicle stick frame, with a small snowflake or star topper.
People always ask: Is this the same as macramé? Not quite — there’s no knotting technique, just consistent looping. If you can wrap yarn around a frame, you can do this.
These look particularly good in groups — a set of three in graduating sizes on a surface is a complete small display.
Christmas Tree Tassels
🔥 Would you like to save this?
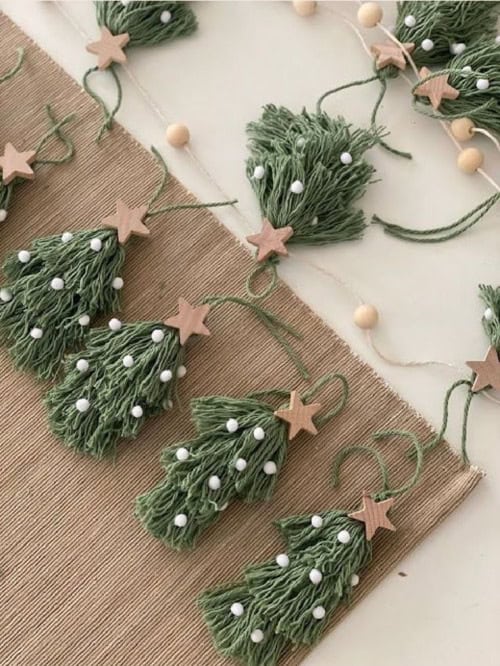
Green yarn wrapped into tassel form, with white beads at the bottom and a wooden star at the top.
People always ask: Where do these go? Anywhere with a hook or a nail. Mantelpiece, window frame, stair banister, the edge of a bookshelf. A row of them in different sizes is one of the most striking things you can do with very little material.
Ornaments That Aren’t the Usual Round Ball
Button Heart Ornament
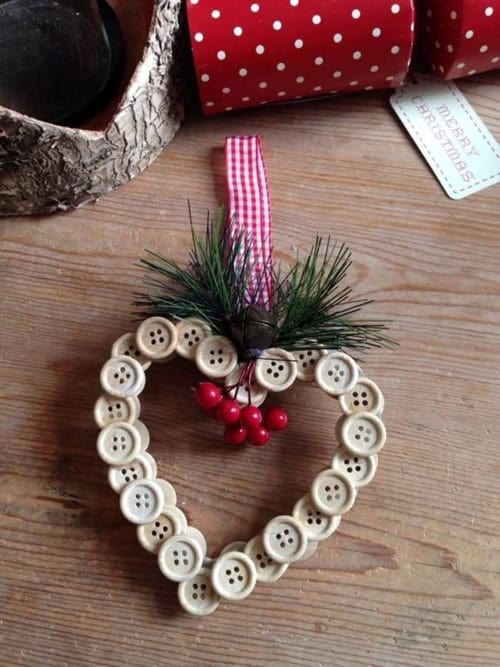
Wooden buttons arranged in a heart shape, with a small bow and a loop for hanging.
People always ask: What kind of glue? Hot glue works fastest. PVA craft glue is more forgiving but takes longer to dry. Don’t use superglue — it sets too fast to adjust positioning.
People also ask: What colour buttons?* Cream and white buttons on natural wood give a neutral, Scandinavian feel. Red and green mixed are more traditional. All one colour in a rich jewel tone — dark burgundy or forest green — is surprisingly elegant.
Wooden Beads with Velvet Bows
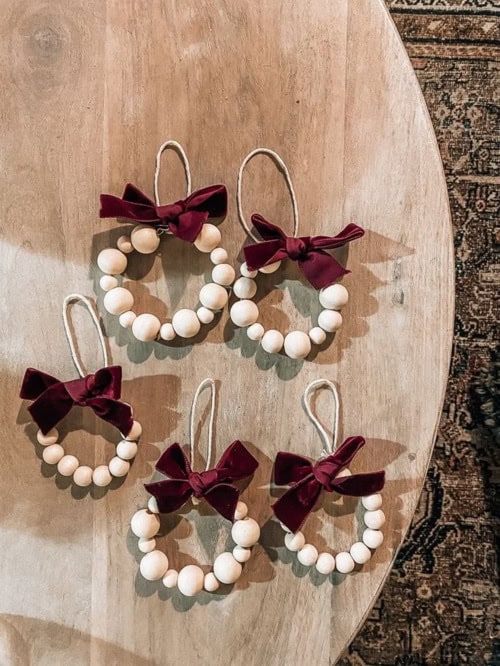
Wooden beads strung into a circle with small red velvet bows at intervals.
People always ask: How do you close the circle?* Tie a secure knot and tuck it behind one of the bows. The bow hides the join.
These photograph beautifully and they’re genuinely quick to make — maybe twenty minutes once you’ve threaded the beads. Good for last-minute gifts or for filling a tree that needs more ornaments.
Paper Snowflake Ornaments
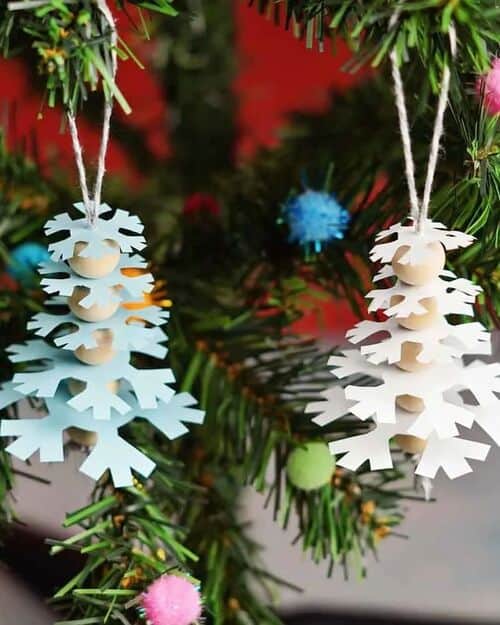
Layered paper snowflakes, stacked and glued at the centre, strung on twine.
People always ask: Does the paper hold up?* Heavier card stock (200gsm or above) lasts well. Thin printer paper curls and eventually tears. If you want them to survive more than one season, laminate the individual layers before stacking.
Variations:
- White on white for a classic look
- Kraft paper for a rustic feel
- Painted afterwards in silver or gold
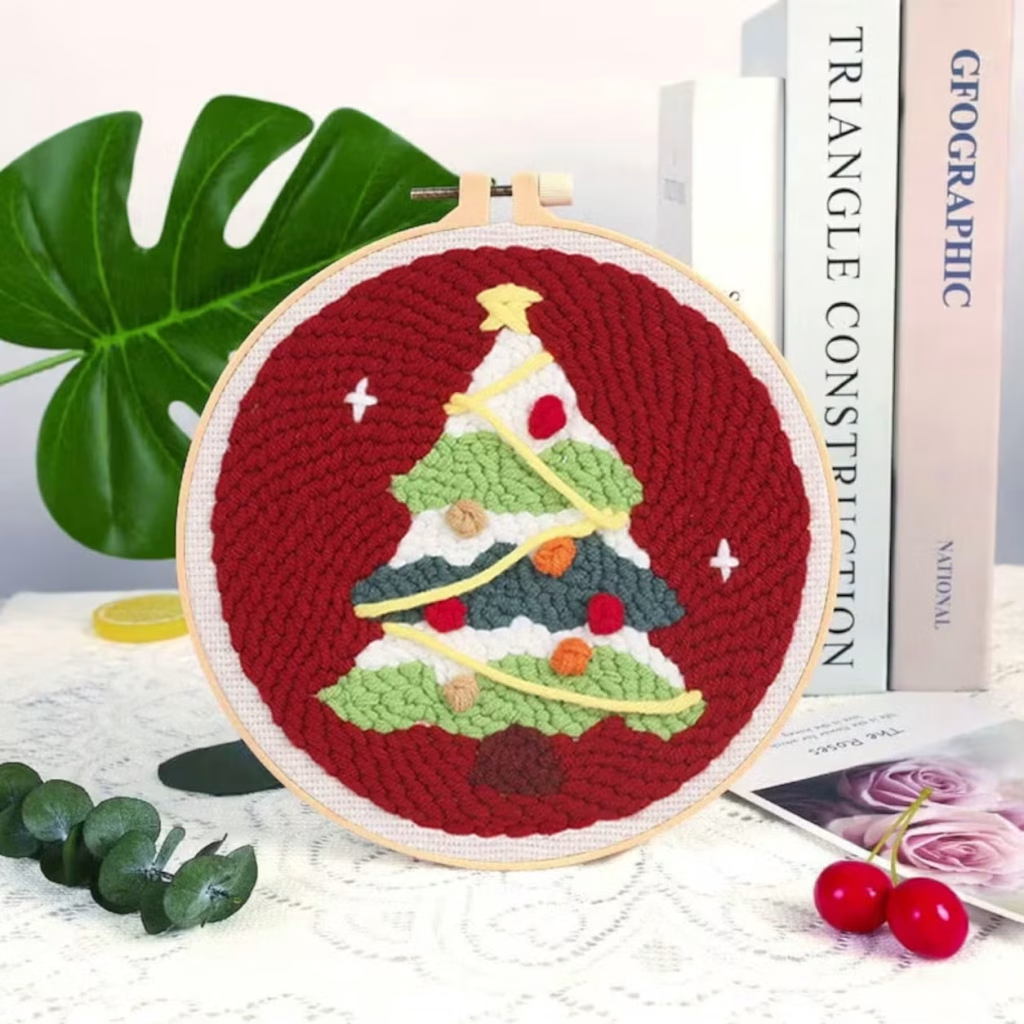
Embroidery Hoop Ornaments
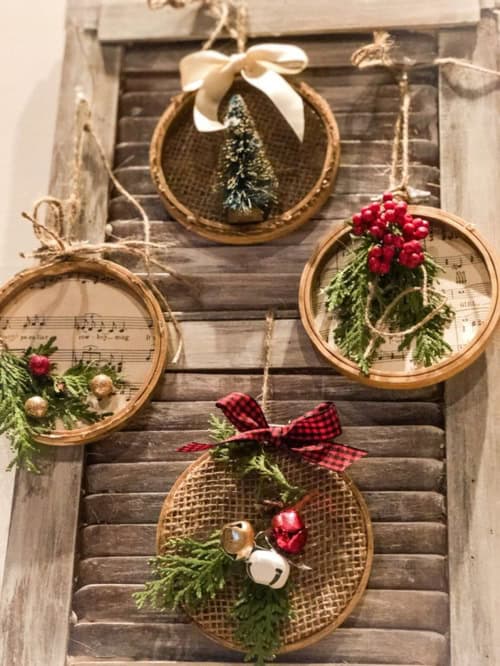
A small embroidery hoop with burlap or linen stretched across it, decorated with a miniature scene — a small tree, a sprig of greenery, a strip of sheet music.
People always ask: Do I need embroidery skills?* No. The hoop is just a frame. The design inside can be entirely made from glued-on materials. No stitching required unless you want it.
This is one of those crafts that looks more skilled than it is, which I find very satisfying.
Repurposed and Unexpected
Santa Claus Spoons
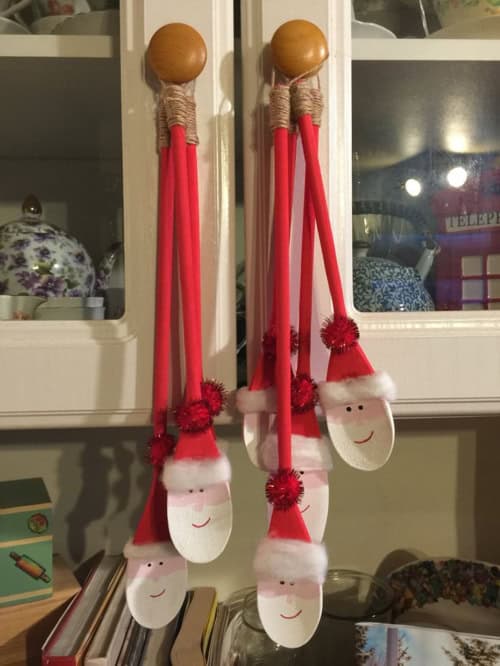
Wooden or plastic spoons painted with Santa faces — red hat, white beard, rosy cheeks — hung on cabinet knobs, door handles, or the tree itself.
People always ask: Wooden or plastic?* Wooden paint more easily and look nicer. Plastic spoons work but need a primer coat first or the paint won’t stick.
Marina made a set of these one year with every member of the family painted on a spoon. She insisted on exact likenesses. The results were chaotic and we kept them for years.
Christmas DIY Shadow Box
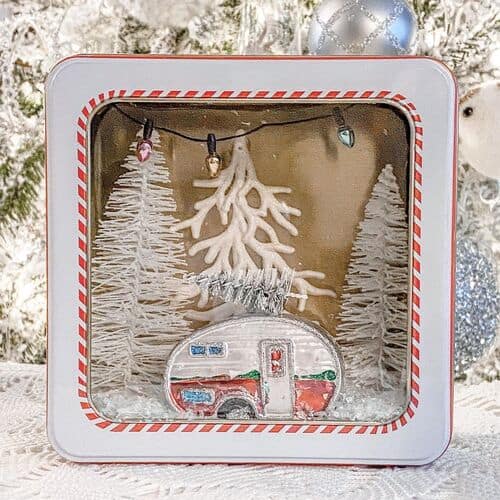
An old cookie tin or shallow box turned into a miniature Christmas scene — tiny houses, small figures, fake snow, a mirror for a skating rink.
People always ask: What size tin?* A standard rectangular biscuit tin works well. Deeper is better than shallower — you want the scene to have dimension.
People also ask: Where do you get miniature pieces?* Christmas villages and advent calendars are good sources. Craft shops carry miniature trees and houses. Old Nativity scene figures can be repurposed.
This is the one that takes the most time of everything on this list — and also the one that will probably end up on your equivalent of the December shelf and stay there.
Simple Displays and Door Decor
Popsicle Stick Sleds with Pinecones
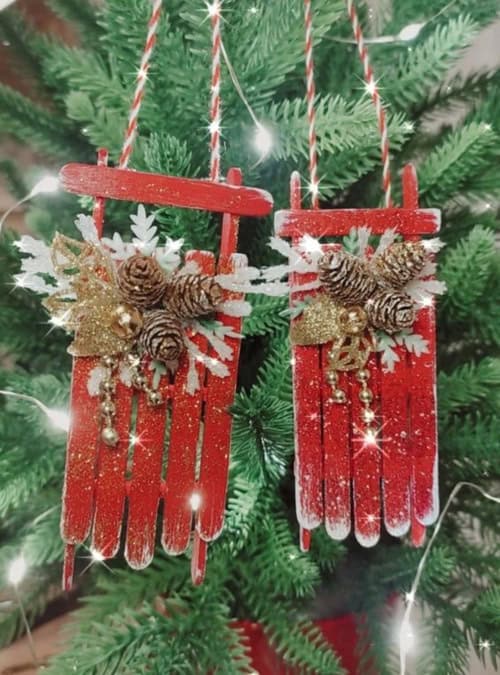
Red-painted popsicle stick sled frames, decorated with small pinecones, gold beads, and ribbon.
People always ask: How do you make the sled shape?* Four sticks glued flat in a row form the base, two curved sticks glued beneath form the runners. There are many tutorials online but the principle is simple.
Variations:
- Red and gold for traditional Christmas
- White and silver for a winter wonderland look
- Left unpainted in natural wood for a rustic version
Mini Sled Ornaments
Smaller version of the above, sized to hang on the tree rather than sit on a surface, decorated with small bells and a sprig of faux greenery.
Festive Mitten Wall Decoration
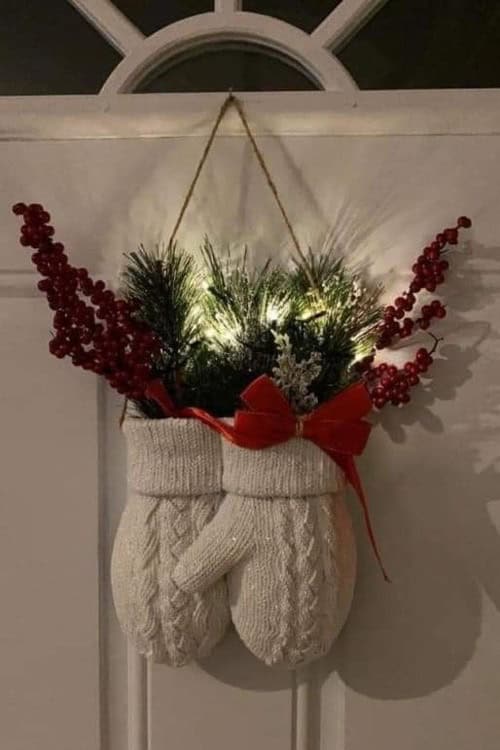
A pair of mittens — knitted or bought — filled with faux greenery, red berries, and a red bow, hung on a rope on the wall.
People always ask: Does it have to be real mittens?* No. Craft shops sell decorative mitten forms specifically for this. But real mittens from a thrift shop give it a warmer, more personal feel.
People also ask: What do you put inside?* Faux greenery holds better than real greenery (which dries and drops). Add a few stems of red berries, a bow at the wrist, and it’s done.
Festive Candle Holders
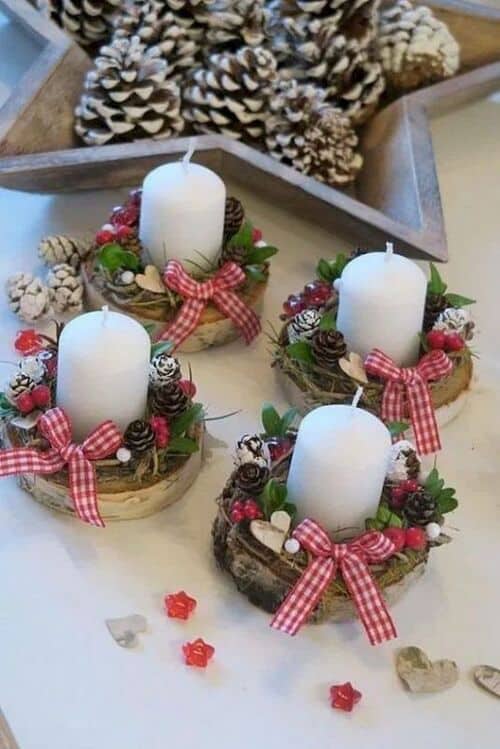
A wooden base decorated with pinecones, berries, small faux greenery, and gingham bows — built around pillar candles.
People always ask: Is this a fire hazard?* Keep any greenery, ribbon, or embellishment below the level of the candle flame and further than 10cm from the wick. Or use flameless candles, which are indistinguishable at a distance.
The Snowman Variations (Because There Are Always Snowmen)
Snowman Tassels
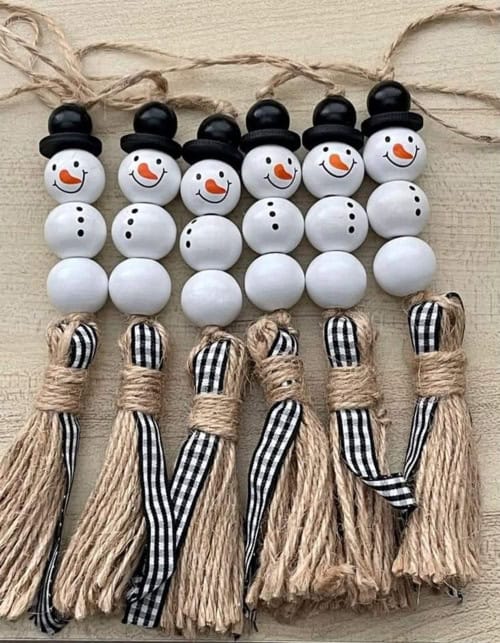
Stacked wooden beads painted white, with tiny black hats, gingham ribbon bows, and tassel bases.
People always ask: How do you make the hat?* A small black button topped with a narrow strip of black card rolled into a cylinder, glued to a flat circle. Or buy tiny top hats from a craft shop — they exist.
These are one of the nicest gifts to give. A set of three in a small bag, tied with ribbon, costs almost nothing to make and looks genuinely lovely.
A Note on Making This Manageable
The most common question I get about Christmas crafts isn’t about a specific technique. It’s: how do I not feel overwhelmed by the amount of things to make?
The answer is to stop trying to make everything at once.
Pick three crafts from this list. Make those well, in an afternoon, with a cup of something warm and something to listen to. Then decide if you want to do more. The December shelf doesn’t have to be fully stocked in one session.
It builds up over years. That’s the point.
Pin this for later so you know where to find it when December arrives.

I’m Katerina Lithopoulou, co-creator of DIY Cozy Living. I’ve always loved the little things that make a space feel special. With a background in language and a passion for photography and cozy design, I enjoy turning everyday inspiration into simple ideas people can actually use.
My motto: “Cozy isn’t a trend — it’s a feeling.”
