
The Ultimate Guide to the DIY Balloon Arch (Easy & Step By Step)
If you’ve ever searched for balloon arch instructions, and then decided it was too costly or complicated, you aren’re the only one. Loads of folks think you’ve got to have expensive things, or be a pro, to manage one. Really, it isn’t difficult – and you can do it without using much money.
This article shows all you require to construct a balloon arch and not empty your bank. I’ll explain what to purchase, the way to put it up, and the way to finish it fast, even if you’ve never tried it. You won’t require helium, or any special kit. And, no, you don’t need to be skilled at crafts, either.
I’m going to give you my best advice for holding down the expenses. This covers where to get your balloons, the size which is most effective, and the way to make the most of things you might currently possess. I’ve included some cheerful plans to make your arch stand out, without additional costs.
This article is most useful if you are arranging a birthday party, a baby shower, or a graduation. Even for a small gathering in your garden, a balloon arch is a great addition for a very small price.
We are going to talk about:
- The way to make your arch for under $15-$20
- Which tools are truly needed (and which aren’t)
- Ways to make your arch appear more complete using fewer balloons
- Preventing typical do-it-yourself problems before they occur
Whether you’re putting on an event in the near future, or just want to save concepts for a later date, this guide will allow you to be prepared.
Continue reading to discover the way to construct a balloon arch that is both beautiful and uncomplicated – and doesn’t put any strain on your funds!
Let’s get started!!!
Why a Balloon Arch is the Best Budget Decor
Planning a party means the expenses really climb up on you. With the cake, the food, and the place to have it, things for decoration are usually what people think about last.
However, a balloon arch is not like other decorations. It’s something that really stands out. It uses up a big, bare wall; it makes a specific spot for pictures; and it makes the whole space appear ‘done’ – all for the same cost as a couple of pizzas.
Professionals who do this sort of thing usually want between $200 and $600 for a normal 12-foot garland. If you do it yourself, you only pay for what you use.
If you are clever about it, you can get an effect as good as the pros for only $15 to $25. That is a really good thing for how much money you’ve got to spend on the party.
What Tools You Really Need (And What You Can Skip)
The “party industry” wants you to think you need heavy-duty metal frames, helium tanks, and professional-grade clips.
You don’t.
In fact, some of those “special tools” actually make the job harder for a beginner.
1. The Electric Balloon Pump (The Only “Must-Have”)
If you are going to spend money on one thing, make it an electric pump.
Trying to blow up 100 balloons by mouth or with a hand pump will take you hours and leave you exhausted.
An electric pump costs about $20 on Amazon and can inflate two balloons at once in seconds. It’s the difference between a project that feels like a chore and one that’s actually fun.
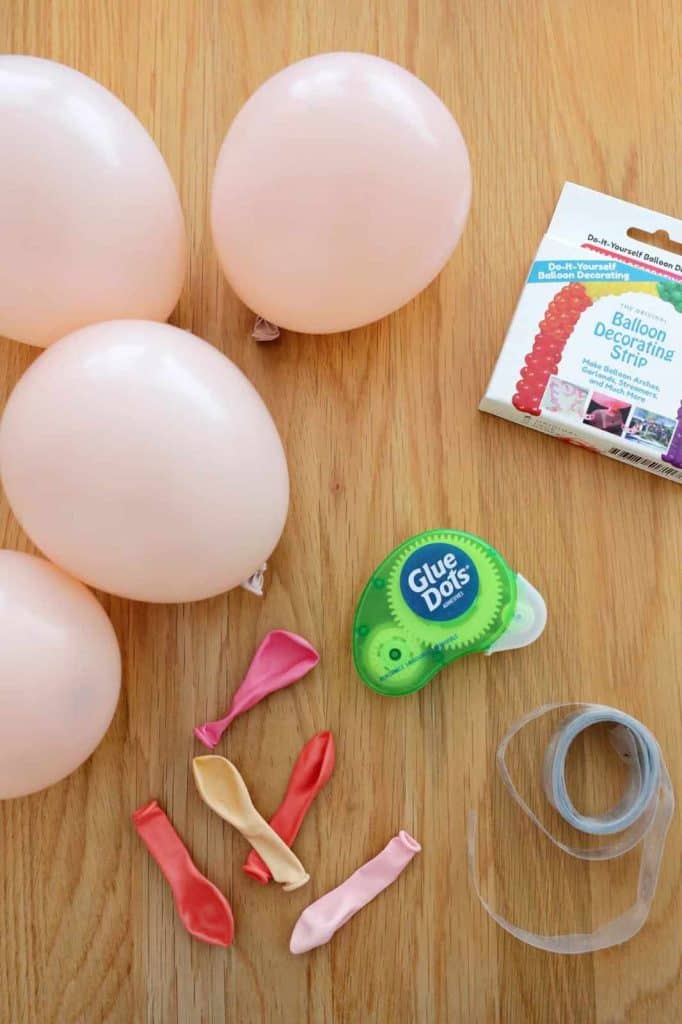
2. The Balloon Decorating Strip
This is a long, clear plastic tape with small holes punched into it. Forget the old-school way of tying balloons to a string with fishing line—that’s for professionals with a lot of patience.
The strip does the hard work for you. You just pull the knot through the hole, and the balloon stays put.
3. Glue Dots
These are small, double-sided adhesive dots.
They are essential for the “finishing” stage. If you see a gap in your arch where the plastic strip is showing, you just pop a glue dot on a small balloon and stick it right into the hole.
4. Command Hooks and Fishing Line
Don’t buy expensive “arch stands.” They take up too much floor space and are hard to hide. Instead, use 3M Command Hooks.
They stick to your walls and come off without peeling the paint. A little bit of clear fishing line or even leftover curling ribbon is all you need to tie the balloon strip to the hooks.
Selecting Your Balloons: Sizes and Colors
This is where the “look” of your arch is decided. Most people just buy one bag of standard balloons and wonder why their arch looks like a grocery store display.
The secret to that Pinterest-style “organic” arch is variety.
The Three-Size Rule
To get a full, professional look, you need three different sizes of balloons:
- Large (12-inch or 18-inch): Use these sparingly (maybe 5-10 per arch) to create focal points.
- Standard (10-inch): These will be the “bulk” of your arch.
- Small (5-inch): These are the most important for filling gaps and making the arch look thick.
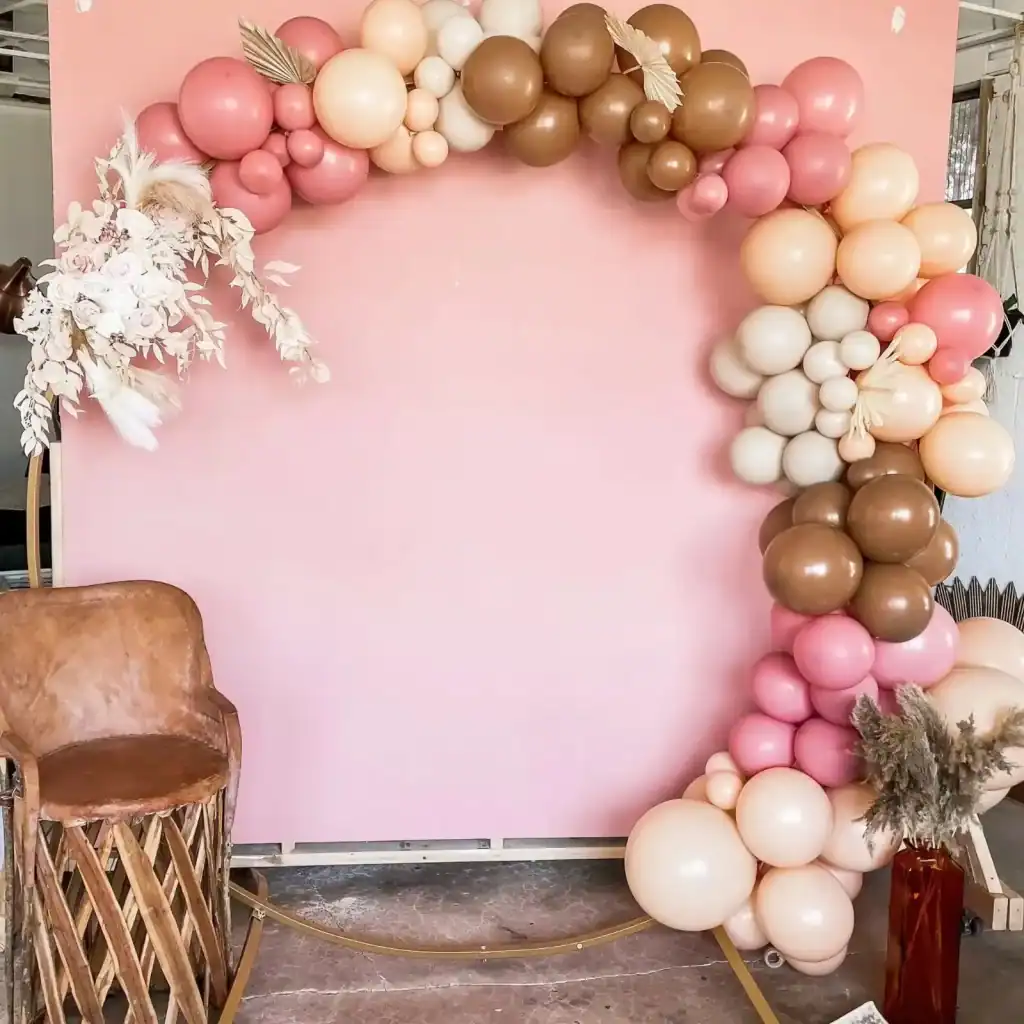
Choosing a Color Palette
Stick to 3 or 4 colors. If you use too many colors, it can look messy. If you use too few, it can look flat.
A classic combo is two “main” colors (like navy and light blue) and one “accent” color (like gold or white).
Money Tip: Buy “Balloon Kits” on Amazon. They usually come with 100+ balloons in coordinated colors and sizes, plus the decorating strip and glue dots, often for under $15. It’s much cheaper than buying individual bags at a party store.
Step-by-Step: The Assembly Process
Phase 1: The Inflation Station
Find a clean spot on the floor—ideally on a rug or a clean sheet. Latex balloons are like magnets for hair and dust. If you blow them up on a dirty floor, they’ll look grimy before the party even starts.
Blow up all your balloons first. Don’t worry about making them perfect. Some should be slightly under-inflated, and some should be full. This adds to the “organic” look.
- Avoid the “Pear” Shape: If your balloon looks like a pear (skinny at the top, wide at the bottom), it’s over-inflated. Let a little air out until it’s a nice, round sphere. Round balloons look more expensive.
Phase 2: Building the “Skeleton”
Unroll your plastic decorating strip. Leave about 12 inches of empty strip at the beginning—you’ll need this for hanging later.
Start with your 10-inch and 12-inch balloons. Push the knot of the balloon through the hole in the strip.
- The Alternating Trick: Put the first balloon through the hole from the “front” side. Put the next balloon through the next hole from the “back” side. This keeps the balloons from all bunching up on one side and makes the arch naturally curvy.
Continue until you’ve used up your medium and large balloons. At this point, it might look a little “leggy” or thin. Don’t panic—that’s normal!
Phase 3: Hanging the Arch
It’s much easier to finish the arch once it’s already on the wall.
- Decide where you want the “peak” of your arch to be.
- Place a Command hook at that peak and another one at the bottom where you want the arch to end.
- Use fishing line to loop through the balloon strip and tie it to the hooks.
- Adjust the shape until you like the way it drapes.
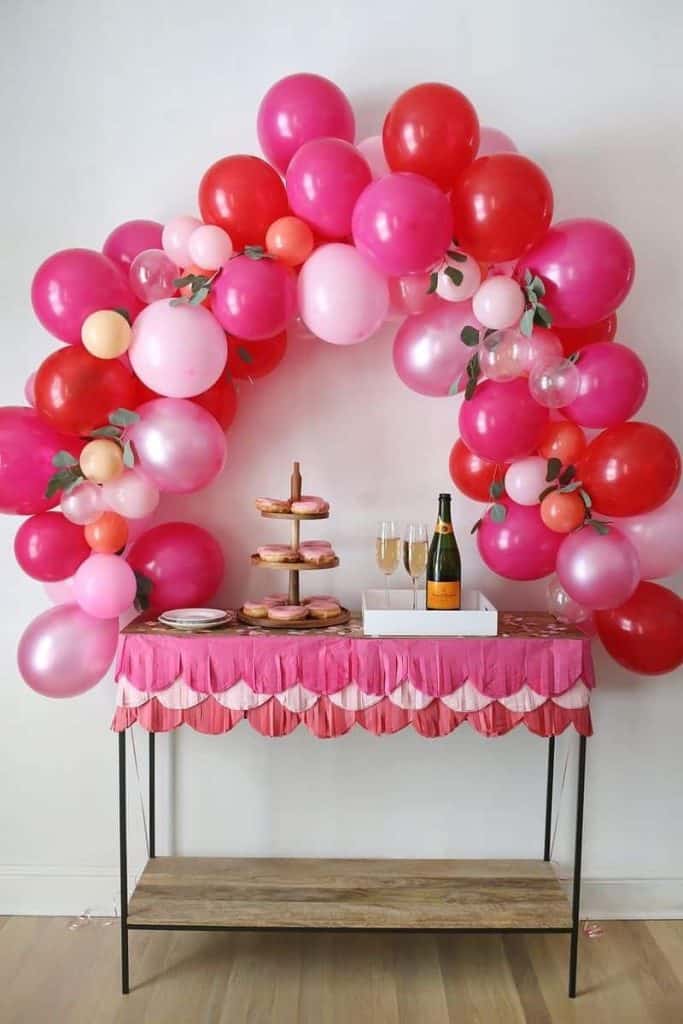
Phase 4: Filling the Gaps (The Final Polish)
Now take your small 5-inch balloons. These are your “fillers.” Apply a glue dot to the side of a small balloon and press it into any “holes” you see in the arch. Use these to hide the plastic strip and to cover the spots where you can see the wall behind the balloons. This step takes about 10 minutes but makes the biggest difference in the final look.
Advanced Tips for an Even Better Look
1. Adding Greenery or Florals
If you want to make your arch look like it cost $500, go to the dollar store and grab some faux eucalyptus or ivy vines. Tuck the stems into the balloon strip between the balloons. The contrast between the soft balloons and the sharp greenery makes it look incredibly high-end.
2. Double-Stuffing (The Professional Secret)
Have you ever noticed how some balloons have a really deep, “matte” color? That’s called double-stuffing. It’s when you put one balloon inside another before blowing them up.
- Example: Put a black balloon inside a pink one to get a deep, dusty rose color.
- Budget Note: This doubles your balloon cost, so only do this for “hero” balloons or if you have extra room in the budget.
3. Dealing with “Oxidization”
Latex balloons are a natural product. When they are exposed to oxygen and sunlight, they start to “oxidize,” which gives them a velvety, matte look. Some people love this! If you prefer the shiny look, keep your arch away from direct sunlight and don’t make it more than 24 hours in advance.
Troubleshooting: What to Do When Things Go Wrong
My balloons keep popping!
This usually happens for two reasons: static or heat. If you’re working on a carpet, static can pop thin balloons. If you’re outside, the sun expands the air inside the balloon until it bursts.
If you’re hosting an outdoor party, under-inflate your balloons by about 20% to give the air room to expand in the heat.
The arch is sagging in the middle.
This means you need more “anchor points.” Don’t just use two hooks; use three or four. A well-placed hook in the center of the curve will take the weight off the ends and keep the shape crisp.
The glue dots aren’t sticking.
Glue dots work best on clean, dry latex. If your balloons are dusty or if it’s very humid, they might struggle. Make sure you press the balloon firmly and hold it for three seconds to ensure a good bond.
How to Save More on Your Balloon Arch
If you’re really pinching pennies, here is how to drive that cost down to the absolute minimum:
- Skip the Pump (If You Must): If you have a group of 3-4 friends who are willing to help, you can skip the electric pump and blow them up by hand. Just be prepared for it to take a while!
- Use Trash Bags for Transport: If you aren’t building the arch at the party location, blow the balloons up at home and put them in large, clean trash bags. This keeps them clean and makes them easy to move in a car.
- Reuse Your Tools: Keep your electric pump and your plastic strip! You can pull the balloons out of the strip after the party is over and save the strip for your next event. You only ever have to buy the balloons again.
Planning Your Timeline
Don’t leave the balloon arch for the morning of the party. You’ll be too stressed with food and guests.
- 2 Days Before: Buy your supplies.
- 1 Day Before: Blow up the balloons and assemble the strip. Keep the completed garland in a spare room or a large bag.
- Party Day: Hang the arch and do the “gap filling” with the small balloons. This should take less than 20 minutes on the day of the event.
Final Thoughts
At the end of the day, a balloon arch isn’t about getting everything exactly right; it’s more about building a cheerful mood for people you invite, and doing it without worrying about your finances.
Whether it’s your first time or your tenth, remember that the “organic” look is very forgiving. If a balloon pops or a gap opens up, just stick another one in there!
Once you see the look on your kid’s face or the way your photos turn out, you’ll realize it was worth every bit of effort.
And the best part?
You’ll have an extra $300 in your pocket that didn’t go to a professional decorator.
And…that’s all I have for today’s article! I really hope you found this article helpful and interesting!
If you have any questions or you just wanna share your thoughts with us write your comments below and we will be more than happy to get back to you as soon as possible!
Until next time,
Stay safe,

I’m Katerina Lithopoulou, co-creator of DIY Cozy Living. I’ve always loved the little things that make a space feel special. With a background in language and a passion for photography and cozy design, I enjoy turning everyday inspiration into simple ideas people can actually use.
My motto: “Cozy isn’t a trend — it’s a feeling.”
