Crocheted Christmas Tree Skirt Ideas That Look Handmade in the Best Way

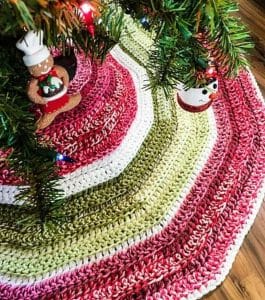
The tree skirt is the one thing I kept putting off every year.
I’d spend real time on the ornaments, the ribbon, the lights. Then I’d get to the base and think ”I’ll figure that out later”.
Later would arrive on December 22nd and I’d be standing there with a piece of fabric from a drawer and a feeling that the whole tree looked unfinished.
Last year I finally decided to deal with it. I started looking at crocheted tree skirts and went down a hole I did not expect. The range of what people make is genuinely remarkable. Simple ones that take a weekend. Heirloom pieces that take a month. Ones with 3D flowers that I cannot believe a person made with two sticks and some yarn.
This is everything I found, organized by style and difficulty, so you can actually find the one that fits both what you want and what you’re willing to sit down and make.
What to Know Before You Start
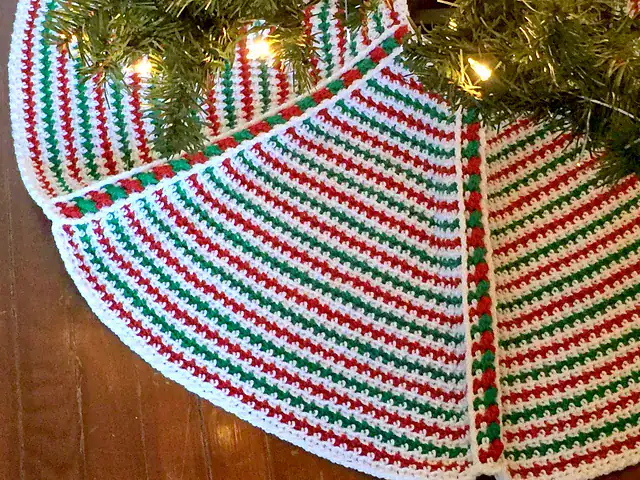
Crocheted tree skirts vary a lot in time, skill level, and yarn cost. Before you look at patterns, it helps to know what you’re working with.
| Style | Yarn Weight | Skill Level | Time Needed |
|---|---|---|---|
| Farmhouse / Simple | Super bulky | Beginner | 1–2 days |
| Faux fur trim | Super bulky + fur | Beginner | 1–2 days |
| All faux fur | Faux fur yarn | Beginner | 1 day |
| Buffalo plaid | Bulky (double strand) | Beginner/Intermediate | 2–3 days |
| Bobble stitch | Worsted (double strand) | Intermediate | 3–5 days |
| Basketweave | Worsted | Intermediate | 3–4 days |
| Star/pentagon shape | Worsted | Intermediate | 3–4 days |
| Snowman appliqué | Worsted | Intermediate | 4–6 days |
| Pom pom trim | Any | Beginner | 1–2 days |
| Poinsettia motifs | Worsted | Advanced | 1–2 weeks |
| Filet crochet | Thread / size 10 | Advanced | 2–4 weeks |
One thing that surprised me: the fancier something looks does not always mean it takes longer. The all-faux-fur version is one of the easiest to make and also one of the most dramatic. The basketweave looks complex and is actually quite rhythmic once you understand the pattern logic.
The Quick Ones (Beginner-Friendly)
These are the skirts you can start and finish in a long weekend. Good if you need something done, or if you’re newer to crochet and don’t want to commit to a month-long project.
The Simple Farmhouse Skirt
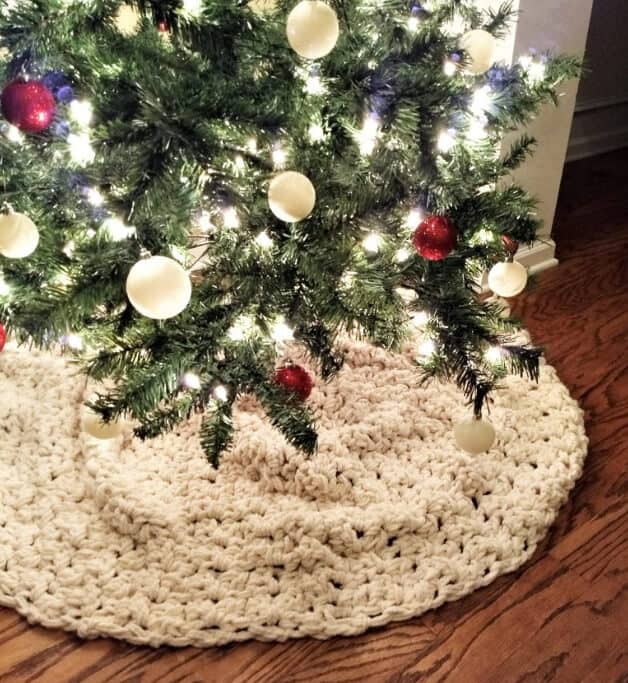
Super bulky yarn, double strands, basic stitches worked in rounds. This is genuinely achievable in a day or two if you can sit with it.
The farmhouse version works best in:
- Cream or oatmeal for a natural look
- White for a classic winter feel
- Soft grey if your tree is more modern
What makes it look intentional rather than rushed is the yarn weight. Super bulky creates stitches that look deliberate and substantial. Don’t try to replicate this with thinner yarn unless you have a lot more time. The thickness is part of the aesthetic.
The All-Faux-Fur Skirt
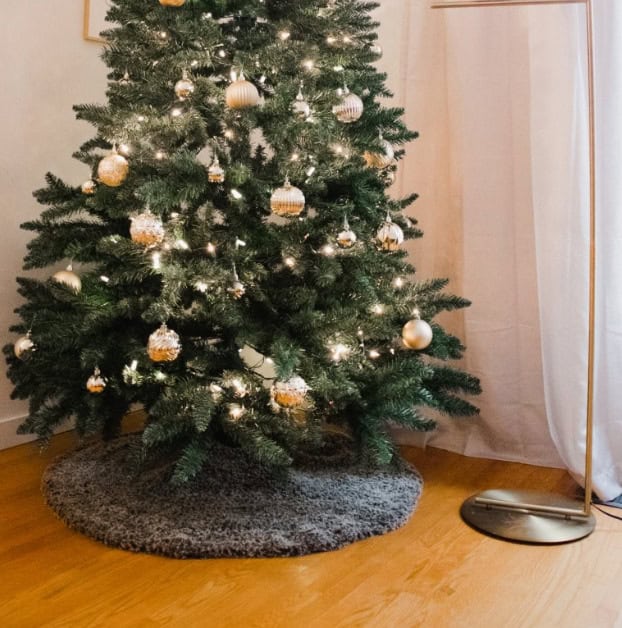
The entire skirt made from faux fur yarn. No trim added separately. Just fur, all the way through.
Marina saw a photo of one of these and her reaction was immediate. It looks like a cloud at the base of the tree. Slightly ridiculous in the very best way.
The practical advantage: you cannot see individual stitches because the fur covers everything. Any imperfections disappear completely into the fluff. For a beginner, this is genuinely one of the most forgiving options on the list.
Variations:
- White for traditional snowy look
- Ivory for something slightly warmer
- Taupe or charcoal for a more modern tree
Pom Pom Trim
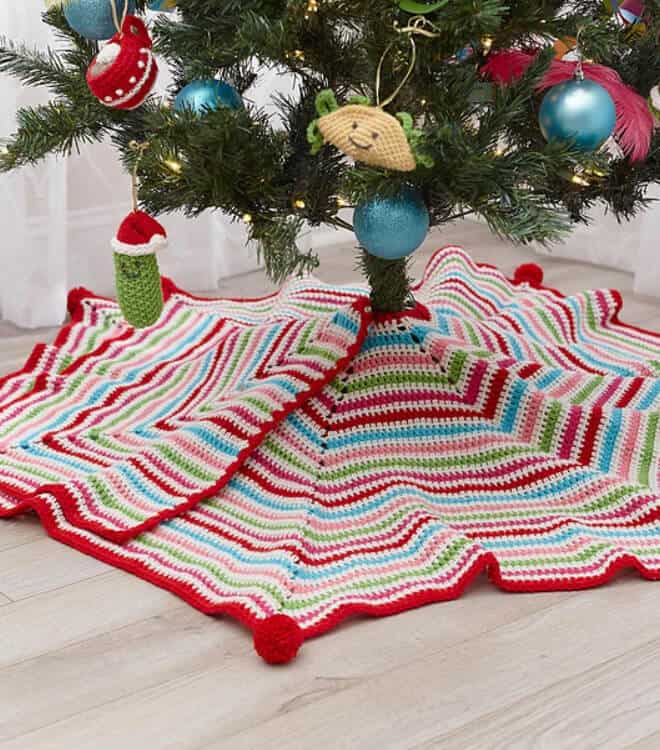
A simple striped or colour-blocked body with pom poms along the pointed edges.
The pom poms can be made from leftover yarn in coordinating or contrasting colours, which is a good way to use up odds and ends from other projects. It also means the skirt can be fairly inexpensive to make overall.
Marina has requested pom poms on everything for the past two years. I have put pom poms on things I never expected to put pom poms on. The tree skirt felt inevitable.
The Textured Ones
These take longer but the result looks genuinely handcrafted in a way that flat stitches sometimes don’t. You can feel the difference when you touch them.
Bobble Stitch
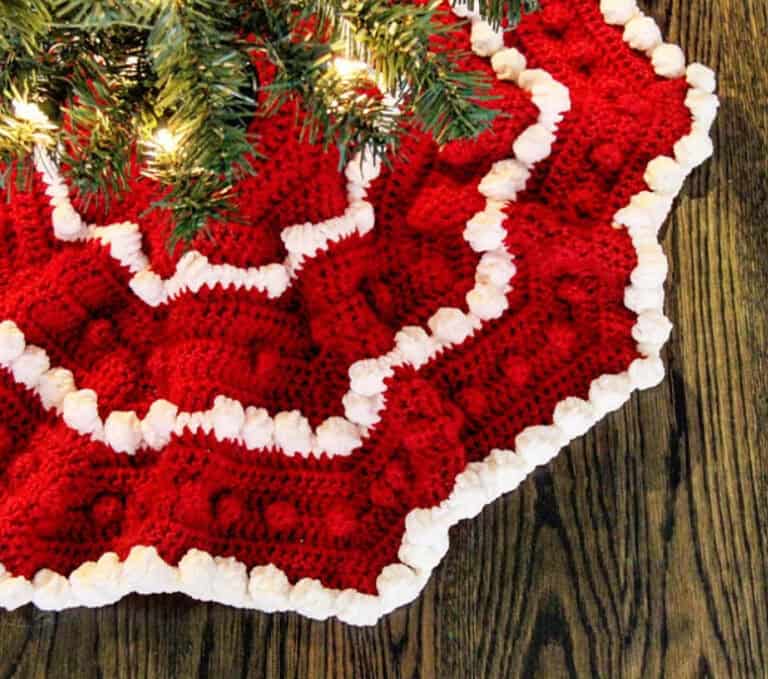
Raised bobbles across the entire surface of the skirt, worked in double strands of worsted weight yarn.
Up close the texture is beautiful. From across the room it reads as a richly detailed base that makes the tree above it look more intentional. Guests notice this one.
The honest part: bobbles are slower to work than regular stitches. Each one requires several steps. Budget your time accordingly. It’s not technically difficult, it’s just time-consuming. Put on something to watch and settle in.
Works well with:
- Cream or white yarn for classic feel
- Deep red for a traditional Christmas look
- Forest green if you want something unexpected
Click here to get the FREE crochet pattern!
Basketweave Stitch
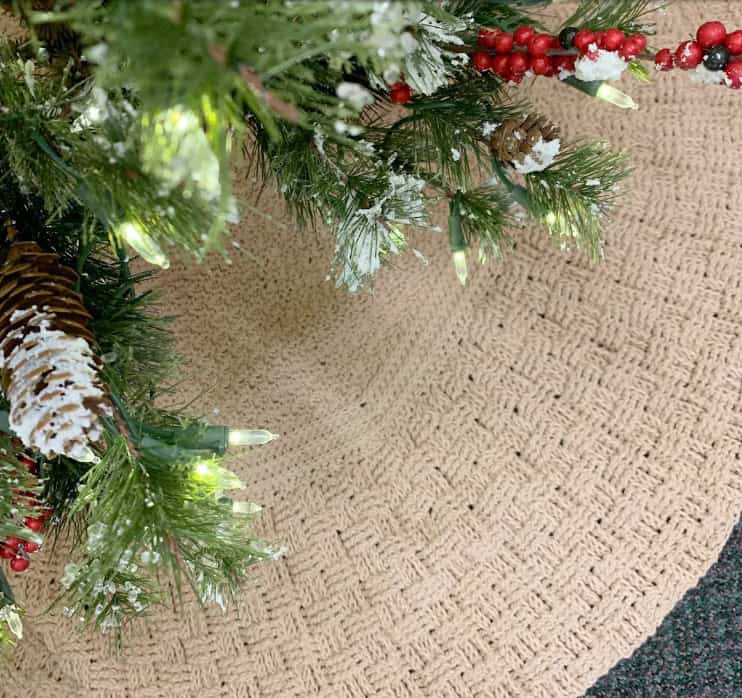
Alternating blocks of front and back post stitches that create a woven texture. It looks more complicated than it is.
Once you understand the logic of the stitch pattern, it becomes rhythmic. The Country Christmas version pairs a basketweave body with a wide shell stitch border, and that contrast between the two textures is where it really works. Plain centre, decorative edge.
This one sits well under a classic red and green tree or a farmhouse natural-toned tree. Less well under a very modern minimalist setup, where it might feel too traditional.
Click here to get the FREE crochet pattern!
The Themed and Playful Ones
Good for families, for children’s trees, or if you just want the skirt to have a personality of its own.
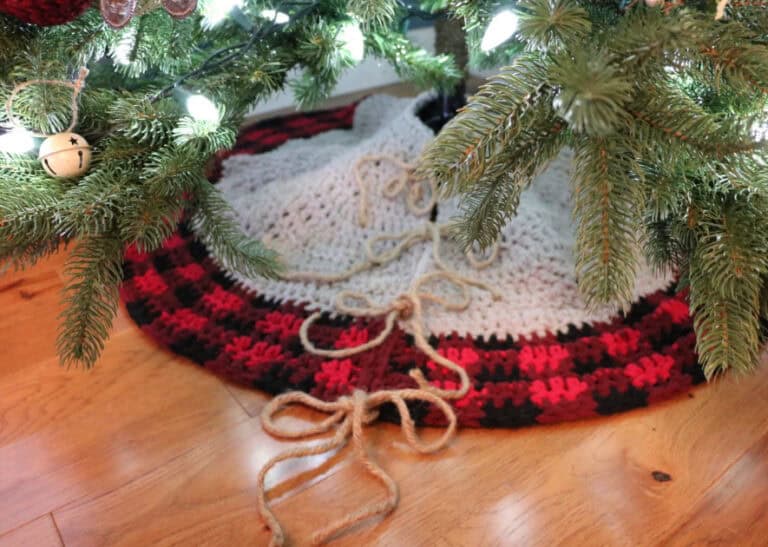
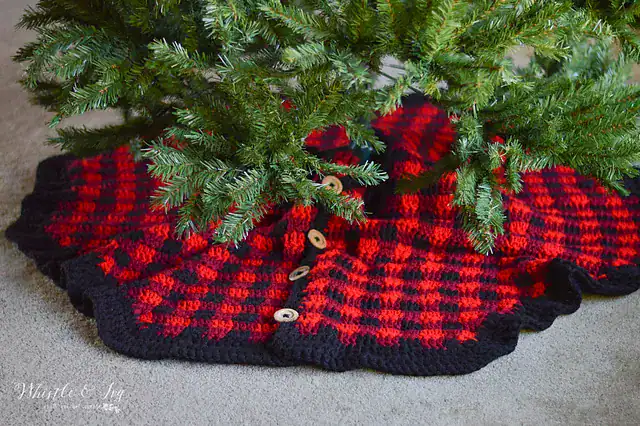
Buffalo Plaid
🔥 Would you like to save this?
The plaid effect is achieved with basic double crochet stitches and careful colour changes between rows. It looks like it should be complicated. It isn’t.
| Colour Combo | Mood |
|---|---|
| Red and black | Classic, bold |
| Red and white | Bright, festive |
| Green and cream | Softer, farmhouse |
| Navy and cream | Preppy, unexpected |
The jute closure some versions use is a nice finishing detail. It ties the skirt closed at the back and gives the whole thing a handmade-on-purpose feeling rather than handmade-because-I-didn’t-know-better.
If you’ve done any colour change crochet before, this is very manageable. If you haven’t, the plaid pattern gives you a clear visual guide for exactly where you are in the row.
Click here to get the FREE crochet pattern!
Snowman Appliqué
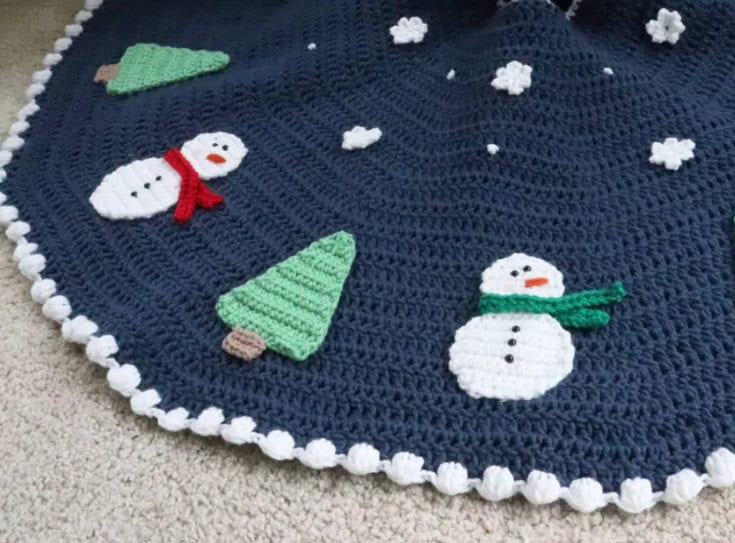
A simple crocheted body with separate crocheted snowman figures made and then attached on top.
The body is straightforward. The appliqués are where you spend your time and where the skirt becomes personal. You can make the snowmen exactly how you want: different scarves, different sizes, different little details.
Maria once drew me a snowman on a piece of paper and said she wanted one exactly like it. I cannot crochet at that level of specificity. But I appreciated the commission.
This is a good project for someone who finds straight pattern repetition boring. The appliqué work keeps it interesting.
Click here to get the FREE crochet pattern!
Star or Pentagon Shape
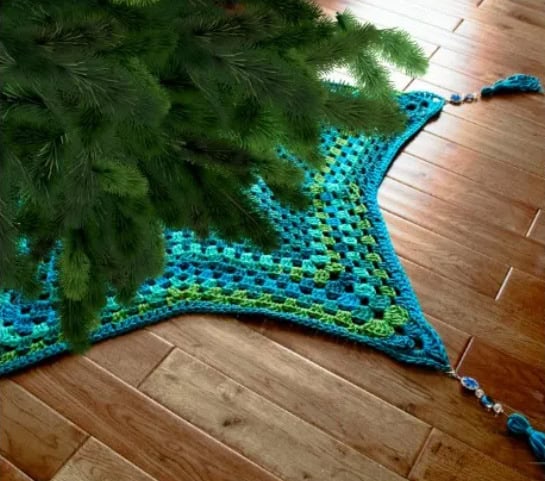
Most tree skirts are a circle with a cut-out for the trunk. The star and pentagon versions break that and it makes a real difference in how the skirt reads under the tree.
The points extend outward. The skirt becomes part of the visual rather than just a covering. Jeweled tassels at each tip add a bit of sparkle without making it look overdressed.
This is a good option if you want the base of the tree to actually draw the eye.
Click here to get the FREE crochet pattern!
The Show-Off Versions
For when you have the time, the skill, and the desire to make something that will last for decades.
Poinsettia Motifs
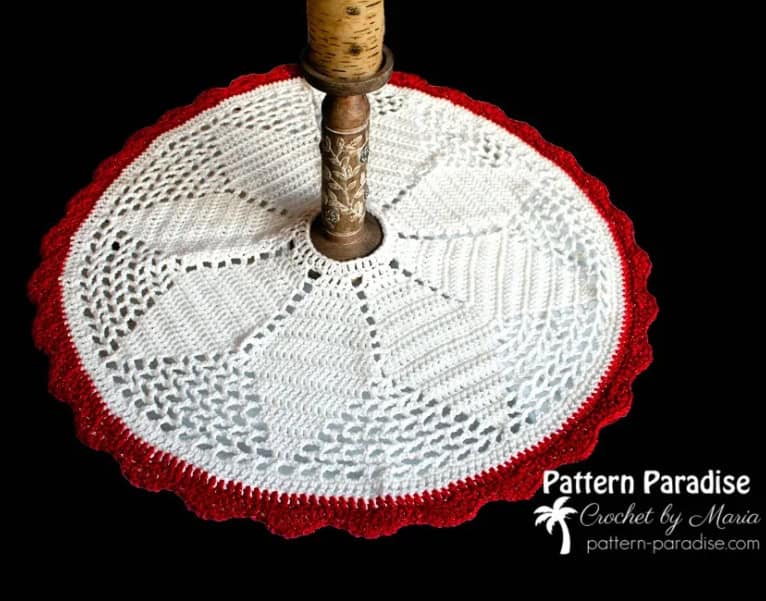
A lemon peel stitch body with separate crocheted poinsettia flowers made and then attached on top. Each flower is worked petal by petal and then assembled.
It sounds painstaking and it is. Looking at a finished version makes it make sense immediately. The three-dimensional flowers catch light differently throughout the day. The skirt looks different in the morning than it does in the evening with the tree lights on.
Colour options that work:
- Red poinsettias on cream background (traditional)
- Dusty pink on white (soft and modern)
- Burgundy on ivory (rich and elegant)
The green leaves between the petals make or break this one. Use a true green, not a yellow-green.
Click here to get the FREE crochet pattern!
Filet Crochet
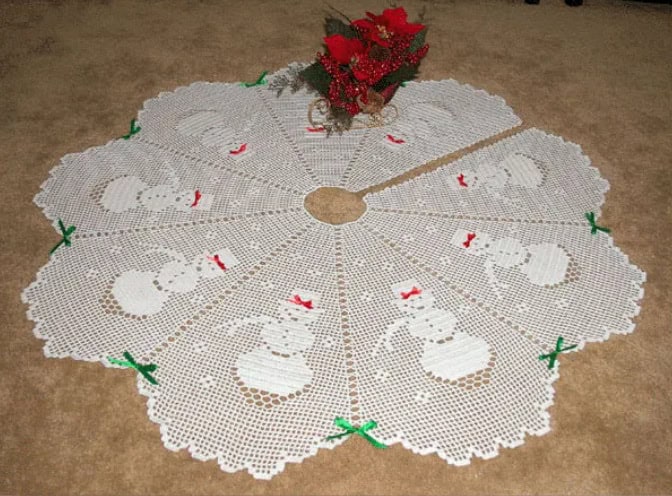
Fine thread, size 10 hook, a lace-grid pattern that looks like embroidery from a distance.
This is the heirloom option. Winter Wonderland designs, poinsettia grids, snowflake patterns. Ribbon woven through the finished border as a final touch. The kind of tree skirt that gets folded carefully every January and brought out again the following year with genuine anticipation.
Zina has a version of this in her house that was made by her mother. She brings it out every Christmas and puts it under the tree without saying much about it. But you can tell it means something.
Requirements: comfort reading a filet chart, patience, and not being in a hurry. If those three things are true for you, this is worth every hour it takes.
The Finishing Details That Actually Matter
Whichever version you make, these choices at the end determine how the finished skirt looks and holds together.
Closure options:
- Button and loop (traditional, clean)
- Jute tie (rustic, farmhouse-appropriate)
- Ribbon tie (soft, elegant)
- Velcro (practical, invisible)
Border options:
- Shell stitch (classic, soft edge)
- Faux fur trim (luxurious, hides any unevenness in final round)
- Pom poms (playful, good for using leftover yarn)
- Simple single crochet (clean, modern, minimal)
What to put under it
A crocheted tree skirt with nothing underneath loses some of its effect. A layer of batting inside it gives it body and makes it sit better. Alternatively, a piece of felt cut to the same size and hand-stitched to the back gives structure without adding thickness.
A crocheted tree skirt takes more time than buying one and less money. The handmade quality shows in a way that is hard to explain until you see it under an actual tree, in your actual living room, on Christmas morning.
Worth the effort. I say that every year now.
Thanks for reading.

Save this and pin it for when you’re ready to start.
I’m Katerina Lithopoulou, co-creator of DIY Cozy Living. I’ve always loved the little things that make a space feel special. With a background in language and a passion for photography and cozy design, I enjoy turning everyday inspiration into simple ideas people can actually use.
My motto: “Cozy isn’t a trend — it’s a feeling.”
