
How to Make DIY Decorated Flower Pots (That Look Like You Bought Them)
I want to tell you about the afternoon Marina decided she was an artist.
Not in the general way that eight-year-olds decide things. In the specific, committed, I-have-already-found-the-scissors way. She had seen something on my phone….One of those satisfying craft videos where someone transforms a plain terracotta pot into something beautiful in about forty-five seconds of sped-up footage — and that was it. Decision made. We were doing this.
Now.
I looked at the plain terracotta pots on our balcony. The ones that had been sitting there since last spring with nothing in them, waiting for me to do something with them and being ignored every time I walked past.
I looked at Marina, who was already rummaging through the craft drawer with the energy of someone who has found her purpose.
Fine.
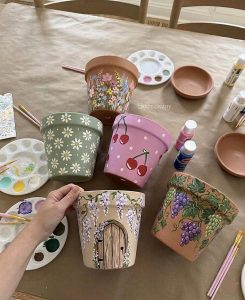
An hour later we had three decorated pots, Mod Podge on the kitchen table, napkin scraps all over the floor, and Marina standing back with her arms crossed looking at the results the way she looks at things that have gone exactly as she planned.
They were, genuinely, beautiful.
Why Plain Terracotta Pots Are One Of The Best Things To Decorate
There’s a certain appeal to the simplicity of a basic terracotta pot, and it almost makes you want to decorate it. They don’t cost much, are available in all sizes, and have a nice level of texture. Because of that texture, anything you do attach to one looks as if it was meant to be there, as though the surface wasn’t just a cheap addition from a garden store but was always intended for something lovely.
With Mod Podge and paper napkins (or scrapbook paper, for a different style) you can totally change them. A dull pot then looks like it belongs in a fancy design store! Plus, the entire thing is finished in under an hour, won’t use much money, and can be completed at the kitchen table, even with someone watching TV.
That is to say, it’s exactly the sort of thing Marina would enjoy doing on an afternoon.
What You Need
For the pots:
- Plain terracotta pots — any size works, but 10-12cm diameter is a good starting point
- Paper napkins with a pattern you love — florals, geometric, anything with individual motifs you can cut out. Look for ones with clearly defined images rather than all-over patterns
- Mod Podge, matte finish
- Foam brushes — at least two, one for the Mod Podge and one to keep clean
- Small sharp scissors — the pointed kind make cutting much easier
- Chalk paint or acrylic paint in white or cream (optional but recommended)
- Clear waterproof sealant spray (Polycrylic or similar) if you plan to put real plants in them
What Mod Podge actually is, for anyone who hasn’t used it:
It’s a decoupage medium — glue, sealer, and protective finish all in one. It goes on white and dries completely clear. The matte finish is the one to reach for. It has no shine, dries hard, and looks clean and natural on terracotta.
Don’t let it intimidate you. It is one of the most forgiving craft products available and I say this as someone who has been intimidated by it unnecessarily for years.
Step 1: Paint the Pot (Optional But Worth It)
You don’t have to paint the pot before decorating it. The terracotta colour is warm and lovely and the napkin motifs will adhere directly to it just fine.
But.
A single coat of white chalk paint as a base makes the colours of the napkin designs pop in a way they don’t against the natural terracotta. It takes ten minutes including drying time if you use chalk paint — it dries almost immediately — and the difference in the finished result is noticeable.
Let it dry completely before moving to the next step.
Step 2: Separate the Napkin Layers
This is the step nobody shows clearly in the videos and it is the most important one.
Decorative paper napkins are almost always two or three ply — multiple layers pressed together. For Mod Podge work, you want only the top printed layer. The other layers are thick and will create wrinkles and lumps when you try to apply them.
Unfold the napkin completely. You’ll see the layers clearly at the edges. Gently peel them apart, working slowly from one corner. The top printed layer is thin — almost tissue-paper thin — and it tears easily. Take your time.
Set the plain white layers aside and keep only the printed top layer.
Marina tore her first one.
Twice.
Then she got the technique and didn’t tear another. It takes about thirty seconds to learn and one ruined napkin to understand why you should be patient about it.
Step 3: Cut Out Your Motifs
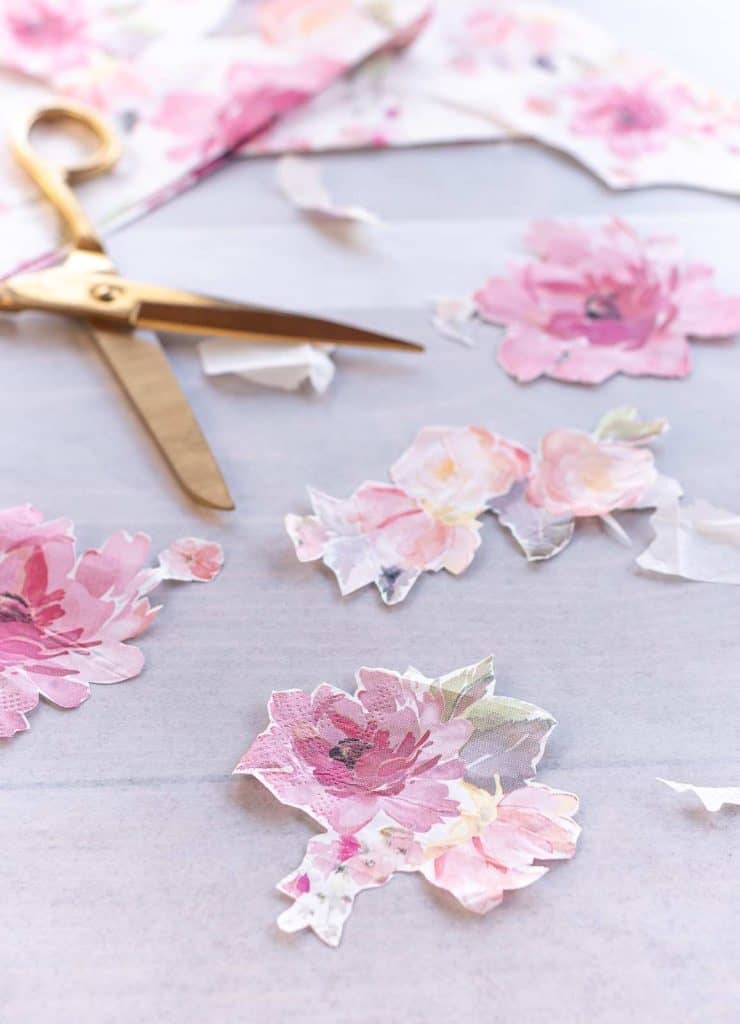
Use small sharp scissors to cut out the individual motifs from the printed layer — flowers, leaves, birds, whatever your napkin has. Cut as close to the edge of the design as you can manage.
The pointed scissors make a significant difference here. Round-ended ones are frustrating for this kind of detail. If you have a pair of small embroidery scissors or nail scissors, use those.
Marina cut out seventeen flowers.
She counted them. She announced the number. She was very pleased.
Step 4: Apply the Motifs With Mod Podge
This is the part where it comes together.
Pour a small amount of Mod Podge into a dish or the lid of the container. Using a foam brush, apply a thin layer of Mod Podge to a section of the pot. Place a cut-out motif onto the wet Mod Podge and press it gently into place.
Then brush more Mod Podge over the top of the motif — smoothing outward from the centre of the design with gentle strokes. The goal is to eliminate any air bubbles or wrinkles. Work slowly. The tissue-thin napkin layer wrinkles easily if you rush.
If a wrinkle appears, don’t try to lift the motif. Gently smooth it outward with the brush while the Mod Podge is still wet. In most cases it will flatten.
Continue adding motifs around the pot, overlapping slightly if you want a fuller look, or spacing them with gaps for something more minimal. There is no wrong arrangement. Step back occasionally and look at it from a distance — the scale and balance of the design are easier to see from further away than from directly above it.
Step 5: Let It Dry and Add the Final Coat
Once all your motifs are in place, let the pot dry completely. At least an hour, ideally more. Don’t rush this — wet Mod Podge looks milky and you need to see the clear finish before you add the final coat.
When fully dry, apply one final layer of Mod Podge over the entire decorated surface. This seals everything in and gives the pot a clean, finished appearance.
Let it dry again.
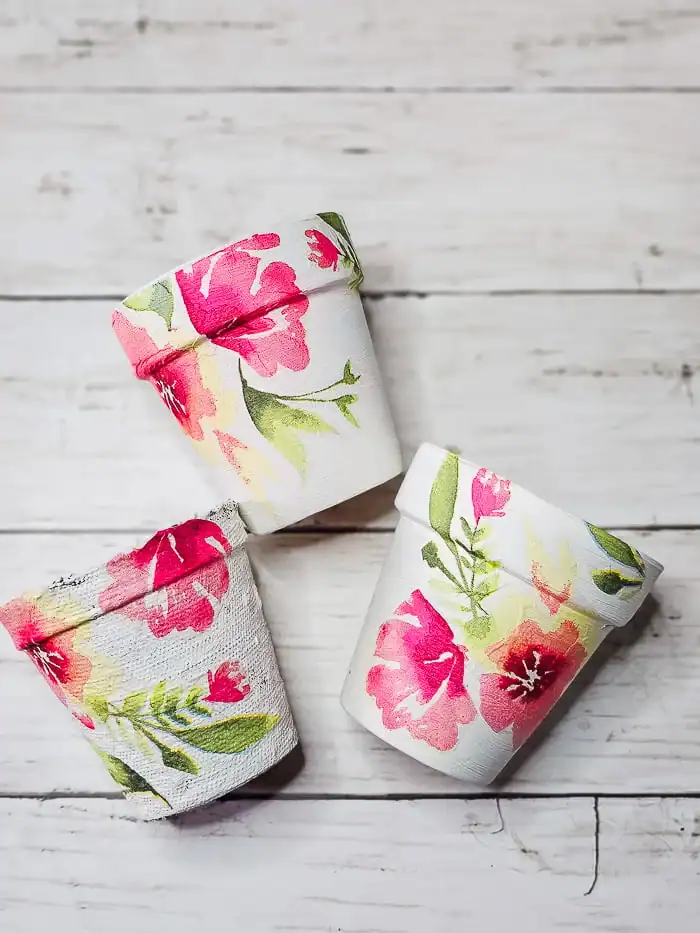
The finished pot will have a subtle matte sheen — protected, smooth, completely fixed in place.
A Note on Real Plants
Mod Podge is not waterproof. If you fill these pots directly with soil and water them, the moisture will work through the terracotta and eventually affect the decoration.
Two solutions:
Use faux greenery or dried flowers, which is what Marina did — she arranged dried lavender in hers and it looks exactly right.
Or seal the finished pot with a polycrylic spray on both the outside and the inside before planting anything in it. One reader reported that she planted herbs in pots she’d sealed this way and they held up through an entire summer outdoors. Spray both surfaces, let dry completely, then plant.
What They Look Right Now
We have three flowerpots on the balcony. Marina picked out peony napkins, pink flowers that have the look of being far more expensive than two euros for twenty. Maria went into the kitchen halfway through getting something, and then stayed to help with the whole thing without ever mentioning she’d been distracted. She chose a blue and white floral design.
I used little sprigs of rosemary from a kitchen napkin, and I liked it a lot more than I thought I would when I discovered it at the back of a drawer.
The table on the balcony holds all three, right by the coffee pot. Each morning, looking at them, I get a lovely warm feeling from something unexpectedly good being created on a Tuesday afternoon from napkins and glue. Marina’s already thinking of the next pots to decorate.
I haven’t told her yet that we’ve used all the Mod Podge. We’ll discuss that later.
Conclusion – DIY Terracotta Pots For Flowers
You get a feeling these projects are going to be more trouble than they’re worth, and then they are so much nicer than you thought. It isn’t the final product being amazing, although it is pretty, it’s the time spent making it.
An hour around the kitchen table with scissors, napkins, and a container of glue is all it takes for a kid to declare herself an artist, and for her to be correct!
And that’s all I have for today….I really hope you found this idea interesting and this article helpful. If you happen to make these, I’d really like to know which napkins you picked. That one small choice totally alters how the pot feels and I am truly interested in what others go for!
Tell me in the comments, and if you’ve done things differently, perhaps using fabric instead of napkins, a different sealer, or pots made from something else for example.
Until next time,
Stay safe,


I’m Katerina Lithopoulou, co-creator of DIY Cozy Living. I’ve always loved the little things that make a space feel special. With a background in language and a passion for photography and cozy design, I enjoy turning everyday inspiration into simple ideas people can actually use.
My motto: “Cozy isn’t a trend — it’s a feeling.”
