
My Honest Guide to Finally Getting Under Your Kitchen Sink Together
🔥 Would you like to save this?
A certain annoyance comes with opening the cupboard beneath your kitchen sink; you require the washing-up liquid, you are certain it is in there, and yet, somehow, each time you want it you must move four other items to reach it.
I’ve inhabited five different flats over the years, and in each one, that cupboard became an issue within a few months. Different kitchens, different plumbing, different designs – the same mess. Eventually I stopped criticising the room and began to think about why it continued to happen.
The under-sink cupboard fails for three reasons, almost universally: the pipes render standard organisers pointless, everything is just put in without any order, and nobody ever works out what truly ought to be in there at all.
Correct these three things, and you’ve corrected the cupboard. Here is how!
Let’s dive in!
First Step: Measure the Actual Room
Most under-sink organisers people purchase don’t fit. Not because the goods are poor – because that cupboard is almost never a neat rectangle.
The P-trap drain pipe runs down the centre, supply lines come off the sides, and in some kitchens a waste disposal unit occupies a quarter of the floor space altogether.
Before you buy anything, get down with a tape measure and record:
- The full internal width of the cupboard
- Depth from front to back
- Height allowance to the left and right of the pipe – these are frequently different
- How far the pipe is from the front of the cupboard
- The pipe’s diameter – this is more important than people think when choosing a U-shaped organiser
Write these figures in your phone before you shop. The pipe’s position is the variable which ruins most schemes. I once purchased an organiser, put it all together on the kitchen floor, and found it missed clearing the pipe by three centimetres. Measure first. Constantly.
Step One: Determine What Truly Belongs Here
This is the stage most organising guides skip, and it is the most crucial one. Under-sink cupboards gather things simply because they are in the kitchen and need somewhere to go. Before spending anything on organisers, be firm about what has actually earned a place in that cupboard.
Belongs under the sink:
- Washing-up liquid, washing-up brush, sponges and scrubbers
- Surface sprays, glass cleaner, floor cleaner
- Rubber gloves
- Bin liners and refuse sacks
- Drain products and sink-specific cleaners
- A small box you can grab and carry to clean other rooms (more on this below)
Doesn’t belong here – move these out:
- Batteries and lightbulbs → junk drawer or utility room
- Plastic bags → a drawer near the worktop
- Bulk kitchen roll stock → larder or storage cupboard
- Pet supplies → wherever you feed the pet
- Random tools, mystery items, anything you can’t immediately justify
When I moved everything that didn’t genuinely belong out of my cupboard, I released nearly a third of the space without buying a single thing. This stage alone is worth doing before anything else.
Step Two: The Clear-out
Pull everything out and put it on the floor. Everything. What you discover will be sobering.
You will find: bottles which are entirely empty but somehow still there, products you bought and never liked, things which have gone off (yes, cleaning products expire – check the base of the bottle), and at a minimum two copies of something you forgot you already possessed.
The rule I use: empty → throw away. Gone off → throw away. Not used it in six months and can’t say why I’d need it → throw away.
What remains is your actual stock. It is almost always smaller than you anticipated, and that is the point.
Key understanding: most people discover they only need about half of what they were storing. Clearing copies alone often frees up considerable space before you’ve organised anything.
Step 3: Work Around the Pipes

This is where nearly all attempts to get organised go wrong. Here are the solutions that will work:
| Solution | Best For | Approx. Cost |
|---|---|---|
| U-shaped / adjustable organizer | Full-width solution, any cabinet | €20–40 |
| Tension rod for spray bottles | Freeing up floor space instantly | €5–10 |
| Stackable pull-out drawer units | Maximizing height on each side | €25–50 |
| Turntable (lazy Susan) | Wide cabinets, deep reach | €10–20 |
| Over-door wire rack | Sponges, gloves, small items | €10–15 |
U-shaped organisers – the kind from mDesign and Lynk are good – have a notch to go around the drain pipe, so you get a whole, flat surface across the cupboard floor. This is easily the most helpful thing you can buy for an under-sink cupboard; the pipe goes through the notch, and suddenly you have two useful sides joined by a front shelf – it really is like a different cupboard.
Tension rods are the smartest cheap idea I’ve found. Put one in horizontally near the top of the cupboard – just like a curtain rail – and hang your spray bottles from it by the handles. They hang in the air, the whole floor space below them is free, and it’s actually quicker to get them than to rummage in a box. Use two rods next to each other if you’ve got a lot of bottles. It won’t cost you much at all.
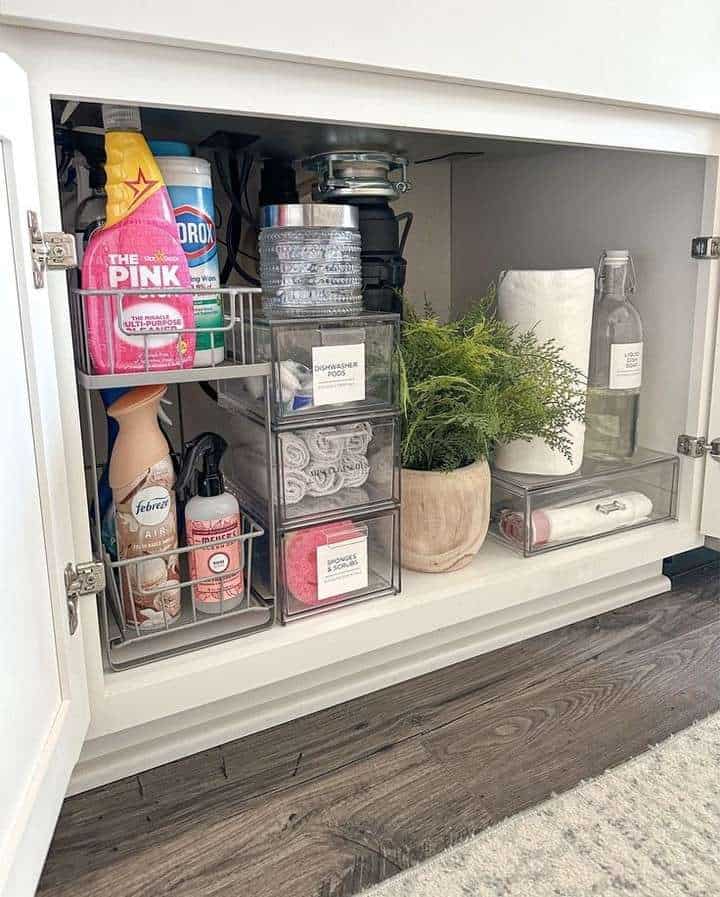
Stackable pull-out drawer units on each side of the pipe will let you use the height you do have. A two-tier pull-out on one side, a small shelf on the other. I went from storing about ten items awkwardly to over twenty with room left, and the cupboard hadn’t got any bigger.
Something I learnt when organising my current kitchen: put the main unit together first, before doing anything else. I made the mistake of setting up the smaller bits on one side, thinking I was getting things done, then finding my main organiser didn’t quite fit over the pipe’s bulge. Start with the biggest, most important piece and build around it.
Step 4: The Zone System
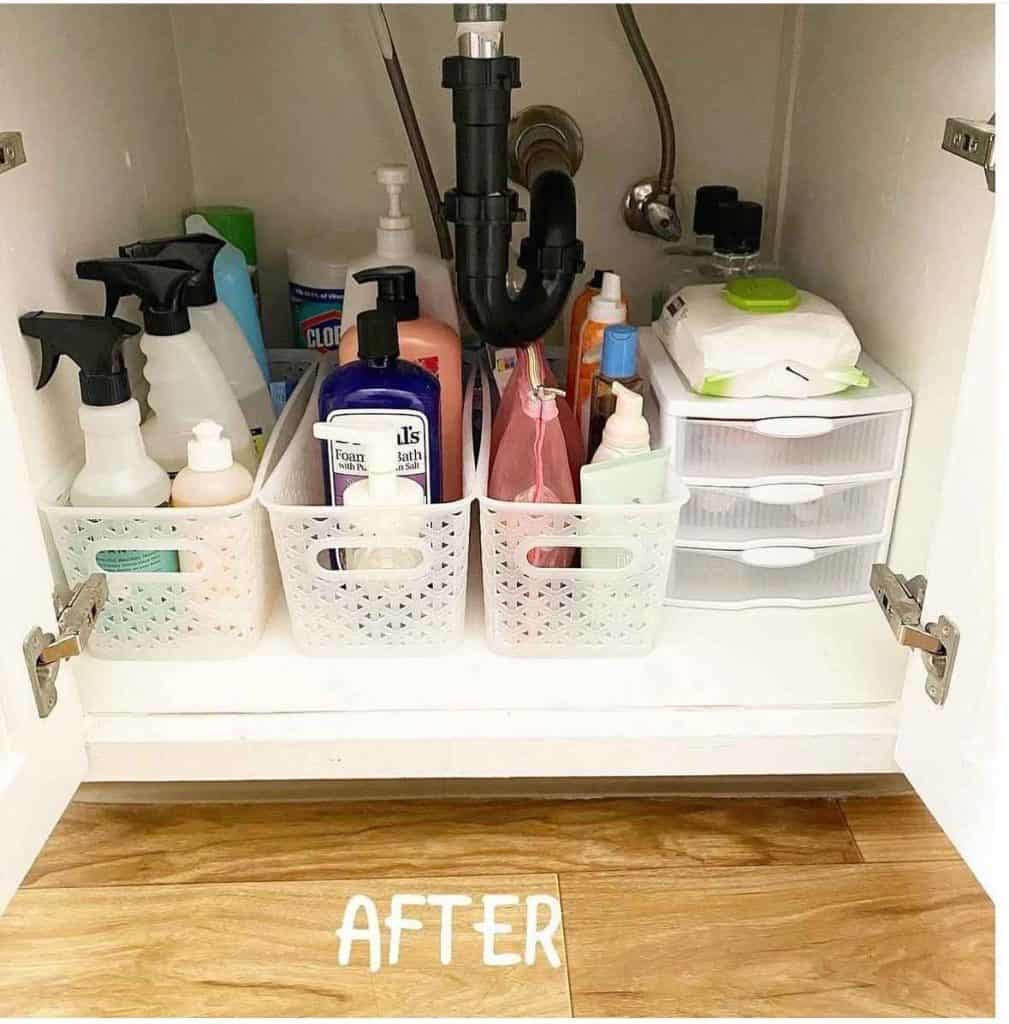
Once you know what you’re keeping and you’ve dealt with the pipe, split the cupboard into three zones. This is the system that will keep the cupboard organised long after the initial setting-up – because everything has a permanent place.
Front zone — Daily use
Washing-up liquid, the sponge you’re using at the moment, dish brush, hand soap refill. These are things you reach for every day. Nothing should ever be in front of them. This zone should be very easy to get at.
Middle zone — Weekly use
Surface sprays, glass cleaner, scrubbing brush, floor cleaner. You need these fairly often, but not every morning. They go just behind the daily zone.
Back zone — Refills and spares only
Extra bottles, large refills, more sealed sponges. This is your store room. When the front zone runs out, you fill it up from here and add the item to your shopping list. There shouldn’t ever be any surprises in the back zone.
The reason this works in the long run is that it’s a system, not just an arrangement. When something is in the wrong zone, you know at once. That annoyance is what stops things from going back to being messy.
The Portable Cleaning Caddy Idea
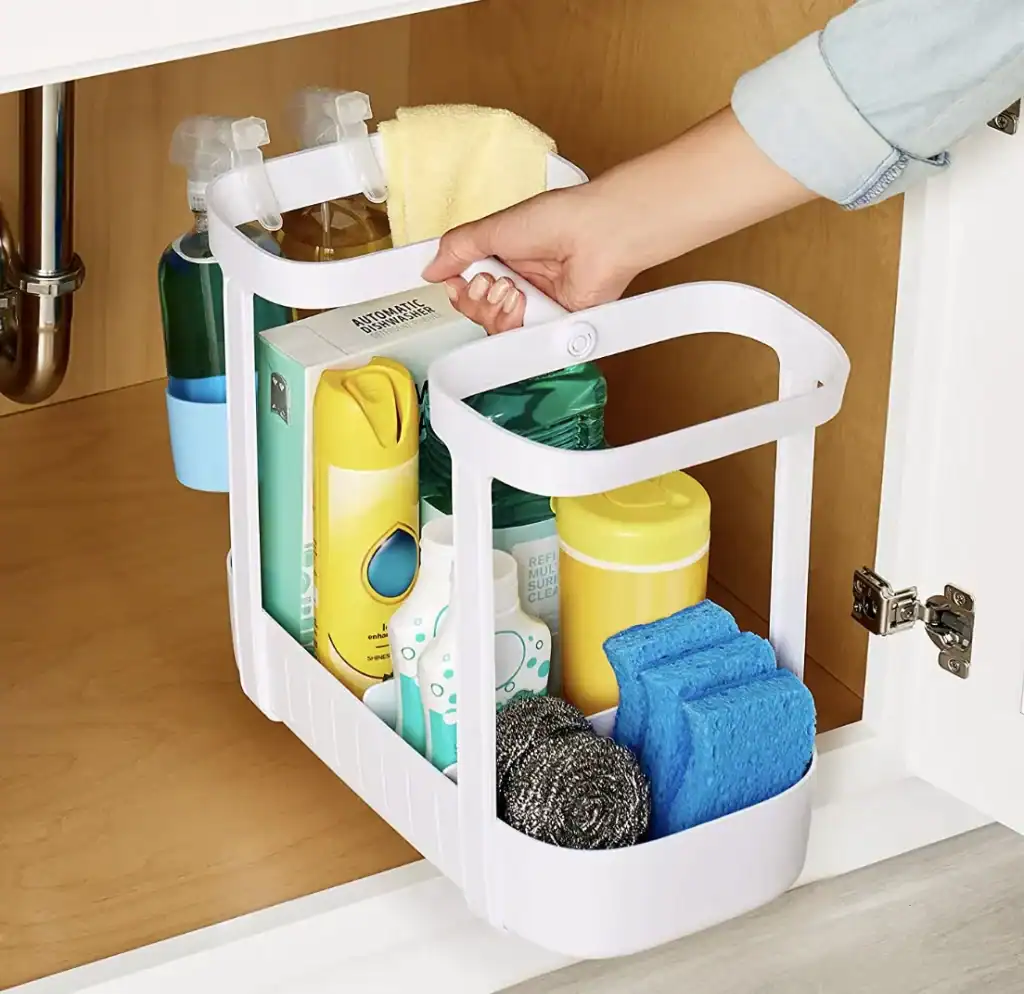
This is one of the most sensible ideas I’ve come across and really has changed how I clean: keep a small caddy with a handle under the sink containing your most-used sprays and cloths. When you need to clean the bathroom, the living room, anywhere – you just pick up the whole caddy and carry it with you.
No more going back and forwards to the kitchen four times for different products. No more leaving bottles lying about the house. Everything goes with you and goes back together.
The caddy should be in the middle zone. It needs to be easy to grab with one hand and not too big to fit comfortably under the sink when you aren’t using it. A simple rectangular plastic caddy with a handle is perfect – you don’t need anything fancy.
Step 5: Solving the Deep Cabinet Problem
If your cupboard is 60cm or deeper, things put in the back half effectively vanish. This is exactly how you end up buying three bottles of the same floor cleaner because you couldn’t see what was already there.
- Pull-out baskets – on wheels – let you slide the entire thing out, view everything, and push it back. This is the finest thing you can purchase for a deep cupboard, and costs less than most individuals think.
- A Lazy Susan – a turning tray – enables you to rotate to get to items at the back. It’s very good in broad cupboards, particularly for bottles of different sizes.
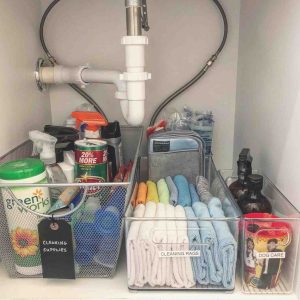
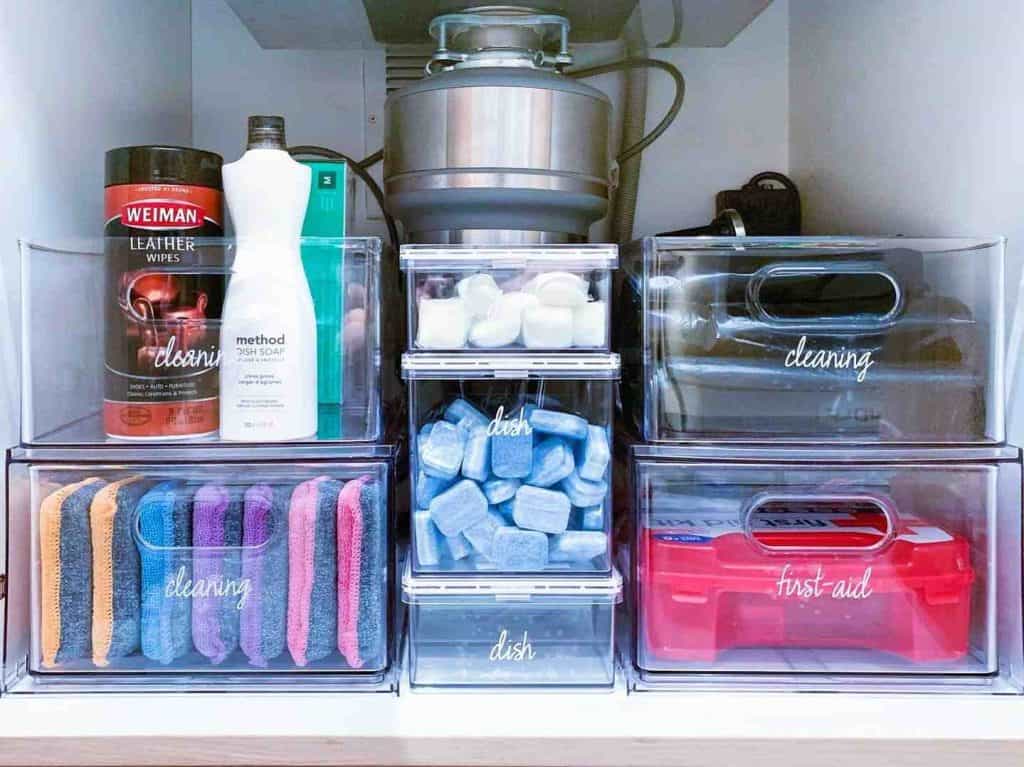
- See-through, labelled containers – if you can clearly see what is in a container from the front, you will not purchase duplicates. Two containers deep is okay, provided the one at the back can be seen and is labelled.
- The “front half only” rule – everyday and weekly-use items are kept in the front half of the cupboard only. The rear half is purely for extra stock, and you refill from front to back as items are used up.
The Cabinet Door: Free Storage Most People Miss
In most kitchens, the inside of the cabinet door is genuinely unused space. Depending on the depth of your cupboard, and where the hinges are, you can add:
- A wire over-door rack for sponges, little brushes, and scrubbing pads.
- Adhesive Command hooks for rubber gloves – hung to dry instead of being crammed into a corner, they last a lot longer and do not become musty.
- A slim pocket organiser for small things: a spare sponge, cable ties, a small funnel.
- A laminated “what goes here” card – sounds a bit much, but if other people in your home use this cupboard, a simple reference card stops the entire system falling apart after a week.
The door is particularly useful for renters because it needs no drilling. Command hooks will hold more than people imagine and come off completely cleanly.
What To Put Into Containers (And What Not To)
Decanting – transferring items from their original packaging into matching containers – is popular in organisation content, and with good reason. But under the sink, it needs to be done carefully – not to everything.
Worth putting into containers:
- Dish soap into a glass or pottery pump dispenser (if it is kept on the worktop rather than under the sink).
- Rubbish bags out of the box and into a roll, kept in a pull-out drawer – this is truly more convenient.
- Steel wool, sponges, and scrubbing pads out of their packaging and into a small open container so you can see exactly how many you have left.
Not worth putting into containers:
- Cleaning sprays – they require their original labels for safety and dosage advice.
- Anything corrosive or chemical – always keep the original packaging with warning information.
- Items you do not use frequently enough to justify the container space.
The reason for decanting is to make things easier to get to and easier to see. If it does not serve either of those two purposes, do not bother.
Keeping It Like This
The initial organisation is the simple part. Maintenance is where most people give up after a few months. The cupboard does not fall apart all at once – it happens gradually, one item put in the incorrect place at a time.
What actually works for long-term maintenance:
- Label the areas, even roughly. Not for you – for everyone else in the household who does not know the system.
- A 5-minute tidy once a month – open the cupboard, put right what has moved, check what is running low and restock from the extra stock area.
- Check your extra stock first – before purchasing any cleaning product, open the cupboard and look. This single habit nearly removes all duplicate purchases.
- No temporary items – if something does not belong under the sink, find its proper home immediately. There is no “temporarily” in that cupboard. Temporary is always permanent.
The under-sink cupboard will never be attractive. There are pipes in it. But when it works – when you can open it, get exactly what you need, and close it again in four seconds – it’s one of those little things that quietly changes the quality of your day.
Good home organisation is not about being perfect. It is about removing the ten small annoyances that slow you down every single day without you even knowing it.
This cupboard is one of them. Sort it out once, maintain it lightly, and you will not need to think about it again.
That is precisely the point.
— Katerina

I’m Katerina Lithopoulou, co-creator of DIY Cozy Living. I’ve always loved the little things that make a space feel special. With a background in language and a passion for photography and cozy design, I enjoy turning everyday inspiration into simple ideas people can actually use.
My motto: “Cozy isn’t a trend — it’s a feeling.”
