
How to Create Beautiful Snowflake Crafts With Kids (Beginner to Advanced)

Crafting snowflakes is one of the most magical winter activities for children. Paper snowflakes, glitter snow scenes, and 3D hanging decorations teach kids creativity, symmetry, and fine motor skills — while keeping them entertained for hours.
But beyond the fun, snowflake crafts also strengthen math skills, handwriting muscles, and visual-spatial reasoning in a playful way.
This guide goes far beyond the typical “fold and cut” craft. It breaks down the science, the learning benefits, and 15+ hands-on snowflake projects that range from easy toddler crafts to advanced 3D creations for older kids.
Each section is detailed, actionable, and written so parents and teachers can use it instantly.
Why Snowflake Crafts Are So Good for Kids
Before jumping into the projects, it helps to know why these crafts are more than just cute winter decorations. Snowflake crafts combine several developmental benefits supported by child-development research.
1. They Teach Symmetry & Math Without Worksheets
Snowflakes naturally follow six-fold radial symmetry. When kids fold and cut paper to create snowflakes, they’re learning:
- geometric symmetry
- shapes and angles
- pattern prediction
- spatial awareness
It’s hands-on geometry disguised as art.
2. They Build Fine Motor Skills
Cutting small shapes, adding glitter glue, or folding paper strengthens the same muscles used for:
- handwriting
- tying shoes
- buttoning clothes
- precision tasks
Snowflake crafts = natural occupational therapy.
3. They Support Creative Problem-Solving
Kids quickly realize that small cuts make detailed patterns, angles affect shapes, and fold accuracy changes the final snowflake. This trial-and-error process builds:
- creativity
- critical thinking
- visual planning
4. They Help With Focus & Calm
Much like coloring, crafting is scientifically linked to:
- lowered stress
- improved attention
- better emotional regulation
This is especially helpful in classrooms or busy holiday homes.
Supplies You’ll Need for Snowflake Crafts
You only need a few basics, but certain materials help kids create stronger, prettier snowflakes.
Basic Supplies
- White printer paper or construction paper
- Child-safe scissors
- Glue sticks
- Tape
- String or yarn
Enhancement Supplies
These turn simple snowflakes into “wow” projects:
- Glitter glue (less mess than loose glitter)
- Watercolors
- Pipe cleaners
- Coffee filters
- Popsicle sticks
- Sequins
- Cotton balls
- Clear contact paper
- Tissue paper
Tools for Older Kids
- X-Acto knife (with supervision)
- Paper punchers (circle, star, heart shapes)
- Rulers
- Compass
How to Teach Kids the Basic Snowflake Fold (The Foundation Skill)
Every paper snowflake craft is easier when kids learn the correct folding method. Here’s the most kid-friendly step-by-step approach.
Step 1: Start With a Square
Most paper is rectangular, so teach kids the “triangle fold” trick:
- Fold the top right corner down to the left side.
- Trim the extra strip at the bottom.
Now you have a perfect square.
Step 2: Fold Into a Triangle
Fold the square diagonally to make a triangle.
Step 3: Fold Into a Smaller Triangle
Fold it again to create a smaller triangle.
Step 4: Divide Into Thirds
Here’s the part kids often struggle with — but it’s important:
- Bring the right tip inward slightly.
- Bring the left tip over it until you get three equal sections.
It doesn’t have to be perfect for pretty results.
Step 5: Cut Off the Bottom Tip
This gives you a clean edge for symmetrical cutting.
Step 6: Start Cutting Designs
Teach kids to cut:
- triangles
- half-hearts
- diamonds
- slits
- scallops
Tell them: “Whatever you cut on one side will appear six times when you unfold it.”
This early math lesson blows their minds!
15+ Snowflake Crafts for Kids (With Depth & Variations)
Now let’s dive into the fun part — deeply explained crafts that kids of all ages can make.
These include simple toddler-safe versions, advanced 3D crafts, and fun decorative projects teachers love using in classrooms.
1. Classic Paper Snowflakes (Beginner-Friendly)
Difficulty: Easy
Age: 4–10
This is the traditional fold-and-cut craft. It teaches symmetry, pattern-making, and creative thinking.
How to Make It
- Fold your square using the instructions above.
- Cut small shapes along each folded edge.
- Unfold slowly to reveal the snowflake.
Depth Tip: Show the “Math Behind the Magic”
Explain to kids that snowflakes always have six sides because water molecules freeze in a hexagonal shape.
Kids LOVE knowing this.
Variations
- Use colored construction paper
- Add glitter glue
- Watercolor snowflakes after cutting
- Make giant ones using butcher paper
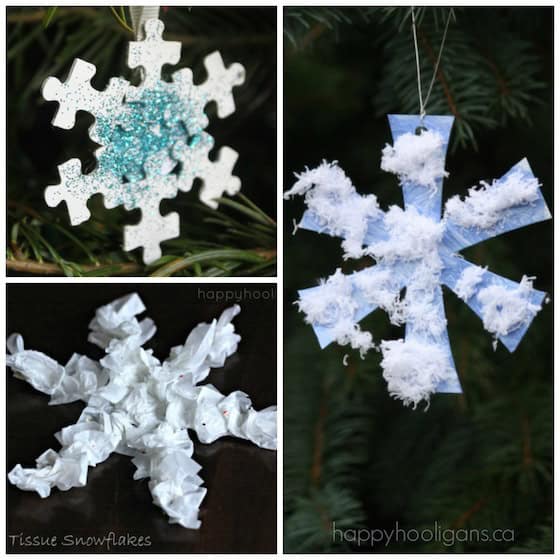
2. Coffee Filter Snowflakes (Super Easy for Toddlers)
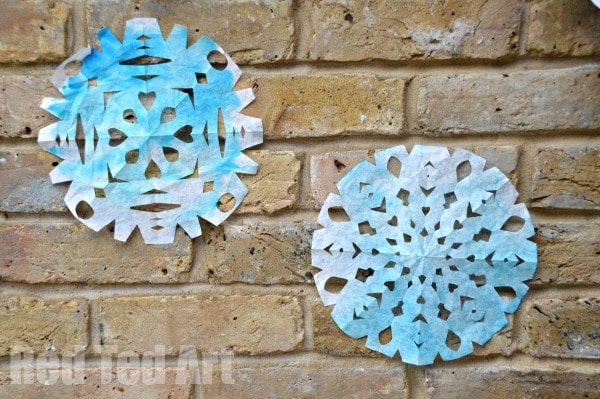
Difficulty: Very Easy
Age: 3–7
Coffee filters are easier to cut than regular paper, making them ideal for young children or classrooms without strong scissors.
How to Make
- Fold into thirds like a normal snowflake.
- Snip small shapes (even sloppy cuts look beautiful).
- Unfold and flatten.
- Decorate with watercolors — the coffee filter absorbs colors beautifully.
Why It Works
Coffee filters create soft, feathery edges that mimic real snowflakes.
Teacher Tip:
Hang dozens on a window to create an instant winter wall.
3. Watercolor Snowflakes (Beautiful & Artistic)

Difficulty: Easy
Age: 5–12
Kids paint the paper before cutting. This adds a dreamy, wintery color when the snowflake opens.
How to Make
- Start with watercolor paper or thick white paper.
- Paint blues, purples, and soft greens.
- Let dry fully.
- Fold and cut your snowflake.
Skill Building
- Color blending
- Brush control
- Pattern planning
Variation
Salt-watercolor effect: sprinkle salt on the wet paint for a crystal-like texture.
4. Glitter Glue Snowflakes (Less Mess Than Glitter)
Difficulty: Easy
Age: 4–10
Using glitter glue lets kids add sparkle without cleaning your house for three days.
How to Make
- Make any paper snowflake.
- Outline the edges and designs with silver or iridescent glitter glue.
- Let dry completely before hanging.
Skill Developed
Patience — because touching wet glitter glue ruins everything (which kids learn quickly!).
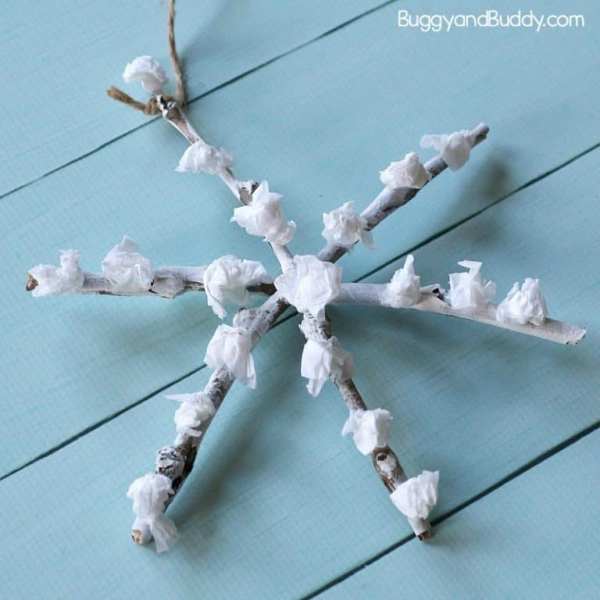
5. Popsicle Stick Snowflakes (Durable & Great for Wall Decor)
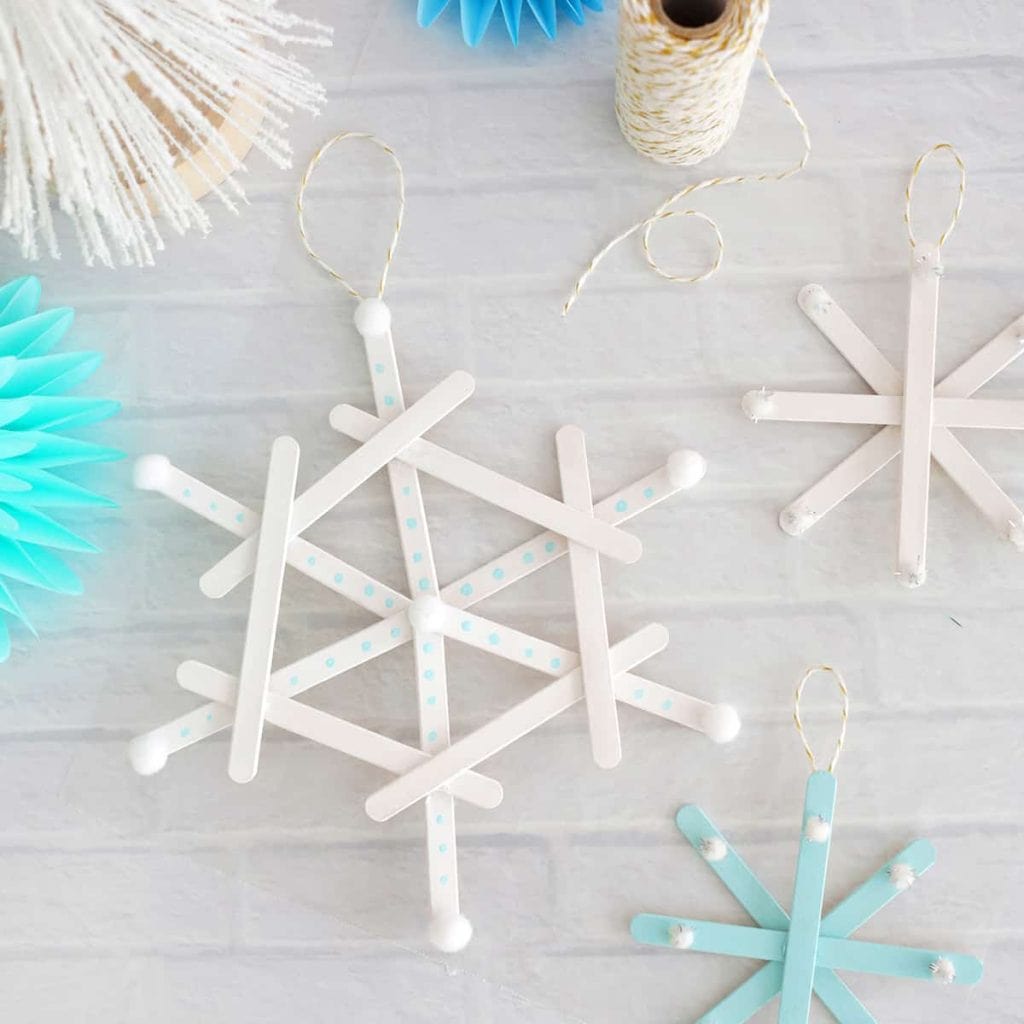
Difficulty: Medium
Age: 5–12
These create big, sturdy snowflakes perfect for decorating classrooms, doors, or kid bedrooms.
How to Make
- Glue three popsicle sticks into a six-point snowflake shape.
- Paint white or metallic silver.
- Add sequins or pom-poms.
- Hang using yarn or clear fishing line.
Why Kids Love It
It’s 3D, sturdy, and lets them design patterns with decorations.
STEM Angle
Popsicle stick snowflakes reinforce the concept of radial symmetry in a physical way.
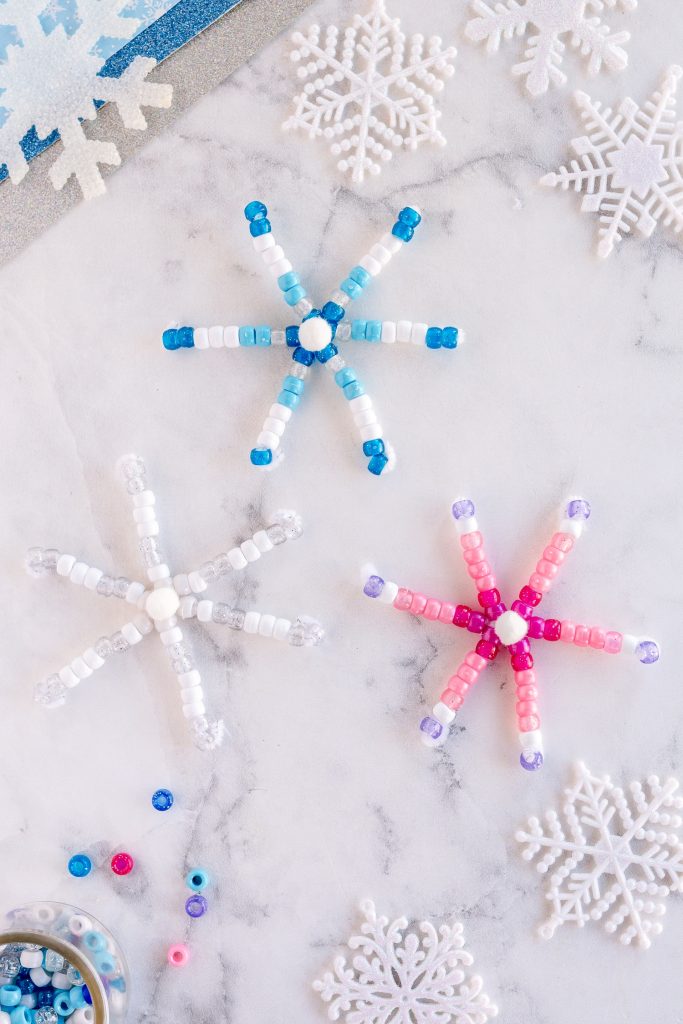
6. Pipe Cleaner Snowflakes (Great for Fine Motor Skills)
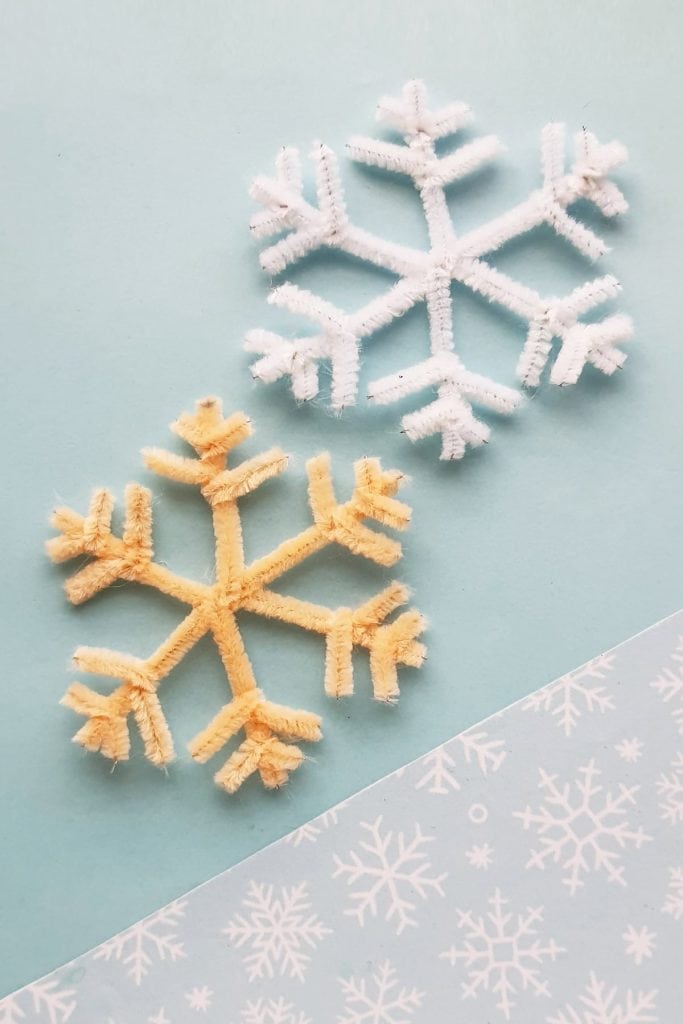
Difficulty: Easy–Medium
Age: 4–10
Pipe cleaners are bendable, sparkly, and perfect for little hands.
How to Make
- Twist three pipe cleaners together to make 6 arms.
- Cut smaller pieces and twist them around each arm.
- Bend and shape the tips.
- Add beads for extra sparkle.
Why It’s Great
The twisting motion strengthens finger dexterity, which improves handwriting skills.
7. Snowflake Suncatchers (Window-Friendly Craft)
Difficulty: Medium
Age: 5–12
These look stunning on windows when sunlight hits them.
What You Need
- Tissue paper
- Clear contact paper
- Scissors
How to Make
- Cut a snowflake shape out of black paper (this is the outline).
- Stick it onto contact paper.
- Fill the inside with small tissue paper squares.
- Seal with another layer of contact paper.
- Trim the edges.
Learning Benefit
Kids practice precision and layering while exploring how light interacts with color.
8. Cotton Ball Snowflakes (Perfect for Preschoolers)
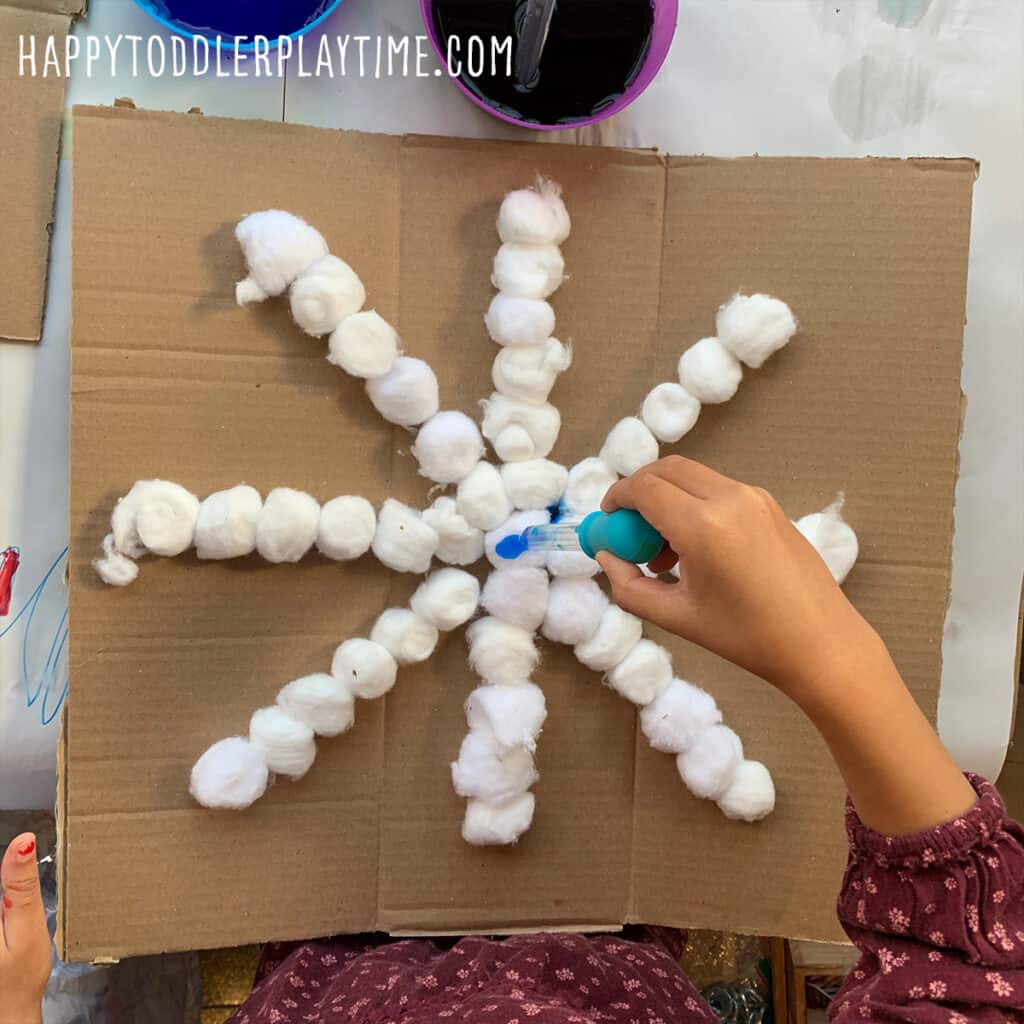
Difficulty: Very Easy
Age: 2–6
Soft, fluffy snowflakes kids can assemble without scissors.
How to Make
- Cut a large simple snowflake shape.
- Spread glue onto the arms.
- Stick on cotton balls.
Why It Works
Ideal for toddlers who can’t cut shapes yet but love tactile crafts.
9. 3D Paper Snowflakes (Showstopper Craft for Older Kids)
Difficulty: Medium–Advanced
Age: 8–14
These are the giant, fancy snowflakes you see hanging in malls during Christmas.
How to Make (Summary)
- Fold paper into squares.
- Cut slits along each layer.
- Open each piece and twist inward to create loops.
- Glue six loops together to form a 3D snowflake.
Why It’s Valuable
This teaches:
- sequencing
- precision cutting
- assembly skills
It’s practically an engineering project.
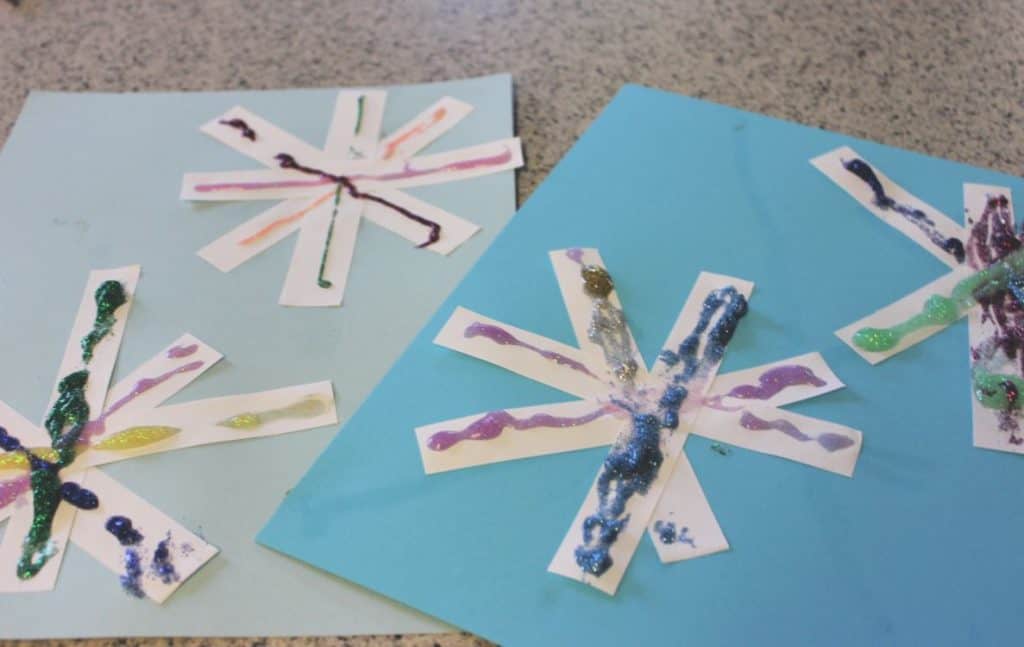
10. Q-Tip Painted Snowflakes (Great for Hand-Eye Coordination)
Difficulty: Easy
Age: 3–9
Q-Tips create a dotted, pointillism effect that turns simple snowflake outlines into textured art.
What You Need
- Q-tips
- Blue or purple construction paper
- White paint
- Optional: glitter glue
How to Make
- Draw a simple snowflake outline on colored paper.
- Dip Q-tips in white paint and let kids dot along the design.
- Fill the inside with pointillism dots or small strokes.
Why It Works
This helps younger children practice:
- hand-eye coordination
- grip control
- visual focus
The dabbing motion is also calming and rhythmic.
11. Snowflake Playdough Imprints (Sensory Craft)
Difficulty: Very Easy
Age: 2–7
This is a great hands-on project for toddlers and sensory seekers. No cutting, no glue — just exploration.
How to Make
- Roll out white or blue playdough.
- Press plastic snowflake cookie cutters into the dough.
- Add beads, gems, or sequins for decoration.
Learning Benefits
- Enhances sensory exploration
- Strengthens hand muscles
- Boosts creativity through free play
Extension
Use real snowflakes (caught on black paper) as inspiration pictures.
12. Button Snowflakes (Cute, Colorful & Perfect for Motor Skills)
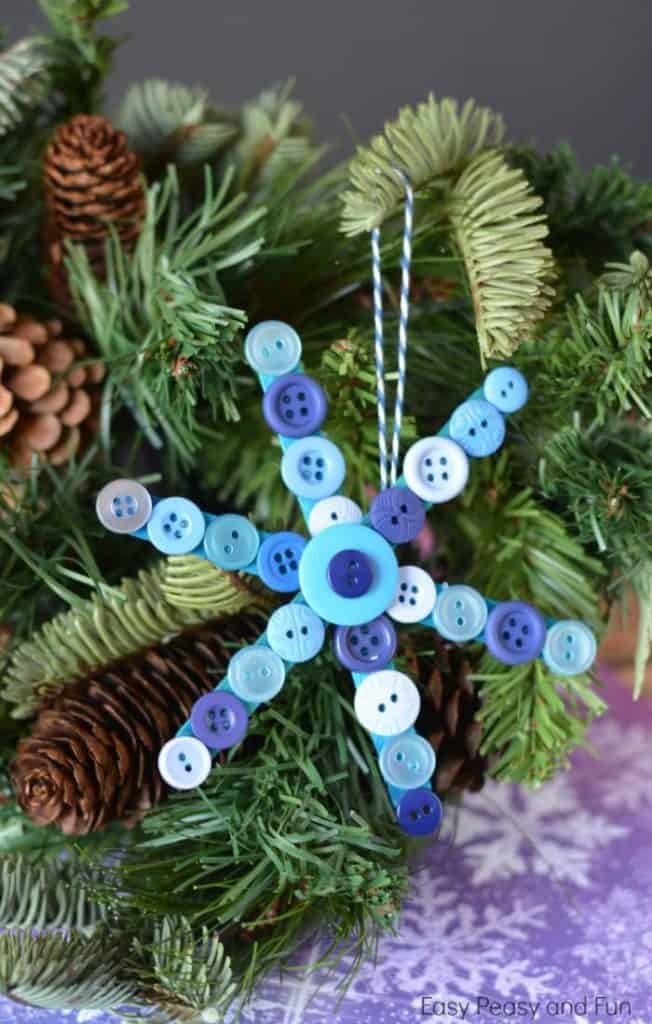
Difficulty: Easy
Age: 4–10
Buttons make adorable, colorful snowflakes that can be framed or hung as ornaments.
How to Make
- Cut a large, simple snowflake base out of cardstock.
- Let kids glue buttons onto each arm.
- Use matching or mixed colors for fun patterns.
Why It’s Great
Button placement requires precision, which improves fine motor control and pincer grasp strength.
13. Sequined Snowflake Ornaments (Shiny & Fancy)
Difficulty: Medium
Age: 6–12
These look store-bought and are perfect for holiday gifts.
What You Need
- Foam sheets
- Sequins
- Glue
- Ribbon
How to Make
- Cut out snowflake shapes from foam.
- Glue sequins along the arms, either following a pattern or randomly.
- Attach ribbon for hanging.
Educational Angle
Kids explore pattern-making, color combinations, and design symmetry.
14. Tissue Paper Mosaic Snowflakes (Art + Geometry)
Difficulty: Medium
Age: 5–12
This craft blends mosaic-making with winter art.
How to Make
- Cut a snowflake shape out of cardstock.
- Glue small squares of tissue paper in color groups.
- Layer white on top for a frosty look.
Why It’s Helpful
This teaches kids:
15. Snowflake Wreath (Group Project)
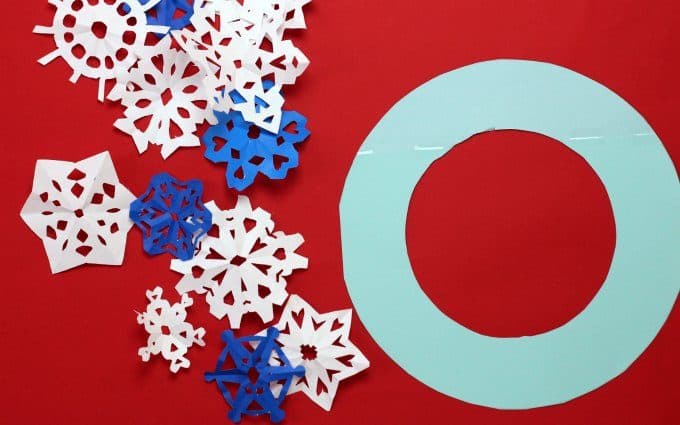
Difficulty: Medium
Age: 5–12
Great for classrooms or siblings crafting together.
How to Make
- Cut out 10–20 paper snowflakes.
- Glue them in a circular wreath shape.
- Add a bow or glitter.
Group Benefit
Kids learn teamwork and how individual pieces contribute to a larger design.
Educational Extensions & STEM Connections
Make your article stand out by teaching parents and teachers how snowflake crafts tie into science, math, and literacy.
1. Snowflake Shape Study
Show kids how real snowflakes form hexagons and branches.
2. Weather & Temperature Lessons
Explain how snow forms and why each snowflake is unique.
3. Symmetry Drawing Pages
Give kids blank half-snowflakes and have them draw the mirrored side.
Classroom Applications
Teachers can turn snowflake crafts into:
- winter bulletin boards
- math center activities
- art and symmetry lessons
- holiday gifts for parents
- fine motor practice sessions
Pro tip: Create a “Snowflake Gallery Wall” where every child’s work gets displayed.
Troubleshooting: Common Problems & Fixes
1. “My snowflake ripped!”
Use thicker paper or teach smaller cuts.
2. “It’s hard to cut.”
Use coffee filters or thinner paper for beginners.
3. “It doesn’t look like a snowflake.”
Remind kids that snowflakes always have six points.
Safety Tips for Kids
- Always supervise scissors for younger children.
- Use blunt-tip scissors for preschoolers.
- Keep hot glue guns for ages 8+ with adult help.
- Non-toxic paints and glues only.
How to Display Kids’ Snowflake Crafts
- Hang from ceilings with fishing line
- Tape to windows for frosty effects
- Make garlands across walls
- Create a winter mobile
- Frame the best ones for keepsakes
FAQ Section
1. What is the easiest snowflake craft for toddlers?
Coffee filter snowflakes or cotton ball snowflakes.
2. What’s the best snowflake craft for older kids?
3D paper snowflakes or salt-crystal snowflakes.
3. Why do real snowflakes have 6 points?
Because water molecules freeze in a hexagonal pattern.
4. Can snowflake crafts help with learning?
Yes — they build symmetry skills, geometry, fine motor coordination, and creativity.
Conclusion: Why Snowflake Crafts Matter
Snowflake crafts are more than just winter decorations — they’re powerful learning tools.
They teach kids geometry, creativity, fine motor control, and the beauty of patterns in nature. Whether your child is snipping simple shapes or engineering 3D masterpieces, these crafts spark imagination and hands-on discovery.
Most importantly, snowflake crafts give kids a break from screens, help them focus, and create winter memories that last long after the snow melts.
I’m Anastasios Moulios, co-founder of DIY Cozy Living. I enjoy finding creative, practical ways to make small spaces feel warm, stylish, and lived-in. I started this blog with Katerina to share real ideas that make a home feel a little more personal and a lot more comfortable.
