
21+ Creative Pumpkin & Wreath DIY Ideas for Your Home

Fall is a season made for cozy creativity. As the air turns crisp and leaves begin to change, nothing transforms your home faster than a few well-placed pumpkins and a welcoming wreath.
The best part? You don’t need a huge budget to get the look. With some simple supplies and a little imagination, you can craft decorations that feel custom-made for your home.
We’ll start with pumpkins — because they’re the centerpiece of autumn décor — and then move into wreaths that tie it all together.
🎨 1. Painted Pumpkins for Every Style
Supplies: Pumpkins (real or faux), acrylic paint, brushes, painter’s tape, optional stencils.
Painting pumpkins is one of the easiest ways to customize your fall décor. Skip the carving mess and simply coat your pumpkins in paint to match your style. Chalk paint works beautifully for a rustic farmhouse look, while metallics (gold, copper, silver) add elegance. For a modern vibe, try bold matte shades like navy, mustard, or forest green.
Steps: Clean and dry the pumpkin, then apply primer if using a slick faux surface. Paint in thin layers, allowing each coat to dry. Use painter’s tape for stripes or stencils for words and patterns. Seal with a clear topcoat for durability.
Variations: Personalize with hand-lettered words like Grateful or Gather. Add polka dots, chevrons, or even pressed leaves glued on for texture.
Why it works: It’s cheap, beginner-friendly, and adaptable. You can match pumpkins to your existing décor instead of being stuck with orange.
🧵 2. Fabric-Wrapped Pumpkins
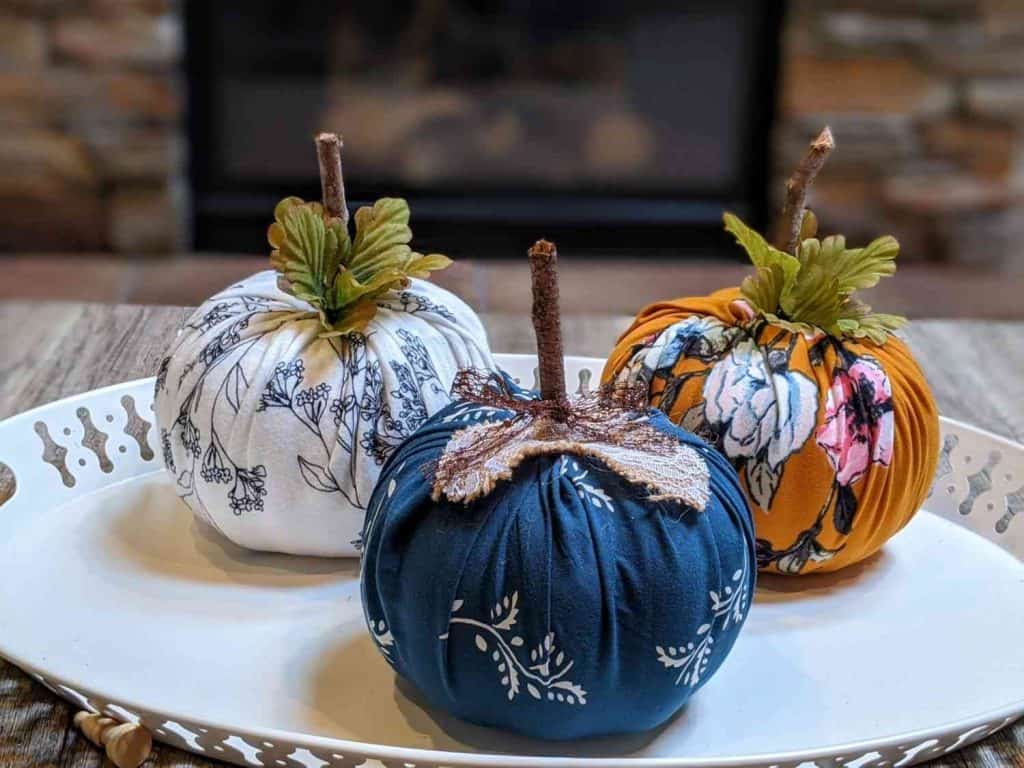
Supplies: Small foam or real pumpkins, fabric scraps (flannel, burlap, velvet), twine or ribbon, scissors, hot glue.
This DIY is perfect if you love cozy textures. Simply wrap pumpkins in fabric to give them a soft, elegant look. Plaid flannel creates a casual, rustic feel, while velvet or satin makes them look high-end.
Steps: Cut a square of fabric large enough to cover the pumpkin. Place the pumpkin in the center, gather the fabric at the top, and secure with twine, ribbon, or a dab of hot glue. Tuck the fabric neatly around the stem or replace the stem with a cinnamon stick for added charm.
Variations: Use different fabrics for a mix-and-match collection. Create a neutral display with ivory linens, or go bold with jewel-toned velvets.
Why it works: It’s no-mess, reusable, and can be customized endlessly. Plus, it turns ordinary pumpkins into unique statement pieces.
🍽️ 3. Pumpkin Centerpieces

Supplies: Pumpkins (various sizes), tray or wooden board, candles, faux leaves, pinecones, optional fairy lights.
Pumpkins make the perfect base for a stunning table centerpiece. Group different-sized pumpkins on a tray, layering in natural elements like pinecones, acorns, and faux leaves. Add candles for a warm glow, or wrap fairy lights around the arrangement for extra magic.
Steps: Place the largest pumpkin in the center, then surround it with smaller ones. Fill gaps with greenery, berries, or mini gourds. Add height by stacking pumpkins or placing them on candlesticks.
Variations: Paint the pumpkins white for a farmhouse vibe, or add metallic accents for a Thanksgiving table. For a Halloween version, mix in black candles and darker foliage.
Why it works: It instantly elevates your dining or coffee table with little effort and doubles as both seasonal décor and ambiance.
✨ 4. Glitter Pumpkins
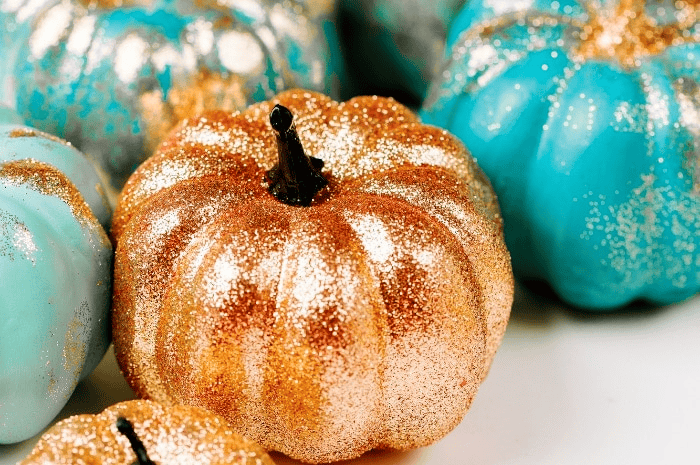
Supplies: Pumpkins, craft glue or Mod Podge, glitter (fine or chunky), paintbrush, newspaper for cleanup.
Glitter pumpkins bring sparkle to your décor without needing carving skills. They’re great for kids’ crafting or anyone who wants a little glam.
Steps: Paint glue onto the pumpkin in sections. Sprinkle glitter over the glue, tapping off excess. For a dipped look, only coat the bottom half. Let dry completely, then seal with a spray fixative to prevent shedding.
Variations: Use ombré glitter (blend two colors) or metallic glitter for elegance. For a modern twist, glitter just the stem.
Why it works: Fast, eye-catching, and adaptable. A small cluster of glitter pumpkins makes a big statement.
🌱 5. Succulent-Topped Pumpkins
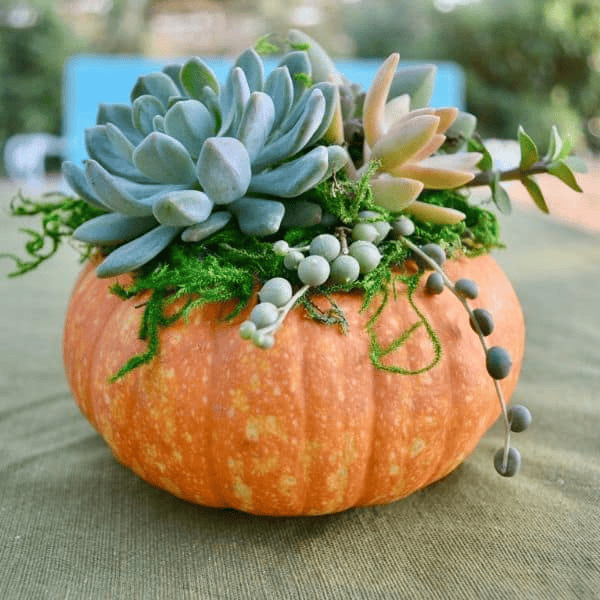
Supplies: Small pumpkins (real or faux), moss, hot glue, succulents or faux succulents.
This project combines autumn with a touch of greenery. Succulent-topped pumpkins make great centerpieces and stay fresh for weeks if you use real succulents.
Steps: Cut off the pumpkin stem and add a layer of moss with hot glue. Arrange succulents on top, securing with glue or floral pins. If using real succulents, plant them into a shallow layer of moss and mist lightly every few days.
Variations: Use mini pumpkins for individual place settings at Thanksgiving. For a farmhouse look, stick to white pumpkins with muted succulents.
Why it works: It’s stylish, unexpected, and doubles as both décor and a living arrangement.
6. Pumpkin Lanterns (Without Carving)

Supplies: Pumpkins, drill or heated tool, marker, LED tea lights, optional stencil.
Carved pumpkins are classic, but they can rot quickly and get messy. Instead, try drilling or etching patterns into the pumpkin’s surface. Use a stencil to mark dots or shapes, then carefully drill through the skin to create holes. Place an LED tea light inside, and you’ll get a glowing lantern effect without carving.
Steps: Clean the pumpkin, draw your design, and drill small holes along the pattern. Insert a battery-operated candle to illuminate.
Variations: Try geometric shapes, stars, or spirals. For elegance, spray paint the pumpkin gold or black before drilling.
Why it works: It’s longer-lasting than traditional carving and creates a unique, glowing display that works indoors or outdoors.
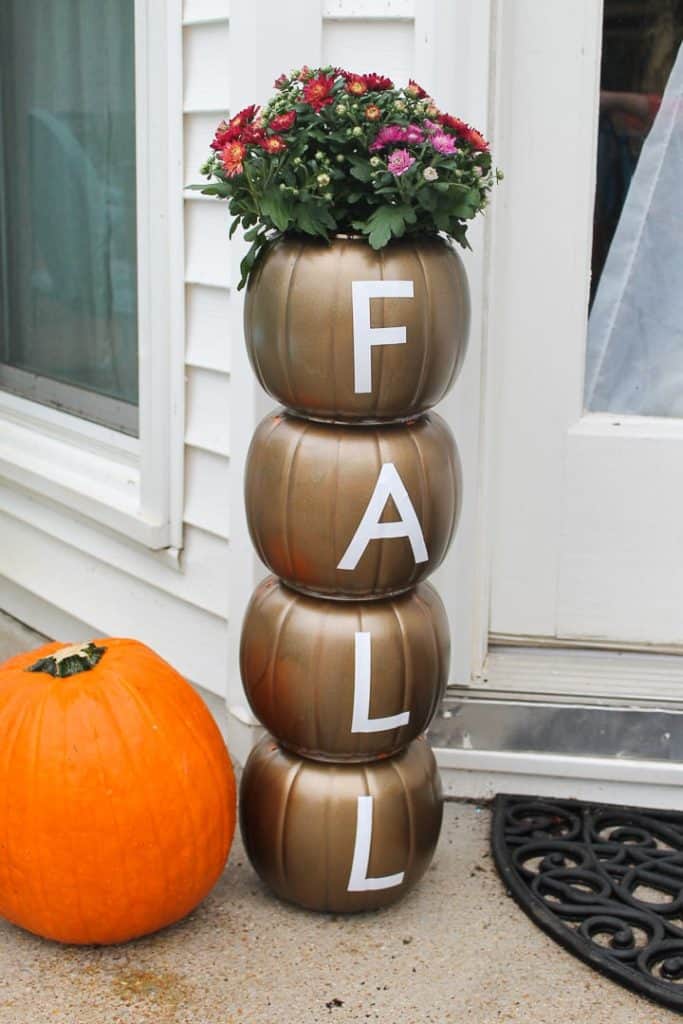
7. Monogram Pumpkins

Supplies: Pumpkins, stencils, paint, brushes, optional ribbon or burlap.
Personalized pumpkins are a warm welcome at your entryway. Using stencils, paint your family’s initials onto pumpkins. Add a bow, raffia, or burlap ribbon to complete the look.
Steps: Tape stencil onto the pumpkin, paint carefully, and let dry. For extra polish, outline in metallic paint or glitter.
Variations: Use vinyl letter stickers for a cleaner finish. Create a full “WELCOME” sign by using one letter on each pumpkin.
Why it works: Adds a personalized, stylish touch to your fall décor, and makes porches and mantels more inviting.
🌼 8. Pumpkin Planters
Supplies: Large pumpkins, potting soil, mums or fall flowers, knife, scoop.
Turn pumpkins into natural flower pots by hollowing them out and filling them with soil and seasonal flowers like mums or pansies. Place them on porches, patios, or tables for instant seasonal flair.
Steps: Cut off the top, scoop out insides, fill with potting soil, and plant flowers. Place the whole pumpkin (or just the shell) on a tray to catch drips.
Variations: Paint or stencil the pumpkin first for extra decoration. Use faux pumpkins for a longer-lasting version.
Why it works: Combines pumpkins and flowers in one arrangement, bringing vibrant fall colors into your décor.
📜 9. Decoupage Pumpkins

Supplies: Pumpkins, Mod Podge, brushes, napkins or scrapbook paper, scissors.
For a chic, artsy look, try decoupage. Cut patterns from napkins, scrapbook paper, or even old book pages, then apply them to your pumpkin with Mod Podge. Smooth gently with a brush until flat and sealed.
Steps: Clean pumpkin, cut out shapes, brush Mod Podge on, apply cutouts, then brush more glue on top to seal.
Variations: Try sheet music for a vintage look, floral napkins for elegance, or kids’ artwork for a personalized version.
Why it works: Budget-friendly and endlessly customizable. Each pumpkin becomes a little piece of art.
✨ 10. Metallic Stem Accents

Supplies: Pumpkins, metallic paint (gold, copper, silver), small brush.
Sometimes less is more. Instead of painting the whole pumpkin, highlight the stem. Brush stems with metallic paint to create a subtle but sophisticated accent.
Steps: Clean pumpkin, apply metallic paint to the stem, let dry. Optional: seal with clear spray.
Variations: Paint vines or swirls down from the stem for a whimsical touch. Group metallic-stemmed pumpkins together for a cohesive display.
Why it works: Quick, stylish, and beginner-friendly. Perfect for busy decorators who want elegance with minimal effort.
🎃 11. Mini Pumpkin Garland

Supplies: Mini pumpkins (real or faux), twine, hot glue or skewers, optional greenery.
A pumpkin garland adds instant festivity to mantels, stair railings, or door frames. Use mini faux pumpkins for longevity, or real ones for a rustic vibe. Attach them to twine with hot glue or skewers, spacing evenly. Add greenery or ribbons between pumpkins for texture.
Steps: Lay out pumpkins, cut twine to desired length, attach pumpkins securely, then hang.
Variations: Mix mini gourds with pumpkins. Add fairy lights to make it glow at night.
Why it works: Creates a statement piece with little effort. It’s versatile, working indoors or outdoors, and adds seasonal charm to any space.
12. Classic Fall Leaf Wreath

Supplies: Grapevine or foam wreath base, artificial autumn leaves (maple, oak), hot glue gun, optional berries or acorns.
This is the most iconic fall wreath and a perfect beginner project. Start with a sturdy grapevine base. Layer artificial leaves in a circular pattern, slightly overlapping them to create fullness. Secure with hot glue as you go. Add clusters of faux berries, acorns, or pinecones for extra detail.
Steps: Attach the largest leaves first, working clockwise around the wreath. Fill in with smaller leaves, berries, or accents. Hang with a burlap ribbon.
Variations: Use metallic spray paint (gold or copper) on some leaves for a modern twist. For a farmhouse look, stick to muted tones like cream and sage.
Why it works: Timeless, customizable, and festive. It immediately signals autumn and works indoors or outdoors.
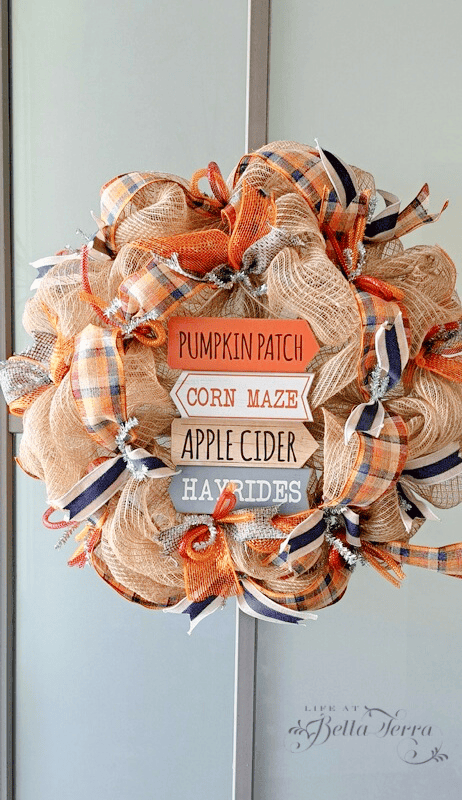
13. Burlap Wreath
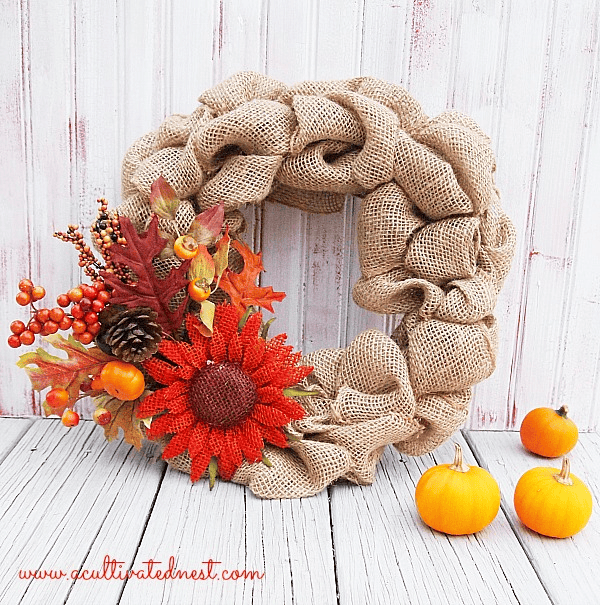
Supplies: Wire wreath frame, burlap ribbon, floral wire, optional faux flowers or pumpkins.
Burlap wreaths have a rustic charm that pairs perfectly with farmhouse décor. Weave burlap ribbon through a wire wreath frame, bunching it up to create a ruffled look. Secure with floral wire at intervals.
Steps: Start by tying the burlap to the frame. Push loops through each section of the wire frame, twisting and fluffing until the wreath is full. Embellish with small pumpkins, sunflowers, or pinecones.
Variations: Swap burlap for plaid fabric for a cozy cabin feel. Use wide lace ribbon mixed with burlap for a softer look.
Why it works: Inexpensive, sturdy, and endlessly versatile. It’s a wreath you can reuse year after year with minor updates.
🎃 14. Pumpkin Wreath
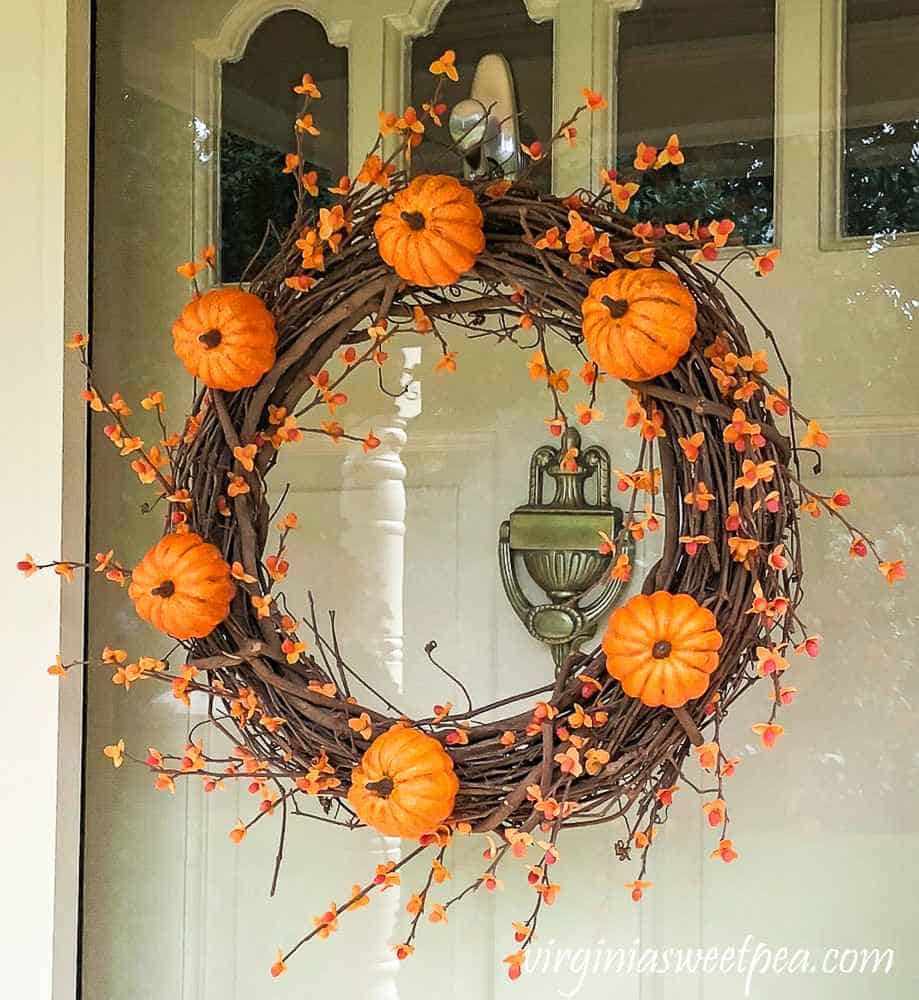
Supplies: Foam or grapevine wreath base, mini faux pumpkins, hot glue, faux greenery or leaves.
This DIY combines the two icons of fall — wreaths and pumpkins. Hot glue mini pumpkins around a base, mixing in greenery or faux leaves for texture. Stagger colors and sizes for dimension.
Steps: Attach greenery first, then glue pumpkins on top. Fill gaps with berries, moss, or ribbon.
Variations: Use all white pumpkins for a farmhouse look, or mix metallic-painted pumpkins for glam.
Why it works: It’s playful and bold. Few decorations say “fall” as clearly as a wreath covered in pumpkins.
🌽 15. Corn Husk Wreath
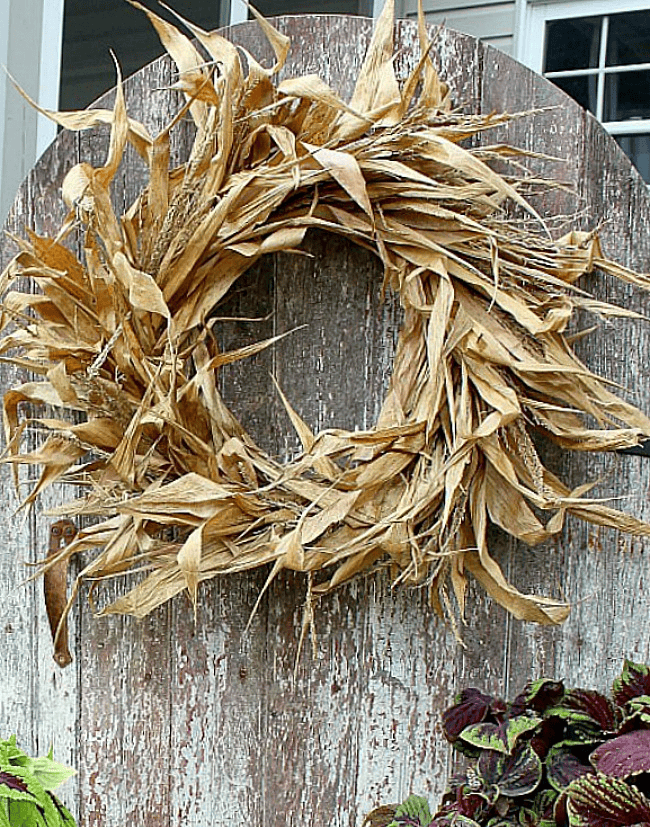
Supplies: Straw or foam wreath form, dried corn husks (from craft stores or saved from corn), hot glue gun.
Corn husks add natural texture and a farmhouse vibe. Soften husks by soaking in warm water for 10 minutes, then dry with a towel. Glue them around the base in overlapping layers until the wreath is full and fluffy.
Steps: Start with an inner circle, glue husks flat, then layer outward for fullness. Trim edges to even the shape.
Variations: Add a burlap bow or dried corn cobs for extra flair. For a modern touch, spray paint husks white or gold.
Why it works: Affordable, sustainable, and authentic. It connects your décor directly to harvest season.
🌻 16. Floral Harvest Wreath
Supplies: Grapevine wreath, faux sunflowers, mums, autumn leaves, hot glue gun.
Bright, cheerful, and full of harvest vibes, this wreath uses artificial fall florals. Cluster sunflowers and mums along one side of a grapevine wreath, letting some leaves spill over for balance.
Steps: Attach larger flowers first, then fill in with leaves and smaller blooms. Leave part of the wreath exposed for a rustic asymmetrical look.
Variations: Use real dried flowers for a delicate, vintage style. Add wheat stalks or lavender for texture.
Why it works: Colorful and uplifting, this wreath brings life to any entryway or wall.
🍎 17. Apple & Berry Wreath
Supplies: Grapevine base, faux apples, berries, greenery, hot glue.
This wreath highlights the harvest with seasonal fruits. Attach faux apples (red, green, or mixed) around the wreath, filling gaps with clusters of berries and leafy greenery.
Steps: Place apples evenly spaced, glue securely, then add berries and leaves for depth.
Variations: Use mini pears, figs, or pomegranates for a unique twist. For Christmas transition, add pine sprigs and holly.
Why it works: A fresh take on fall décor that feels abundant and ties directly to harvest traditions.
🌿 18. Minimalist Greenery Wreath
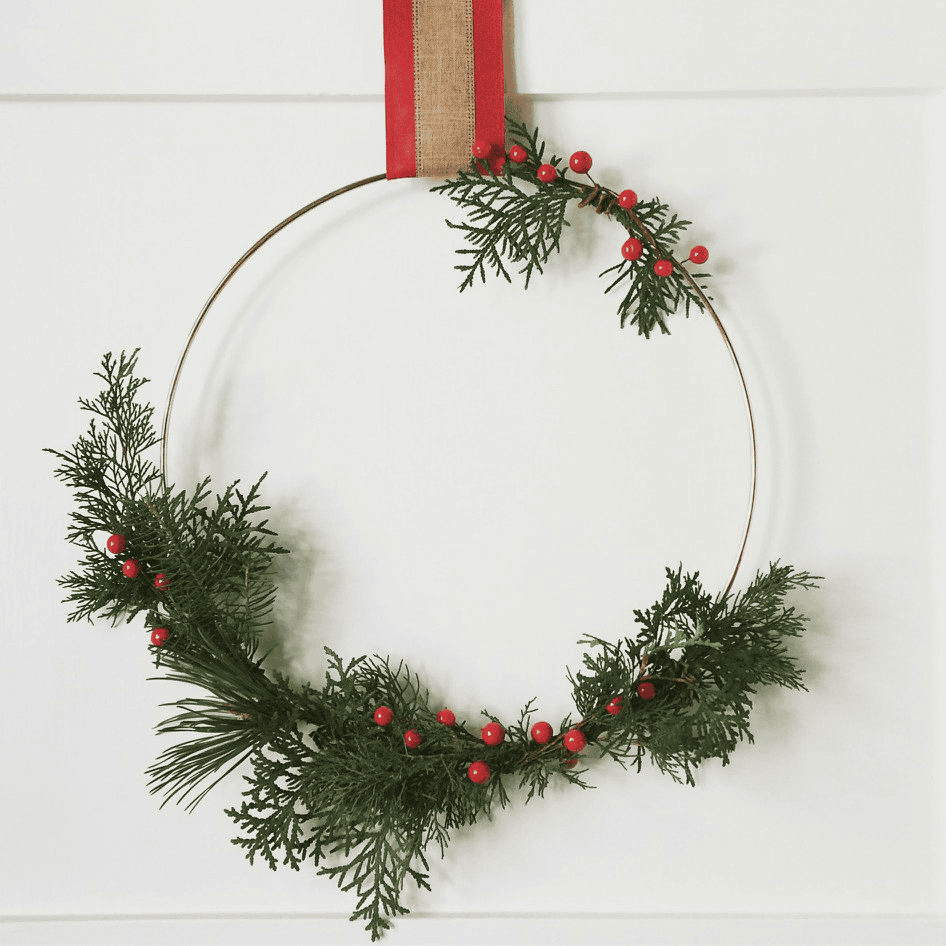
Supplies: Metal hoop or wire base, eucalyptus stems (real or faux), floral wire, ribbon.
If you prefer simplicity, a greenery wreath is elegant and modern. Wrap eucalyptus branches lightly around a hoop, securing with floral wire. Leave negative space exposed for a minimalist look.
Steps: Start at one side of the hoop, attach stems with wire, and layer slightly until half or two-thirds of the hoop is covered.
Variations: Add a velvet ribbon bow for softness. Mix in olive branches or magnolia leaves for variety.
Why it works: Clean, understated, and timeless. Perfect for homes with modern or Scandinavian décor.
🌰 19. Acorn & Pinecone Wreath
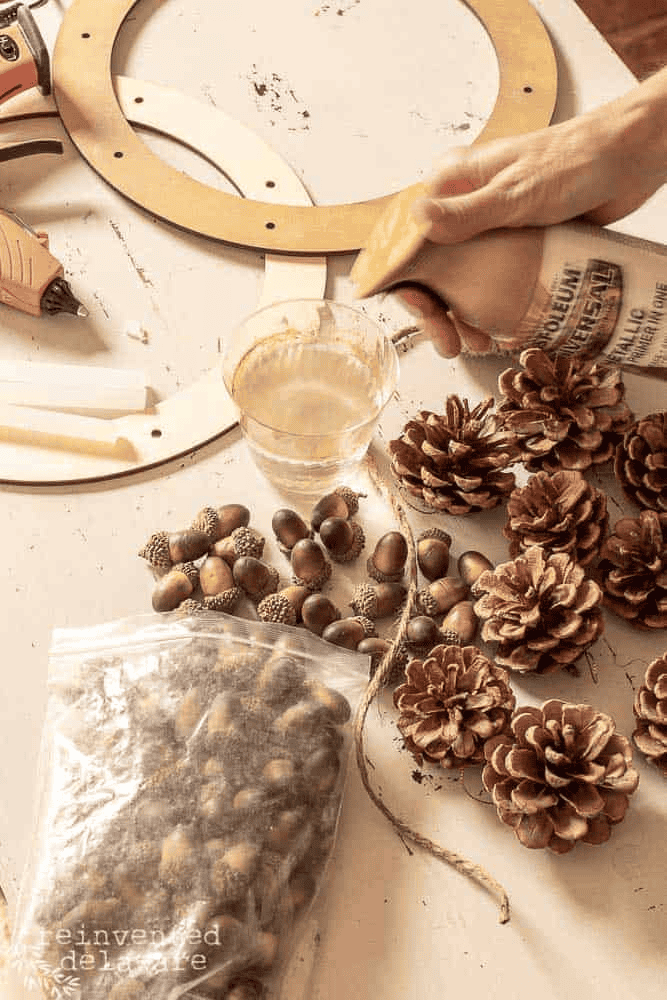
Supplies: Foam or grapevine base, collected acorns, pinecones, hot glue, moss (optional).
This woodland-inspired wreath uses natural elements you can collect for free. Hot glue pinecones and acorns around the wreath, filling gaps with moss for texture.
Steps: Start with larger pinecones, then layer acorns in between. Add a burlap bow or cinnamon sticks for extra detail.
Variations: Spray paint some acorns metallic for sparkle. Use mini pumpkins with pinecones for a mixed look.
Why it works: Brings the outdoors in and creates a cozy, natural autumn vibe.
🌸 20. Dried Flower Wreath
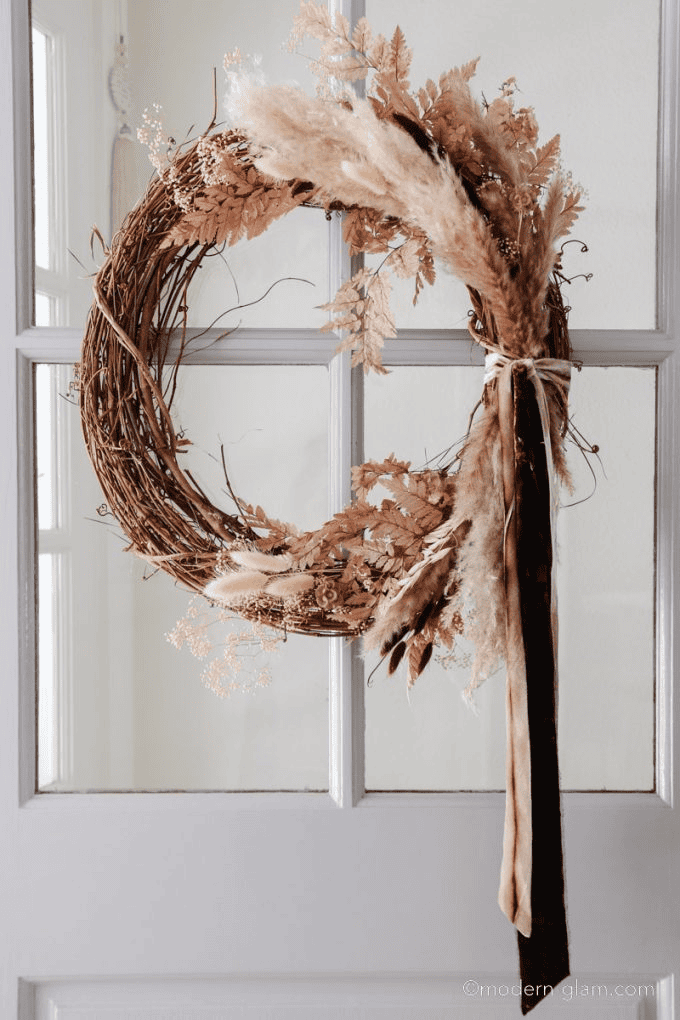
Supplies: Wire wreath base, dried flowers (lavender, wheat, hydrangea), floral wire.
Dried flowers add a delicate, timeless beauty. Bundle flowers with floral wire, then attach them around the wreath frame. Overlap bundles to cover the base fully.
Steps: Work clockwise around the frame, layering flowers. Finish with a satin ribbon bow.
Variations: Go boho with pampas grass and bunny tails, or stick to wheat and lavender for farmhouse simplicity.
Why it works: Long-lasting, romantic, and natural. A perfect piece that can stay up well beyond Thanksgiving.
🎀 21. Ribbon Wreath
Supplies: Foam wreath base, wide seasonal ribbon, hot glue, optional embellishments.
Ribbon wreaths are one of the easiest DIYs. Simply wrap ribbon around the foam base, overlapping slightly as you go. Hot glue the ends securely. Embellish with bows, faux flowers, or even mini ornaments for versatility.
Steps: Wrap ribbon tightly, glue at start and finish. Add layered bows or small accents to personalize.
Variations: Choose plaid for rustic charm, velvet for elegance, or burlap for farmhouse style. Switch ribbons out seasonally to reuse the same base.
Why it works: Quick, affordable, and endlessly customizable. Perfect for beginners who want instant results.
✨ Final Thoughts
From painted pumpkins to burlap wreaths, these DIY ideas prove that you don’t need to spend a fortune to decorate beautifully for fall. The magic is in pairing them: pumpkins lining your steps, a wreath on the door, or both styled together indoors for a cozy harvest display.
Whether you prefer rustic farmhouse, modern elegance, or playful sparkle, these 21+ creative pumpkin and wreath DIY projects let you craft décor that feels personal, festive, and welcoming.
This season, grab a hot glue gun, gather a few supplies, and turn decorating into a family project. You’ll end up with pieces that don’t just look beautiful — they’ll be tied to memories you’ll treasure every autumn.
I’m Anastasios Moulios, co-founder of DIY Cozy Living. I enjoy finding creative, practical ways to make small spaces feel warm, stylish, and lived-in. I started this blog with Katerina to share real ideas that make a home feel a little more personal and a lot more comfortable.
