
RV Black Tank Cleaning Made Easy: The Complete Step‑by‑Step Guide (Tips, Hacks & Pro Secrets)
Let’s be honest—cleaning your RV’s black tank isn’t anyone’s favorite part of the trip. But it’s also not as bad as it sounds.
With a simple routine and the right tools, you can keep your tank fresh, your sensors working, and your RV smelling clean—without stress or mess.
This guide is your easy, step-by-step plan for black tank cleaning. By the end, you’ll know exactly what to do every time, so your dump station stops are fast, simple, and hassle-free.
What You’ll Learn in This Guide
- The exact routine to clean and maintain your RV’s black tank (fast, no mess)
- Deep‑clean steps that restore sensors and eliminate odors
- DIY vs. store‑bought treatments—what actually works
- A seasonal schedule (boondocking, full‑time, and weekend warriors)
- Common mistakes to avoid so you don’t damage valves, seals, or sensors
Black Tank Basics (30‑Second Primer)

Your RV’s black tank holds waste from the toilet.
Waste + water are flushed into the tank, where they’re stored until you dump at a station or into a portable tote. A properly cleaned and hydrated black tank flows faster, smells less, and gives accurate sensor readings.
Golden rule: Liquids are your friend. Always use enough water. Most problems (pyramid plugs, odors, false sensors) start with too little water and not enough rinsing.
Safety First
⚠️ Important: Never mix chemicals (e.g., bleach + ammonia), and go easy on harsh cleaners that can harm seals, gaskets, and friendly bacteria.
Basic PPE & prep
- Nitrile gloves
- Eye protection (especially at splash‑risk dump stations)
- Dedicated hose for tank flushing (label it!)
- Keep a small bottle of hand sanitizer near the compartment
Good habits
- Keep your gray‑tank valve closed during camping; open only to dump after you dump black. (The gray water rinses the hose.)
- At full‑hookup sites, never leave the black valve open—solids will mound up and create a pyramid plug.
Tools & Supplies (With Budget Options)
| Category | Budget Pick | Premium/Pro Pick | Why It Matters |
|---|---|---|---|
| Flush Attachment | Straight flushing wand | Rotating spray wand / 360° nozzle | Breaks up stuck solids and paper |
| Tank Rinse | Built‑in black‑tank flush port | Clear elbow with backflush adapter | Visual confirmation + backflow cleaning |
| Treatments | Enzyme/bacteria pods | High‑quality bacterial digester | Maintains odor control, helps sensors |
| Hose | Dedicated non‑potable hose | Heavy‑duty 5/8″ with brass fittings | Safer, less kinks, longer life |
| Sewer Hose | Basic 15–20 ft hose | Heavy‑duty (24–26 mil) with clear elbow | Prevents bursts, see when tank runs clear |
| Valves/Seals Care | Food‑grade silicone lube | Manufacturer‑approved seal conditioner | Extends valve & seal life |
| Detergent Add‑On* | Mild, dye‑free dish soap | RV‑safe surfactant | Helps suspend solids (use sparingly) |
*Use surfactants/detergents lightly—too much foam can affect sensors or backflow.
The Fast Routine (Every Dump Day)
This is your no‑drama routine for regular maintenance at any dump station.
- Prep
- Put on gloves and eye protection.
- Attach your sewer hose firmly. Use a clear elbow if you have one.
- Dump Black First
- Pull the black valve fully.
- Let it empty until it slows to a drip.
- Rinse/Backflush
- If you have a built‑in flush port, run water for 2–5 minutes while the valve is open.
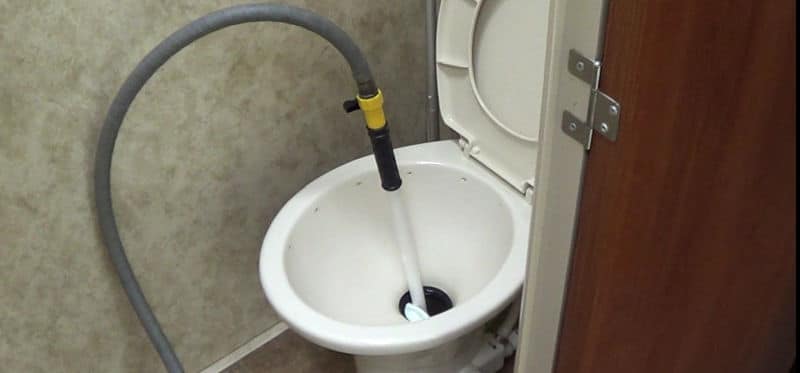
- If not, use a backflush adapter or wand (toilet closed) to break up leftover solids.
- Pulse Rinse
- Close the valve, run the flush for ~30–60 seconds to partially refill, then reopen. Repeat 2–3 times until water is clearer.
- Final Gray Rinse
- Close black. Open gray to rinse the hose with soapy sink/shower water.
- Post‑Dump Conditioning
- Close all valves. Add 2–4 gallons of water back into the black tank through the toilet (or until you hear/feel a good slosh).
- Add your treatment according to the label.
Pro Tip: Before a driving day, leave 5–8 gallons in the black tank with treatment. Driving agitation becomes a free tank “wash”.
Deep‑Clean (Sensor Reset & Odor Elimination)

Do this when sensors read wrong, after long storage, or if you notice persistent odors.
You’ll need: flushing wand or built‑in flush, backflush adapter, dedicated hose, enzyme/bacteria treatment, optional mild detergent or water softener.
Steps
- Drain + Initial Rinse
Dump the black tank fully. Run the flush with the valve open for 2–3 minutes. - Close Valve & Soak
Close the black valve. Fill to ~60–70% (never overfill). Add enzyme/bacteria treatment. Optional: add ¼ cup dye‑free dish soap or ½ cup water softener (sodium hexametaphosphate/polyphosphate blend) to help release residue. - Agitate
Drive for 30–60 minutes or take a curvy route inside the campground (slowly, safely). The motion scrubs the tank walls. - Dump + Pulsed Flushes
Open the valve and empty. Flush 2–4 cycles until water runs very clear. - Sensor Focus
Use a rotating spray wand through the toilet to aim at the sensor sidewall (short bursts). Avoid prolonged high pressure that could damage fittings. - Re‑Prime
Add 2–4 gallons of fresh water and treatment. Verify sensors after the next use; repeat the deep clean if needed.
Pro Tip: Many “sensor problems” are film/sludge on the walls. A soak + drive agitates and removes film better than pressure alone.
How Much Water Do I Use?
| Scenario | Recommended Water |
| After each dump (baseline) | 2–4 gallons in an empty tank |
| Short weekend trip | Start with ~3–5 gallons; use full bowl flushes |
| Full‑time / longer stays | Start with ~5–8 gallons; keep using generous water |
| Before driving | 5–8 gallons with treatment for a self‑cleaning slosh |
Rule of thumb: If you can hear water slosh when you stop, you’ve likely added enough for lubrication and odor control.
DIY vs. Store‑Bought: What Actually Works?
Bacterial/Enzyme Treatments
- Help break down solids and tissue, control odors, and are septic‑friendly.
- Good for regular maintenance; pair with proper flushing.
Surfactants (Dish Soap) & Water Softeners
- Can help release stuck residue when used sparingly.
- Avoid dyes/perfumes. Don’t over‑foam.
Bleach
- Use rarely and lightly (e.g., post‑illness disinfection) and only if your manufacturer approves.
- Too much bleach can dry seals and wipe out helpful bacteria—leading to odor problems later.
Tank Rinse Attachments
- Built‑in flush ports or rotating wands make the biggest difference for sensor film and odor.
Bottom line: Water + regular rinsing + a good enzyme treatment solves 90% of problems.
Common Problems & Fast Fixes

| Symptom | Likely Cause | Quick Fix |
| Rotten‑egg / sewer odor | Dry tank, vents blocked, lost bacteria | Add 3–5 gallons + treatment; check roof vent for nests; ensure toilet seal holds water in bowl |
| “Full” sensor when empty | Residue film on sensor wall | Deep‑clean soak + drive, target spray wand at sensor area |
| Slow drain / burping | Pyramid plug, not enough water | Close valve while camping, add water, break up with wand/backflush; avoid ultra‑thick TP |
| Liquid leaks at valve | Worn seal or debris in blade | Rinse thoroughly; lube seals with RV‑safe silicone; replace blade if needed |
| Frequent clogs | Valve left open at site | Always keep black valve closed until dumping |
Step‑By‑Step: The Clean Dump Station Workflow
- Staging
Wheel chocks in, gloves on, hose connected, cap off, elbow locked. - Black Tank
Pull the handle smoothly. Let it drain to a trickle. - Flush Cycles
Run the tank flush with valve open (2–5 min). Close valve, add 30–60 seconds water, reopen. Repeat until clear. - Gray Tank
Close black. Open gray to rinse hose with soapy water. - Hose Care
Hold hose up in sections so it drains completely. Rinse the elbow. Cap both ends. - Re‑Prime
Add water + treatment to the black tank before leaving the station.
Pro Tip: Keep disposable shop towels and a spray bottle of 70% alcohol in the compartment to sanitize fittings and your hands.
Seasonal & Usage‑Based Maintenance Schedule
| Situation | Every Dump | Monthly | Seasonal (Spring/Fall) |
| Weekend/Occasional | Fast routine + 2–4 gal return water | Deep‑clean if sensors drift | Inspect seals, lube valves, check roof vent |
| Full‑Time Hookups | Fast routine + flush pulses | Deep‑clean monthly | Replace seals as needed; inspect flush port |
| Boondocking | Use water wisely, but never run dry | Deep‑clean after each long trip | Sanitize system; check tote and hoses |
Winterizing Note: If storing in freezing temps, winterize the plumbing per your RV manual. Empty the black tank completely, then add 1–2 cups of RV antifreeze to lubricate seals (do not fill the tank with antifreeze).
Natural & DIY Black Tank Cleaning Recipes (Use Sparingly)
These are use‑at‑your‑own‑rig helpers. Always check your owner’s manual and avoid dyes/perfumes.
| Goal | Recipe | How to Use |
| Odor control + gentle clean | 1 enzyme pod + 4–6 gal water | Add after dump; great for regular use |
| Release residue (soak day) | ½ cup water softener + ¼ cup dye‑free dish soap + 5–8 gal water | Close valve, soak while driving, then dump |
| Post‑illness sanitation* | ¼ cup unscented bleach + 6–8 gal water | Rare use only; soak 15–30 min with valve closed, then flush thoroughly |
*Only if your manufacturer allows bleach. Rinse very well. Don’t mix with any other chemicals.
Smart Habits That Make Everything Easier
- Full‑bowl flushes. When you use the toilet, fill the bowl halfway before you flush solids. Water carries waste.
- RV‑safe TP isn’t magic—but choose a 1–2‑ply that breaks down easily. Test in a jar at home.
- Close black valve while camping. Open only to dump a mostly full tank.
- Use travel days to your advantage. A few gallons in the tank + treatment = mobile wash cycle.
- Label hoses. Potable (fresh) vs non‑potable (flush). Store separately.
What About Sensor Additives?
Strong chemical solvents that promise instant sensor fixes can degrade seals or coatings. Try a soak + drive deep clean first. If you still get false readings, consider external/aftermarket sensors that don’t rely on internal probes.
Myths vs Facts
| Myth | Reality |
| “Leave the valve open at full hookups so it never fills.” | This causes a pyramid plug (solids pile up). Keep it closed. |
| “Lots of bleach keeps it clean.” | Bleach can kill good bacteria and dry seals; use rarely, if ever. |
| “RV‑safe TP is mandatory.” | Any easily dissolving TP works; the key is enough water and regular flushing. |
| “If it stinks, add more perfume.” | Odor usually means too little water or vent issues—fix the cause, don’t mask it. |
Troubleshooting Flowchart (Text Version)
- Bad Odor?
→ Check toilet bowl seal holds water.
→ Add 3–5 gallons + enzyme treatment.
→ Inspect roof vent for blockages.
→ Deep‑clean soak + drive if odor persists. - Sensors Stuck “Full”?
→ Deep‑clean with soak + drive.
→ Targeted wand spray.
→ Repeat once.
→ Consider external sensors if still faulty. - Slow/No Drain?
→ Valve closed while camping? If not, you may have a pyramid—use wand/backflush to break it up.
→ Add more water habitually.
→ Avoid ultra‑thick TP.
Cost & Time Snapshot
| Task | Time | Typical Cost |
| Regular dump + quick flush | 10–20 minutes | Free to $10 dump fee |
| Deep‑clean soak + drive | 1–2 hours (including drive) | $0–$10 (treatments) |
| Valve lube & seal check | 10 minutes | $5–$15 |
| Replacing a blade valve | 30–60 minutes | $20–$40 parts |
Pro Tip: Spending an extra 5 minutes on a pulsed flush can save you hours of troubleshooting sensor issues later.
Boondocking & Portable Tote Tips
- Don’t skimp on water—skimp on frequency instead. Wait until the tank is at least 2⁄3 full before dumping into the tote.
- Keep a compact backflush adapter to clear the line after transferring to a dump station.
- Store a spare pair of gloves, caps, and a short rinse hose with quick connects just for tote duty.
Conclusion
Keeping your black tank clean isn’t about fancy chemicals—it’s about water, routine, and good flushing habits.
Use the Fast Routine for every dump, add a soak-and-drive deep clean when your sensors get stuck, and keep a few gallons in the tank with treatment when you travel.
Do that, and you’ll have a fresh RV, accurate sensors, and quick, stress-free stops.
I’m Anastasios Moulios, co-founder of DIY Cozy Living. I enjoy finding creative, practical ways to make small spaces feel warm, stylish, and lived-in. I started this blog with Katerina to share real ideas that make a home feel a little more personal and a lot more comfortable.
