
How to Crochet a Bat (3 Free Halloween Patterns)

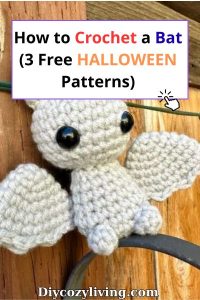
October arrives and I find myself at the table with yarn again.
Halloween is the best month for this because everything you make for it is small, quick, and immediately satisfying. A bat takes an evening. A ghost takes half of one. By the time the girls have gone to bed you have something finished and that is a good feeling at the end of a Tuesday.
These three bat patterns range from a small beginner-friendly bat you can make in an evening to a larger, more detailed version that takes a bit longer and looks considerably more impressive on a shelf. All three use basic stitches.
All three are written out completely below so you don’t need to go anywhere else.
If you’re new to amigurumi or just returning to crochet after a break, start with Pattern One. If you’ve made a few things before and want something with more detail, go straight to Pattern Two.
Pattern Three is the one to make if you want a whole colony of bats hanging in a doorway by Halloween — it works as both a standalone decoration and a garland element.
Before You Start
Abbreviations Used Throughout
| Abbreviation | Meaning |
|---|---|
| MR | Magic ring |
| SC | Single crochet |
| INC | Increase — 2 SC in the same stitch |
| DEC | Invisible decrease |
| DC | Double crochet |
| HDC | Half double crochet |
| CH | Chain |
| SL ST | Slip stitch |
| FO | Fasten off |
| BLO | Back loop only |
| ( ) x number | Repeat what’s in brackets that many times |
| Number in brackets at end of round | Total stitch count for that round |
A Few Things Worth Knowing First
Work in continuous rounds throughout — no slip stitch to join at the end of each round. Place a stitch marker at the beginning of each round and move it up as you go.
Use the invisible decrease for all three patterns. Insert the hook into the front loop of the first stitch, then the front loop of the second stitch, then complete the decrease as normal. It leaves a smooth, almost invisible line on the surface compared to the regular decrease which creates a visible bump.
Count your stitches at the end of every single round. Not every other round. Every round. The stitch count in brackets at the end of each line is your check — if yours doesn’t match, find the error before moving on. A missed increase discovered three rounds later means unravelling three rounds, which is entirely avoidable.
Block the wings. Every bat pattern with flat crocheted wings will tell you this and it’s true — wings worked flat tend to curl.
Wetting them thoroughly, pinning them to a flat surface in the shape you want, and letting them dry completely makes them hold their shape properly. Skip this step and the wings look like they’re trying to fold themselves back up.
Pattern One: The Spooky Batty Bat
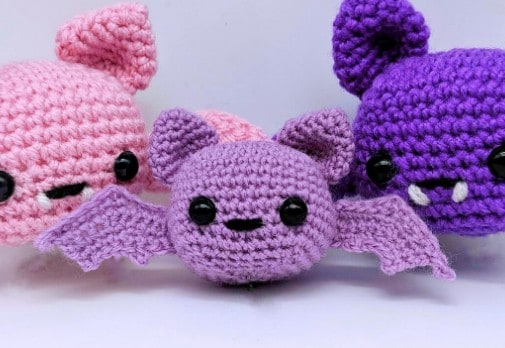
Round, plump, with ears that sit up properly and wings that wrap around the sides of the body. This is the bat I made first and the one I’d start with if you’ve not made amigurumi before. The body is worked in one piece from the top down, the ears and wings are made separately and assembled at the end.
Finished size: Approximately 8cm tall with DK yarn and 3mm hook. Make it smaller using 4ply yarn and a 2mm hook for a baby bat.
Difficulty: Beginner.
Materials:
- 3mm crochet hook (2mm for baby bat)
- DK yarn in black or any colour you like — a small amount
- Tiny bit of black and white yarn for embroidery details
- 8mm safety eyes (6mm for baby bat)
- Polyfill stuffing
- Yarn needle and scissors
- Stitch marker
Body
Work in continuous rounds.
Round 1: MR, 4 SC into the ring. Pull ring closed. (4)
Round 2: (3 SC INC) x 4 — meaning 3 SC in the same stitch, four times around. (16 total, as each 3-stitch increase adds 2 stitches to the original 4)
Wait — let me rewrite this more clearly following the original pattern exactly:
Round 1: MR, 4 SC. (4)
Round 2: 3 SC INC x 4. (12) — each 3-SC-INC means 3 single crochets all in the same stitch, so you’re tripling each stitch.
Round 3: SC, 3 SC INC, (SC x 2, 3 SC INC) x 3, SC. (20)
Round 4: SC x 2, 3 SC INC, (SC x 4, 3 SC INC) x 3, SC x 2. (28)
Round 5: SC x 3, 3 SC INC, (SC x 6, 3 SC INC) x 3, SC x 3. (36)
Round 6: SC x 4, 3 SC INC, (SC x 8, 3 SC INC) x 3, SC x 4. (44)
Round 7: SC x 5, SC2TOG, (SC x 9, SC2TOG) x 3, SC x 4. (40)
Rounds 8 to 14: SC in each stitch around. (40)
Place safety eyes now, between rounds 11 and 12, with 6 stitches between them.
Round 15: SC x 4, SC3TOG, (SC x 7, SC3TOG) x 3, SC x 3. (32)
Round 16: SC x 3, SC3TOG, (SC x 5, SC3TOG) x 3, SC x 2. (24)
Begin stuffing now — lightly and firmly. Less than you think.
Round 17: SC x 2, SC3TOG, (SC x 3, SC3TOG) x 3, SC. (16)
Round 18: (SC, SC3TOG) x 4. (8)
FO leaving a long tail. Thread tail through a yarn needle, pass through the front loop of each remaining stitch, pull to close the gap completely. Weave the end through the body.
Ears (Make Two)
Round 1: MR, 5 SC. (5)
Round 2: 2 SC INC, SC, 2 SC INC, SC, 2 SC INC. (8)
Round 3: (SC, 2 SC INC) x 4. (12)
Round 4: (SC x 2, 2 SC INC) x 4. (16)
Round 5: (SC x 3, 2 SC INC) x 4. (20)
Round 6: (SC x 3, SC2TOG) x 4. (16)
Round 7: (SC x 2, SC2TOG) x 4. (12)
FO leaving a long tail. Do not stuff. Flatten the ear and sew the open end together so it forms a flat pointed shape rather than a tube. Do not cut the tail — you need it to attach the ear to the head.
Sew one ear on each side of the head using the remaining tail. Attach one end of each ear at round 4 and the other at round 7 so the ear sits upright and pointed rather than flopping sideways.
Wings (Make Two)
Wings are worked flat in rows, not in the round.
Row 1: CH 12, turn.
Row 2: SL ST, SC x 4, SC2TOG, SL ST x 4, CH, turn.
Row 3: 2 SC INC, SC x 8, CH, turn.
Row 4: SC x 3, SC2TOG, SC x 5, CH, turn.
Row 5: SC x 3, SC2TOG, SC x 4, CH, turn.
Row 6: SL ST x 5, CH x 2, SL ST.
FO leaving a long tail.
Block both wings before assembly. Wet them thoroughly, squeeze out excess water without twisting, and pin each wing flat to a foam block or a folded towel in the shape you want. Let dry completely — at least a few hours, overnight is better.
To attach: the yarn tail needs to be sewn through the wing slightly so it exits at the inner corner of the wing near the body. Sew the wing onto the body with one end attached at round 14 and the other at round 10. Repeat for the second wing on the other side.
Embroider any face details you want with black and white yarn — a small V-shaped nose, tiny fangs, whatever the bat needs to look right to you.
Pattern Two: The Amigurumi Bat
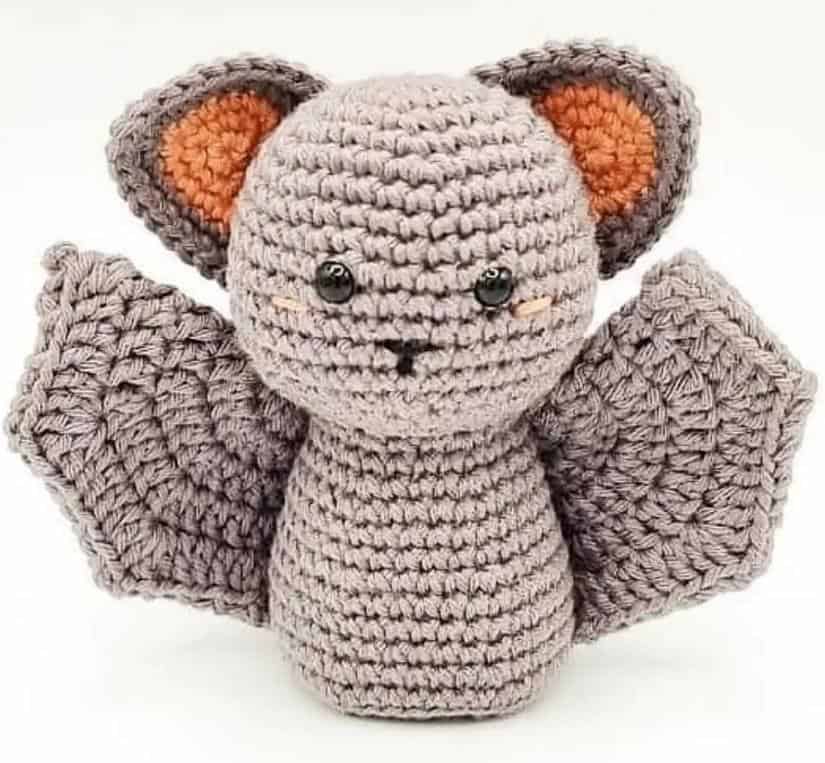
A larger, more detailed bat with a distinct head and body worked continuously, pink inner ears, and wide circular wings worked in double crochet rounds. The size and the pink ear detail make this one considerably more impressive than Pattern One — it looks like something you’d find in a craft shop rather than something you made on a Tuesday evening.
Finished size: Approximately 9cm tall.
Difficulty: Beginner to intermediate.
Materials:
- 3mm crochet hook
- Cotton yarn in dark grey and a small amount of pink
- 6mm safety eyes
- Polyfill stuffing
- A small piece of thin cardboard cut into a circle (for base stability)
- Black embroidery thread for nose
- Yarn needle and scissors
- Stitch marker
Head and Body
Stuff as you go. Work in continuous rounds throughout.
Start in dark grey.
Round 1: MR, 6 SC. (6)
Round 2: INC x 6. (12)
Round 3: (SC, INC) x 6. (18)
Round 4: (SC x 2, INC) x 6. (24)
Round 5: (SC x 3, INC) x 6. (30)
Round 6: (SC x 4, INC) x 6. (36)
Rounds 7 to 9: SC in each stitch around. (36)
Round 10: (SC x 5, INC) x 6. (42)
Rounds 11 to 14: SC in each stitch around. (42)
Insert safety eyes between rounds 10 and 11. Embroider pink cheeks and a black nose between rounds 11 and 12 — the nose sits between the eyes, two stitches wide, with two stitches between the eyes and the nose on each side.
Round 15: (SC x 5, DEC) x 6. (36)
Round 16: (SC x 4, DEC) x 6. (30)
Round 17: (SC x 3, DEC) x 6. (24)
Round 18: (SC x 2, DEC) x 6. (18)
This completes the head. The body begins now — don’t fasten off, continue from where you are.
Round 19: (SC x 2, INC) x 6. (24)
Round 20: SC in each stitch around. (24)
Round 21: (SC x 3, INC) x 6. (30)
🔥 Would you like to save this?
Rounds 22 to 24: SC in each stitch around. (30)
Round 25: (SC x 4, INC) x 6. (36)
Rounds 26 to 29: SC in each stitch around. (36)
Round 30: (SC x 5, INC) x 6. (42)
Round 31: SC in each stitch around. (42)
Round 32: Working in BLO — (SC x 5, DEC) x 6. (36)
Finish stuffing firmly. Cut a circle of thin cardboard approximately 4cm in diameter and slide it into the opening before the next round. This keeps the base flat and helps the bat stand upright.
Round 33: (SC x 2, DEC) x 6. (27) — note: work normally here, not BLO
Round 34: (SC, DEC) x 6. (18)
Round 35: DEC x 9. (9)
Close and fasten off. Weave in end.
Ears (Make Two)
Start in pink.
Round 1: MR, 6 SC. (6)
Round 2: (SC x 3, INC) x 2 — giving you a slight oval rather than a circle. (8) — actually: 3 SC, 3-SC-INC, 3 SC, 3-SC-INC following the original. Check your count at 18 after round 3.
Switch to dark grey after round 3.
Round 4: SC x 2, 3-SC-INC, SC x 5, 3-SC-INC, SC x 3. (24)
Round 5: SC x 3, 3-SC-INC, SC x 7, 3-SC-INC, SC x 4. (30)
FO leaving a long tail. Do not stuff. Sew to the sides of the head between rounds 5 and 12, leaving approximately 5 stitches between the two ears.
Wings (Make Two)
Work in dark grey.
Round 1: MR, CH 3, 15 DC into the ring, SL ST into chain space. (16)
Round 2: CH 3, DC in same space, (DC, DC INC) x 7, DC, SL ST into chain space. (24)
Round 3: CH 3, DC in same space, (DC x 2, DC INC) x 7, DC x 2, SL ST into chain space. (32)
Round 4: CH 3, DC in same space, (DC x 3, DC INC) x 7, DC x 3, SL ST into chain space. (40)
Round 5: CH 3, DC in same space, CH 3, 2 DC in same space, (DC x 4, DC INC, CH 2, DC INC) x 7, DC x 4, SL ST into chain space.
Fold round 5 and stitch together through the back loops only to create the jagged wing edge.
Sew the wings to the back of the body — one on each side, positioned roughly in the centre of the body section.
Pattern Three: The Bat Garland
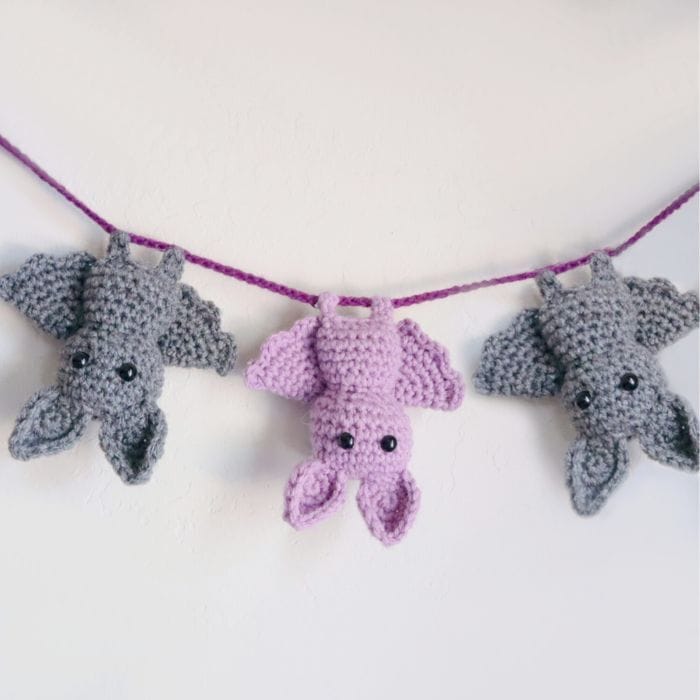
Small, quick and makes a very good garland element. About 10cm tall when finished, with a round body, simple ears, and wings attached flat to the sides. Make six of these in an evening and hang them at different heights across a doorway or window.
This is also the pattern that connects most directly to the Halloween garland article [linked here] — these bats work beautifully mixed with the crocheted ghosts and other small Halloween motifs on a shared garland.
Finished size: Approximately 10cm tall.
Difficulty: Beginner.
Materials:
- 4mm crochet hook
- Worsted weight yarn (weight 4) in black — one small skein is plenty for several bats
- 8mm safety eyes
- Polyfill stuffing
- Hot glue or yarn needle for assembly
- Scissors and stitch marker
Body
Work in continuous rounds.
Round 1: MR, 6 SC. (6)
Round 2: INC x 6. (12)
Round 3: (INC, SC) x 6. (18)
Round 4: (INC, SC x 2) x 6. (24)
Rounds 5 and 6: SC in each stitch around. (24)
Mark where to place the safety eyes now — between rounds 4 and 5, with 6 stitches between them.
Round 7: (SC x 2, DEC) x 6. (18)
Insert safety eyes.
Begin stuffing lightly.
Round 8: (SC, DEC) x 6. (12)
Round 9: DEC x 6. (6)
FO leaving a long tail. Close the gap as with previous patterns, weave in end.
Ears (Make Two)
Round 1: MR, 6 SC. (6)
Round 2: (INC, SC x 2) x 2. (8)
FO leaving a long tail. Flatten slightly. Sew to the top of the head on each side. The ears are small and simple — their job is just to read as bat ears from a distance, which they do.
Wings (Make Two)
Wings for this bat are worked in rows to create the pointed bat wing silhouette.
Row 1: CH 9. SC in second chain from hook, SC x 7. Turn. (8)
Row 2: CH 1, INC, SC x 5, INC, SC. Turn. (10)
Row 3: CH 1, SC x 3, INC, SC x 3, INC, SC x 2. Turn. (12)
Row 4: CH 1, SC x 12. Turn. (12)
Row 5: CH 1, DEC, SC x 8, DEC. Turn. (10)
Row 6: CH 1, DEC, SC x 6, DEC. Turn. (8)
Row 7: CH 1, DEC, SC x 4, DEC. Turn. (6)
Row 8: CH 1, DEC, SC x 2, DEC. (4)
FO leaving a long tail.
Block both wings flat before attaching. Attach one wing to each side of the body, positioned between rounds 3 and 7 of the body. Hot glue holds them quickly and cleanly. A sewn attachment using the yarn tail is more secure for bats that will be handled by children.
Making the Garland
For a garland of six bats: make all six bodies and ears first, then all six pairs of wings. Assembly in batches is faster than completing one bat at a time.
Cut a length of invisible thread or dark yarn as long as you want the garland. Thread a needle with a short length of dark yarn and pass it through the top of each bat’s head. Tie the yarn in a loop above the head. Thread the garland line through each loop, spacing the bats evenly — roughly 15cm between each one looks right.
Hang the garland with the bats at slightly different heights if you have room to vary the loop lengths. Six bats at exactly the same height looks like a diagram. Six bats at varying heights looks like a real colony, which is considerably more satisfying.
Displaying Your Crochet Bats
A cluster of three Pattern One bats in different sizes hanging from a length of invisible thread above the fireplace. Make one slightly larger by using DK yarn instead of 4ply, one standard size, one smaller — hang them at different heights from the same point so they move independently.
Pattern Two, the larger bat, sits well on a shelf on its own. It’s substantial enough to be a standalone decoration rather than needing to be grouped with other things. On a bookshelf between some orange pumpkins and a candle it looks exactly right for October.
Pattern Three bats strung as a garland across a window or a doorway, mixed with some of the small ghosts from the ghost pattern article [linked here]. The bats and ghosts alternate along the garland and the variation in shape makes the display look more interesting than a row of identical motifs.
All three patterns also work in colours beyond black. Deep purple reads as slightly more playful than black. A charcoal grey reads as more sophisticated. A pastel lilac or dusty rose reads as deliberately whimsical — Marina’s preference, predictably.
Common Problems and Fixes
The wings won’t stay flat after blocking: They need longer. Leave them pinned overnight rather than a few hours. If they still won’t hold, lightly starch them with a spray starch before pinning.
The body is lopsided: Usually caused by inconsistent tension in the increase rounds. This is very common in early amigurumi attempts. It improves with practice and isn’t visible once the wings are attached.
The ears keep flopping over: They need to be sewn down at both the front and back of the ear base rather than just at one point. Two attachment points keep them upright.
The bat won’t stand up: Either overstuffed or the base isn’t flat. For Pattern Two specifically, the cardboard circle insert is what makes the base sit flat. Without it the stuffing rounds into a dome and the bat rocks.
The eyes look uneven: Place both eyes before securing either one. Hold the piece at arm’s length and look at it from the front. Adjust until they look right from that distance — not from up close where every millimetre of difference is obvious.
A Final Thought
The first bat I made for our Halloween decorations looked slightly alarmed, which turned out to be an accurate expression for a bat in a living room in Thessaloniki. The eyes were too close together and one ear sat higher than the other. Marina named it immediately, which is what she does, and it’s been coming out of the box every October since.
The later ones are better. The ears sit evenly, the wings block flat, the eyes go in straight. But the first one still has a name and still has a place in the display and somehow that lopsided alarmed expression is the most characterful thing about the whole collection.
Make the first one. Name it if you want to. Make more after.
That’s all I have for today. If you make any of these I’d love to see them in the comments, especially if you use a colour other than black. And if you give them names — which you should — please share those too.
Until next time,
Stay safe,

I’m Katerina Lithopoulou, co-creator of DIY Cozy Living. I’ve always loved the little things that make a space feel special. With a background in language and a passion for photography and cozy design, I enjoy turning everyday inspiration into simple ideas people can actually use.
My motto: “Cozy isn’t a trend — it’s a feeling.”
