
5 Easy Paper Crafts for Toddlers & Preschoolers (That Don’t Require a Degree in Art)

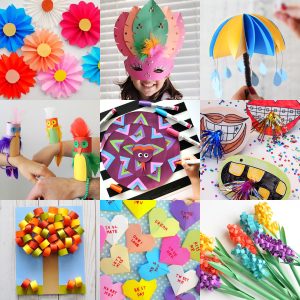
We have all had this moment. It is a rainy Tuesday at 2 p.m., you are cooped up in the house, and your three year old is giving you that telltale look of high energy. You are in need of something to occupy them, and preferably right now.
The easy thing to do is head online and put in an order for one of those fancy 20 piece craft kits.
But we can be candid about what happens then: you will be on your hands and knees for half an hour with complicated supplies, doing the fine cutting and gluing to keep things from going wrong, while your toddler has already lost interest and is off playing with the box it came in.
You don’t require a degree in art or a Pinterest worthy setup to have a good afternoon.
Nor do you want the glitter that will be in your carpet for the next ten years. Some of the best activities for a preschooler are as unpretentious as a stick of washable glue and some construction paper.
We are putting forward five paper projects today that are good for building motor skills and won’t test your sanity or the finish on the kitchen table.
Let’s get to it.
Why Simple Paper Crafts Win Every Time
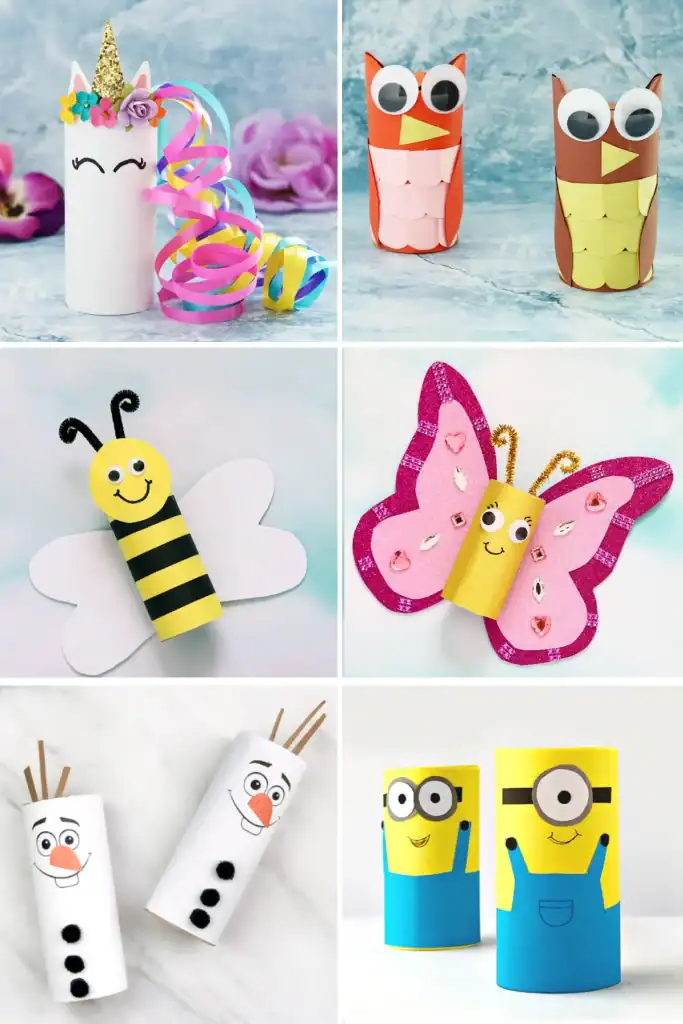
There is a case to be made for keeping things basic when it comes to a child’s brain. Young ones learn by repetition and feeling.
Put an over engineered kit with hard and fast rules in front of a preschooler and their curiosity is stifled; they will be put out if the end result doesn’t match the picture on the packaging.
With ordinary paper there is no fear of wasting money on materials. A piece of paper rips?
Fine, take another and start over.
That kind of independent problem solving and fine motor work is what will stand them in good stead for handwriting down the road.
Craft Overview and Skill Development
Before we jump into the instructions, here is a quick look at how these five paper projects compare in terms of mess, setup time, and developmental benefits for your child.
| Craft Project | Best Age Range | Mess Level | Primary Skill Developed |
| 1. Ripped Paper Mosaic Rainbow | 2 to 4 Years | Very Low | Pincer grasp and color sorting |
| 2. Accordion Fold Caterpillar | 3 to 5 Years | Low | Bilateral hand coordination |
| 3. Contact Paper Suncatcher | 2 to 5 Years | Zero Mess | Visual and spatial awareness |
| 4. Paper Tube Treehouse | 3 to 5 Years | Medium | 3D structural problem solving |
| 5. Handprint Lily Bouquet | 2 to 5 Years | Low | Tracing and self awareness |
1. The Ripped Paper Mosaic Rainbow
Scissors can be intimidating and downright dangerous for a two year old. This craft removes scissors entirely and turns the natural urge to destroy things into a productive art project.
Materials Needed
- 1 sheet of heavy white cardstock
- Scraps of colorful construction paper in rainbow colors
- 1 large washable purple glue stick
- A black crayon
Step by Step Instructions
- Draw the Outline: Use the black crayon to draw simple, wide rainbow arches across the white cardstock. Keep the arches spaced about an inch apart so tiny fingers have room to work.
- The Tearing Phase: Hand your toddler the sheets of colored paper and instruct them to tear them into small shreds. Show them how to pinch the paper between their thumbs and forefingers and pull in opposite directions.
- Sort the Colors: Group the torn pieces into little piles by color. This adds a great color sorting math activity into the craft.
- Glue and Stick: Instead of putting glue on the tiny paper scraps, smear a heavy layer of glue directly onto one arch of the rainbow. Let your child press the matching torn paper pieces onto the sticky arch.
Parent Sanity Tip: Tearing paper is an incredible emotional regulator for toddlers. If your child is having a high energy or frustrated day, let them spend ten full minutes just ripping scrap paper into a bowl before you even start gluing.
2. The Accordion Fold Paper Caterpillar
Preschoolers love crafts that actually move after they are made. This springy caterpillar introduces basic folding techniques and turns into a fun toy for imaginative play.
Materials Needed
- 2 long strips of construction paper in contrasting colors cut to about 1.5 inches wide and 11 inches long
- 1 small circle cut from colored paper for the head
- Googly eyes or a marker to draw eyes
- A glue stick
Step by Step Instructions
- Create the Corner: Take your two long strips of paper and glue the ends together at a 90 degree angle, forming an L shape.
- The Accordion Fold: Show your preschooler how to fold the bottom strip over the top strip while creasing the edge. Then, take the other strip and fold it back over the top.
- Repeat the Pattern: Continue taking turns folding one strip over the other until you run out of paper. Glue the final two ends together so the spring does not unravel.
- Add the Personality: When you pull the paper apart slightly, you will have a bouncy accordion spring. Glue the paper circle onto the front fold, add googly eyes, and draw a happy caterpillar smile.
3. The No Mess Contact Paper Suncatcher
If you cannot handle the idea of wet glue on a busy weekday, this craft is your absolute best friend.
🔥 Would you like to save this?
It uses clear adhesive paper to create a stunning stained glass effect for your windows without a single drop of liquid glue.
Materials Needed
- 1 roll of clear shelf liner or contact paper
- Colored tissue paper cut or ripped into small squares
- Painter’s tape
- Scissors for adult use during prep
Step by Step Instructions
- Prep the Sticky Canvas: Cut a large rectangle of clear contact paper. Peel off the backing and use painter’s tape to tape it sticky side out directly to a window or glass door at your child’s eye level.
- Decorate the Canvas: Hand your child a bowl of colorful tissue paper squares. Let them press the squares directly onto the sticky surface. They can overlap colors, create patterns, or just stick them on randomly.
- Seal the Masterpiece: Once your child is done, cut a second piece of contact paper of the exact same size. Carefully peel the backing and press it sticky side down over the artwork, sandwiching the tissue paper inside.
- Trim and Display: Cut the sandwich into a fun shape like a giant heart, a star, or a butterfly, and tape it up on a sunny window. The sunlight will glow beautifully through the tissue paper.
4. The Paper Tube Treehouse
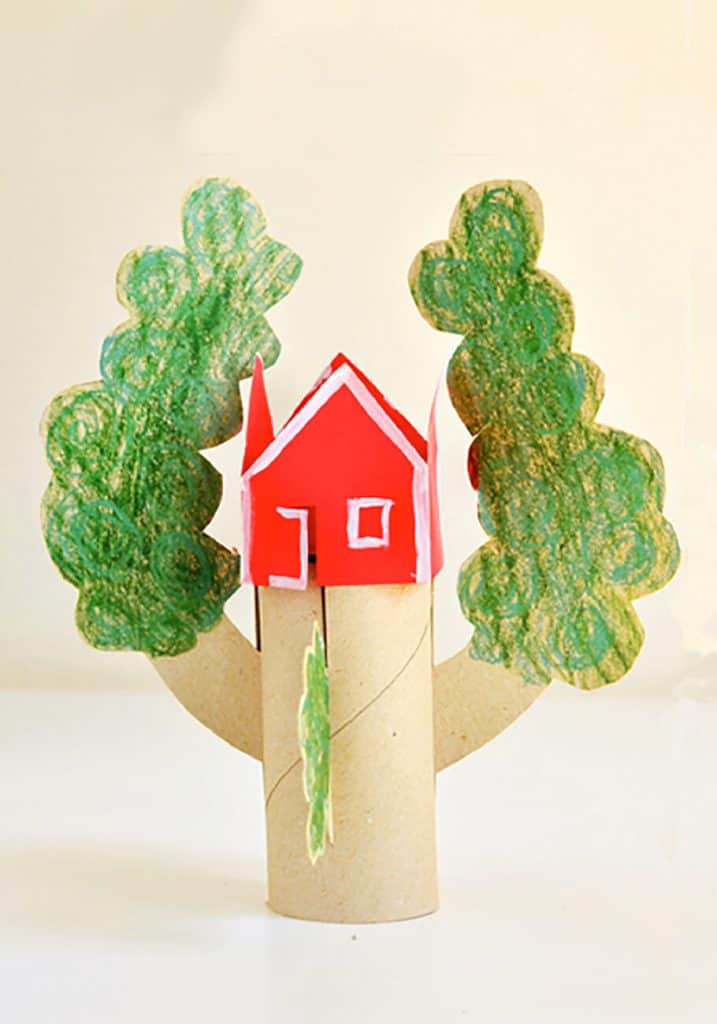
Save your cardboard toilet paper tubes for this project. It transitions preschoolers from flat drawing into early engineering and structural play.
Materials Needed
- 2 or 3 empty cardboard toilet paper rolls
- Green construction paper
- A brown crayon or marker
- Child safe scissors
- A glue stick or clear tape
Step by Step Instructions
- Build the Tree Trunk: Have your child color the cardboard tube brown. Use scissors to cut two small one inch slits opposite each other on the top rim of the tube.
- Create the Foliage: Draw a large cloud shape on a piece of green construction paper and let your preschooler cut it out. It does not need to be symmetrical since real trees are lumpy and organic.
- Assemble the Structure: Slide the bottom edge of the green tree top piece directly into the two slits on the cardboard tube. It will stand up on its own as a 3D tree.
- Add the Treehouse Details: Let your child draw tiny doors, rope ladders, windows, or owls on scraps of paper. Cut them out and glue them onto the standing tree to create a magical forest village.
5. The Handprint Paper Lily Bouquet
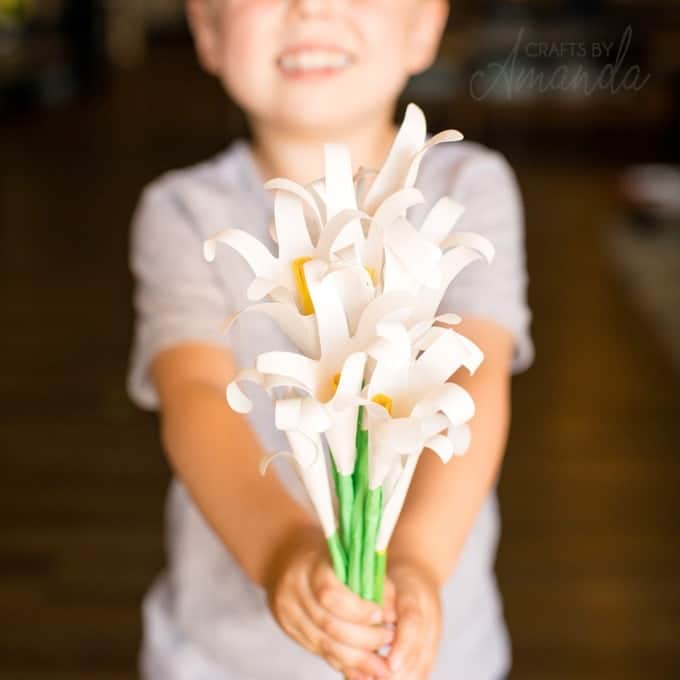
Handprint crafts are classic for a reason. They capture exactly how tiny your child’s hands were at this specific stage of life, making them incredible keepsakes for grandparents.
Materials Needed
- Colored construction paper in pink, yellow, or white for the flower
- Green construction paper for the stem
- A pencil
- Child safe scissors
- Clear tape
- 1 green paper straw or pipe cleaner
Step by Step Instructions
- Trace the Hand: Have your child place their hand flat on a piece of colored paper. Carefully trace around their fingers and palm with a pencil.
- Cut the Handprint: Assist your preschooler in cutting out the handprint outline.
- Form the Lily: Take the paper handprint and gently roll the palm area into a cone shape, leaving the fingers pointing outward at the top. Tape the bottom of the cone secure.
- Curl the Petals: Use a pencil to gently roll and curl the paper fingers outward so they bloom open like lily petals.
- Attach the Stem: Insert the green paper straw or pipe cleaner into the bottom of the paper cone and tape it securely. Make three or four of these in different colors to build a full bouquet.
What to Actually Expect During Craft Time
To be frank, the reality of doing crafts with a toddler is something altogether different from what one might expect.
Scroll through the web and you will find project photos that are immaculate and put together to a T.
But make no mistake, those were done by an adult for the camera. Leave it to a three year old to produce a paper caterpillar that is a bit lopsided, with glue smeared on the table and colors that have little in common. There is nothing wrong with that; in fact, it is a sign the craft was a success.
One is not after gallery quality pieces to hang in the living room. What matters is the thirty minutes of concentration you share, the feel of the sticky paper and the look of pride when your child puts on display what they have made.
Should your child see fit to clump all the blue tissue paper into one mass at the corner of the suncatcher, let them.
Trying to steer their hand or take the scissors to get a straighter line is an invitation to a power struggle over what should be a pleasant afternoon. It is better to attend to the process than the outcome and have a damp cloth on hand for the inevitable mess.
Final Thoughts on Rainy Day Crafting
A few sheets of paper and some patience will do.
For a simple start with no clean up, try the contact paper suncatcher.
When they are at ease with the materials you can move on to the 3D treehouses and accordion folds.
We put these suggestions forward to help you get through an afternoon indoors. Put away the cardboard tubes, stock up on glue sticks and make the most of these messy years.
Until next time,
Stay safe,
Tasos & Katerina

I’m Katerina Lithopoulou, co-creator of DIY Cozy Living. I’ve always loved the little things that make a space feel special. With a background in language and a passion for photography and cozy design, I enjoy turning everyday inspiration into simple ideas people can actually use.
My motto: “Cozy isn’t a trend — it’s a feeling.”
