
Genius Summer Crafts That Keep Your Kids Busy (And You Actually Calm)

Let me tell you about the ice cream craft.
Marina was five. Maria was seven. It was August, it was hot, and I had approximately forty-five minutes of things I needed to do without anyone asking me anything. I set them up at the kitchen table with cardboard, paint, cotton balls, googly eyes and a vague description of what an ice cream craft was. I said the words “you can make any flavour you want” and walked away.
They were at that table for two hours.
Two hours. In August. Without fighting. Marina made eleven ice cream cones. Maria made a sundae with a face on it that she named and gave a backstory to. I drank a coffee while it was still hot. I read four pages of a book. I sat in silence for a moment that felt, genuinely, like a small miracle.
This is what a good summer craft does. Not just keeps the children occupied — keeps them occupied with something they care about enough to stay focused on.
The difference between a craft that lasts twenty minutes and one that lasts two hours is almost entirely in whether the child feels like they’re making decisions. Give them choices and they’ll stay at that table until you have to call them away.
These are the ones that actually work.
Before the crafts — the one thing that makes all of them last longer
Materials out and ready before you introduce the activity. All of them. The moment a child has to wait for you to find the scissors or the glue the momentum breaks and it’s very hard to get back.
I keep a summer craft box — a plastic container, nothing special — with the basics already in it. Paint, brushes, googly eyes, pompoms, foam shapes, cotton balls, cardboard scraps, glue sticks, markers. When one of the crafts below happens I go to the box and pull out what’s needed rather than hunting through three cupboards while Marina loses interest.
The box costs almost nothing to put together. It saves everything.
1. Ice Cream Cone Crafts
The one that started all of this.
Cut cone shapes from brown cardboard or paper. The “ice cream” part is a cotton ball or a pompom or crumpled tissue paper — Marina prefers pompoms because they’re already round. Paint the scoops, add sprinkles with a marker or glitter, googly eyes if they want faces on them which they always do.
The reason this works so well is that ice cream has infinite variations and children know this. Every scoop is a decision. Chocolate or strawberry or “blue raspberry which isn’t a real flavour but Marina insists it is.” You can make a single cone or a tower or a whole ice cream shop. Maria made a menu last summer. A handwritten menu with prices. She was eight.
Ages 4 and up. Easily two hours if you let them run with it.
2. Watercolour Salt Painting
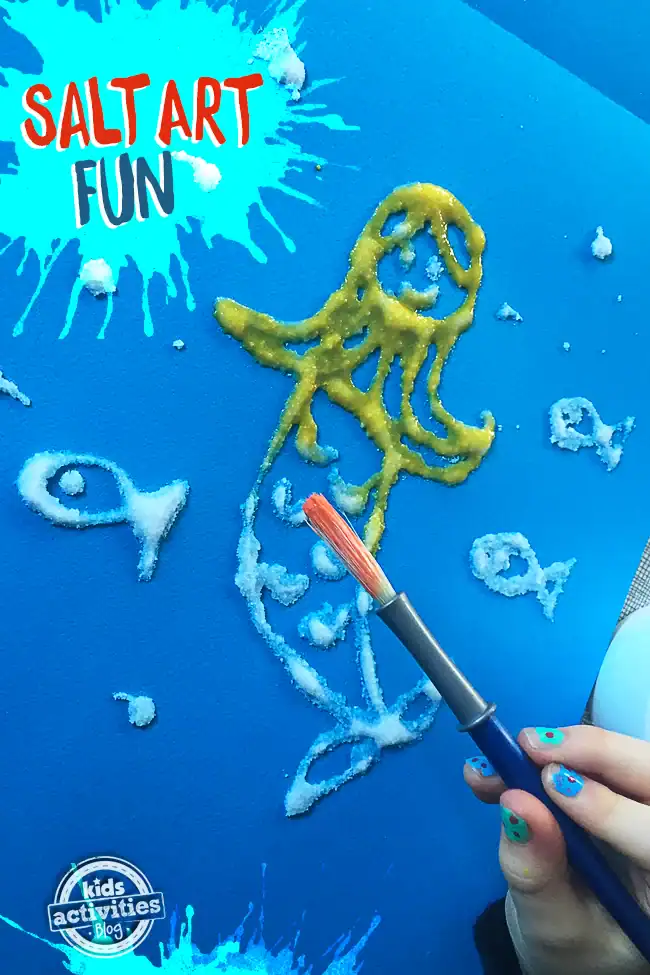
Draw a design with white glue on thick paper or cardboard. Pour table salt generously over the wet glue. Shake off the excess. Let it dry for ten minutes — this is the hard part, the waiting, manage expectations — and then touch watercolour paint to the salt with a wet brush.
The paint travels along the salt in a way that looks like magic. It genuinely does. Both girls went completely silent the first time they tried this because watching the colour move is that satisfying.
The waiting step is the only obstacle. Have something else for them to do during the drying time or they’ll touch it.
3. Popsicle Stick Picture Frames
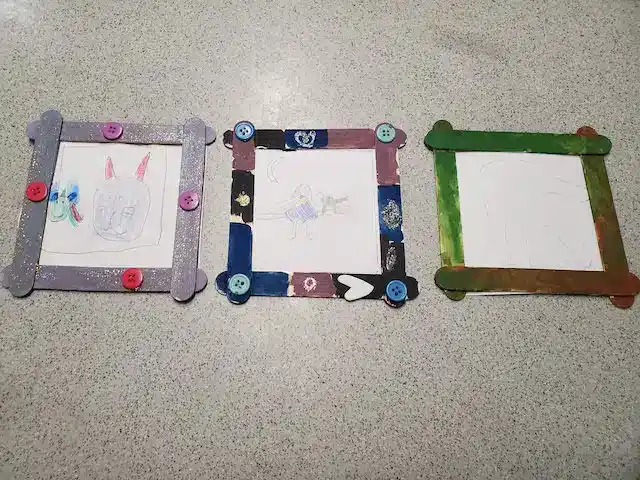
Glue popsicle sticks into a square frame shape. Paint. Decorate with whatever the craft box has — buttons, stickers, small foam shapes, markers. Attach a photo or draw a picture for the inside.
Simple. But the decorating phase takes longer than you’d expect because every button placement is a considered decision. Marina rearranged the decorations on hers four times before she was satisfied. That’s forty minutes right there.
4. Paper Plate Sun Catchers
Cut the centre out of a paper plate leaving just the rim. Stretch plastic wrap tightly across the opening and secure it with tape. Let the child stick torn pieces of tissue paper in different colours onto the plastic wrap — they overlap, the colours mix, it looks like stained glass when held up to light.
Hang them in a window when dry. The satisfaction of seeing it glow in the afternoon sun is enormous and immediate and makes the child feel like they made something real. Which they did.
5. DIY Stress Balls
Fill a balloon with flour. Tie it off. Draw a face on it with permanent marker.
That’s it.
Takes ten minutes to make and then provides an unknown quantity of additional entertainment because squeezing a flour balloon is genuinely satisfying and children will do it for longer than makes sense. Maria made five of them last summer and gave them names. She still has two.
Use a funnel for the flour or it goes everywhere. Learned this the hard way.
🔥 Would you like to save this?
6. Rock Painting
Collect smooth flat rocks — from the garden, from a walk, from anywhere. Paint them with acrylic paint. Add details with a fine marker once dry.
The beauty of rock painting is that it has no rules and no wrong answers and children instinctively understand this. A rock can be a ladybug or a pizza or a portrait of the cat or an abstract pattern or the Greek flag. Marina painted a rock that was “a rock who is also a person” and spent forty minutes on it.
Leave finished rocks in the garden, give them to grandparents, use them as paperweights, line them up on a windowsill. Zina has a collection of rocks painted by the girls that she keeps on her kitchen windowsill and has never moved.
7. Bubble Wrap Printing
Take a piece of bubble wrap. Paint over it with a brush or roller. Press paper firmly onto the painted surface and peel back.
The result is a pattern of circles that looks like it required skill and technique. It didn’t. It required bubble wrap and five minutes and the children feel like proper artists because the result genuinely looks good.
Cut the bubble wrap into shapes first — a circle of bubble wrap pressed onto paper makes a perfect sun. A rectangle makes interesting abstract art. Marina made wrapping paper this way for Zina’s nameday last year and it looked like something you’d buy.
8. Marble Run From Cardboard Tubes
Save toilet roll tubes and paper towel tubes through the preceding weeks. On the day: tape them to a wall or the back of a door at angles so a marble rolled into the top travels through each tube and falls into the next one and eventually lands in a cup at the bottom.
Building it takes as long as they want it to. Testing it takes as long as the marble keeps working. Adjusting the angles when it doesn’t work teaches something about physics without anyone mentioning physics.
Maria engineered ours. Marina provided feedback. Tasos got involved despite not being the target audience and stayed involved for longer than the children did.
9. Tie-Dye T-Shirts
Yes it’s messy. Yes it’s worth it.
White cotton t-shirts, rubber bands, fabric dye. Twist sections of the shirt and secure with rubber bands before applying dye in different colours. Leave wrapped for several hours. Rinse, remove bands, reveal.
The reveal is the moment. Both girls screamed when they saw theirs. Every tie-dye shirt comes out differently which means you can’t be disappointed by the result because there’s no expected result. Whatever it looks like is what it was supposed to look like.
Do this outside. Do it in clothes you don’t care about. Put down plastic sheeting. Accept that some dye will end up somewhere it shouldn’t and decide in advance that you’re fine with this. Then it’s a brilliant afternoon.
10. Paper Bag Puppets
A paper lunch bag, markers, googly eyes, yarn for hair, scraps of fabric for clothes. The bag becomes a puppet — hand goes inside, fingers in the flap that forms the mouth.
Takes twenty minutes to make. Provides an unpredictable amount of subsequent entertainment depending on whether the children decide to put on a show, which Marina always does and Maria sometimes does and Tasos occasionally gets recruited to watch.
The puppet show phase is when you get to sit on the sofa and be an audience, which is its own kind of rest.
11. Homemade Playdough
Two cups flour, one cup salt, two tablespoons cream of tartar, two tablespoons oil, one cup boiling water. Mix together. Knead until smooth. Add food colouring and knead it through.
Making the playdough is part of the activity. The mixing and the kneading and the colour going in and spreading through the dough — this is already twenty minutes of engaged time before anyone has made anything with it. Then the playing with it is separate again.
Homemade playdough is softer and more satisfying than the bought version. It keeps for weeks in a sealed container. Marina prefers making it to playing with it, which I didn’t expect and which tells you something about her specifically.
12. Sun Prints
This one requires sunshine, which in a Greek summer is not a constraint.
Cyanotype paper — available online, inexpensive — is paper that reacts to UV light. Arrange leaves, flowers, flat objects on the paper in direct sunlight. Leave for a few minutes. Rinse with water. Where the objects blocked the light stays white. Everything else turns blue.
The result looks like a photograph made without a camera because that’s essentially what it is. Both girls found this slightly difficult to believe when they saw it the first time. Maria asked me to explain it twice. I explained it as well as I could. She still looked uncertain.
Frame them. They look genuinely beautiful and the children made them with leaves they picked themselves from the garden and that combination of simple materials and extraordinary result is what the best crafts always have.
The honest truth about summer crafts
The ones that last — the ones that actually buy you the quiet afternoon you need — are the ones where the child feels like they’re the one making decisions. Not following instructions, not copying something exactly, but choosing. This flavour, this colour, this arrangement, this face on this rock.
Your job is to set up the materials and get out of the way.
That’s all I have for today. If your children have a craft that reliably holds their attention for more than an hour I genuinely want to know about it in the comments. The ice cream craft is still our record but I’m always looking for something that might beat it.

I’m Katerina Lithopoulou, co-creator of DIY Cozy Living. I’ve always loved the little things that make a space feel special. With a background in language and a passion for photography and cozy design, I enjoy turning everyday inspiration into simple ideas people can actually use.
My motto: “Cozy isn’t a trend — it’s a feeling.”
