
The Best Christmas Ornaments Are the Ones You Make Yourself

Every December, a particular box appears from the storage room. It isn’b the box of lights or the one full of lovely decorations.
It’s the other one, holding Maria’s a little wonky salt dough star from when she was four, a pinecone with a ribbon tied and re-tied until it’s almost all knots and not a bow anymore, and a dried orange slice from a year I can’t recall that amazingly still has a hint of cinnamon scent.
They aren’t lovely, any of them. But they are the first things to go onto the tree.
That’s the power of ornaments you’ve made yourself. They hold onto something that store-bought ornaments just don’t quite achieve for example the memory of a specific afternoon, a child’s hands working, a kitchen smelling of baking, glue or spices.
And the great thing is they’re really easy to make, won’t cost much at all, and taking an hour or two to do them is truly worthwhile.
Without further ado, let’s get into it!!
Why Homemade Ornaments Make The Christmas Tree Feel Like YOURS!
A Christmas tree packed with ornaments that all match is pretty. I’ve seen them in catalogues and liked the look, but then I look at our tree, which has no matching ornaments, and decide this is so much nicer.
Homemade ornaments give a tree a feeling of being lived in. They show you things about the people who created them and when they were made.
A tree with both fancy glass baubles and a salt dough handprint from 2019 is a tree for a genuine family, and nothing is more celebratory than that.
These ten ideas will take from ten minutes up to an afternoon. Some require an oven, some a hot glue gun. They can all be done with kids, and they will all end up in a box that will be taken out every December for many years to come.
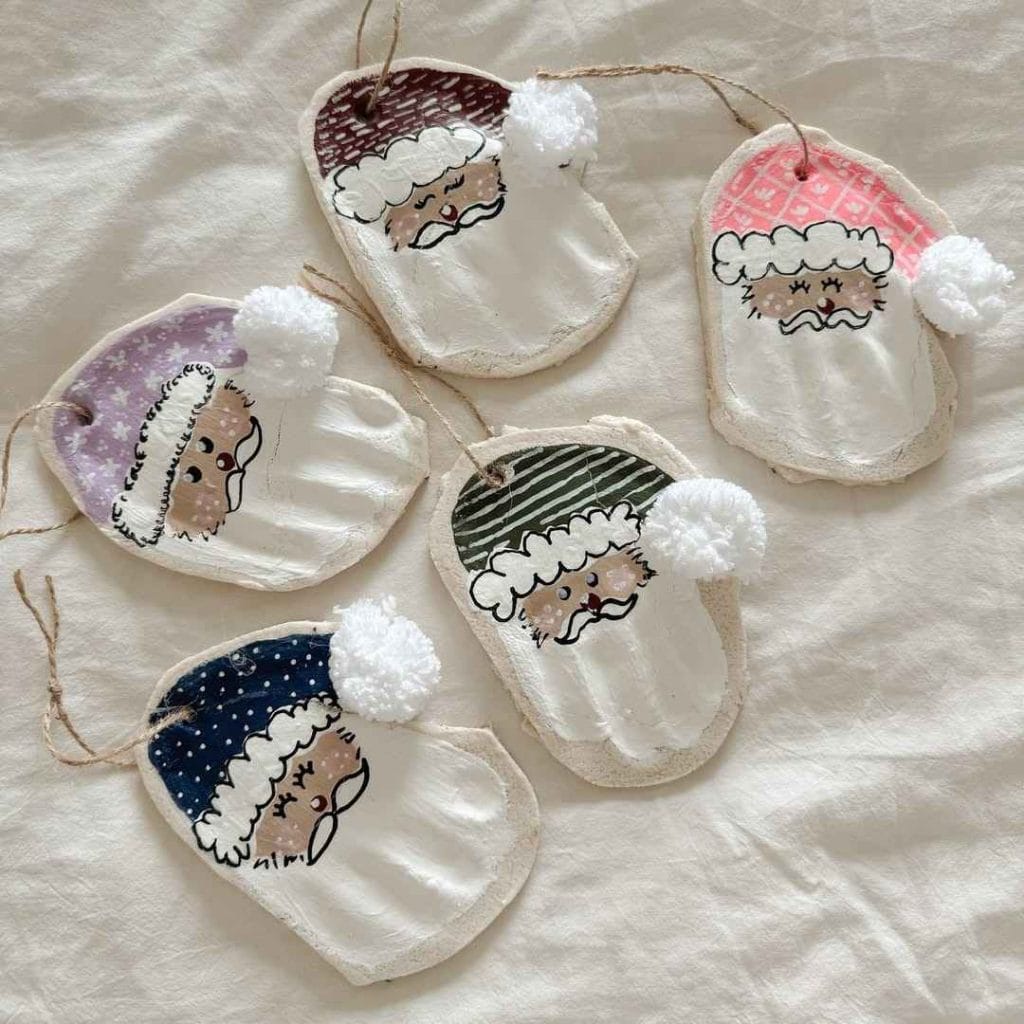
1. Salt Dough Ornaments
Materials Needed:
- 2 cups all-purpose flour
- 1 cup salt
- 1 cup water
- Rolling pin
- Cookie cutters (various shapes)
- Baking sheet
- Acrylic paint (optional)
- Paintbrushes (optional)
- Clear sealant (optional)
Instructions:
- Mix Ingredients: In a mixing bowl, combine the flour and salt. Gradually add the water while stirring until the mixture forms a dough.
- Knead the Dough: Transfer the dough to a floured surface and knead for about 5 minutes until smooth.
- Roll Out the Dough: Using a rolling pin, roll out the dough to about 1/4-inch thick.
- Cut Out Shapes: Use cookie cutters to cut out various shapes. You can make stars, hearts, or holiday-themed shapes like trees and snowmen.
- Create Holes: Before baking, use a straw or skewer to make a small hole at the top of each ornament for hanging.
- Bake: Place the shapes on a baking sheet lined with parchment paper and bake at 200°F (93°C) for 2-3 hours until they are hard.
- Decorate: Once cooled, paint your ornaments with acrylic paint and let them dry. You can also add glitter, sequins, or other embellishments.
- Seal: To protect your ornaments, spray or brush on a clear sealant.
Personalization Tips:
- Add names or the year with a permanent marker or paint before sealing.
- Use themed colors that match your holiday decor.
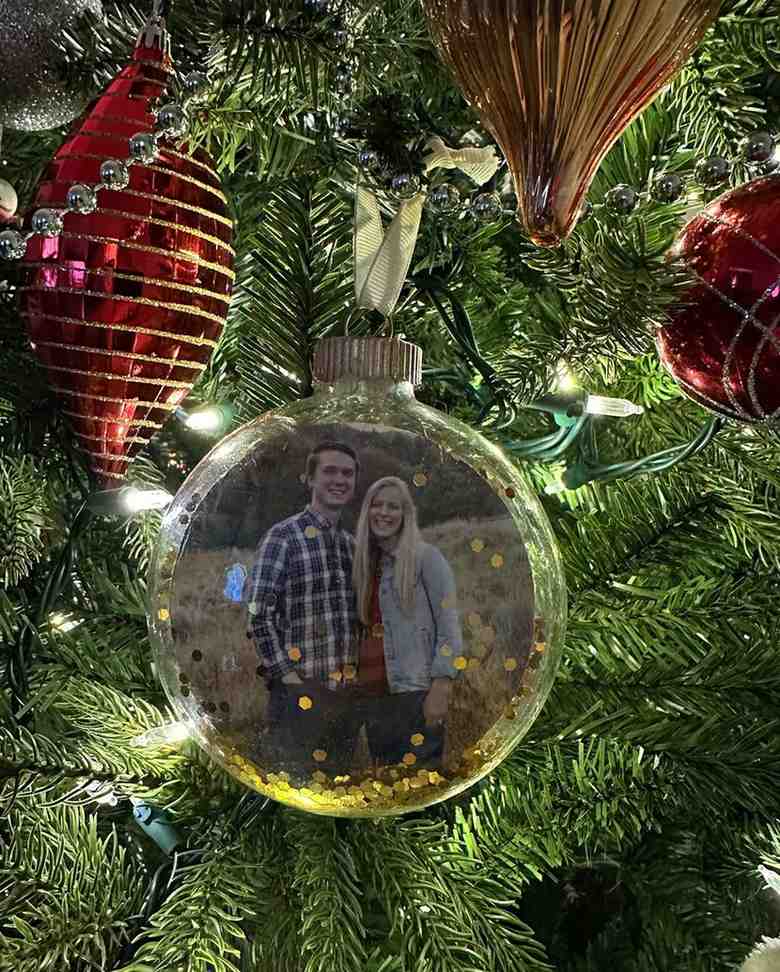
2. Photo Ornaments
Materials Needed:
- Clear glass or plastic ornaments
- Printed photos (family pictures, pets, or special moments)
- Scissors
- Ribbon or twine
- Glue (optional)
Instructions:
- Prepare Photos: Select and print your photos to fit inside the ornaments. You can use smaller images for glass ornaments or larger ones for plastic ones.
- Cut Out Photos: Trim the photos to fit inside the ornaments.
- Insert Photos: Carefully open the ornament and insert the photo. If using glass ornaments, you may want to add a bit of glue to secure the photo in place.
- Add a Ribbon: Cut a length of ribbon or twine and thread it through the ornament’s top for hanging.
Personalization Tips:
- Write a small message on the back of each photo before inserting it.
- Create a themed set of ornaments, such as holiday celebrations from past years.
3. Pinecone Ornaments
Materials Needed:
- Pinecones
- Twine or ribbon
- Acrylic paint (optional)
- Glitter (optional)
- Hot glue gun (optional)
- Beads or embellishments (optional)
Instructions:
- Gather Pinecones: Collect pinecones from your yard or a nearby park.
- Clean and Dry: Brush off any dirt and let them dry completely.
- Paint (Optional): If desired, paint the tips of the pinecones with acrylic paint or add glitter for a festive touch.
- Add Twine: Cut a length of twine or ribbon and tie it around the top of the pinecone, creating a loop for hanging. Use hot glue for extra security if needed.
- Embellish: You can glue beads or small decorations onto the pinecone for added flair.
Personalization Tips:
- Use different colors or patterns to match your holiday theme.
- Add a small tag with a family member’s name for a special touch.
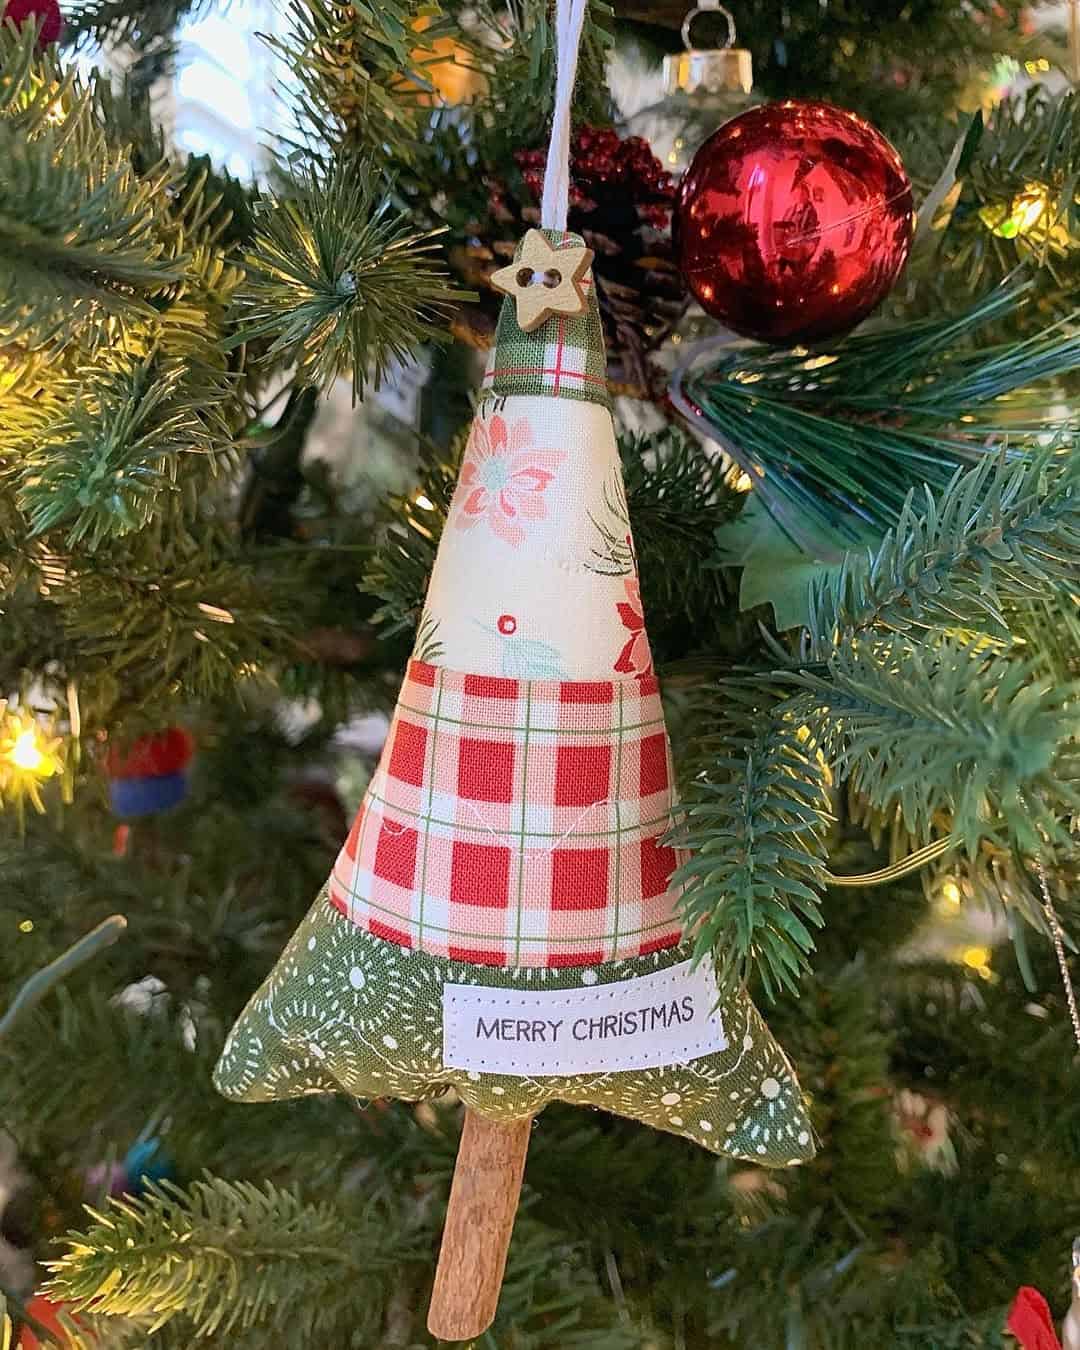
4. Fabric Scrap Ornaments

Materials Needed:
- Assorted fabric scraps (cotton, felt, or holiday-themed)
- Scissors
- Needle and thread or fabric glue
- Stuffing (optional)
- Ribbon
Instructions:
- Cut Fabric Shapes: Cut fabric into holiday shapes (stars, trees, etc.) or simple circles for a more classic ornament look.
- Sew or Glue: If sewing, place two fabric pieces together, inside out, and sew around the edges, leaving a small opening. If using fabric glue, apply glue along the edges and press them together.
- Turn and Stuff (Optional): If you’ve sewn the edges, turn the ornament right side out and stuff it with cotton or fabric scraps before closing the opening.
- Add a Ribbon: Attach a ribbon for hanging.
Personalization Tips:
- Use fabric with special meaning, like an old shirt or a favorite pattern.
- Consider using fabric paint to add initials or holiday messages.
5. Cinnamon Stick Ornaments

Materials Needed:
- Cinnamon sticks
- Twine or ribbon
- Hot glue gun
- Decorative elements (like dried fruit, star anise, or cloves)
Instructions:
- Assemble Cinnamon Sticks: Take three to five cinnamon sticks and arrange them in the shape of a star or tree.
- Glue Together: Use a hot glue gun to secure the sticks together at their intersections.
- Add Decorations: Glue on decorative elements, such as dried orange slices or star anise, for a festive look.
- Create a Hanging Loop: Attach a piece of twine or ribbon to the top for hanging.
Personalization Tips:
- Create an ornament that represents a favorite holiday treat or family tradition.
- Use additional spices or herbs that resonate with family memories.
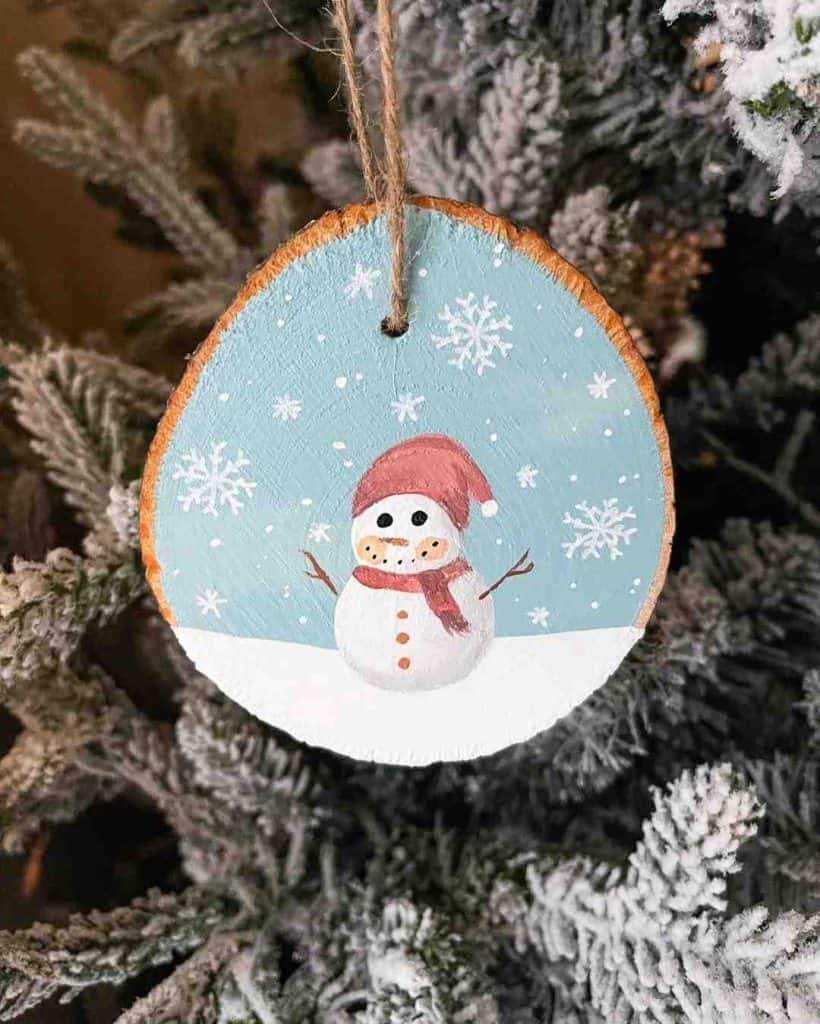
6. Painted Wooden Slice Ornaments
Materials Needed:
- Wooden slices (available at craft stores)
- Acrylic paint
- Paintbrushes
- Twine or ribbon
- Clear sealant (optional)
Instructions:
- Prepare Wooden Slices: Choose smooth wooden slices and sand them lightly if necessary to remove rough edges.
- Paint Designs: Use acrylic paint to create holiday-themed designs, patterns, or messages on one or both sides of the slice.
- Dry and Seal: Let the paint dry completely, and then apply a clear sealant if desired.
- Add Twine: Attach a loop of twine or ribbon to the top for hanging.
Personalization Tips:
- Use a wood burner to engrave names or dates on the slices.
- Paint meaningful symbols or quotes that represent your family.
7. Beaded Ornaments
Materials Needed:
- Assorted beads (wooden, glass, or plastic)
- Wire or sturdy string
- Wire cutters
- Scissors
- Optional embellishments (like bells or charms)
Instructions:
- Cut Wire/String: Cut a piece of wire or string to your desired length for the ornament.
- String Beads: Begin stringing beads onto the wire or string. You can create patterns or random designs.
- Shape the Ornament: Once you have a good amount of beads, shape the wire into a circle or any desired form, twisting the ends together.
- Add Embellishments: If using charms or bells, attach them to the ornament for extra flair.
Personalization Tips:
- Use beads in colors that match your home decor or represent family members’ birthstones.
- Create individual ornaments for each family member, using their favorite colors.
8. Repurposed Jar Lid Ornaments

Materials Needed:
- Metal jar lids
- Scrapbook paper or fabric
- Hot glue or Mod Podge
- Ribbon
- Scissors
- Embellishments (like stickers or glitter)
Instructions:
- Prepare Lids: Remove any labels and clean the jar lids thoroughly.
- Cut Paper/Fabric: Cut scrapbook paper or fabric to fit inside the lid.
- Glue: Use hot glue or Mod Podge to secure the paper or fabric inside the lid.
- Decorate: Add embellishments like stickers or a sprinkle of glitter on top.
- Add Ribbon: Attach a ribbon to the top of the lid for hanging.
Personalization Tips:
- Use patterned paper that reflects your family’s interests or favorite colors.
- Consider adding a photo or special message beneath the glass for a personal touch.
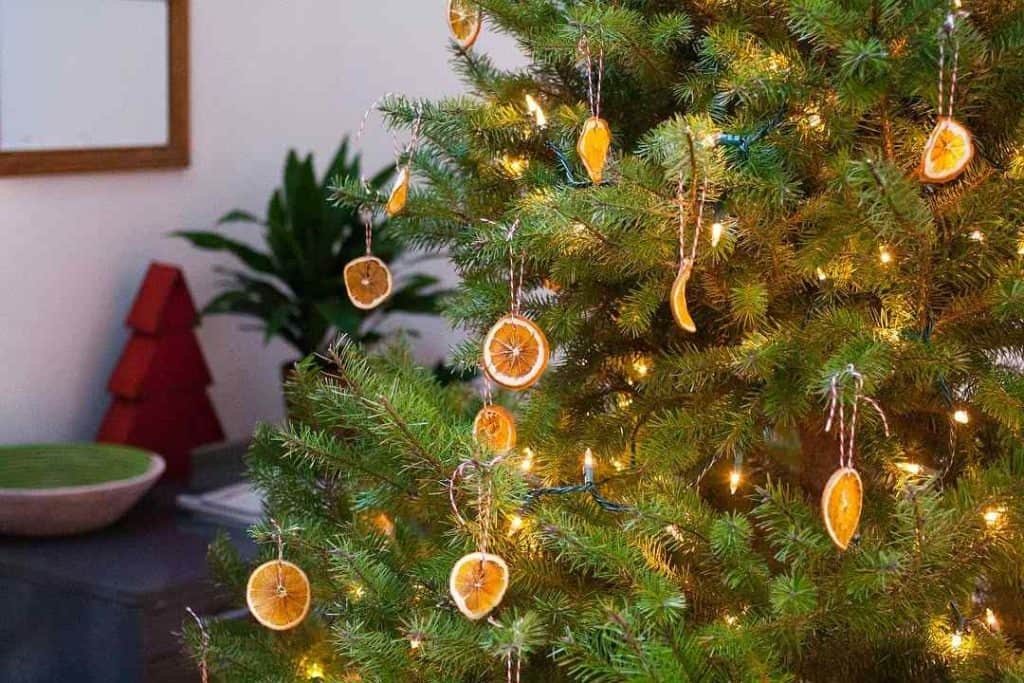
9. Dried Fruit Ornaments
Materials Needed:
- Oranges, lemons, or limes (sliced)
- Baking sheet
- Parchment paper
- Twine or ribbon
- Cinnamon sticks (optional)
Instructions:
- Preheat Oven: Preheat your oven to 200°F (93°C).
- Prepare Fruit: Slice the fruits into thin rounds and remove any seeds.
- Arrange on Baking Sheet: Place the slices on a baking sheet lined with parchment paper.
- Dry the Fruit: Bake in the oven for 2-4 hours, flipping halfway through, until they are dehydrated and firm.
- Create Hanging Loops: Once cooled, use a skewer to poke a hole in the top of each slice. Thread twine or ribbon through the hole for hanging.
- Add Cinnamon Sticks (Optional): You can tie a cinnamon stick to the ornament for added fragrance and decoration.
Personalization Tips:
- Mix different types of dried fruit for a colorful assortment.
- Pair with other ornaments for a rustic, natural look.
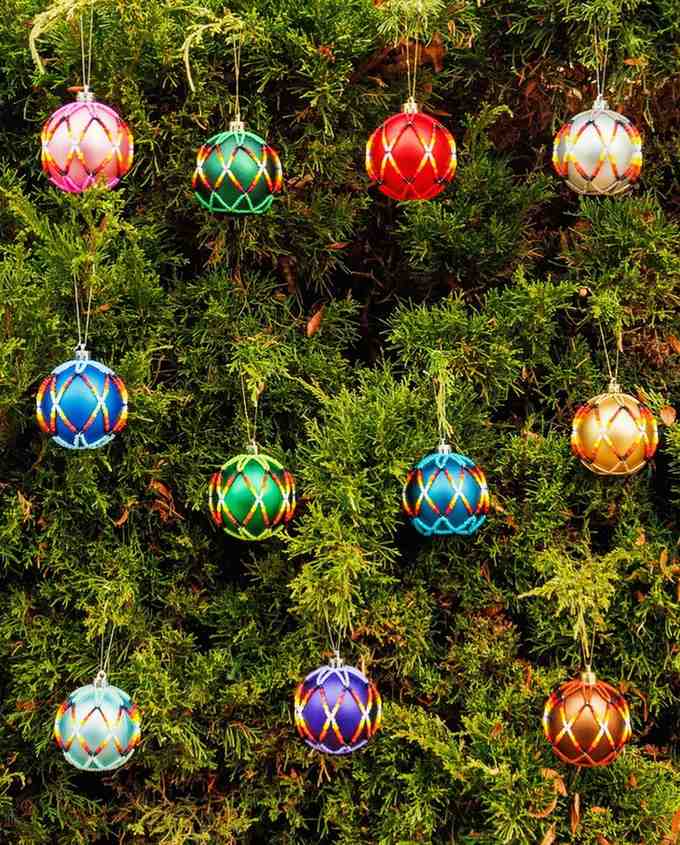
10. Quilted Ornaments
Materials Needed:
- Fabric squares (various colors)
- Styrofoam balls or wooden shapes
- Straight pins
- Ribbon for hanging
- Scissors
Instructions:
- Cut Fabric Squares: Cut fabric into squares, approximately 2 inches in size.
- Pin Squares: Take a square of fabric, fold it into a triangle, and pin it into the Styrofoam ball or wooden shape. Repeat, overlapping the triangles until the entire surface is covered.
- Finish the Ornament: Once covered, attach a ribbon loop to the top for hanging.
Personalization Tips:
- Use fabric that matches your holiday theme or family colors.
- Consider incorporating squares of meaningful fabric from past projects or family clothes.
Before You Start
You can generally get most of these decorations done in one afternoon. But some, like the ornaments made of salt dough or dried fruit, need baking, and that can easily turn a simple project into an all-day affair.
So do a little thinking about your timing. If you start at nine in the morning, you’ll have them done by evening. Begin at four in the afternoon and they’ll dry while you sleep, and you can decorate them the following morning – and that’s a totally good plan.
Have a box or tray close by to place each ornament in as you finish it. A heap of fragile items on the kitchen counter is bound to be broken by someone stretching for something beyond them. (I’ve learned this from experience!)
And if it doesn’t all work as expected let’s say if the dough splits, the beads are wonky, or your fabric shape is a far cry from the star you pictured, just put it on the tree regardless. After a decade, it’ll be the first one you go to get!
Conclusion – Homemade Ornaments For Your Christmas Tree
Last December we made ornaments from salt dough. Maria specifically asked for stars and Marina was set on doing handprints, even though you can’t get a cutter for those, but we did manage to make it happen.
The ornaments with Marina’s handprints are a little wonky and the paint she selected isn’t something I’d have picked myself. However, they will definitely be going on the tree this year, with all the other things we’ve made over time that aren’t quite perfect.
Similar Posts you May Also Like:
- The Easiest Way to Decorate a Pastel Christmas Tree
- 30 Ridiculously Cute and Festive Christmas Gift Basket Ideas for Friends and Family
- Festive Front Porch Ideas to Wow Your Neighbors This Christmas
And that’s all I have for now! I really hope you’ll put one of these ideas into action on your tree this Christmas, or maybe more than one if you have some time and kids who are up for it!
If you do attempt any of them, let us know what it went in the comments below!
Which ornament did you make, did anything surprising happen, and did anyone absolutely need to make a handprint? I’m really interested to hear about it!
Until next time,
Stay safe,


I’m Katerina Lithopoulou, co-creator of DIY Cozy Living. I’ve always loved the little things that make a space feel special. With a background in language and a passion for photography and cozy design, I enjoy turning everyday inspiration into simple ideas people can actually use.
My motto: “Cozy isn’t a trend — it’s a feeling.”
